
Icing for Cake
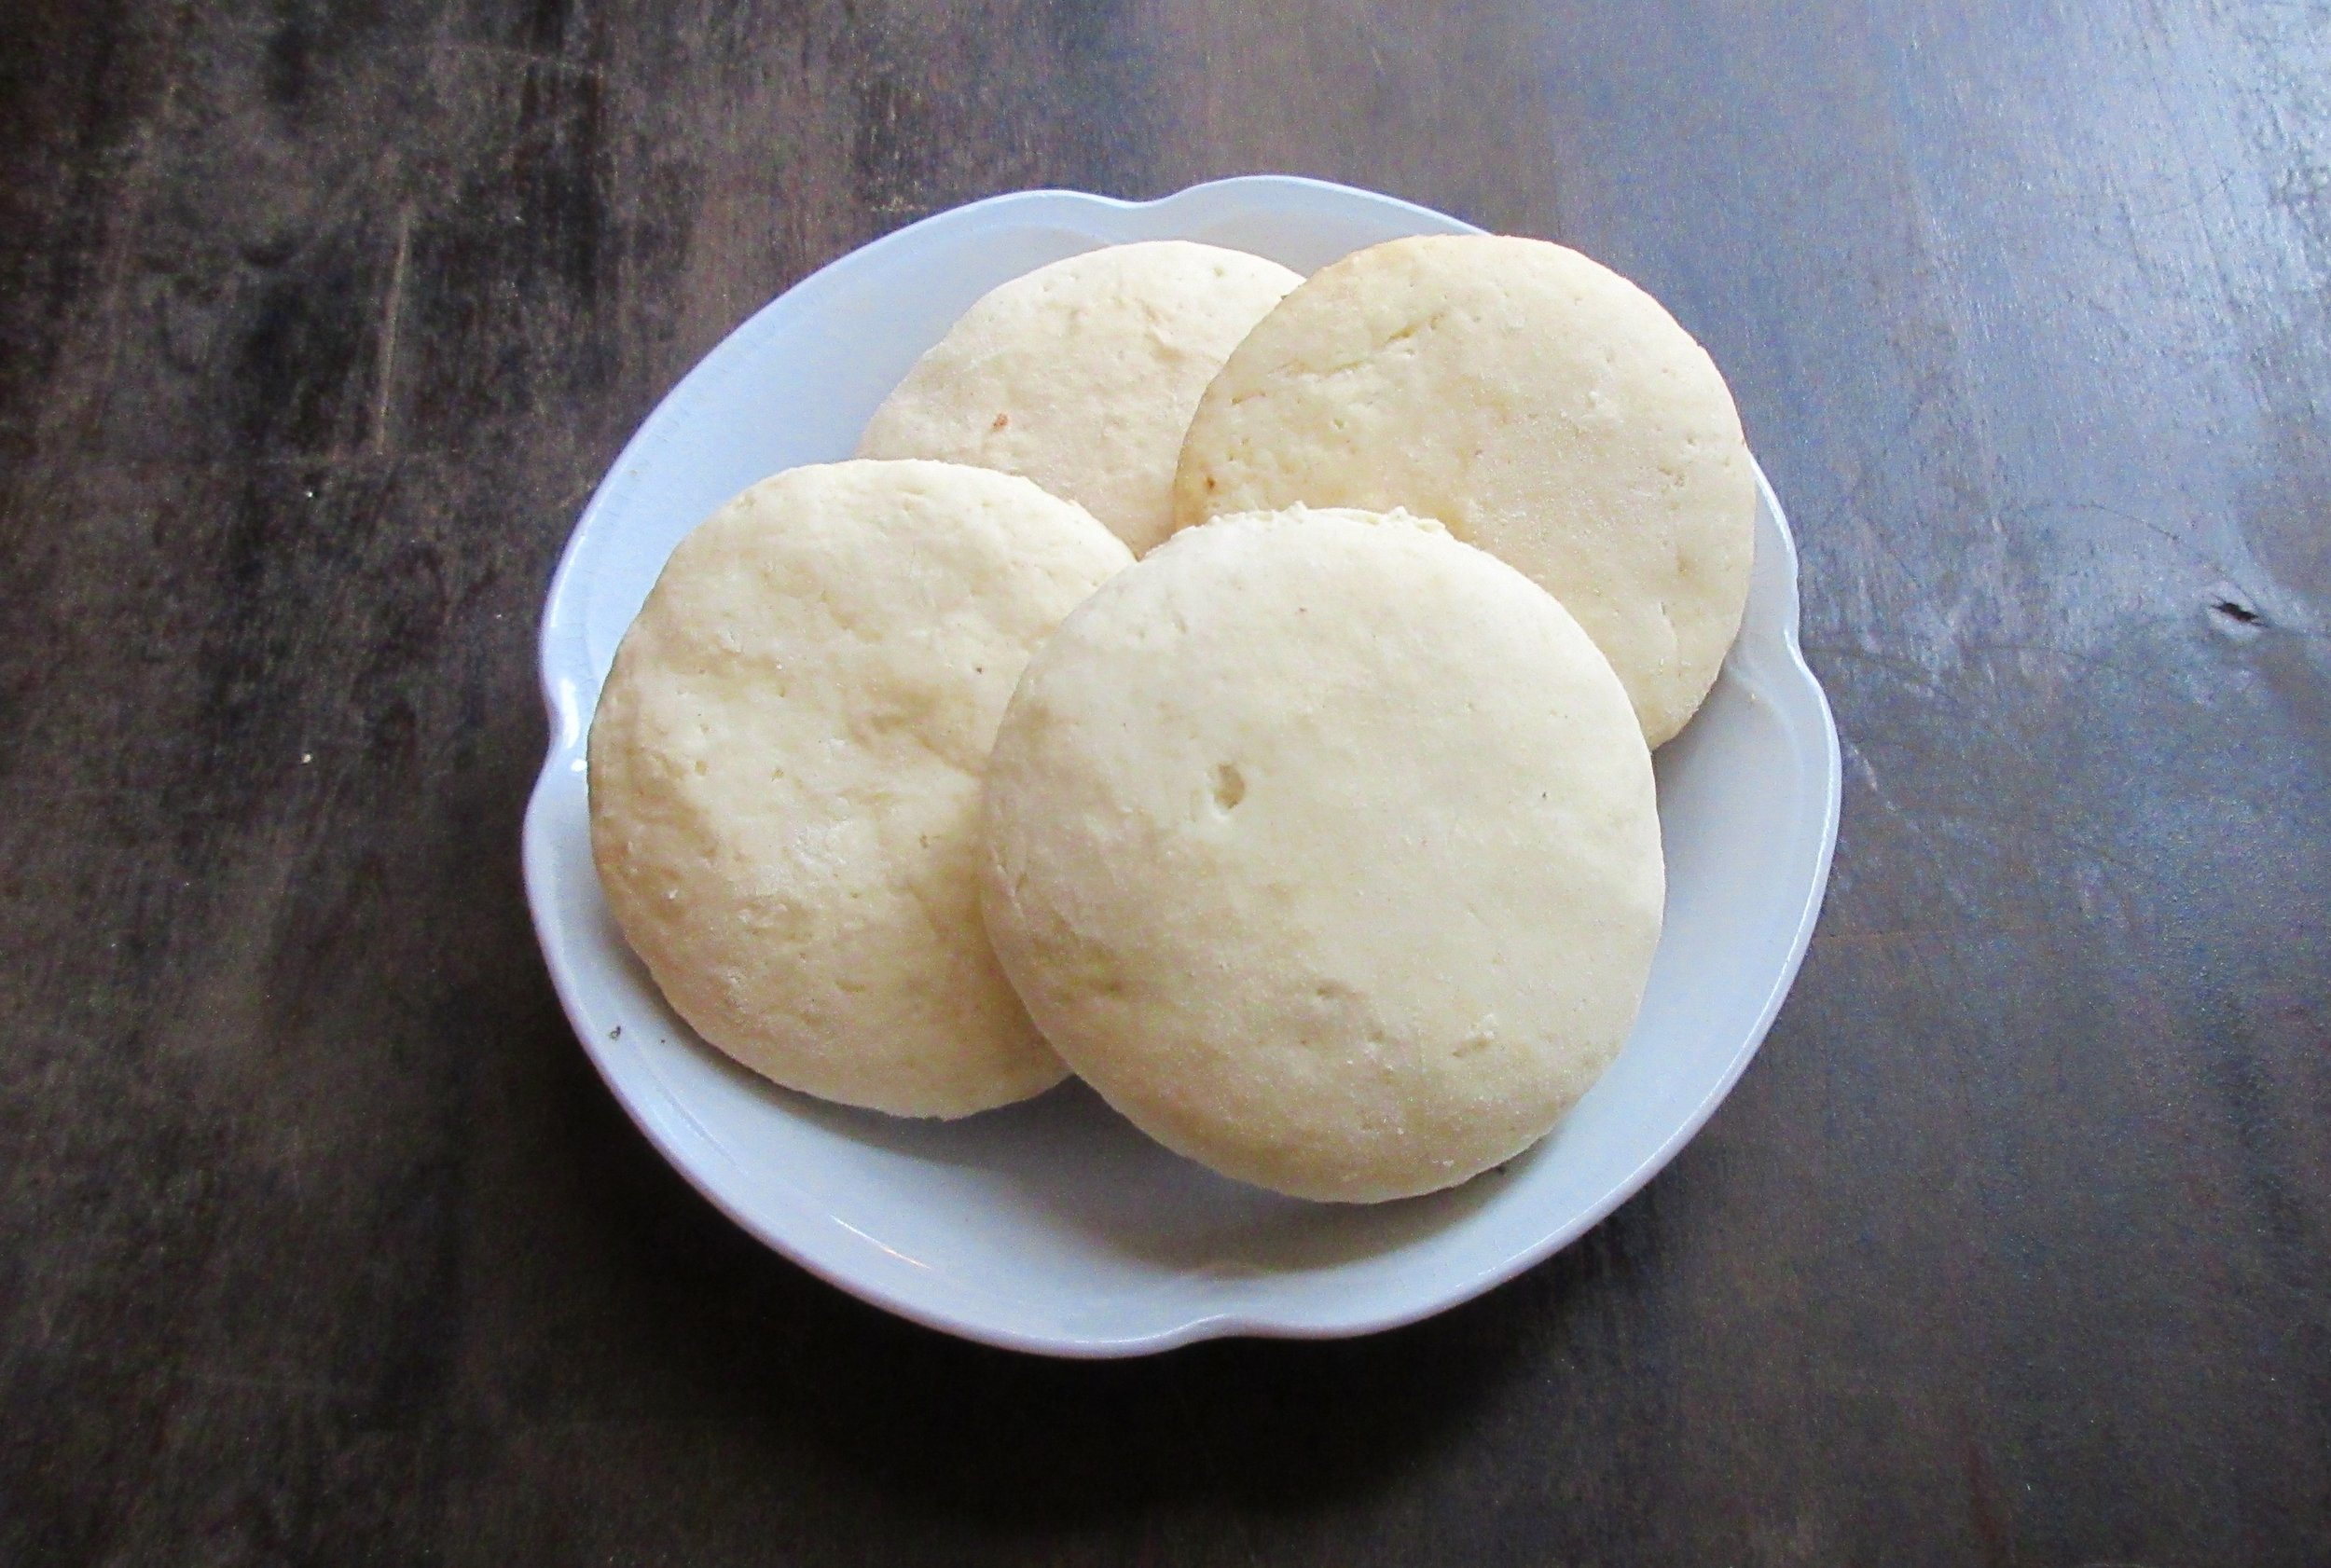
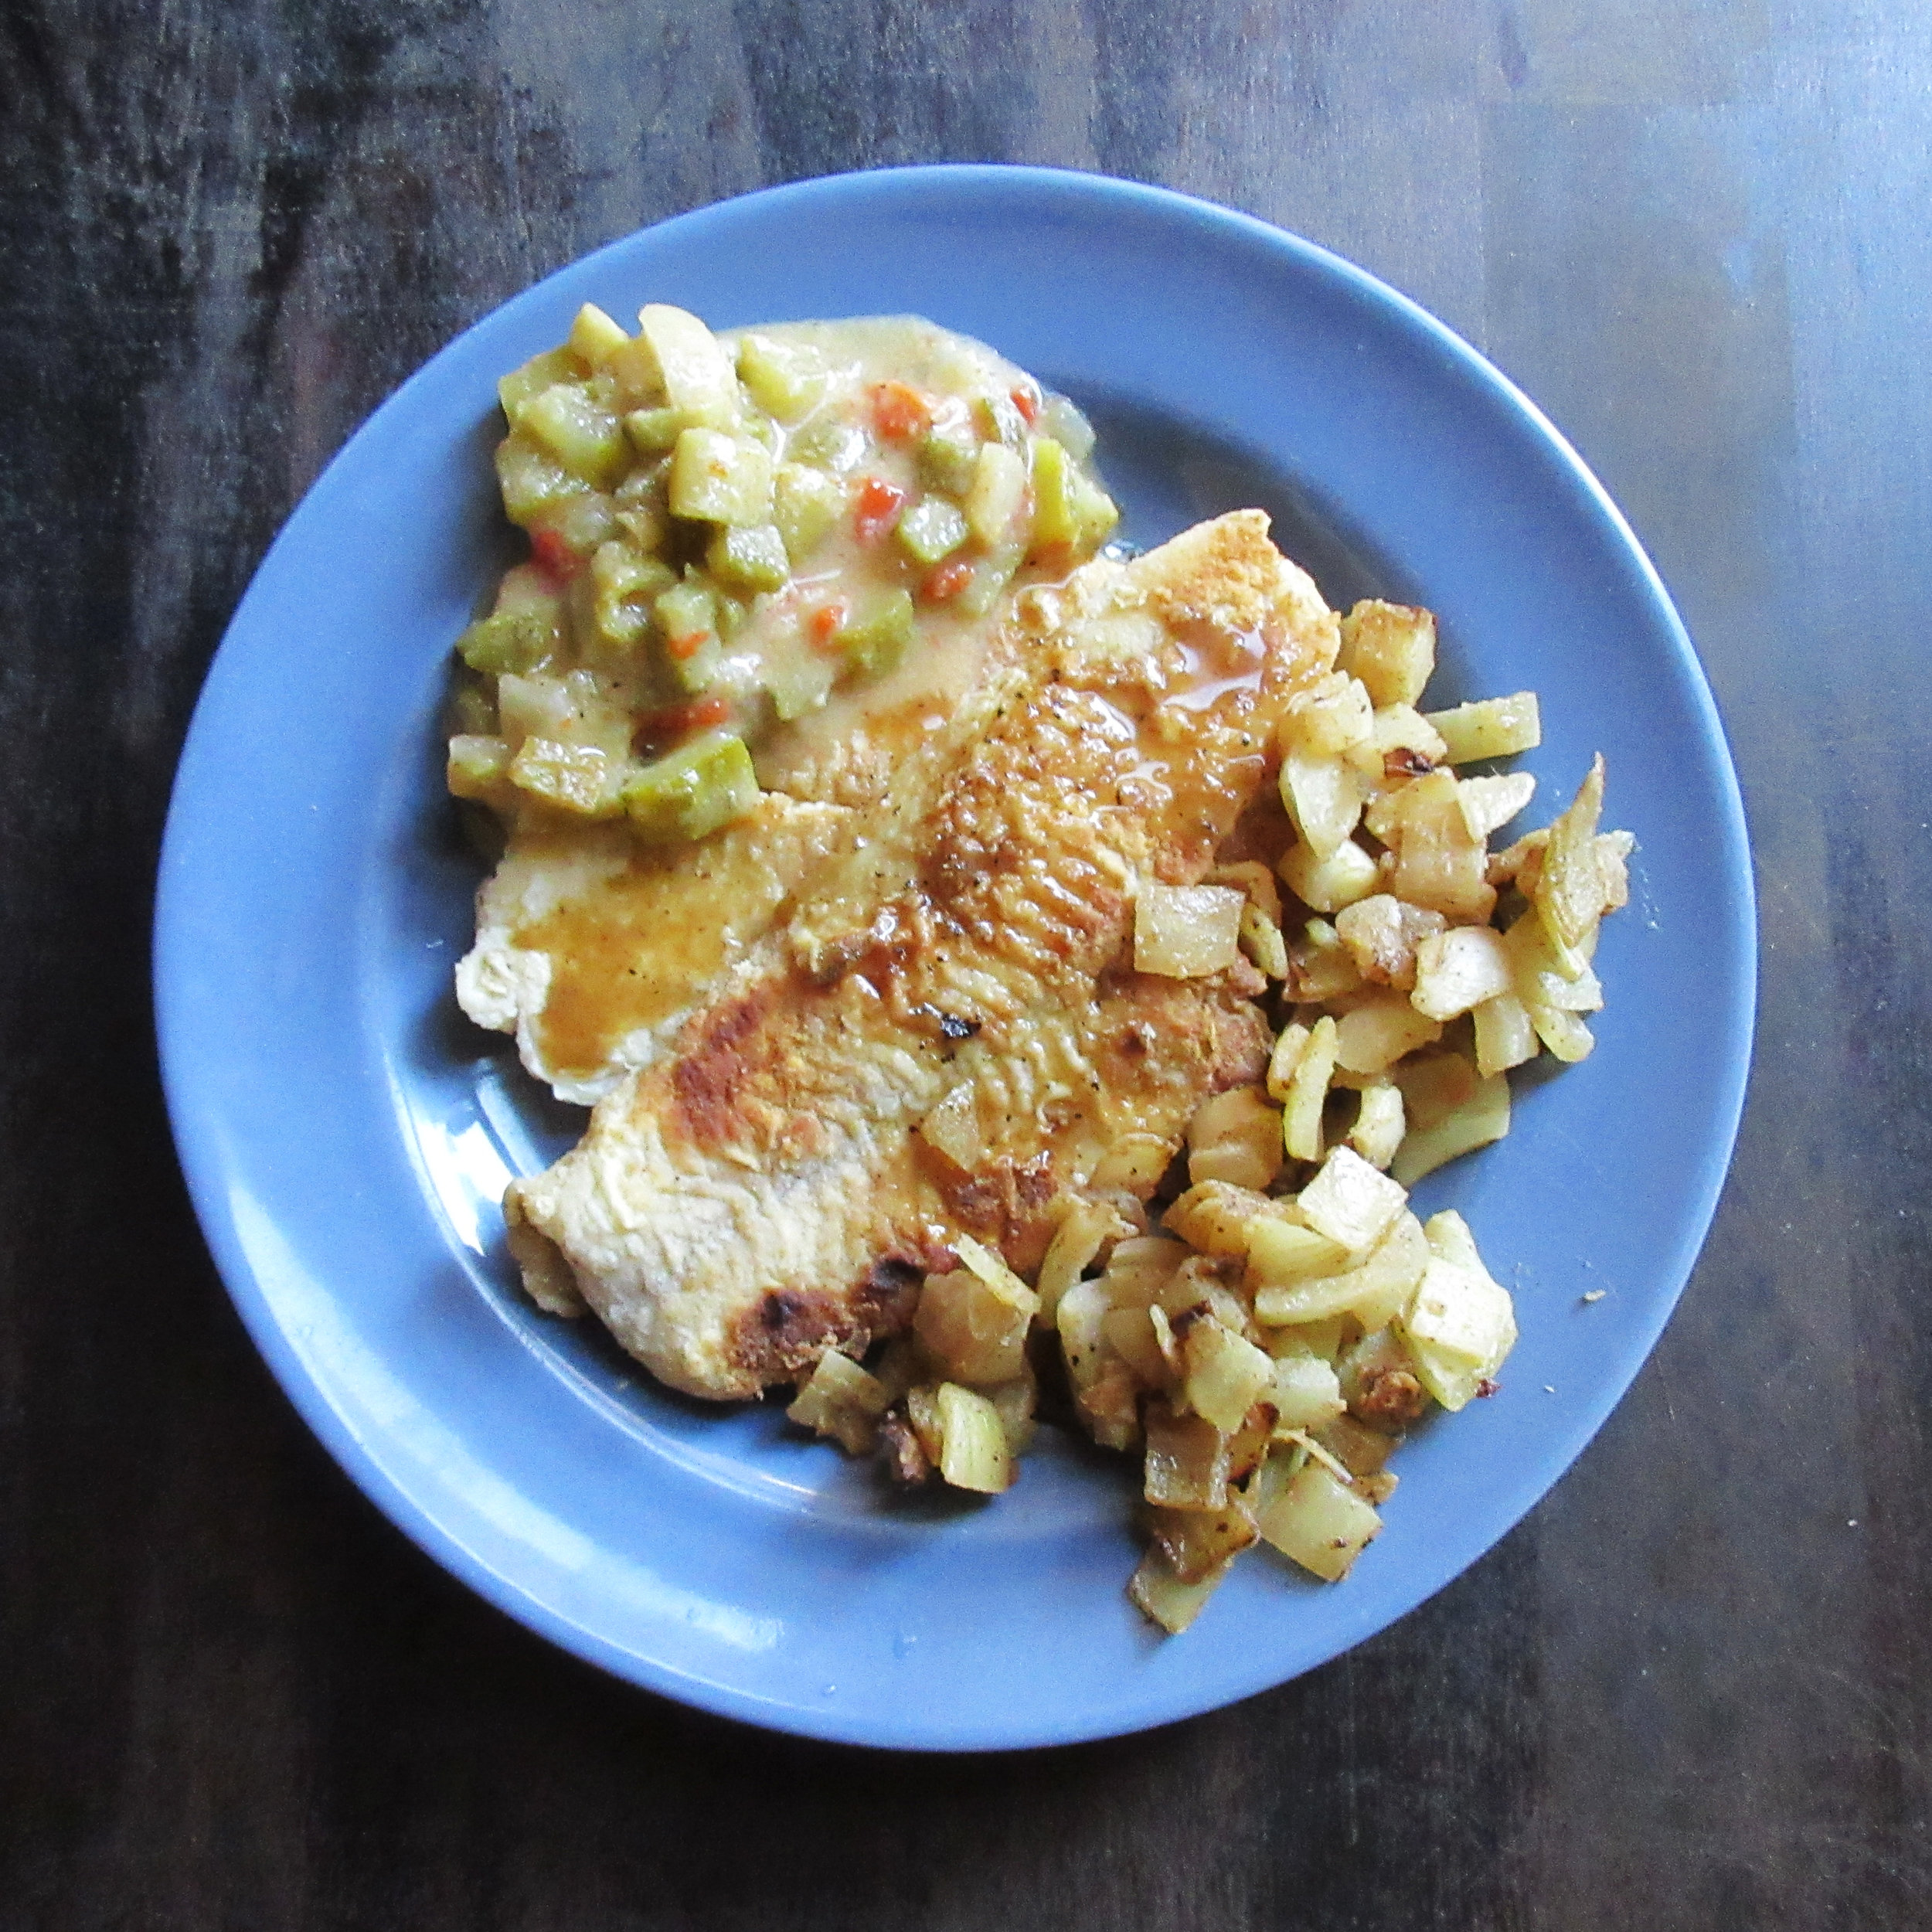
Icing for Cake saved the day when I had about 5 dozen bland Ammonia Cakes that needed some extra pizzazz! Both Ammonia Cakes and Icing for Cake are found in the 1898 The New Galt Cookbook, which is a community cookbook compiled not far from where I grew up and where I live today. Icing for Cake is a simple white sugar and milk icing that hardens within minutes and you could drizzle it on cakes, cookies, donuts or squares.

You’ll find this recipe in:
The New Galt Cook Book
Compiled and Edited by: Margaret Taylor and Frances McNaught
Toronto, 1898
Original Recipe:
ICING FOR CAKE.
MRS. WALKER, CALGARY.
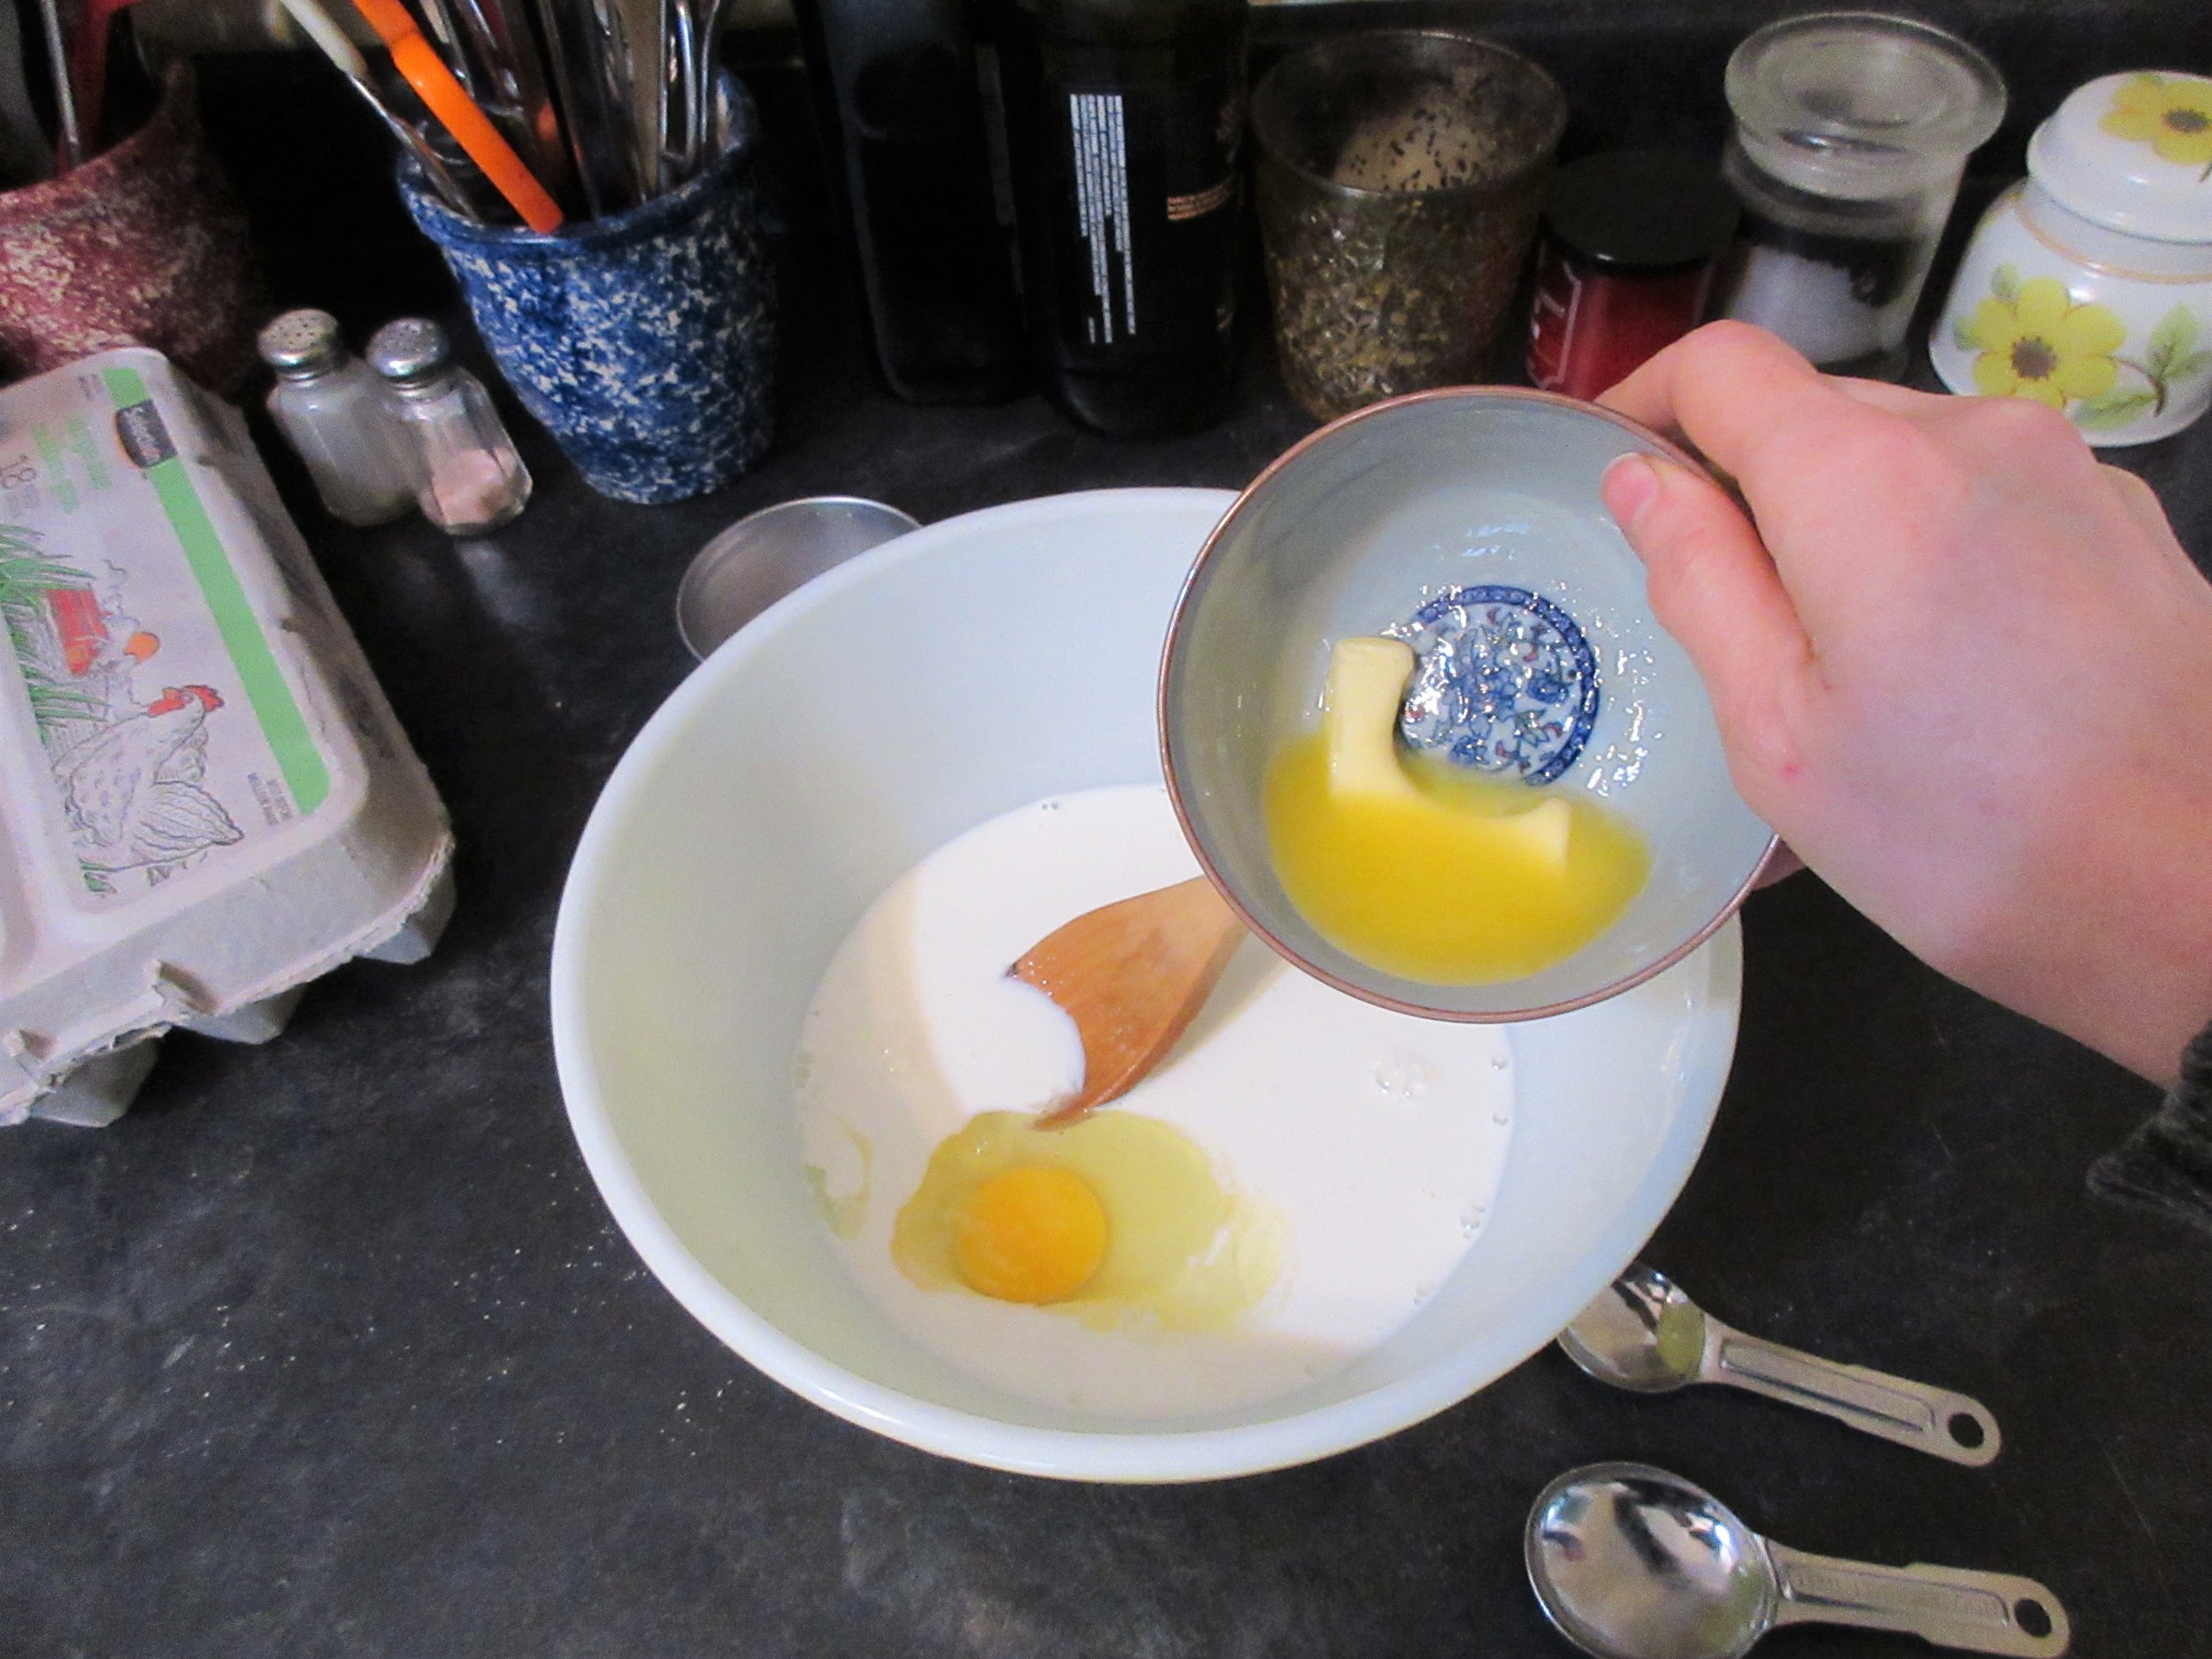
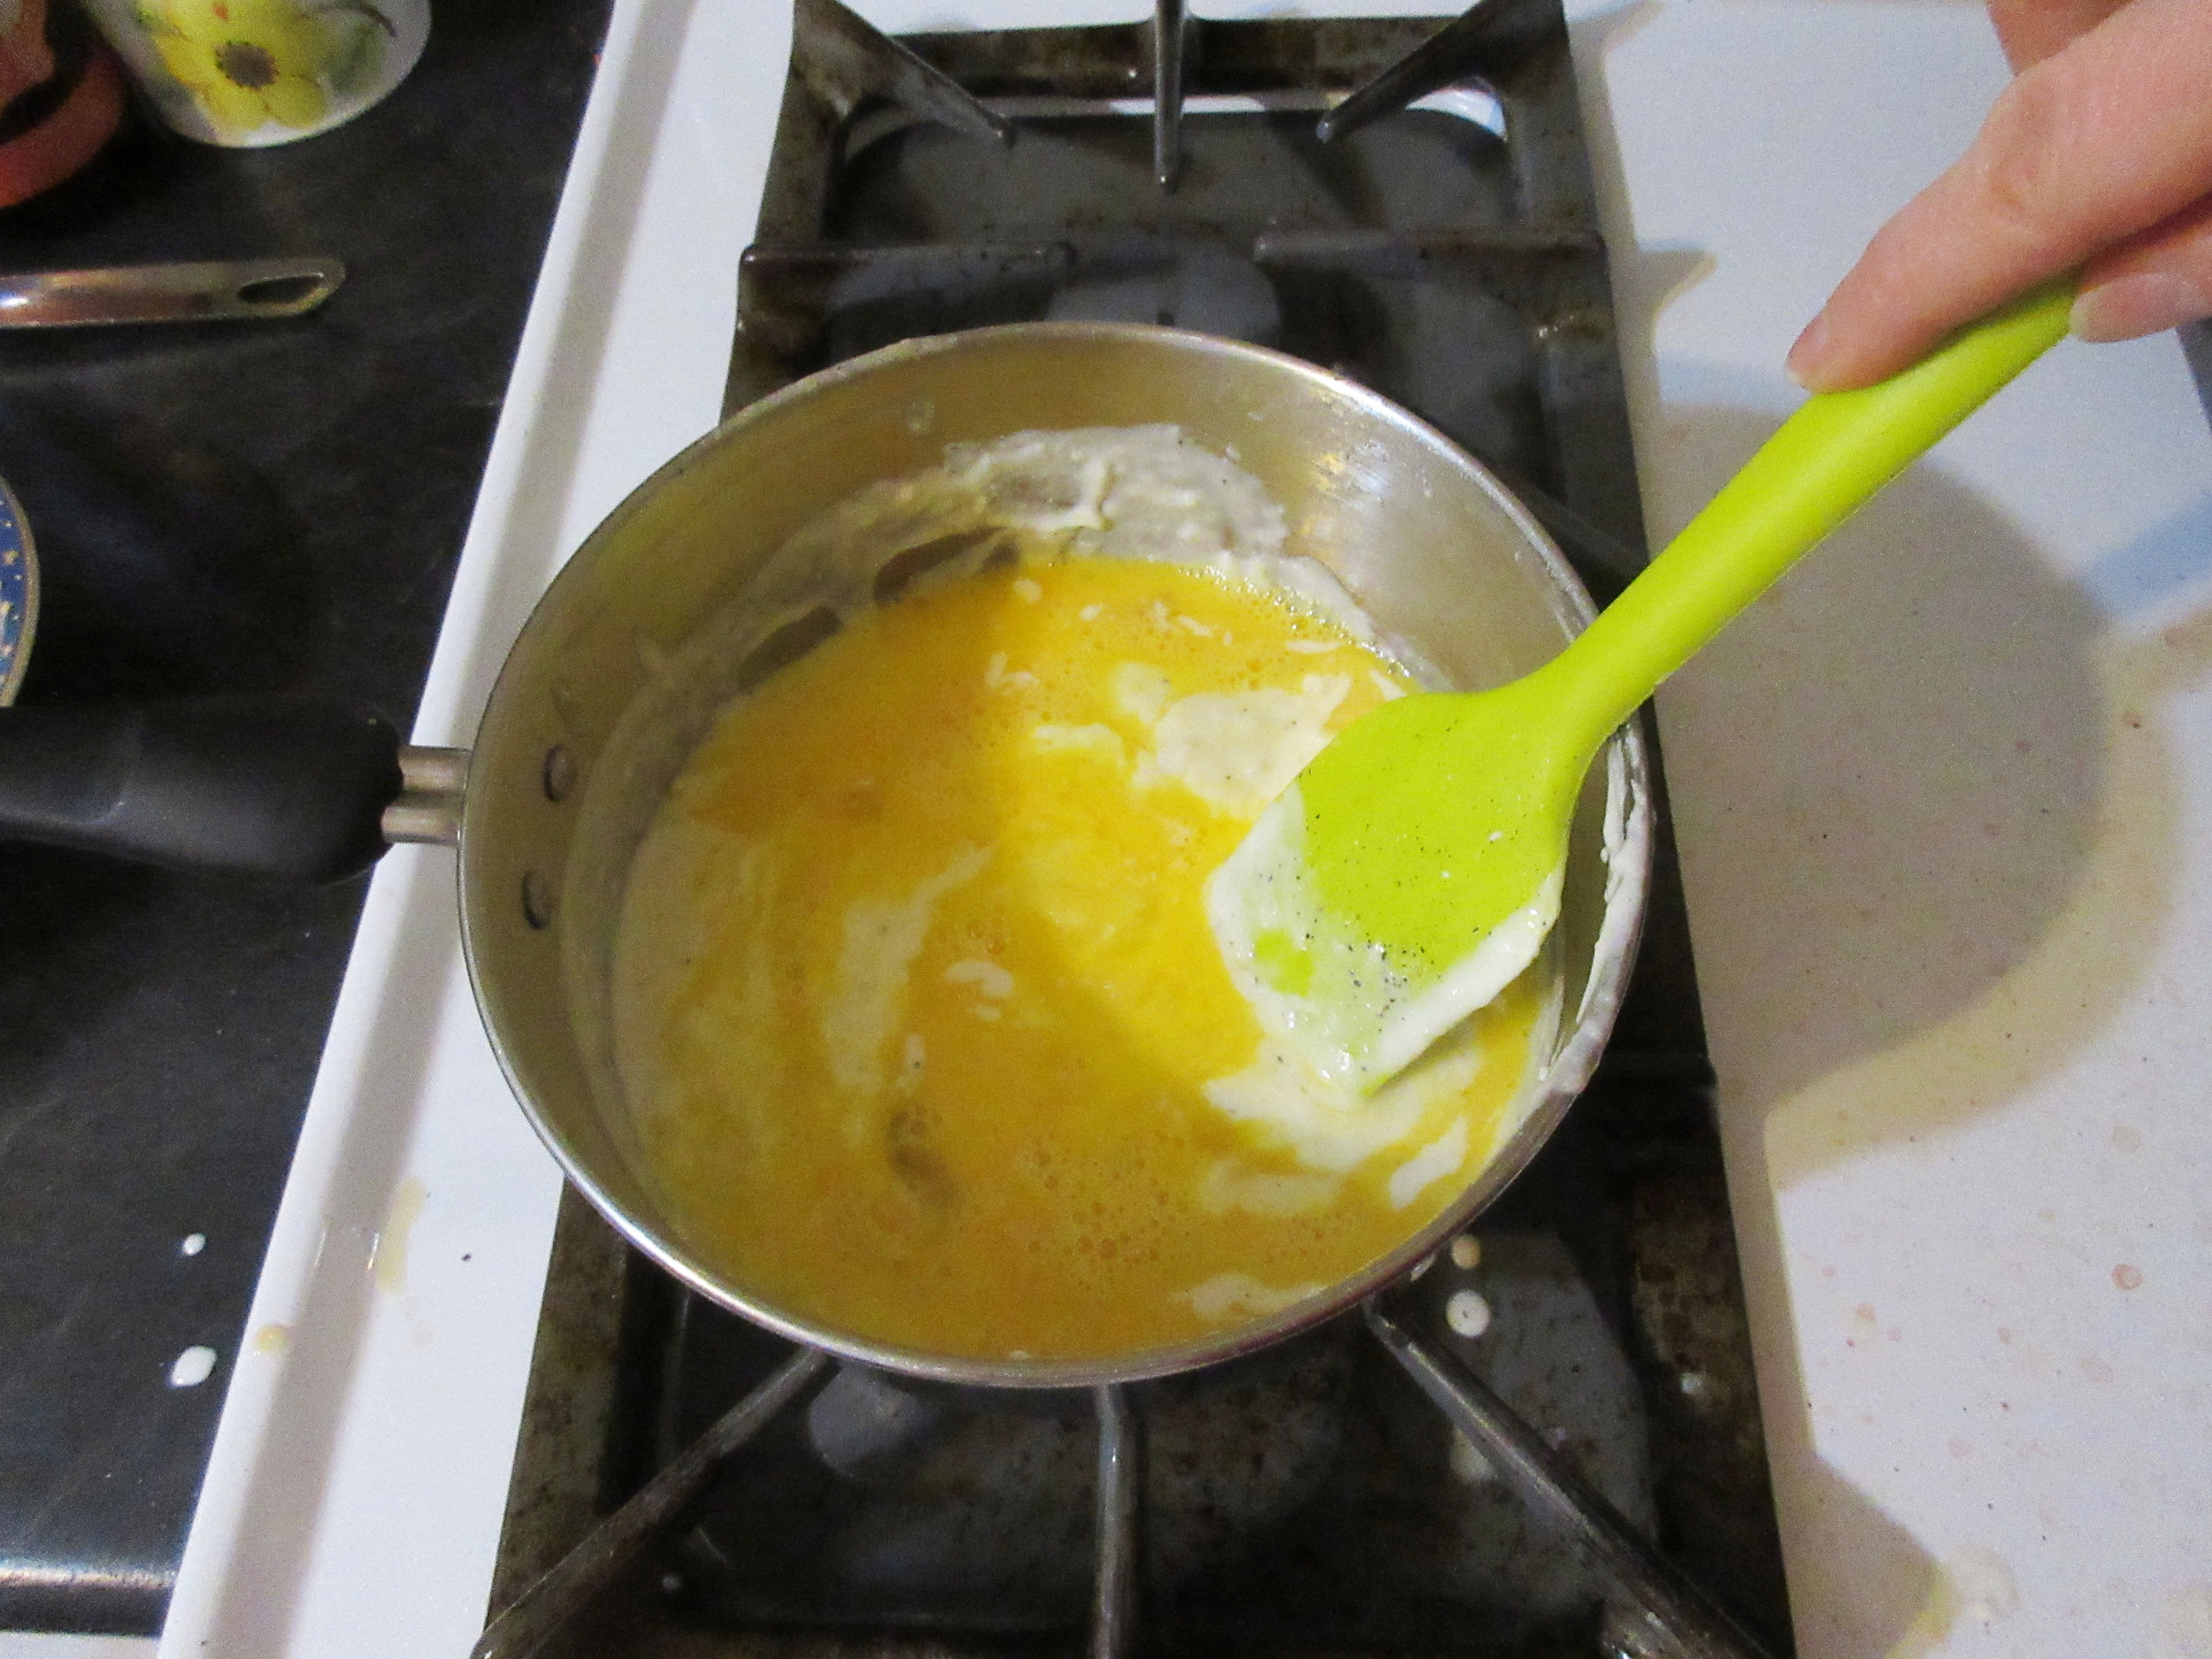
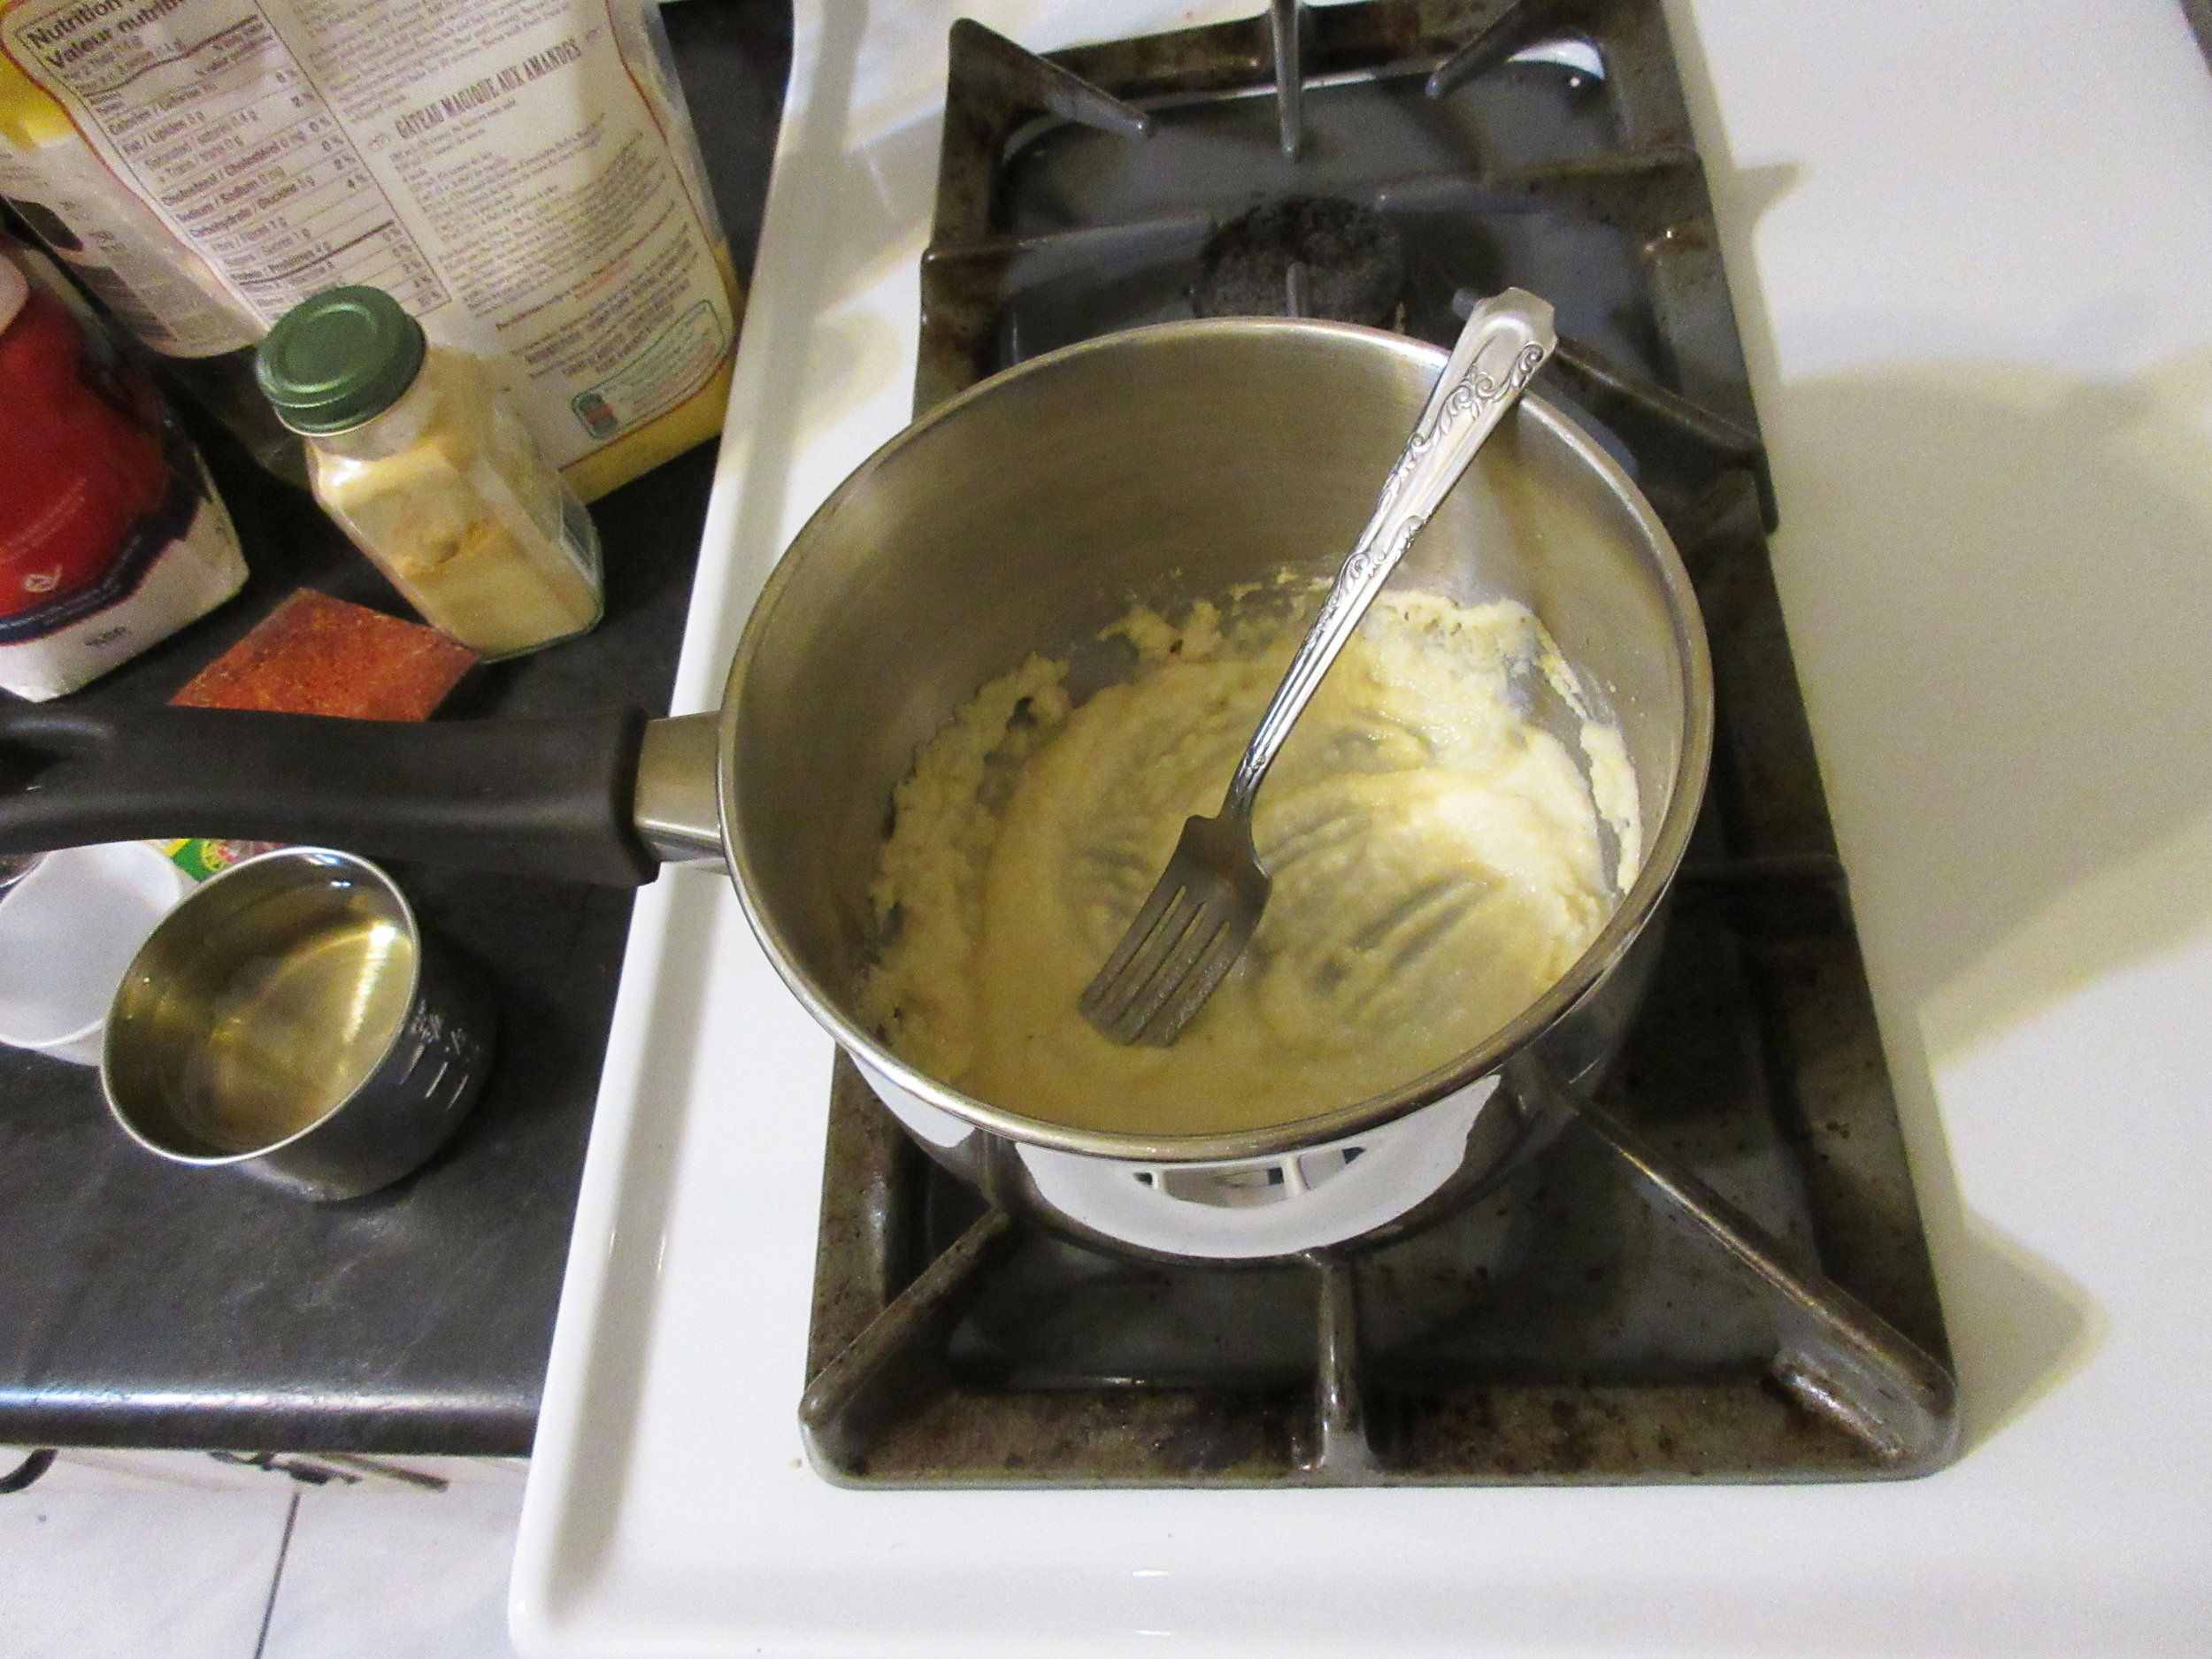
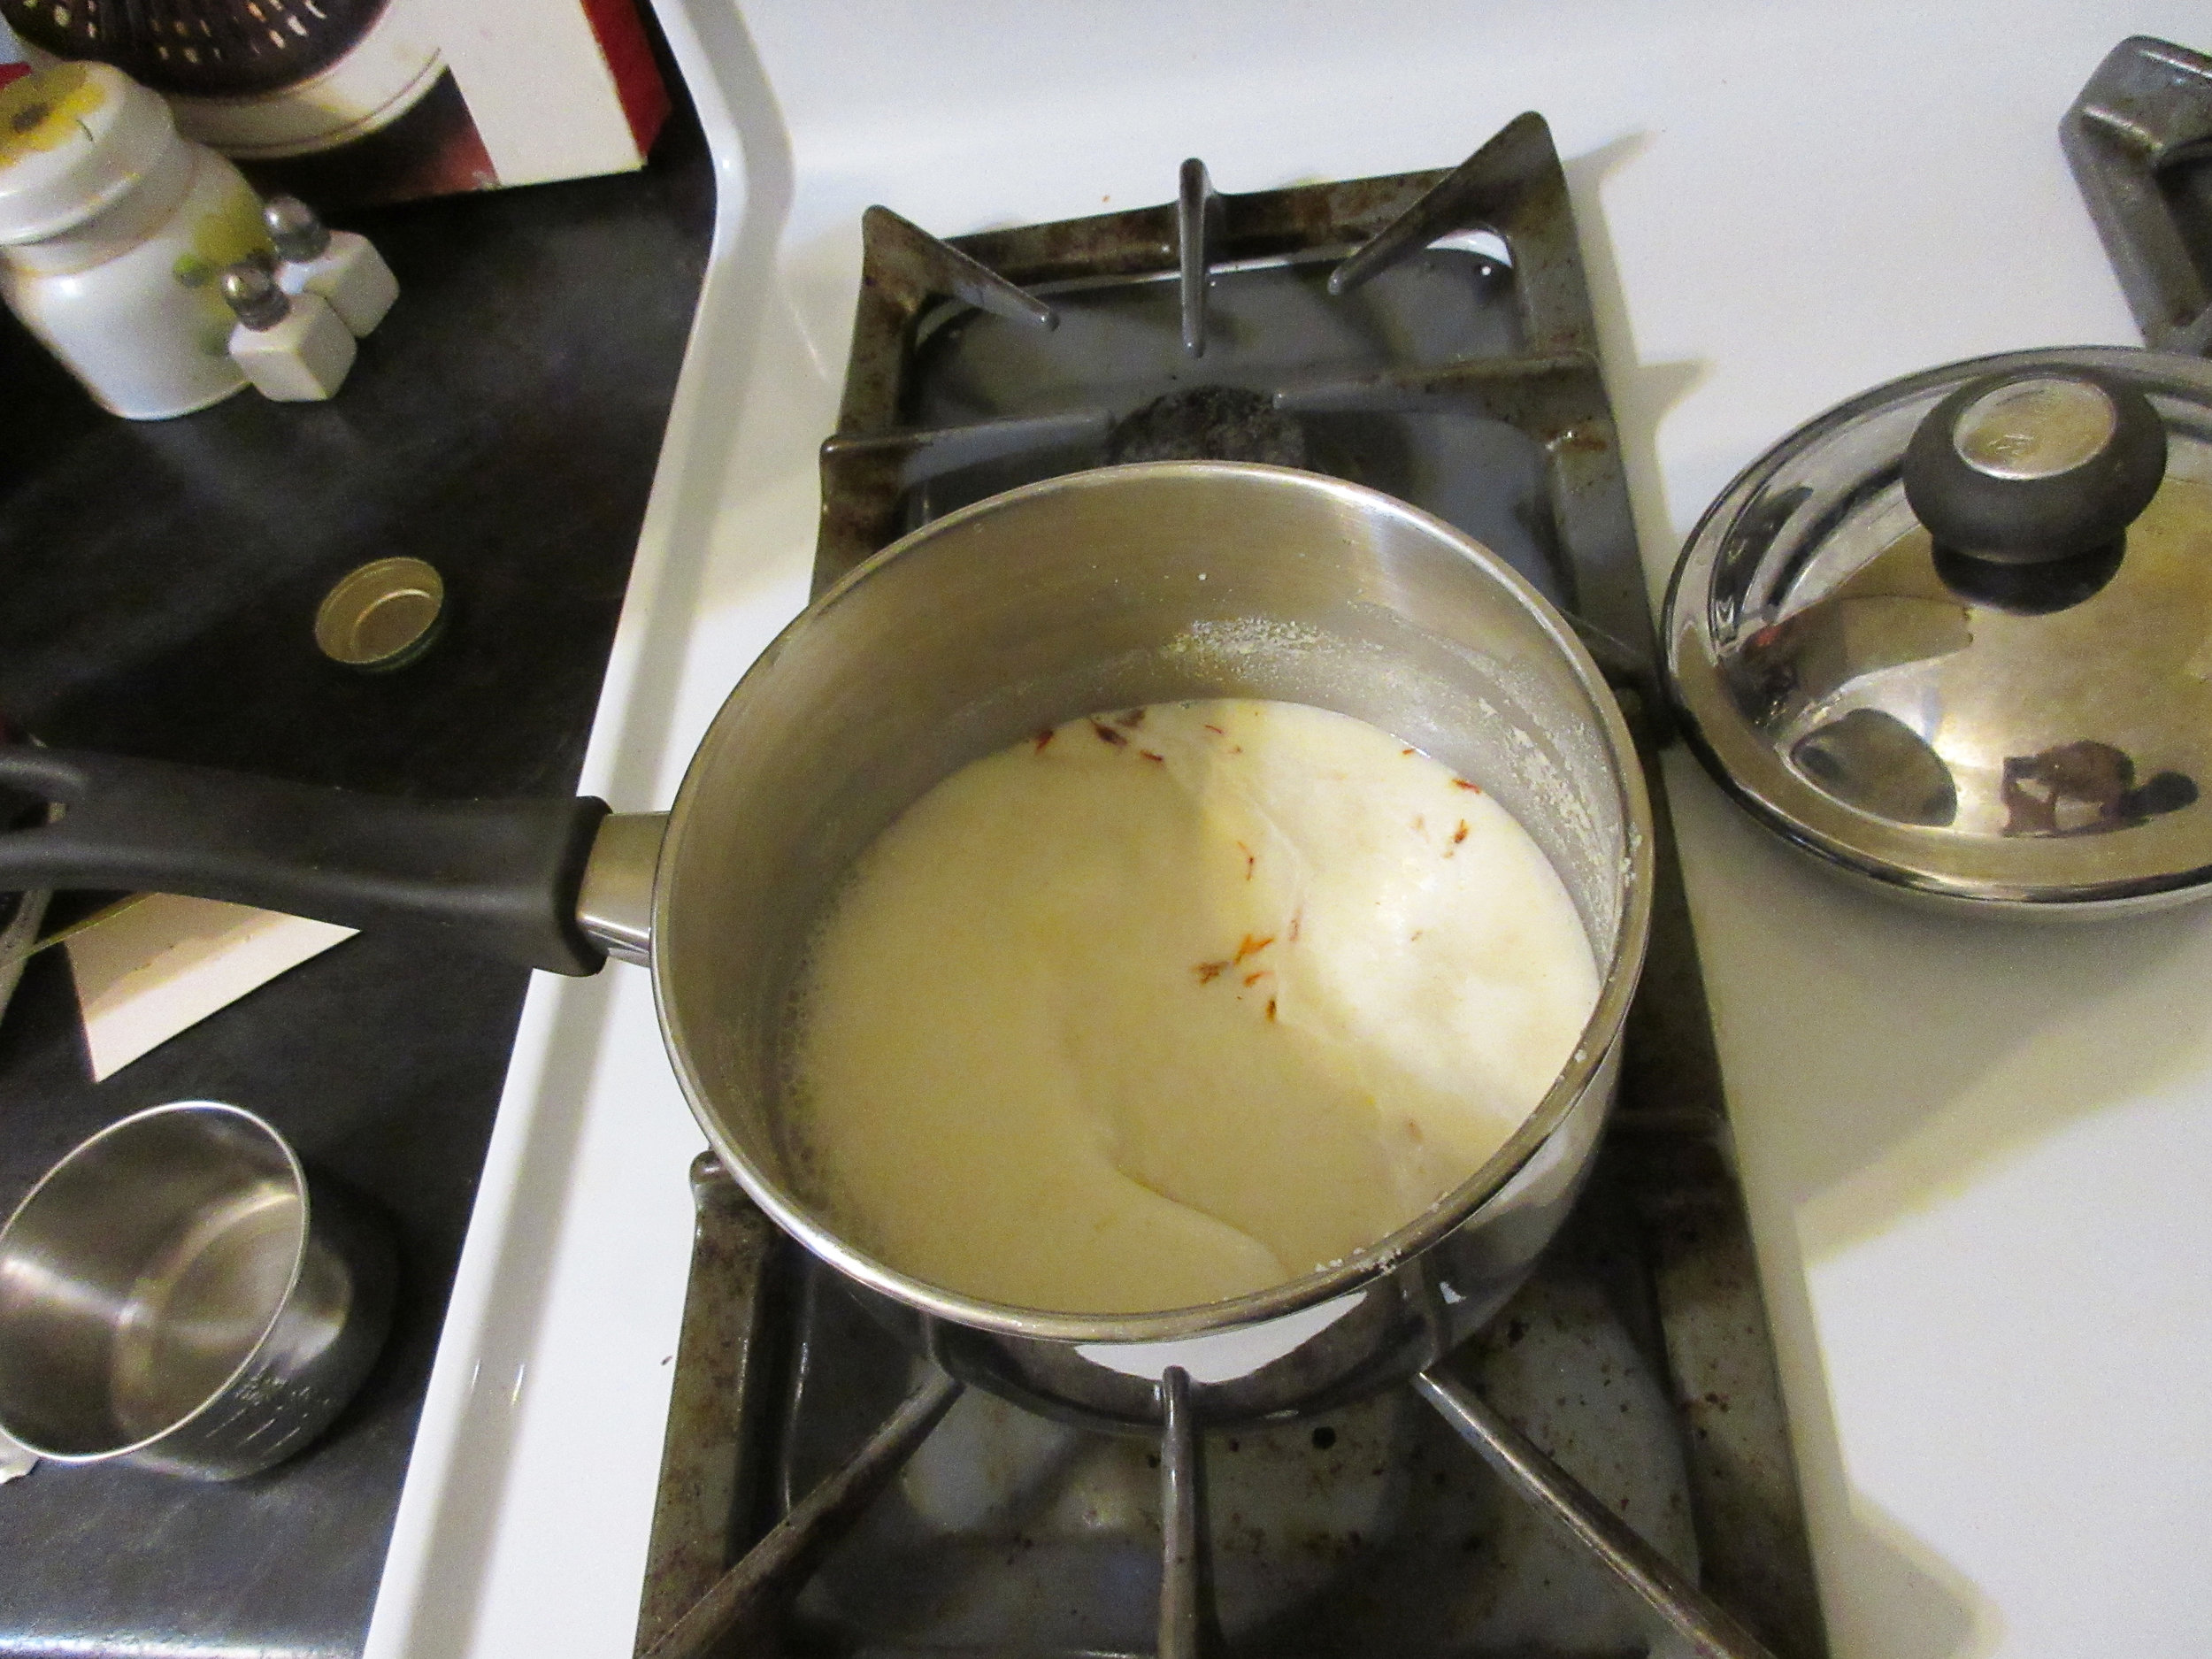
One cup granulated sugar, one-quarter cup milk. Boil together thee minutes. Stir until it boils, when it is boiling do not stir. Move back and only let it bubble and not burn (for three minutes). Then beat well, put on cake rather thin as it gets hard soon. If not even take a knife wet it in cold water and smooth it over.


My Experience:
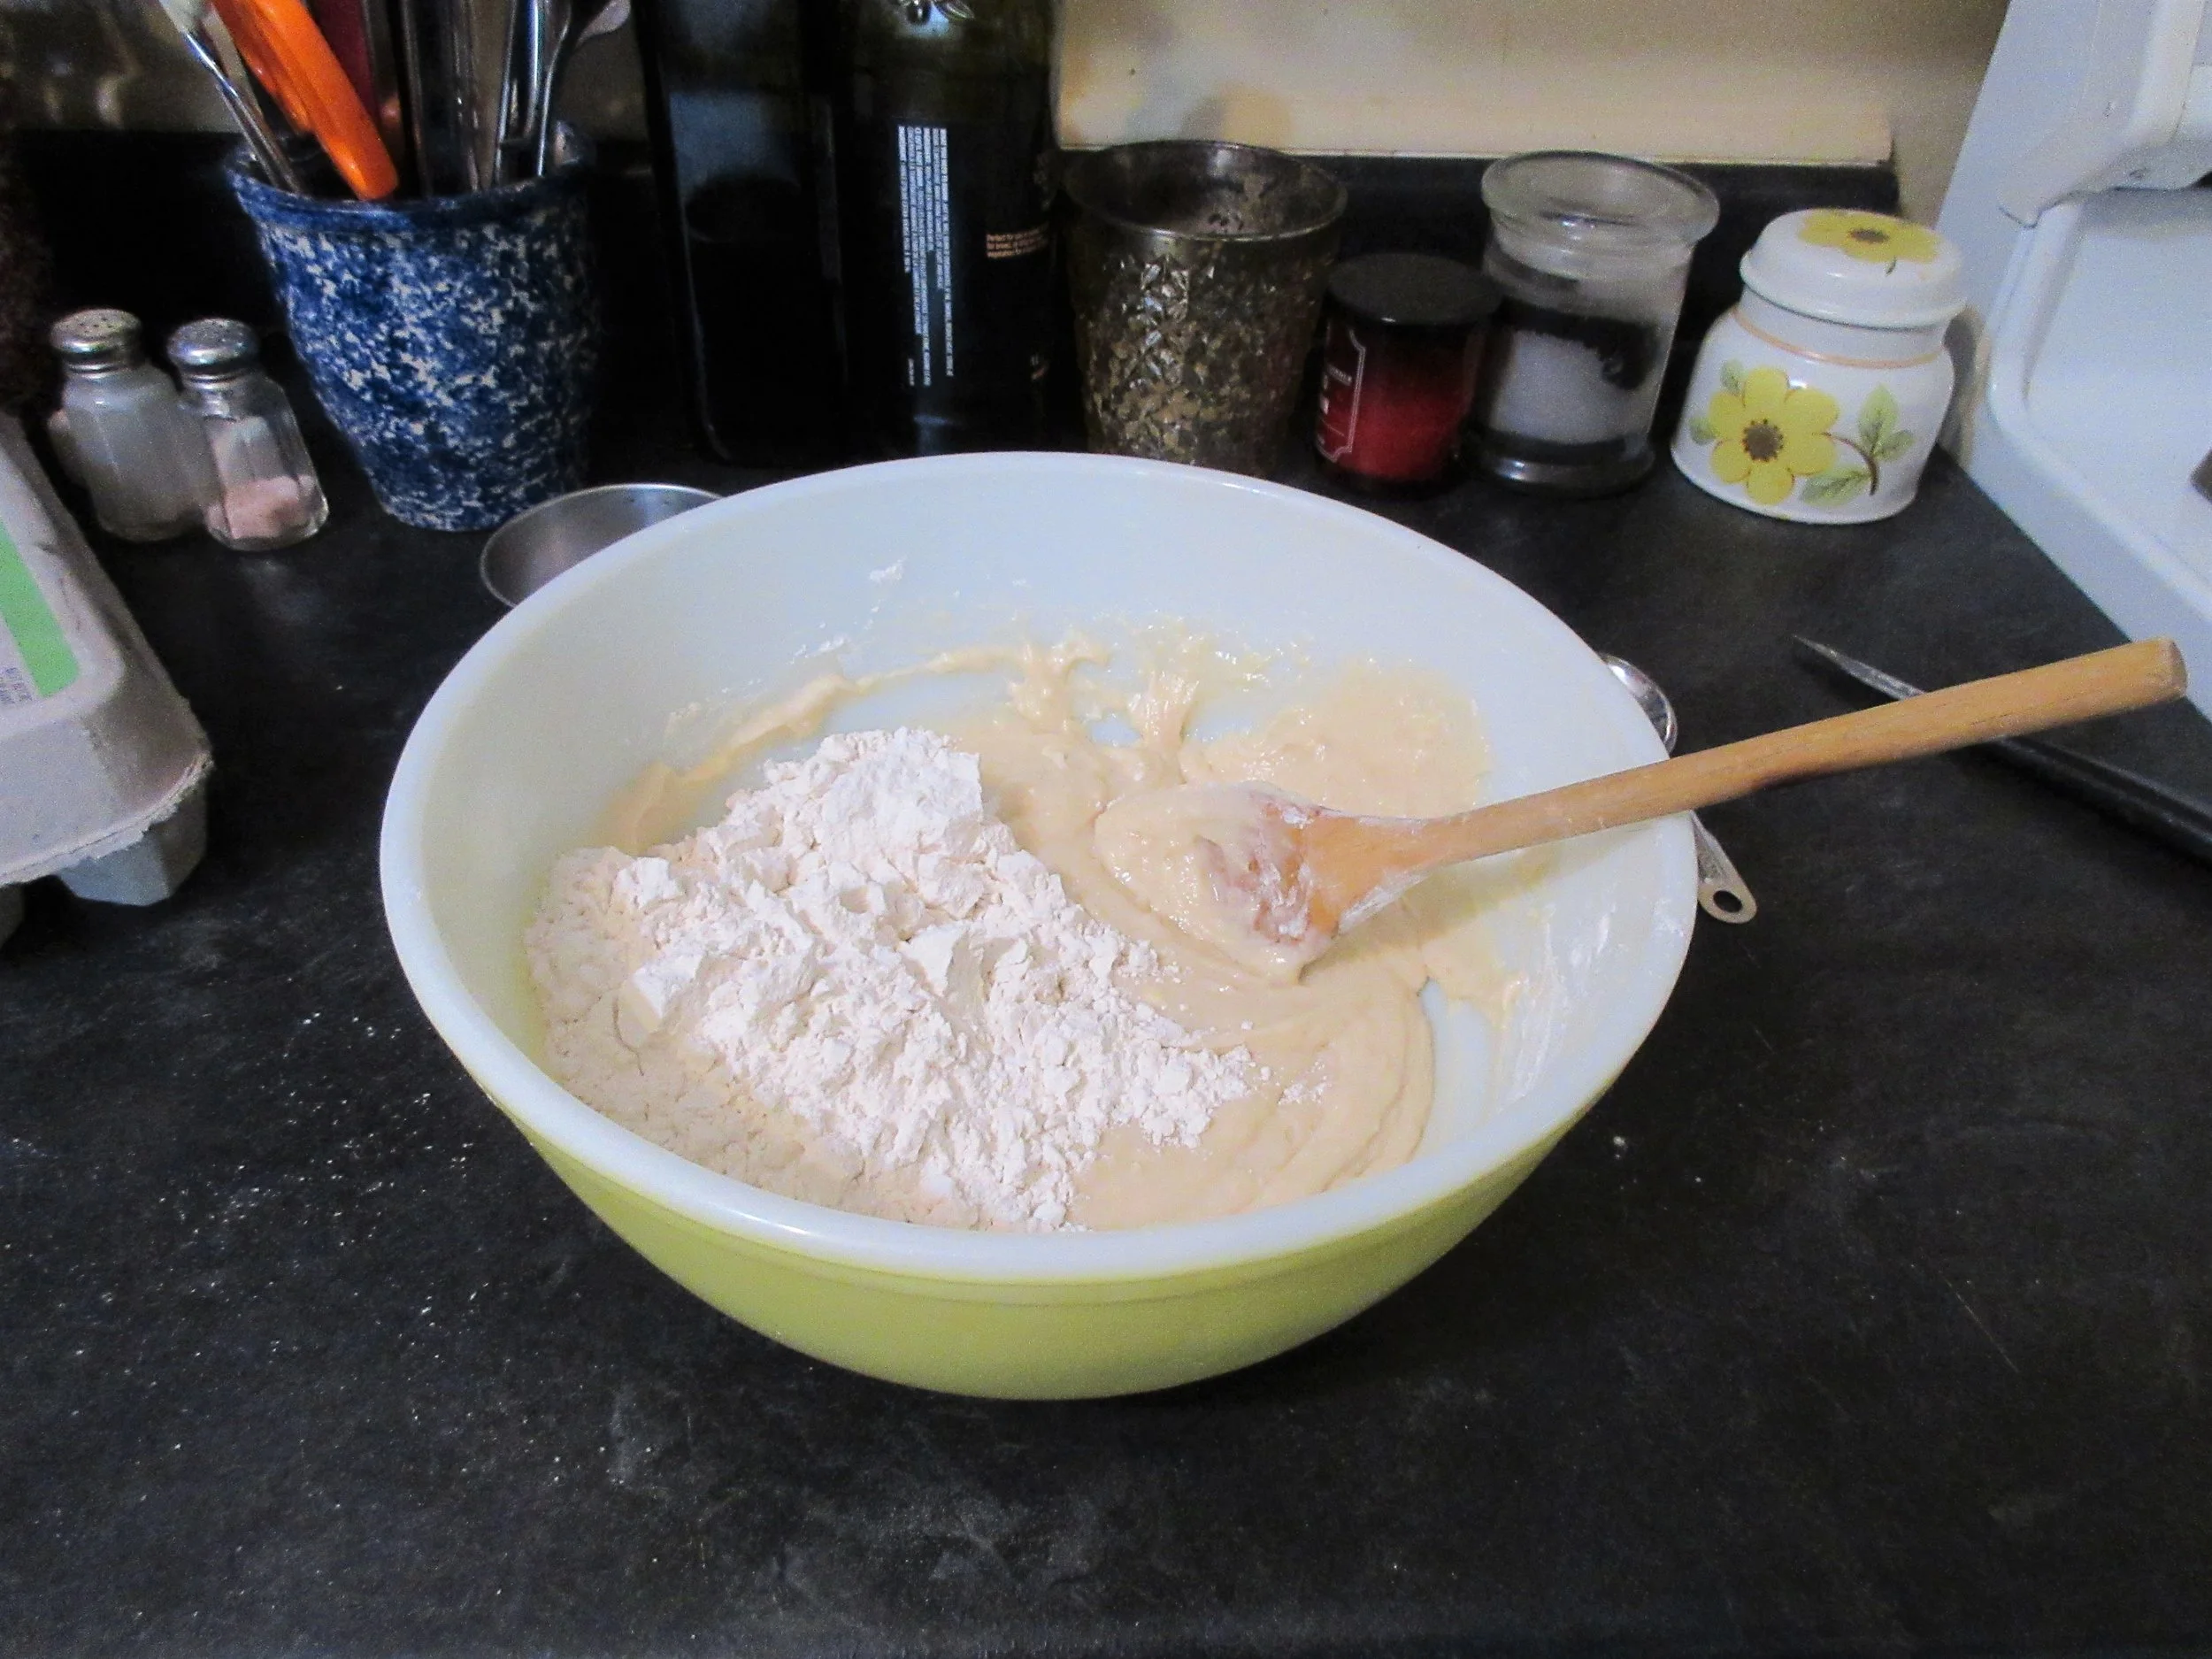
The 1898 recipe is rather easy to follow, so I won’t create an entirely new recipe. I will make a few comments, though. Granulated sugar refers to white sugar and it does begin hardening within minutes. I suggest getting all your utensils and your cake/cookies/donuts ready before you begin heating the sugar & milk because you should begin icing ASAP after its done.
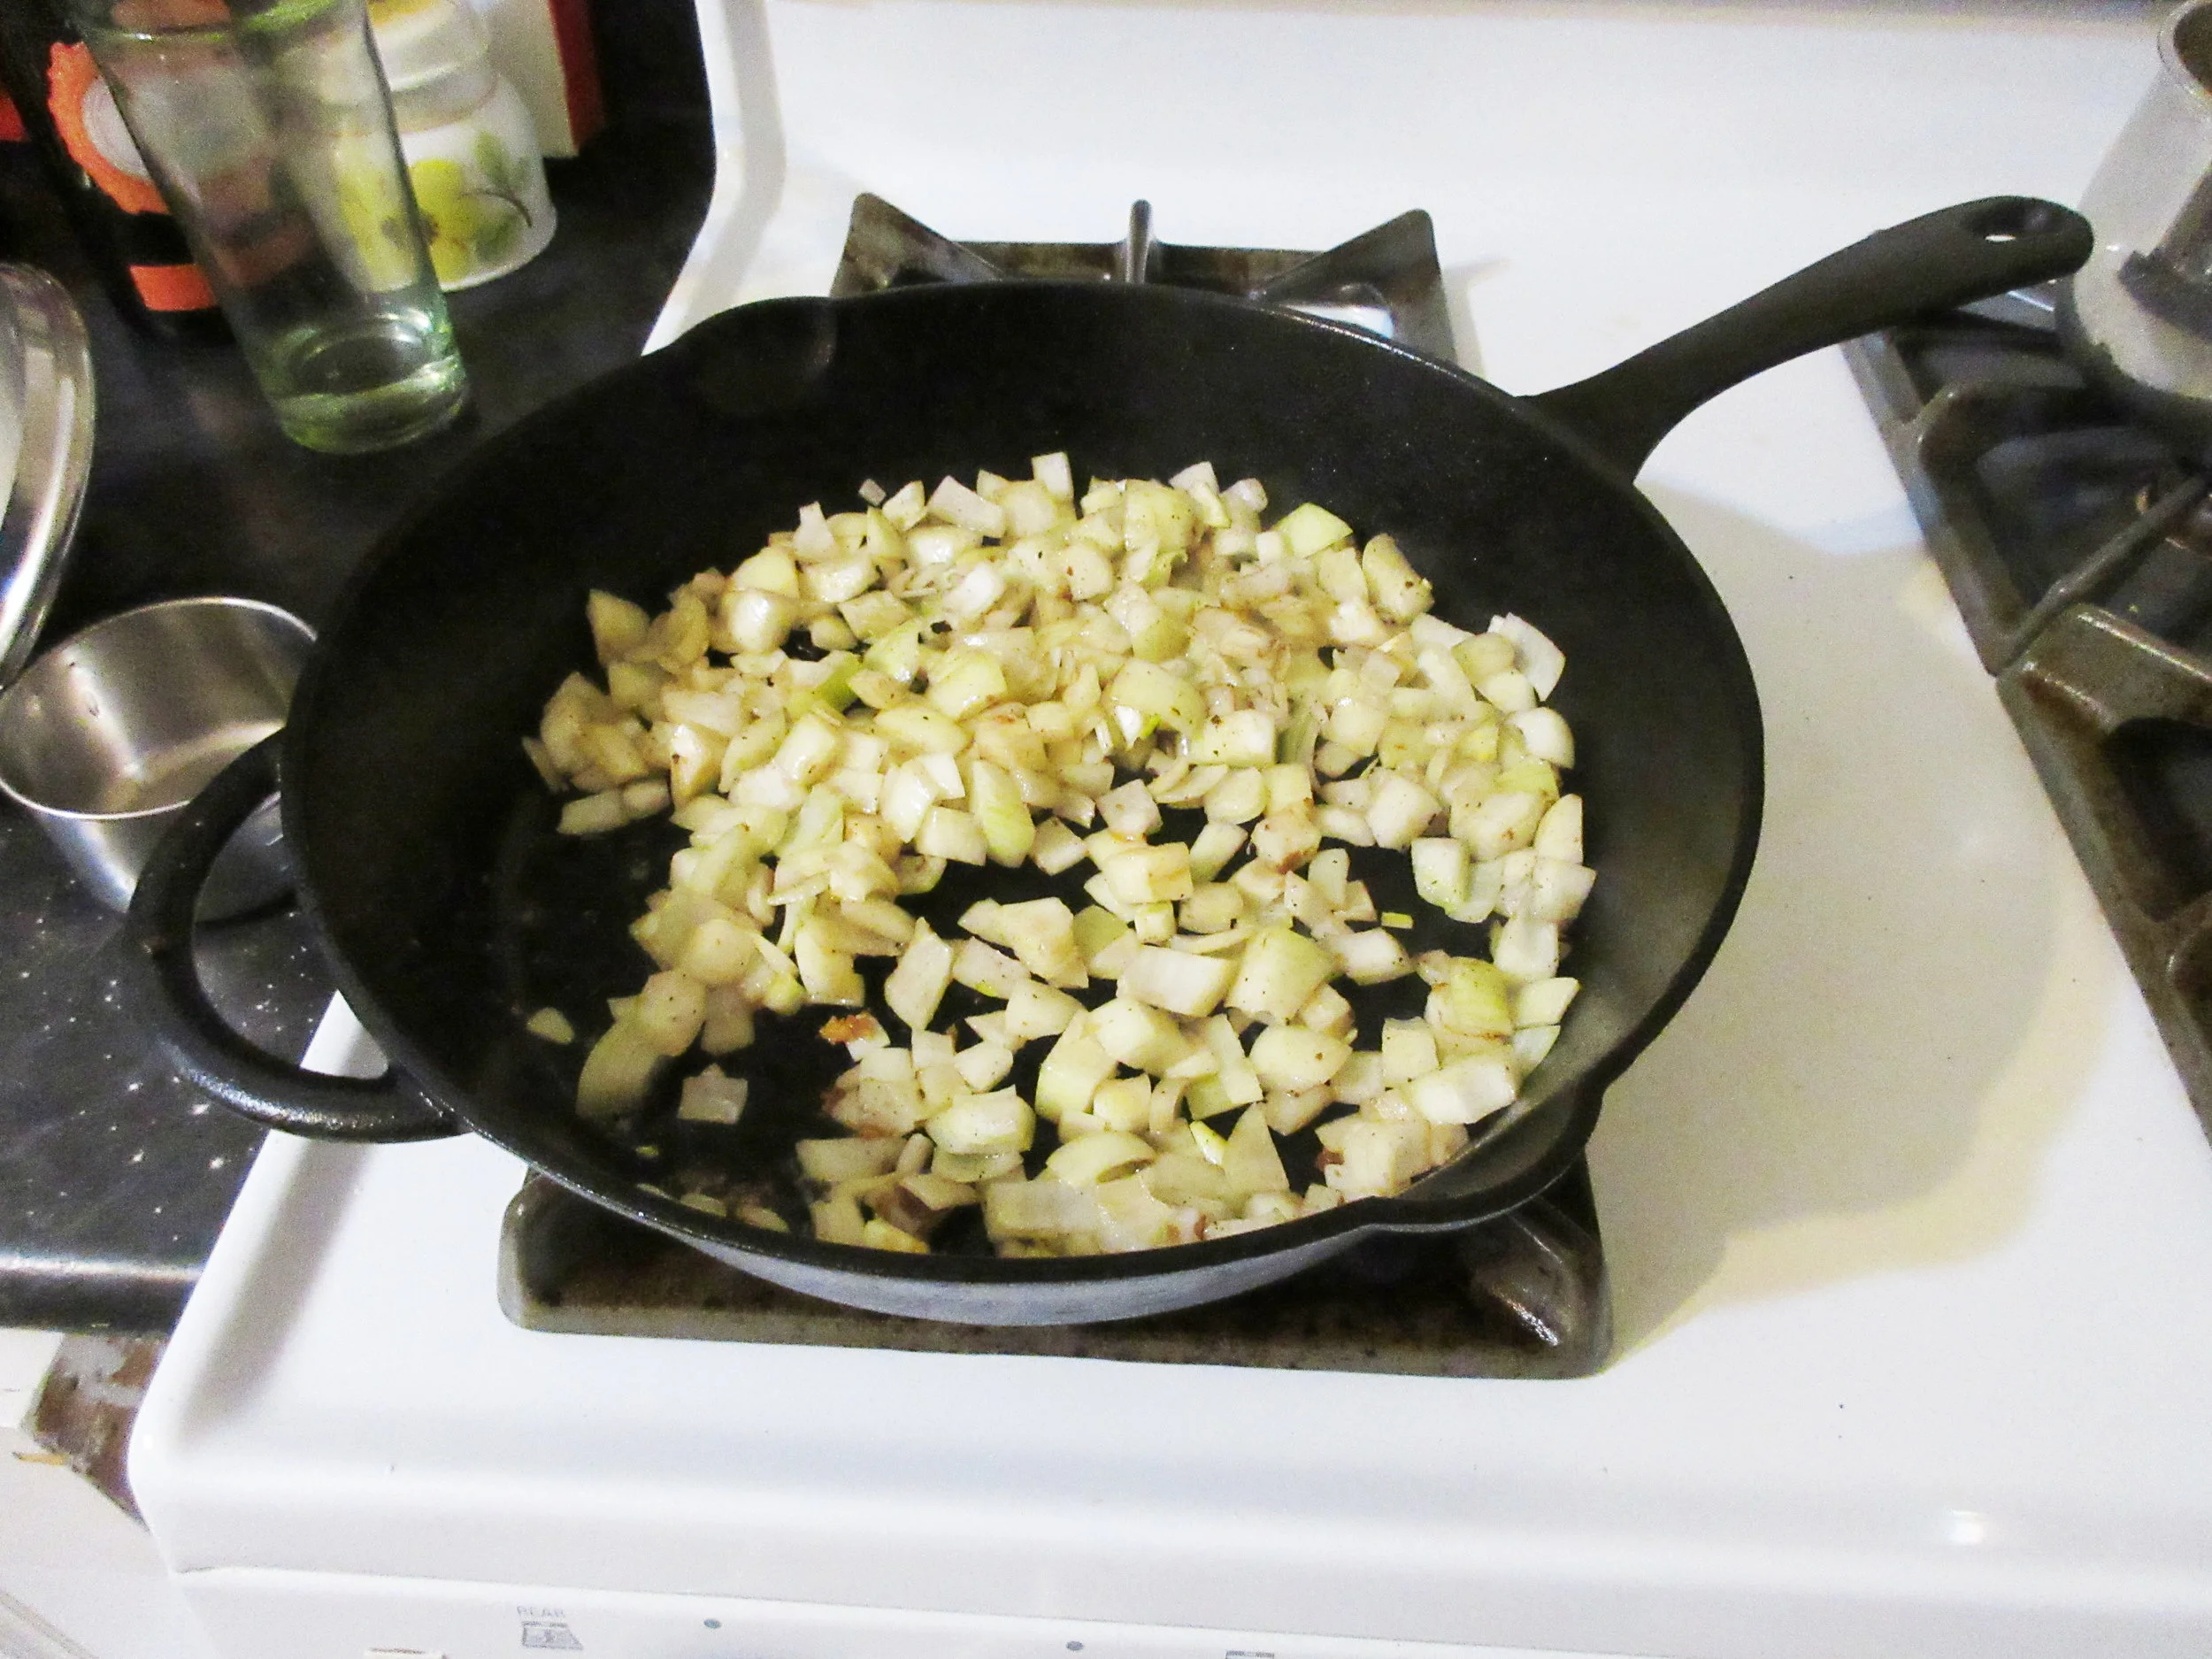
When Mrs. Walker instructs us to “move back” the pot after the milk & sugar, she is telling us to move the pot off the area directly above the fire on your wood stove, and off to the back or side of the stove where it is cooler. Changing your pot’s proximity to the fire is how a cook would adjust the temperature. I have a natural gas stove, so I was able to get the same effect just by turning down the flame. If you have a stove that doesn’t change its temperature as abruptly as gas or a wood fire, I suggest starting your pot on one element on high heat, but have a second element on low or medium-low that you can transfer your pot to after the milk & sugar boils.
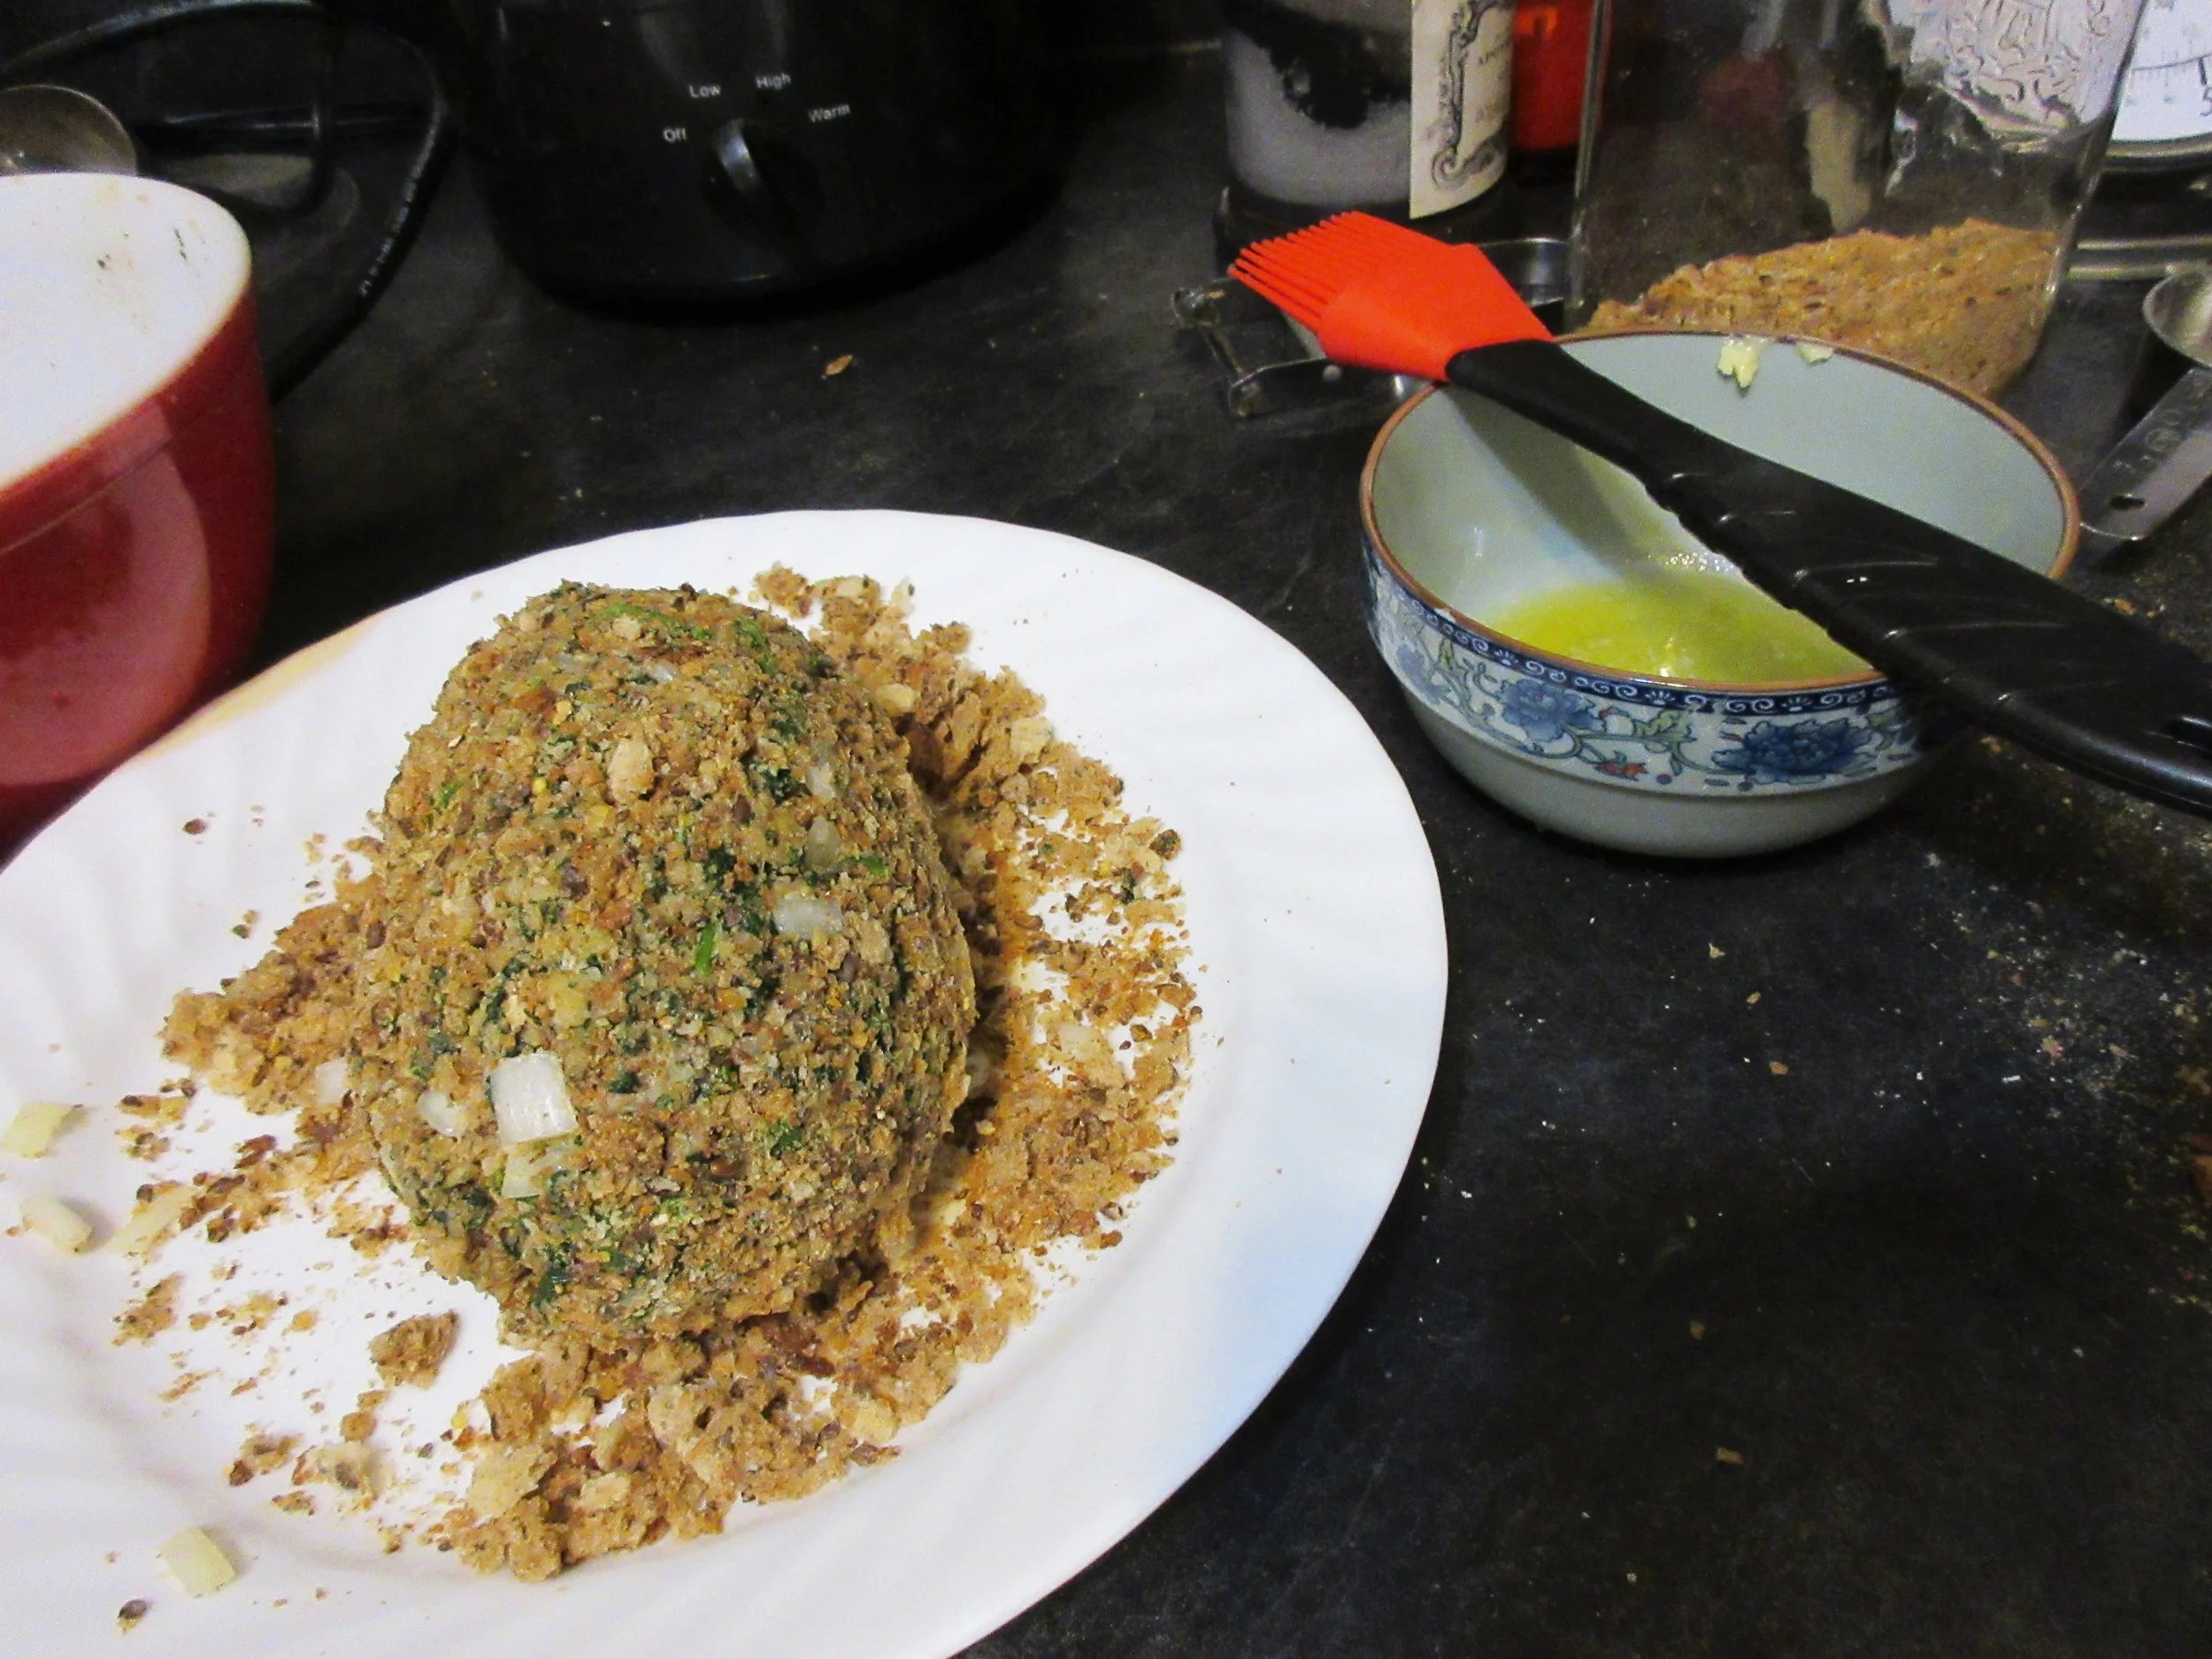
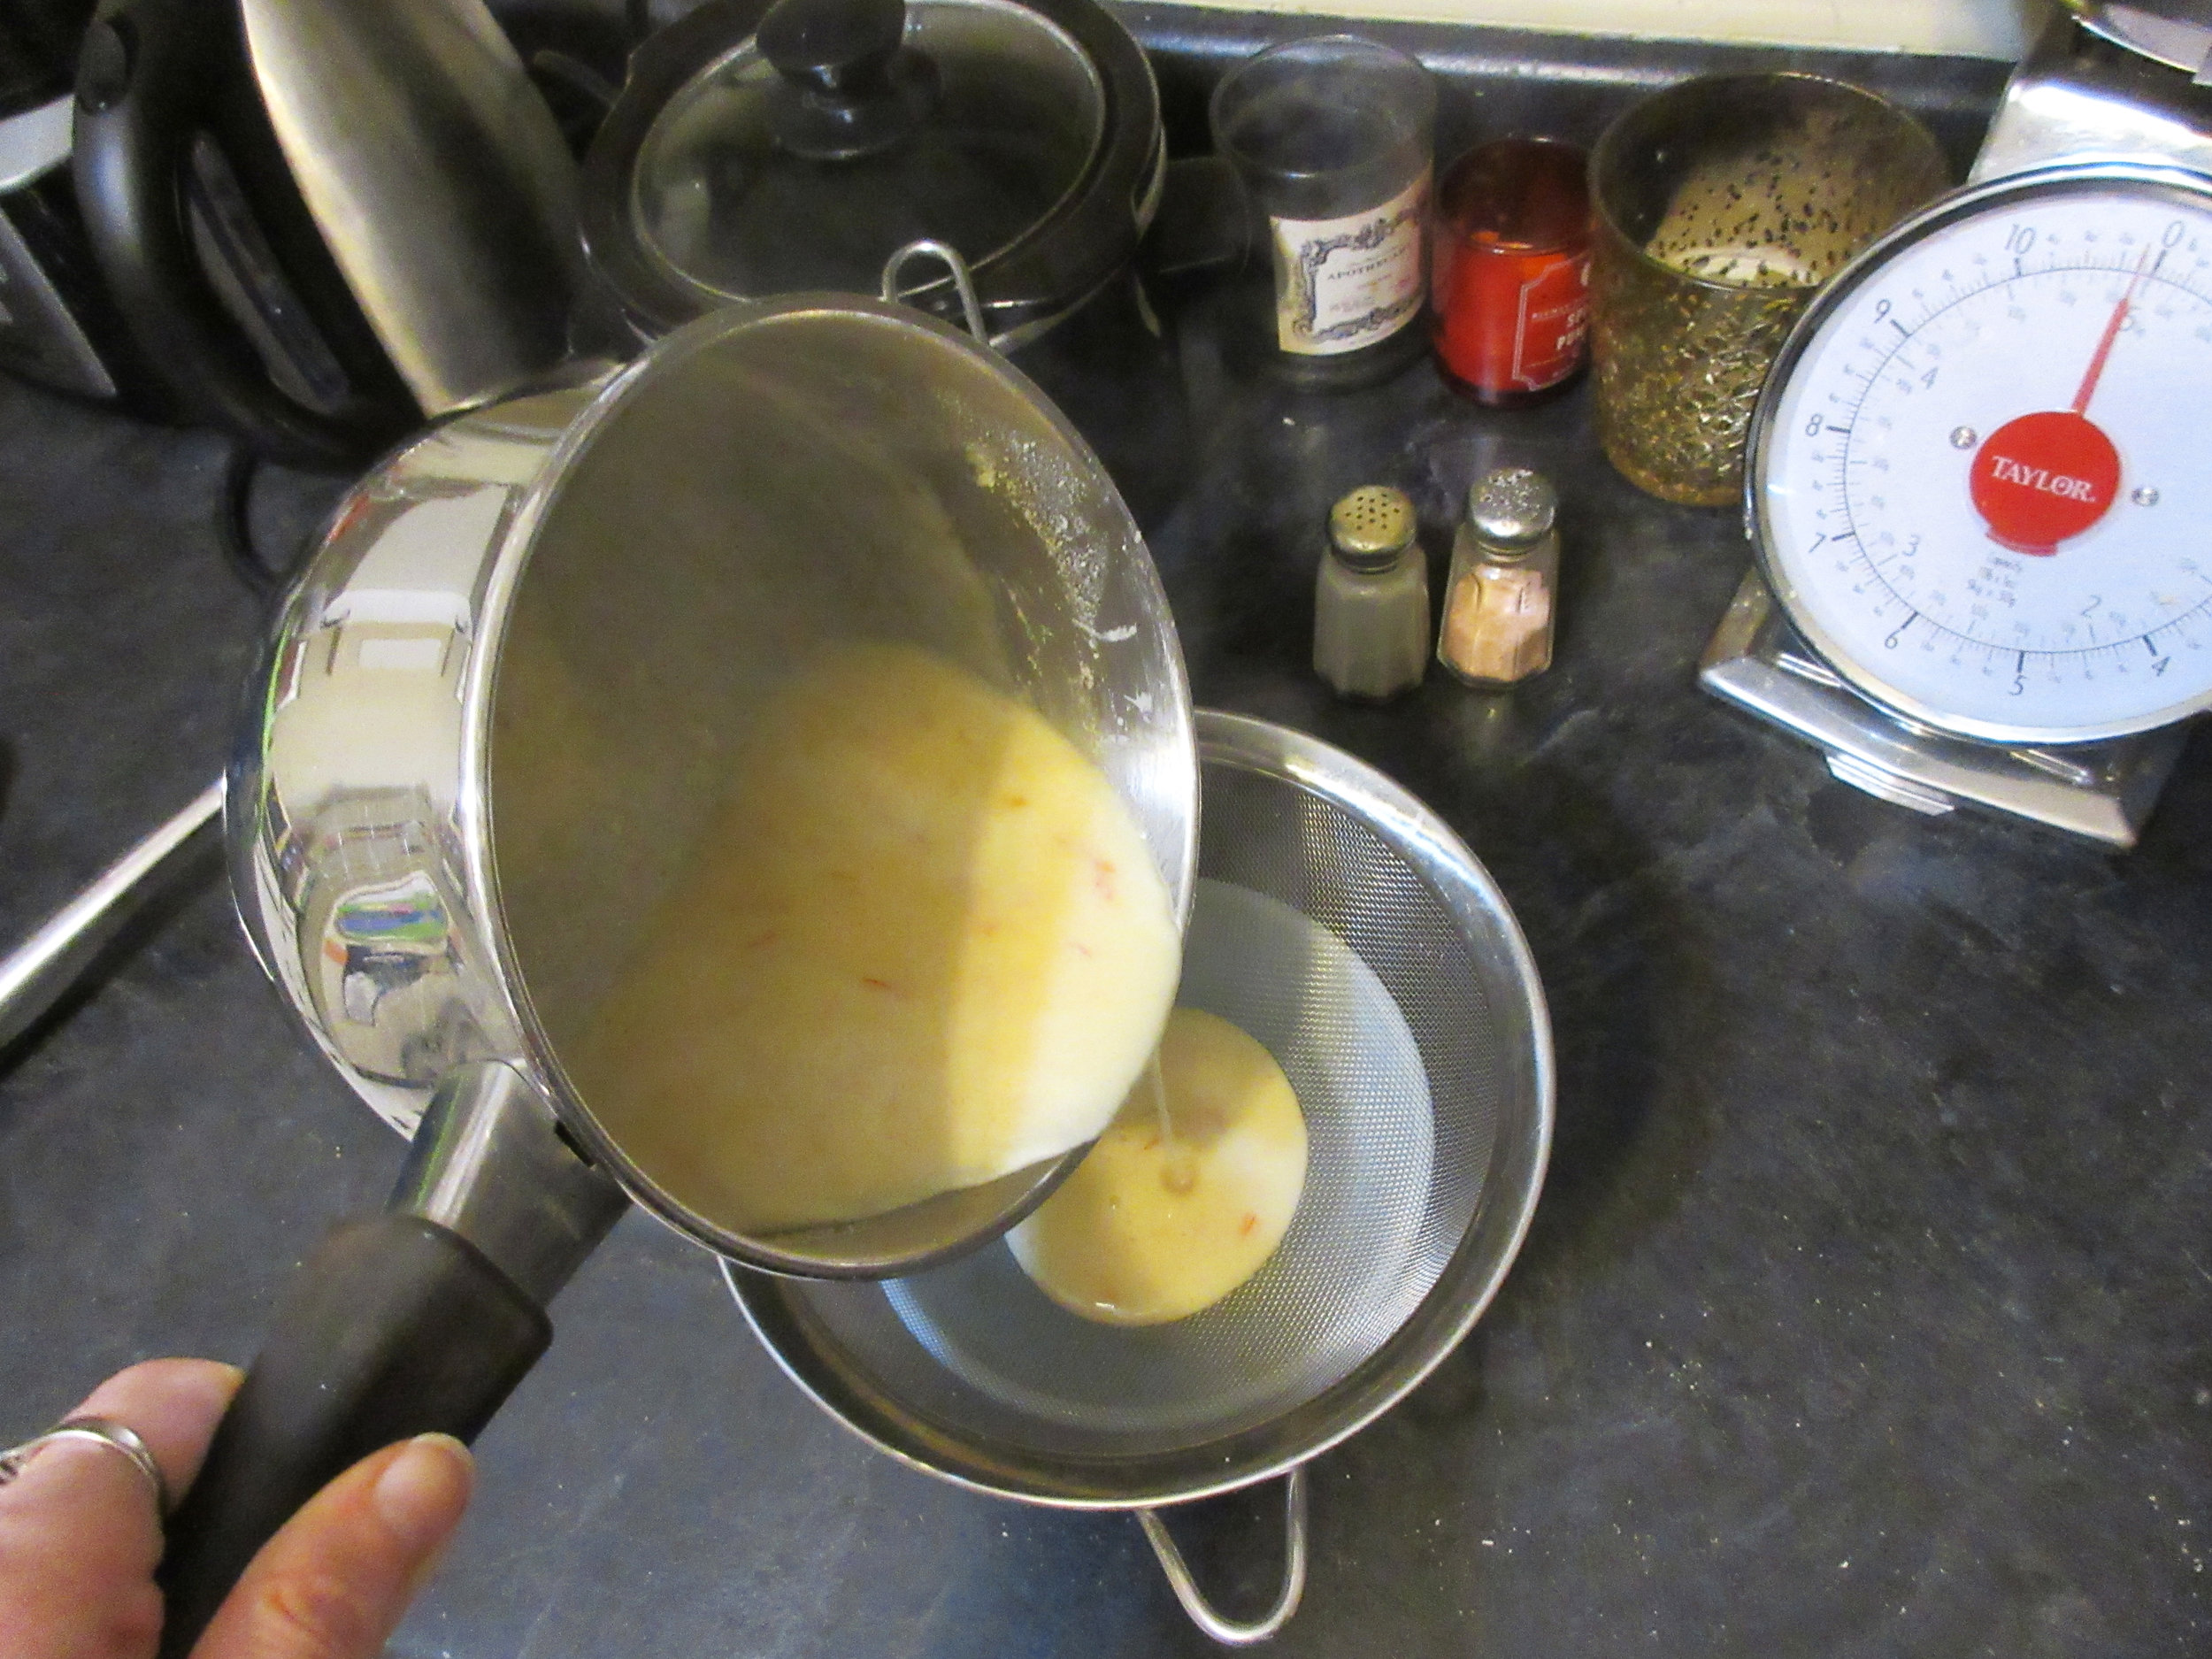
The recipe says to “beat well” and I probably whisked it for one or two minutes. It became more white and little bit thicker and I wasn’t sure if I had whisked it enough, but it set perfectly. I poured this icing onto my cookies with a spoon. This recipe also suggests: “If not even take a knife wet it in cold water and smooth it over”. I was ready with a knife and a glass of water, but I didn’t need to try this out.

I wasn’t intending to make this recipe, but the day before I baked some Ammonia Cakes that didn’t have much flavour and I thought could use some extra pizzazz. Both Ammonia Cakes and Icing for Cake are found in the 1898 The New Galt Cookbook, which is a community cookbook compiled not far from where I grew up and where I live today. Icing for Cake is a simple white sugar and milk icing that hardens within minutes and you could drizzle it on cakes, cookies, donuts or squares.
A couple of weeks ago, I prepared the food served at a Victorian Tea held at the Fashion History Museum in Cambridge, Ontario. All of the recipes served came from The New Galt Cookbook and Food Historian Carolyn Blackstock spoke during the Tea about her experience in 2014 when she made a recipe a day for a year from The New Galt Cookbook. Ammonia Cakes were on the menu at the Victorian Tea and I decided to make the recipe for my blog when the museum gave me the leftover baker’s ammonia. Head over to my Ammonia Cakes blog post if you’re curious to find out more about the history of using ammonia as a leavening agent in baking.
One of the fascinating aspects of Carolyn Blackstock’s Cooking with the Galt Cook Book project is that she not only made a recipe a day for a year, but she also did research about the women who submitted the recipes. Many days, she provides details and pictures about that woman’s life, but unfortunately there were too many Mrs. Walkers living in Calgary at that time to find out exactly who submitted the Icing for Cake recipe and why she submitted a recipe all the way from Alberta. If you’d like a different perspective on making this recipe, here’s Carolyn’s blog post about making Icing for Cake.

Have a look at Carolyn Blackstock’s Cooking with the Galt Cook Book blog project and try out some of the recipes
Read the Cook Book:

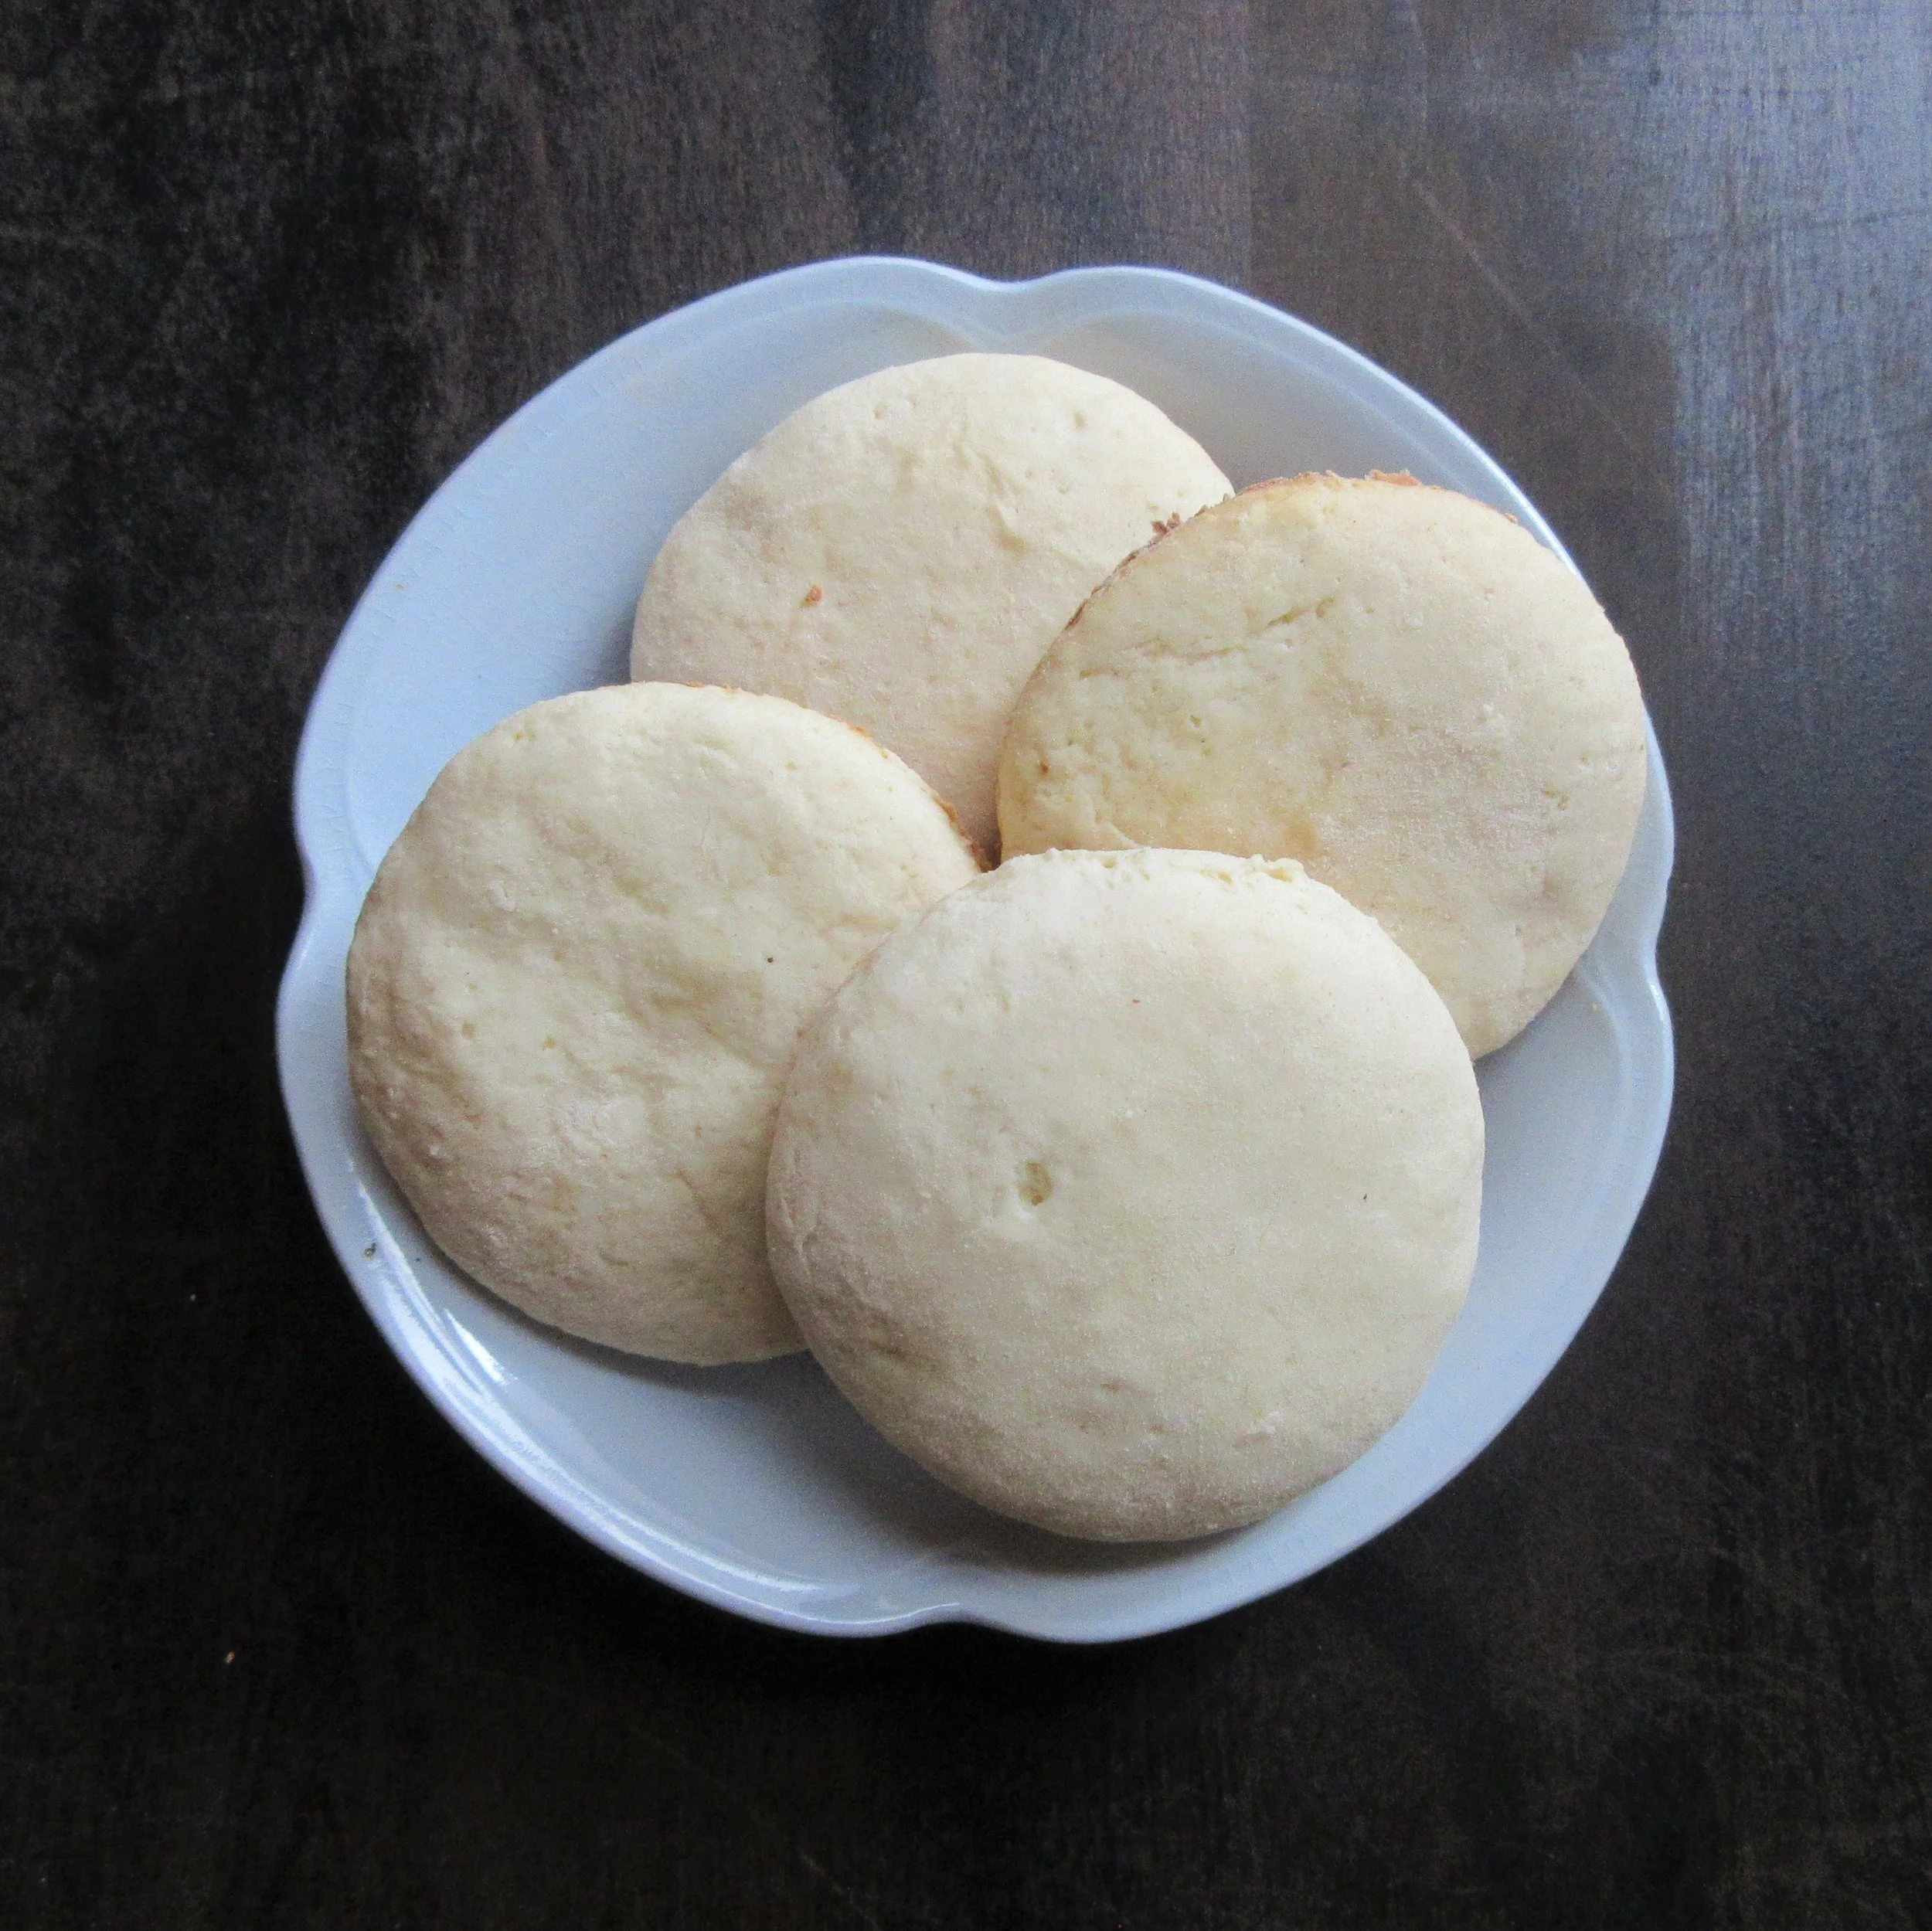
Ammonia Cakes
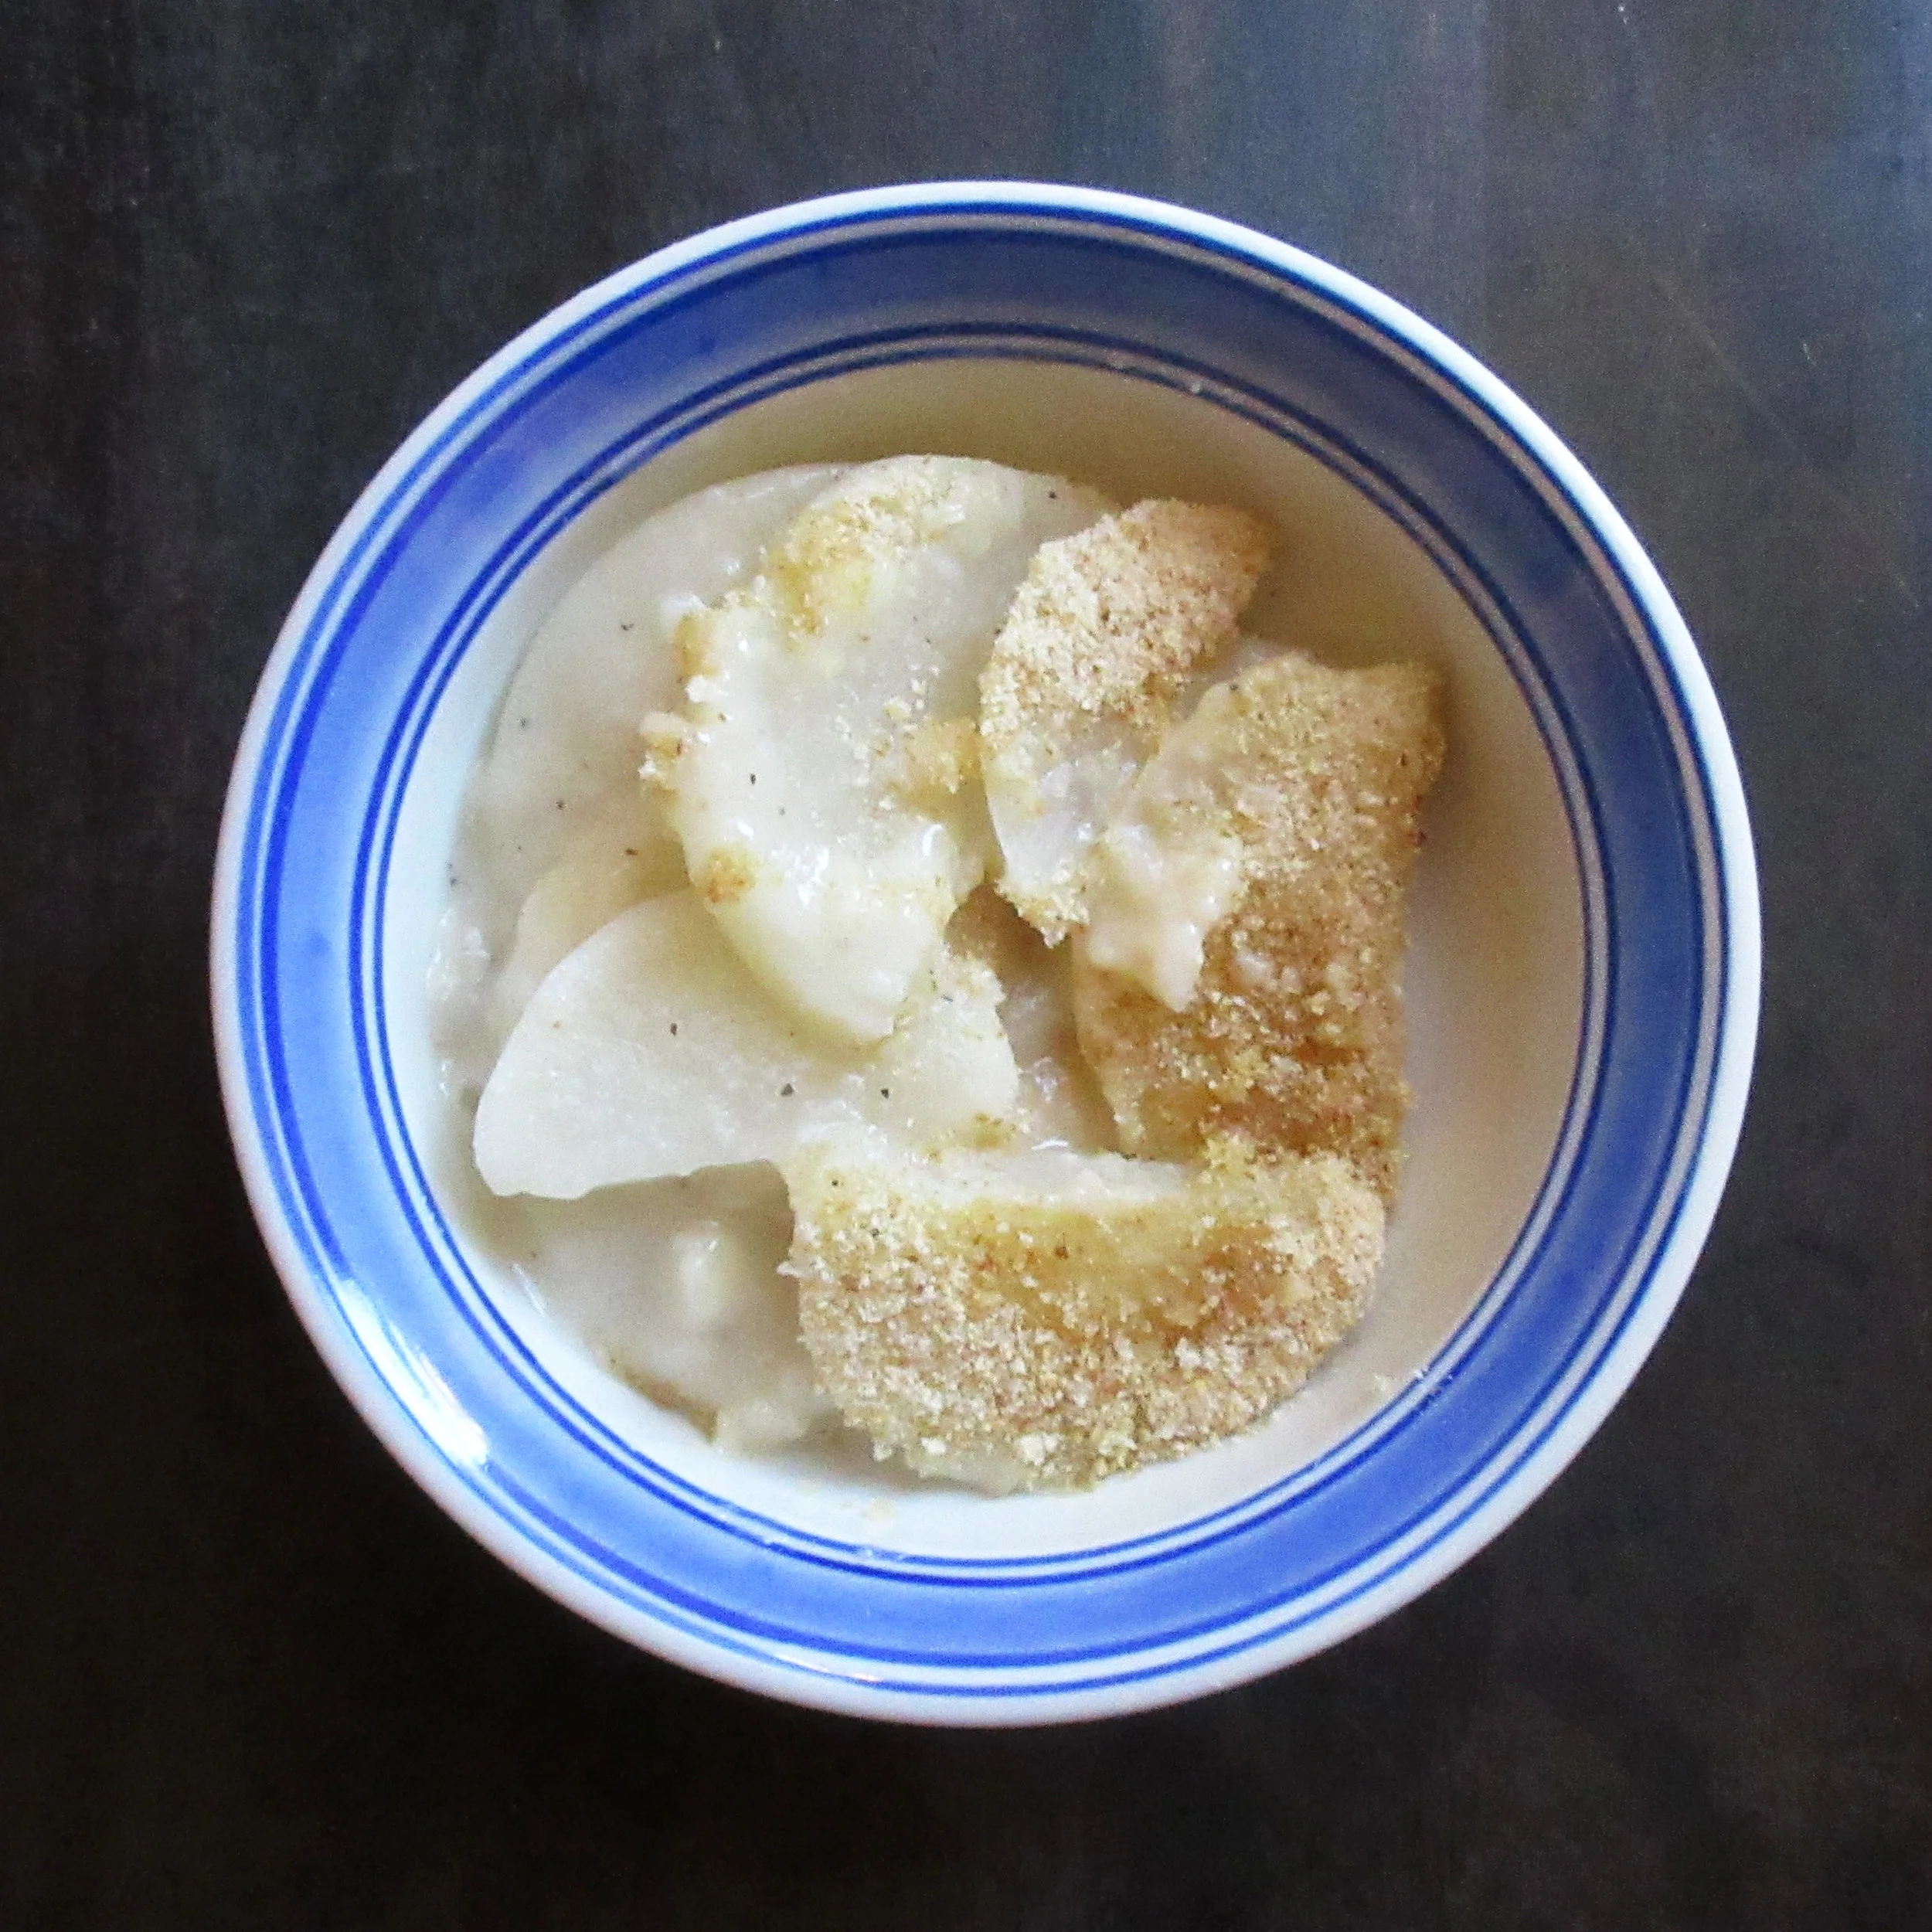
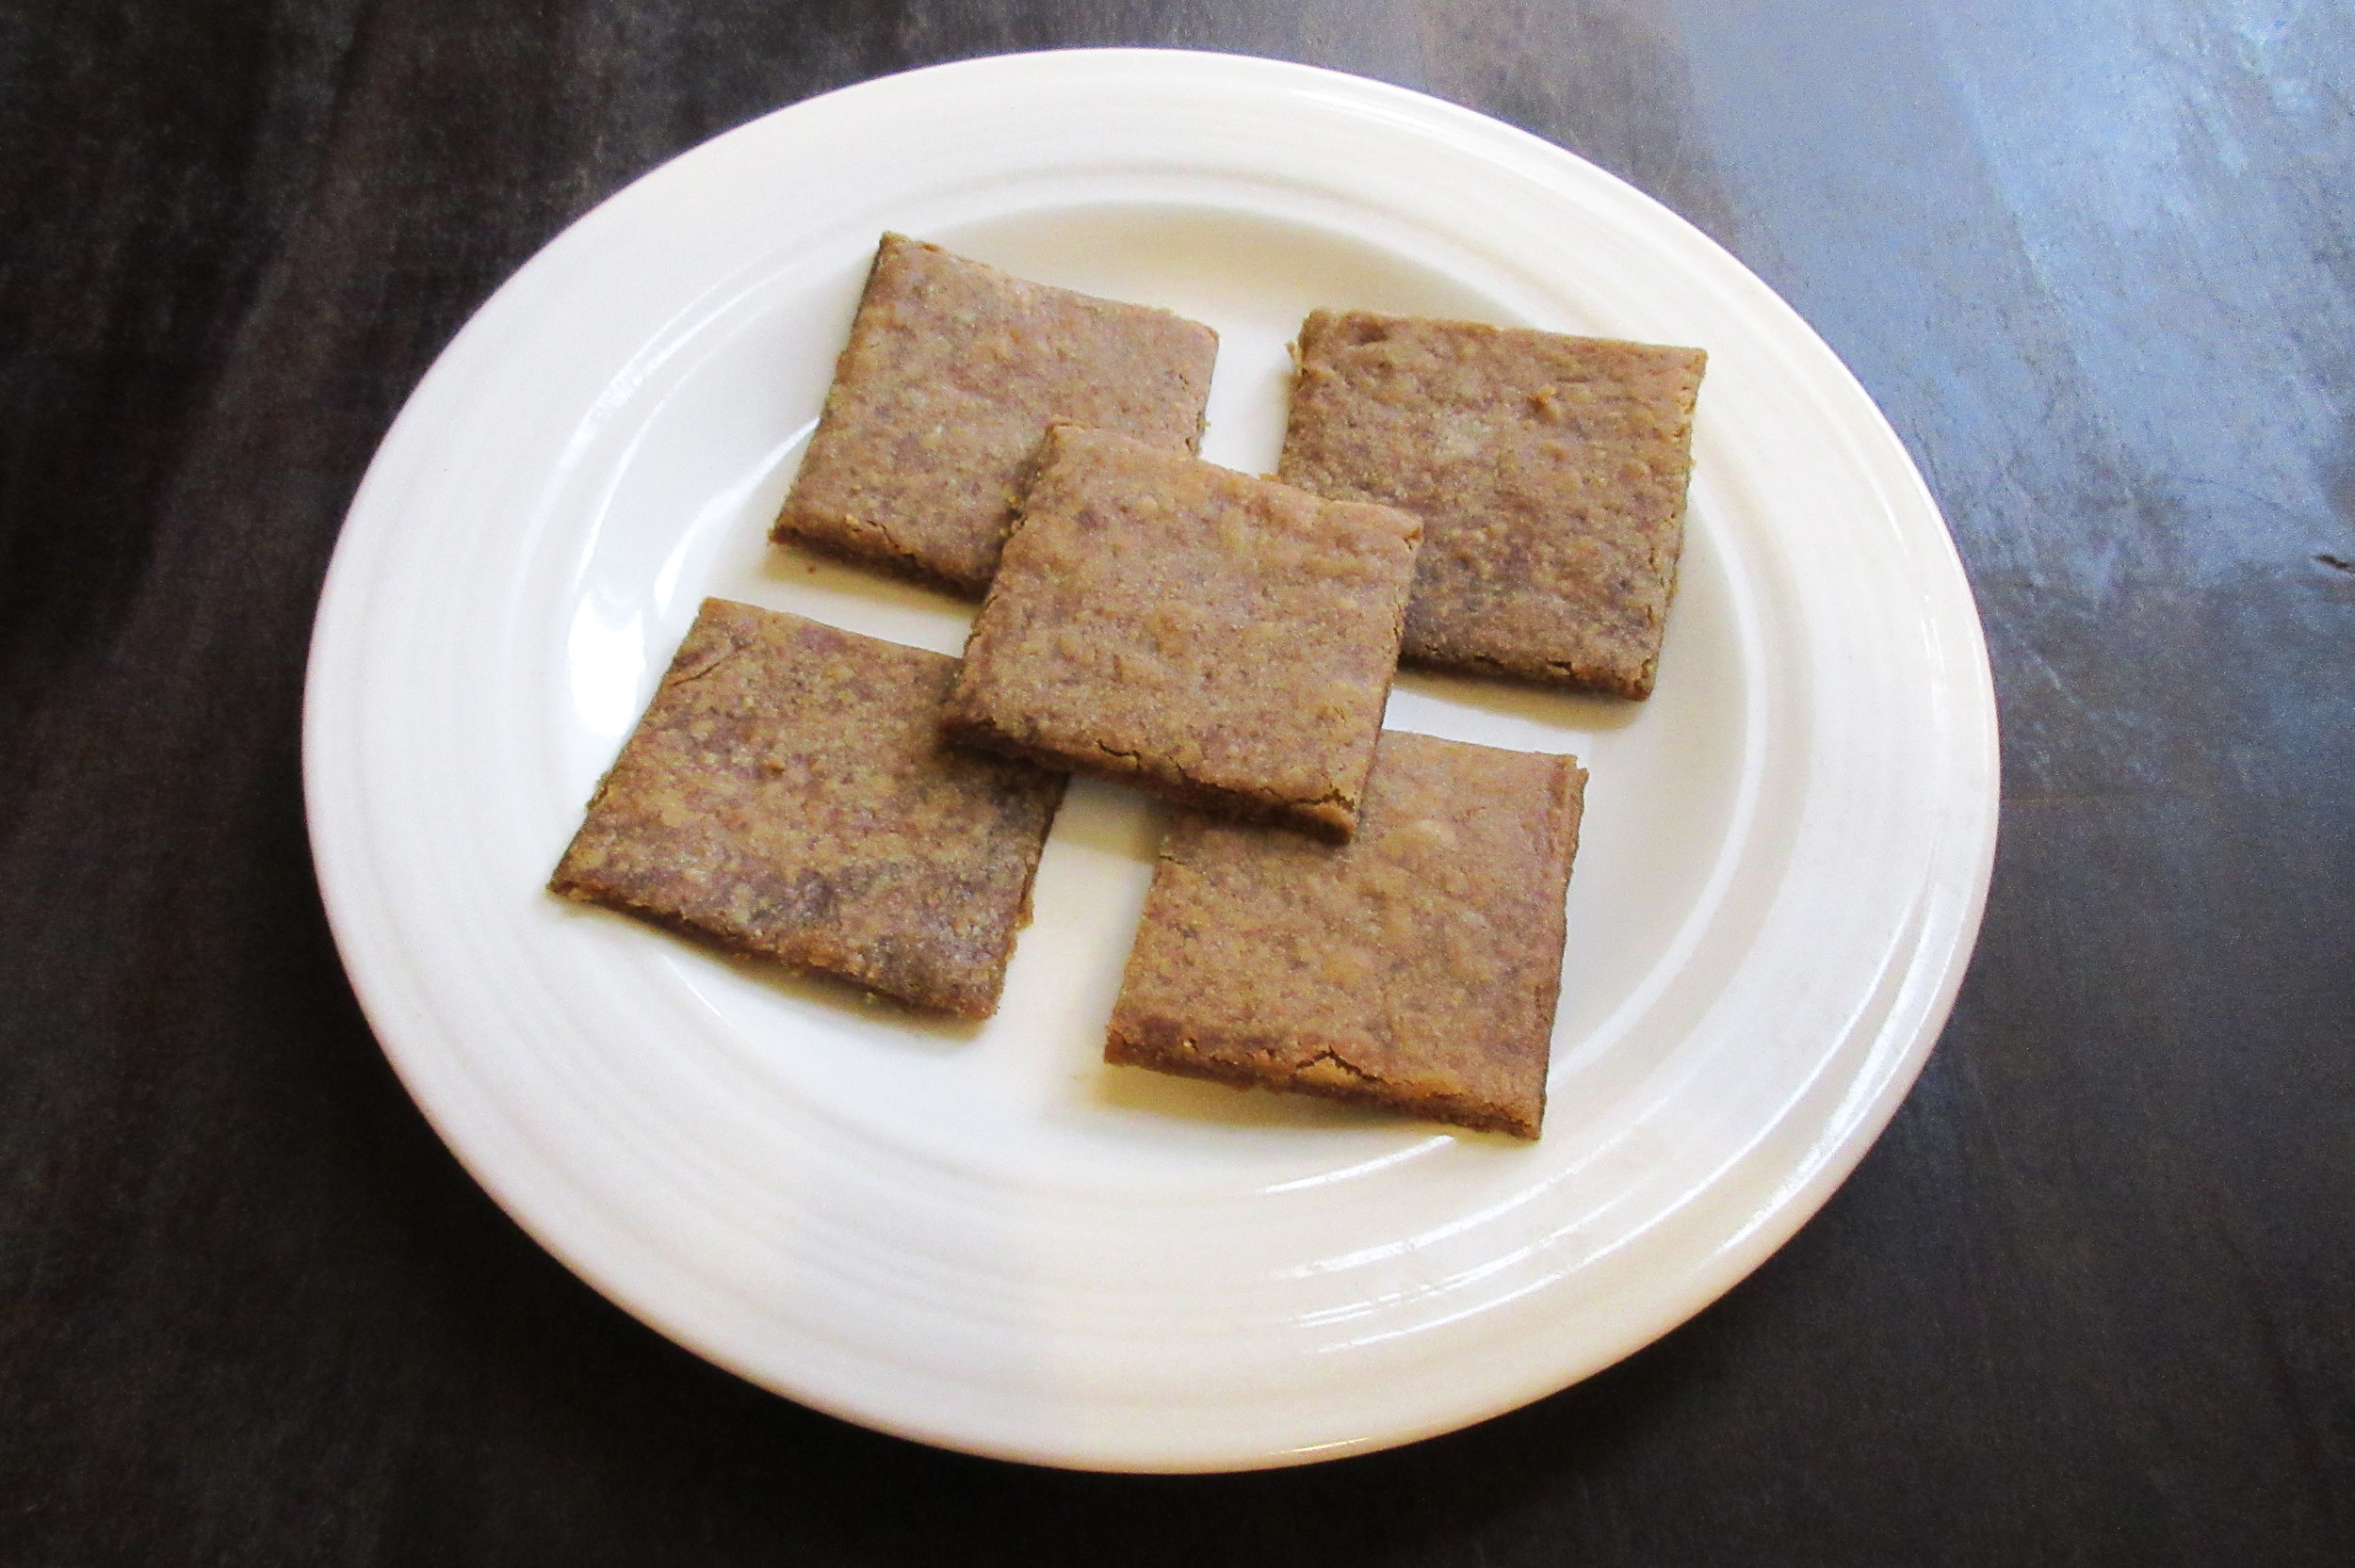
Ammonia Cakes: probably the least appetizing cookie name that I’ve ever come across. These cakes use ammonium bicarbonate (baker’s ammonia) as the leavening agent and I assure you that they don’t taste like ammonia, but they will temporarily stink up your kitchen while they bake! Ammonia Cakes fall on the bland side of the cookie spectrum, so I was lucky to find the recipe Icing for Cake in the same recipe book and I iced them the next day.
Added later: If you’re interested in learning more about Baker’s Ammonia or Ammonium Bicarbonate, continuing reading after this recipe to find out some history and background about this leavening agent.
If you’re more interested in baking a delicious cookie that uses Baker’s Ammonia, head over to my Cup Cookies recipe (I don’t recommend baking Ammonia Cakes).
You’ll find this recipe in:
The New Galt Cook Book
Compiled and Edited by: Margaret Taylor and Frances McNaught
Toronto, 1898
Added later: If you’re interested in learning more about Baker’s Ammonia or Ammonium Bicarbonate, continuing reading after this recipe to find out some history and background about this leavening agent.
If you’re more interested in baking a delicious cookie that uses Baker’s Ammonia, head over to my Cup Cookies recipe (they taste better than this Ammonia Cakes recipe).
Original Recipe:
AMMONIA CAKES.
MISS ROOS, WATERLOO.
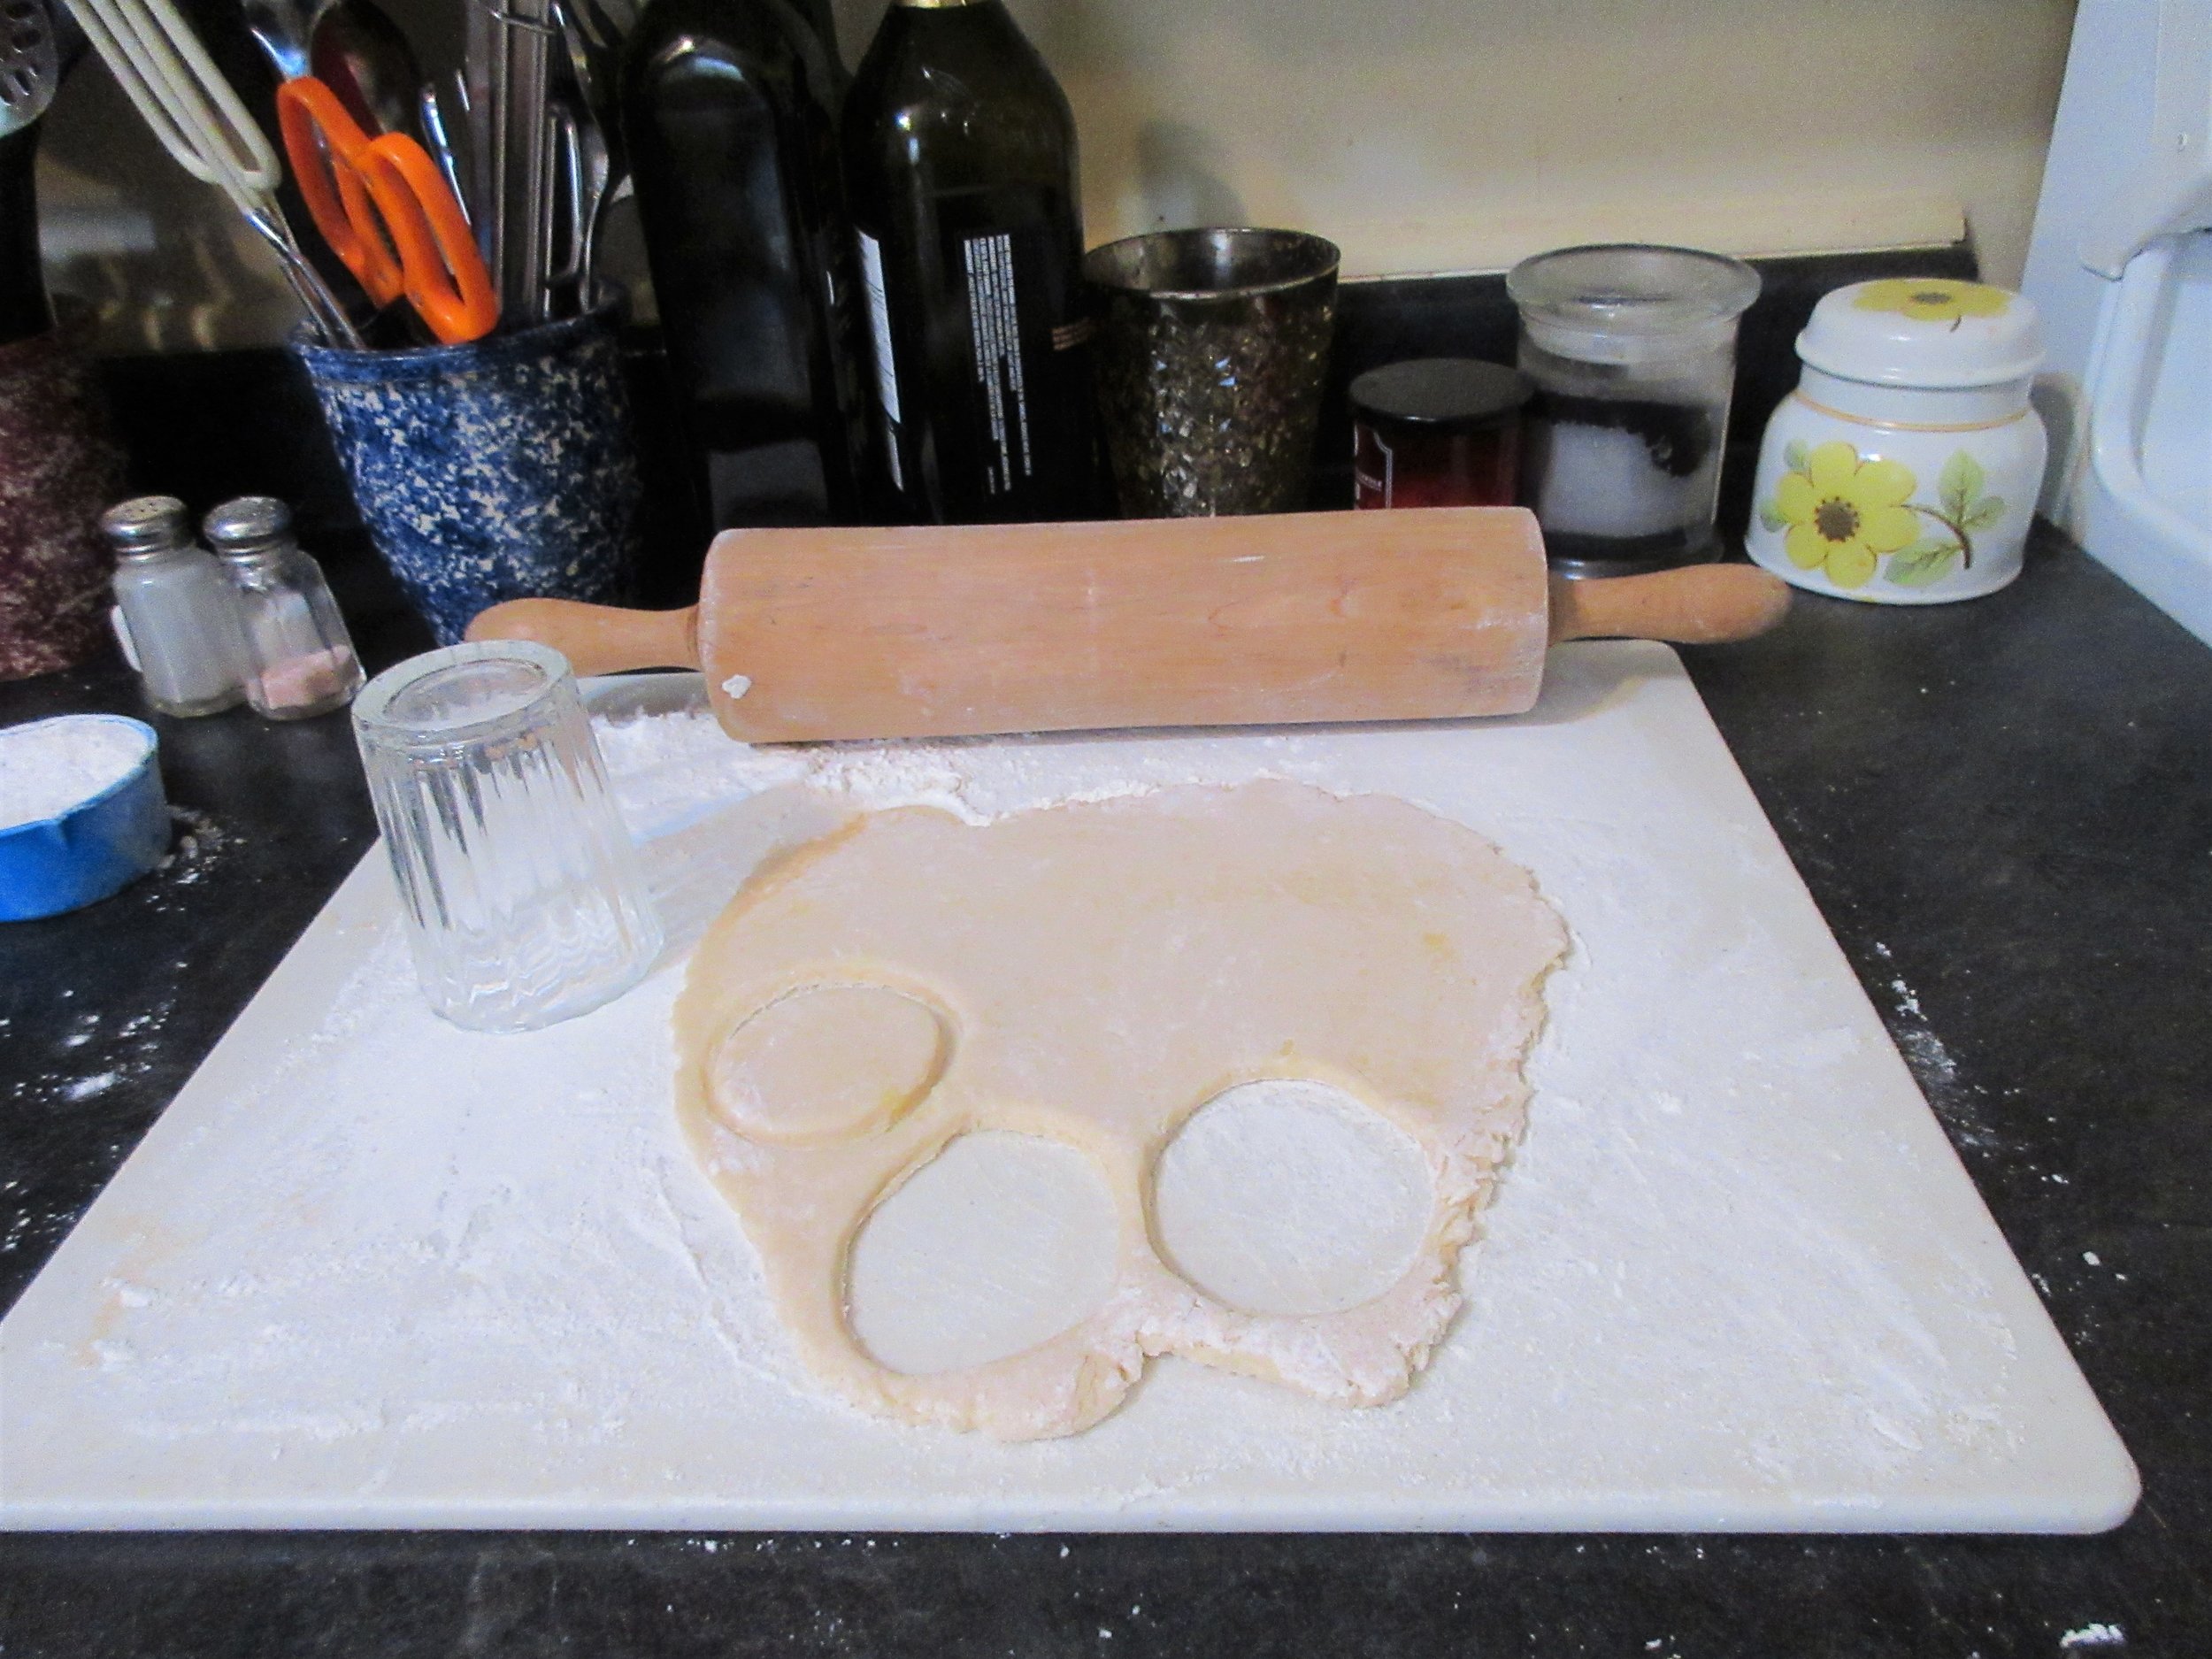
Half pound white sugar, half a pint sweet cream, one egg, half ounce ammonia, a small piece of butter (half the size of an egg). Flour enough to roll out.
My Recipe:
1 cup white sugar
1 cup cream
1 egg
3 tbsp softened butter
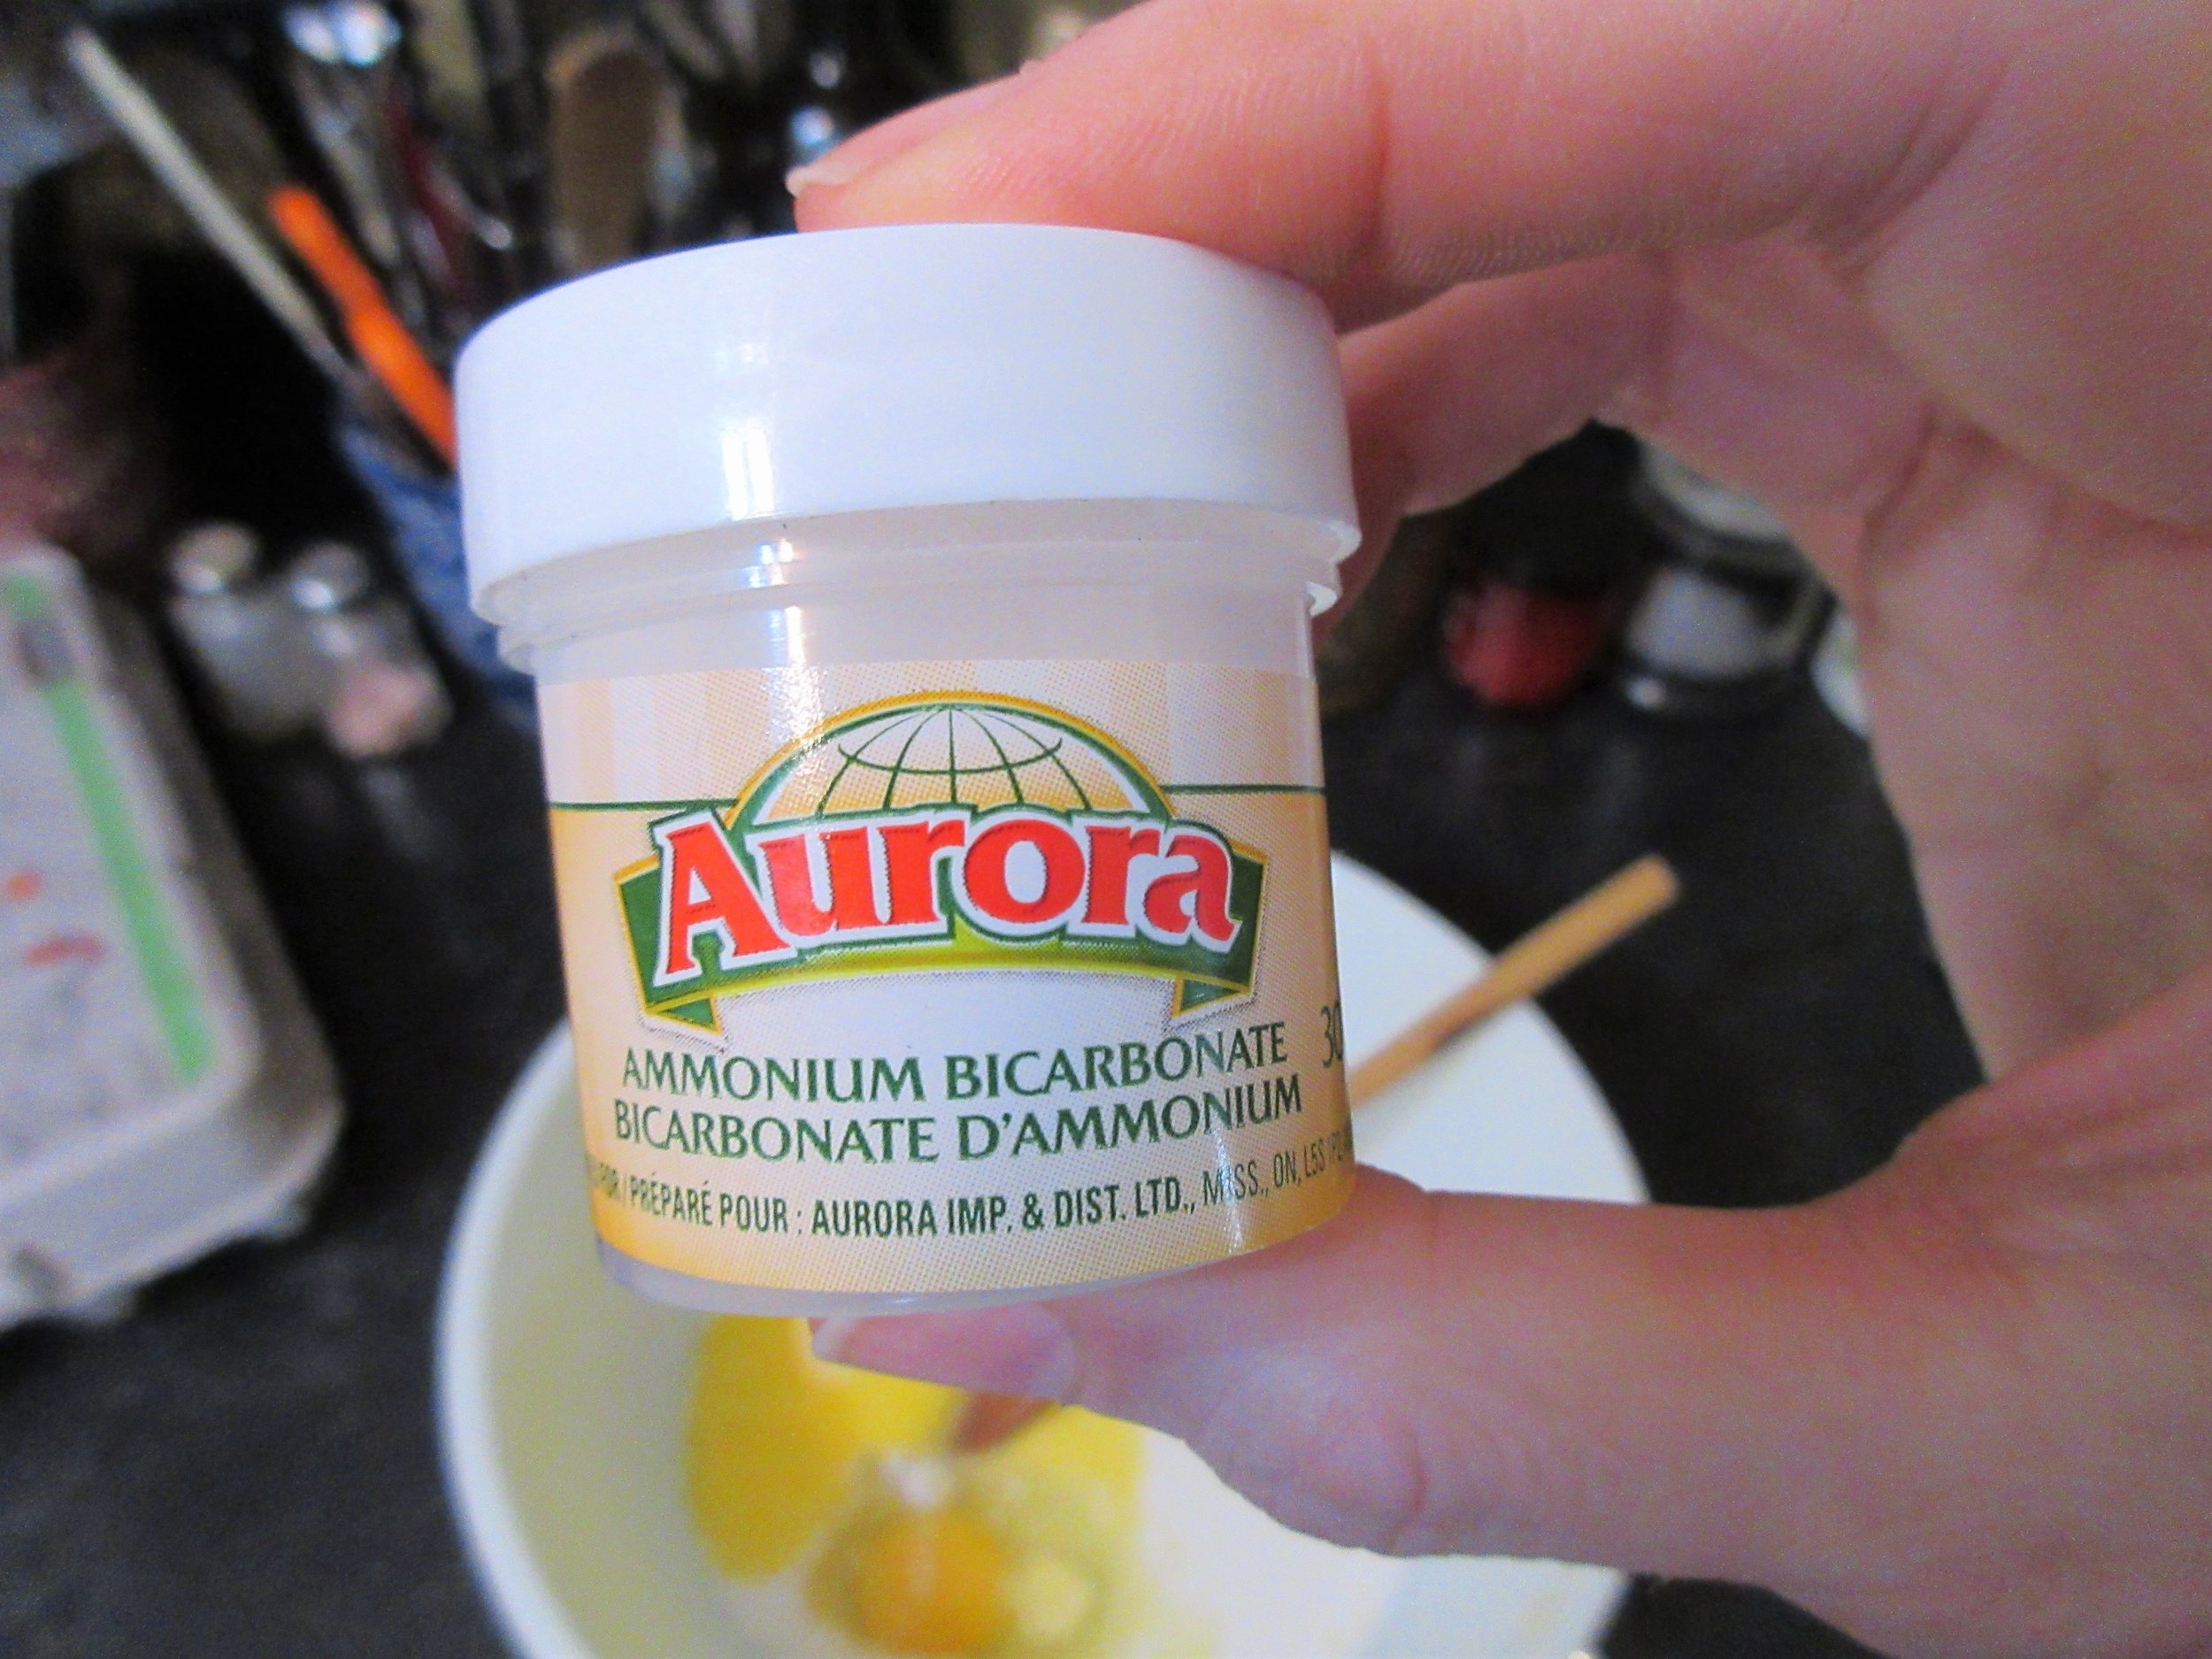
1 tbsp + 1 tsp baking ammonia*
3 ½ cups flour
* Baking ammonia is a white powder and it is also sometimes called ammonium bicarbonate, hartshorn or hirschhornsalz
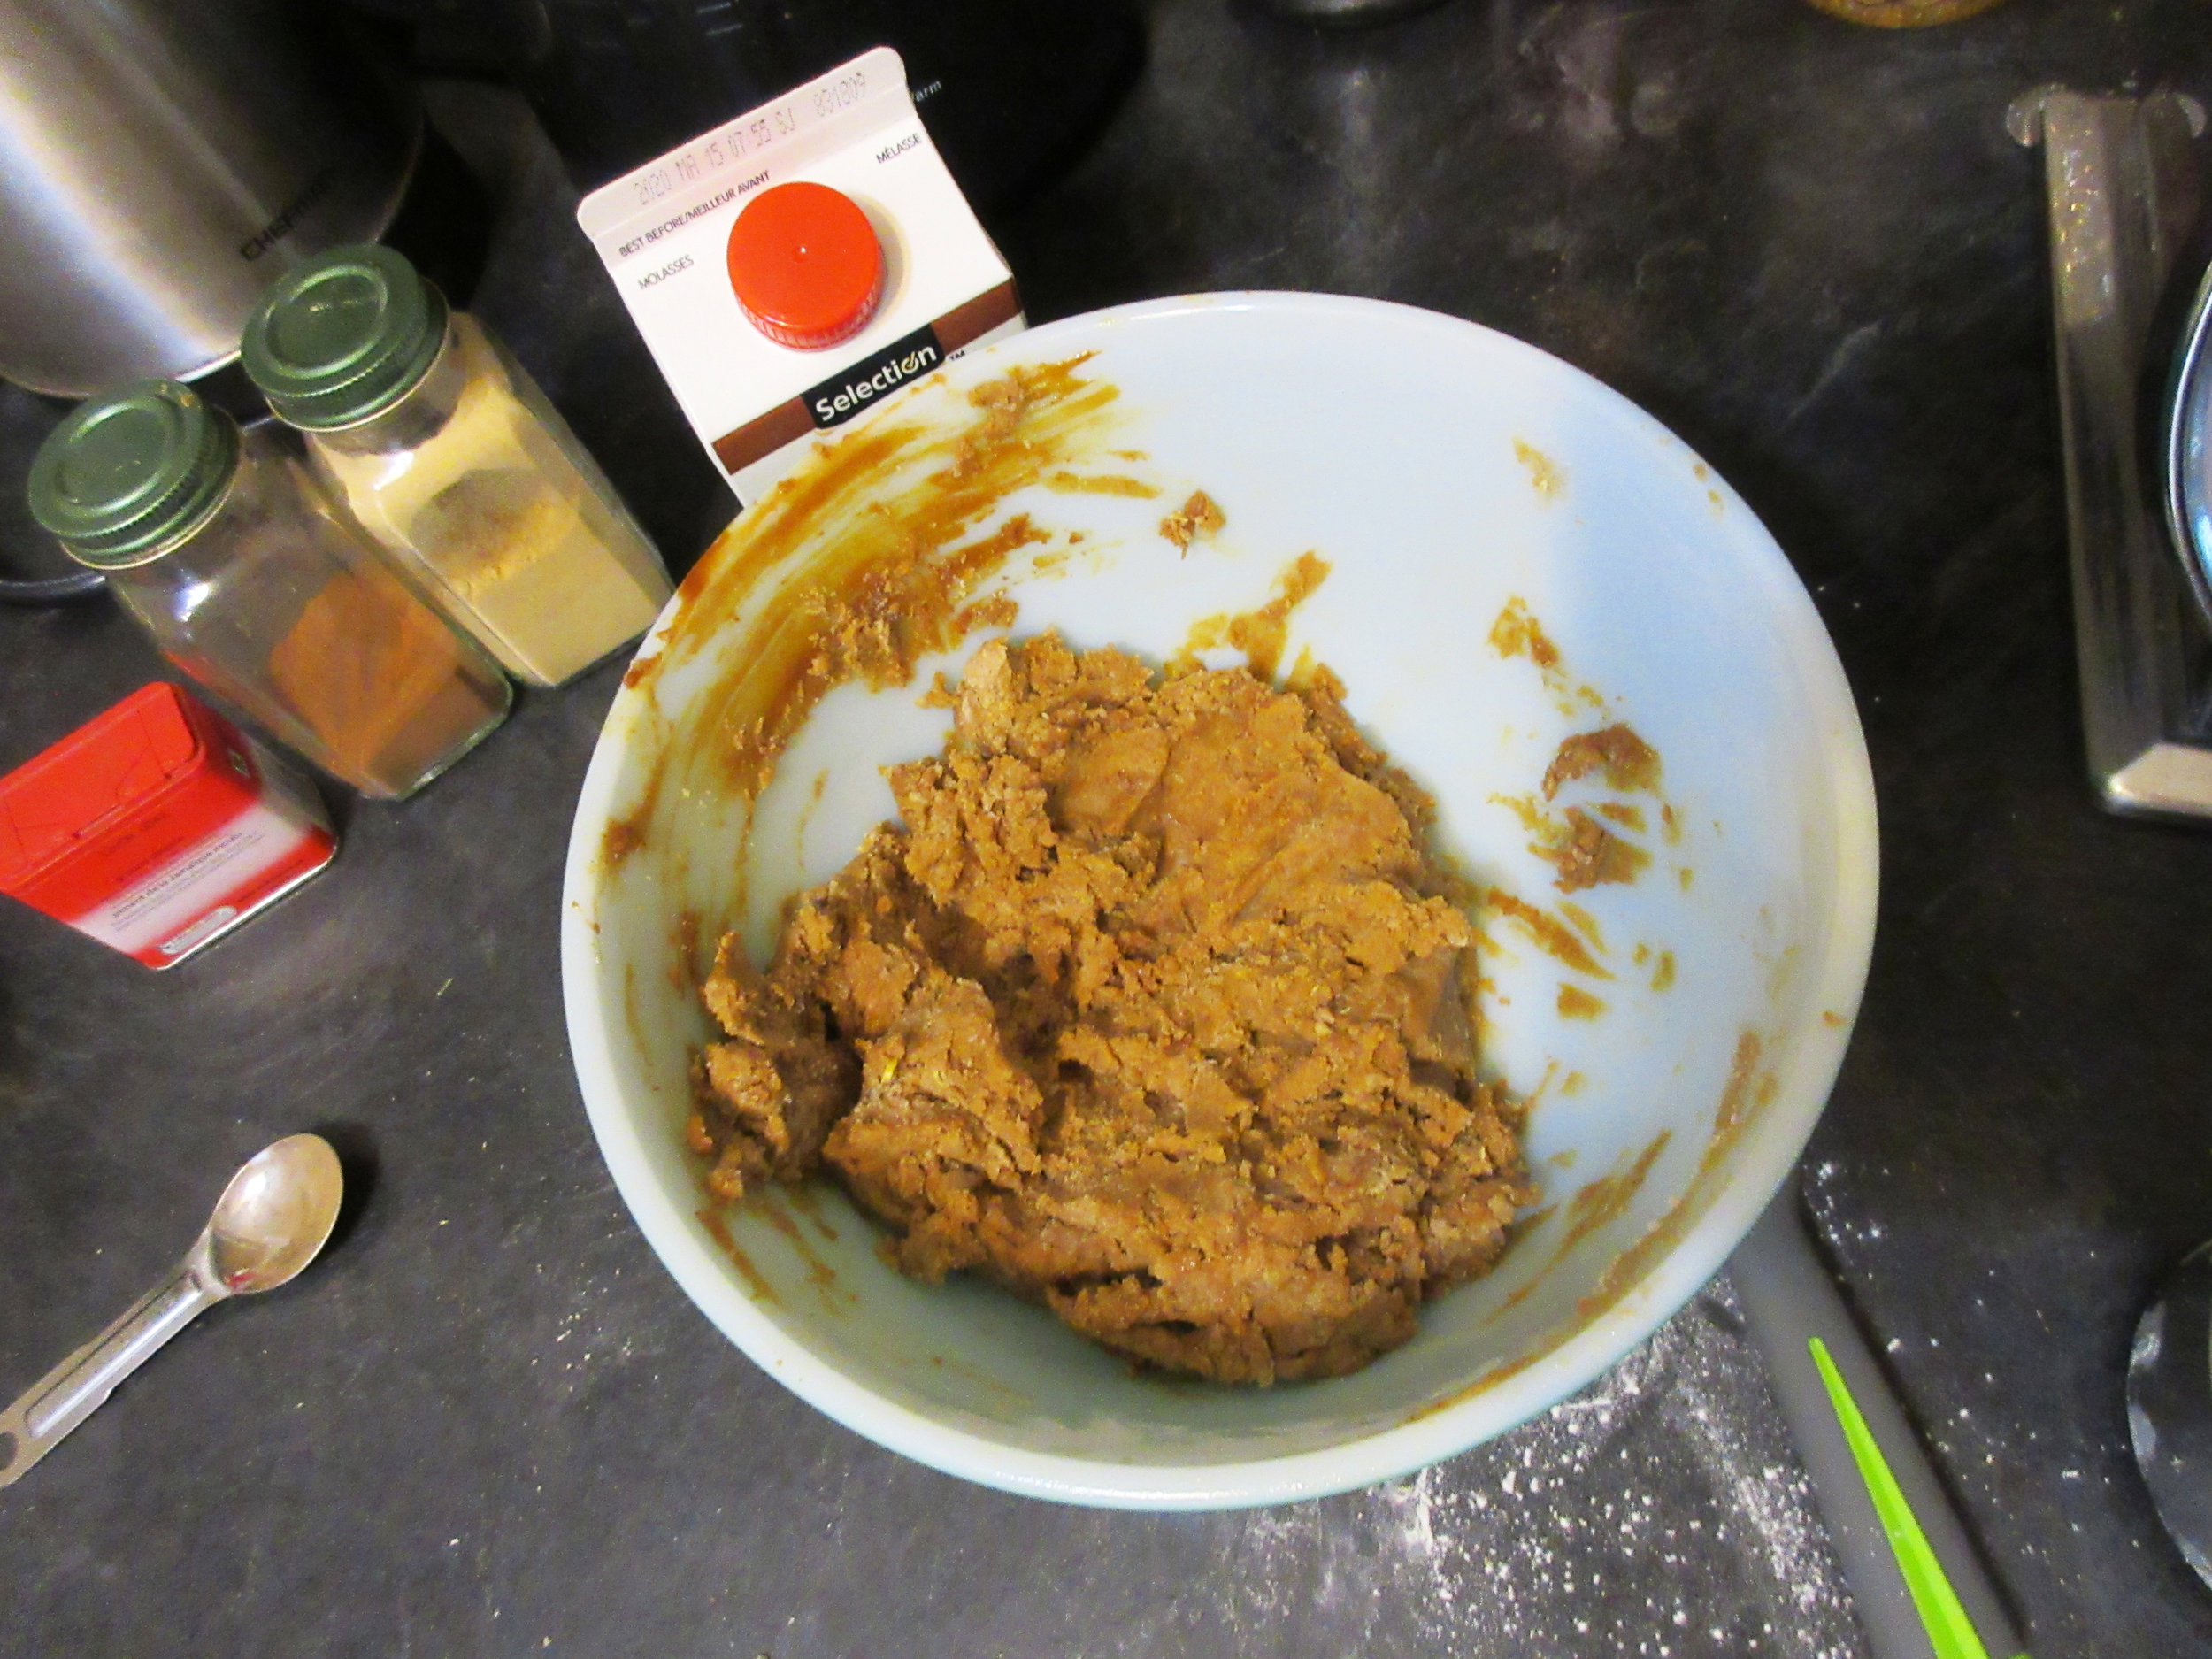
1) Mix together the sugar, cream, egg and butter, then add the baking ammonia and the flour. You may need to use your hands to fully combine the ingredients.
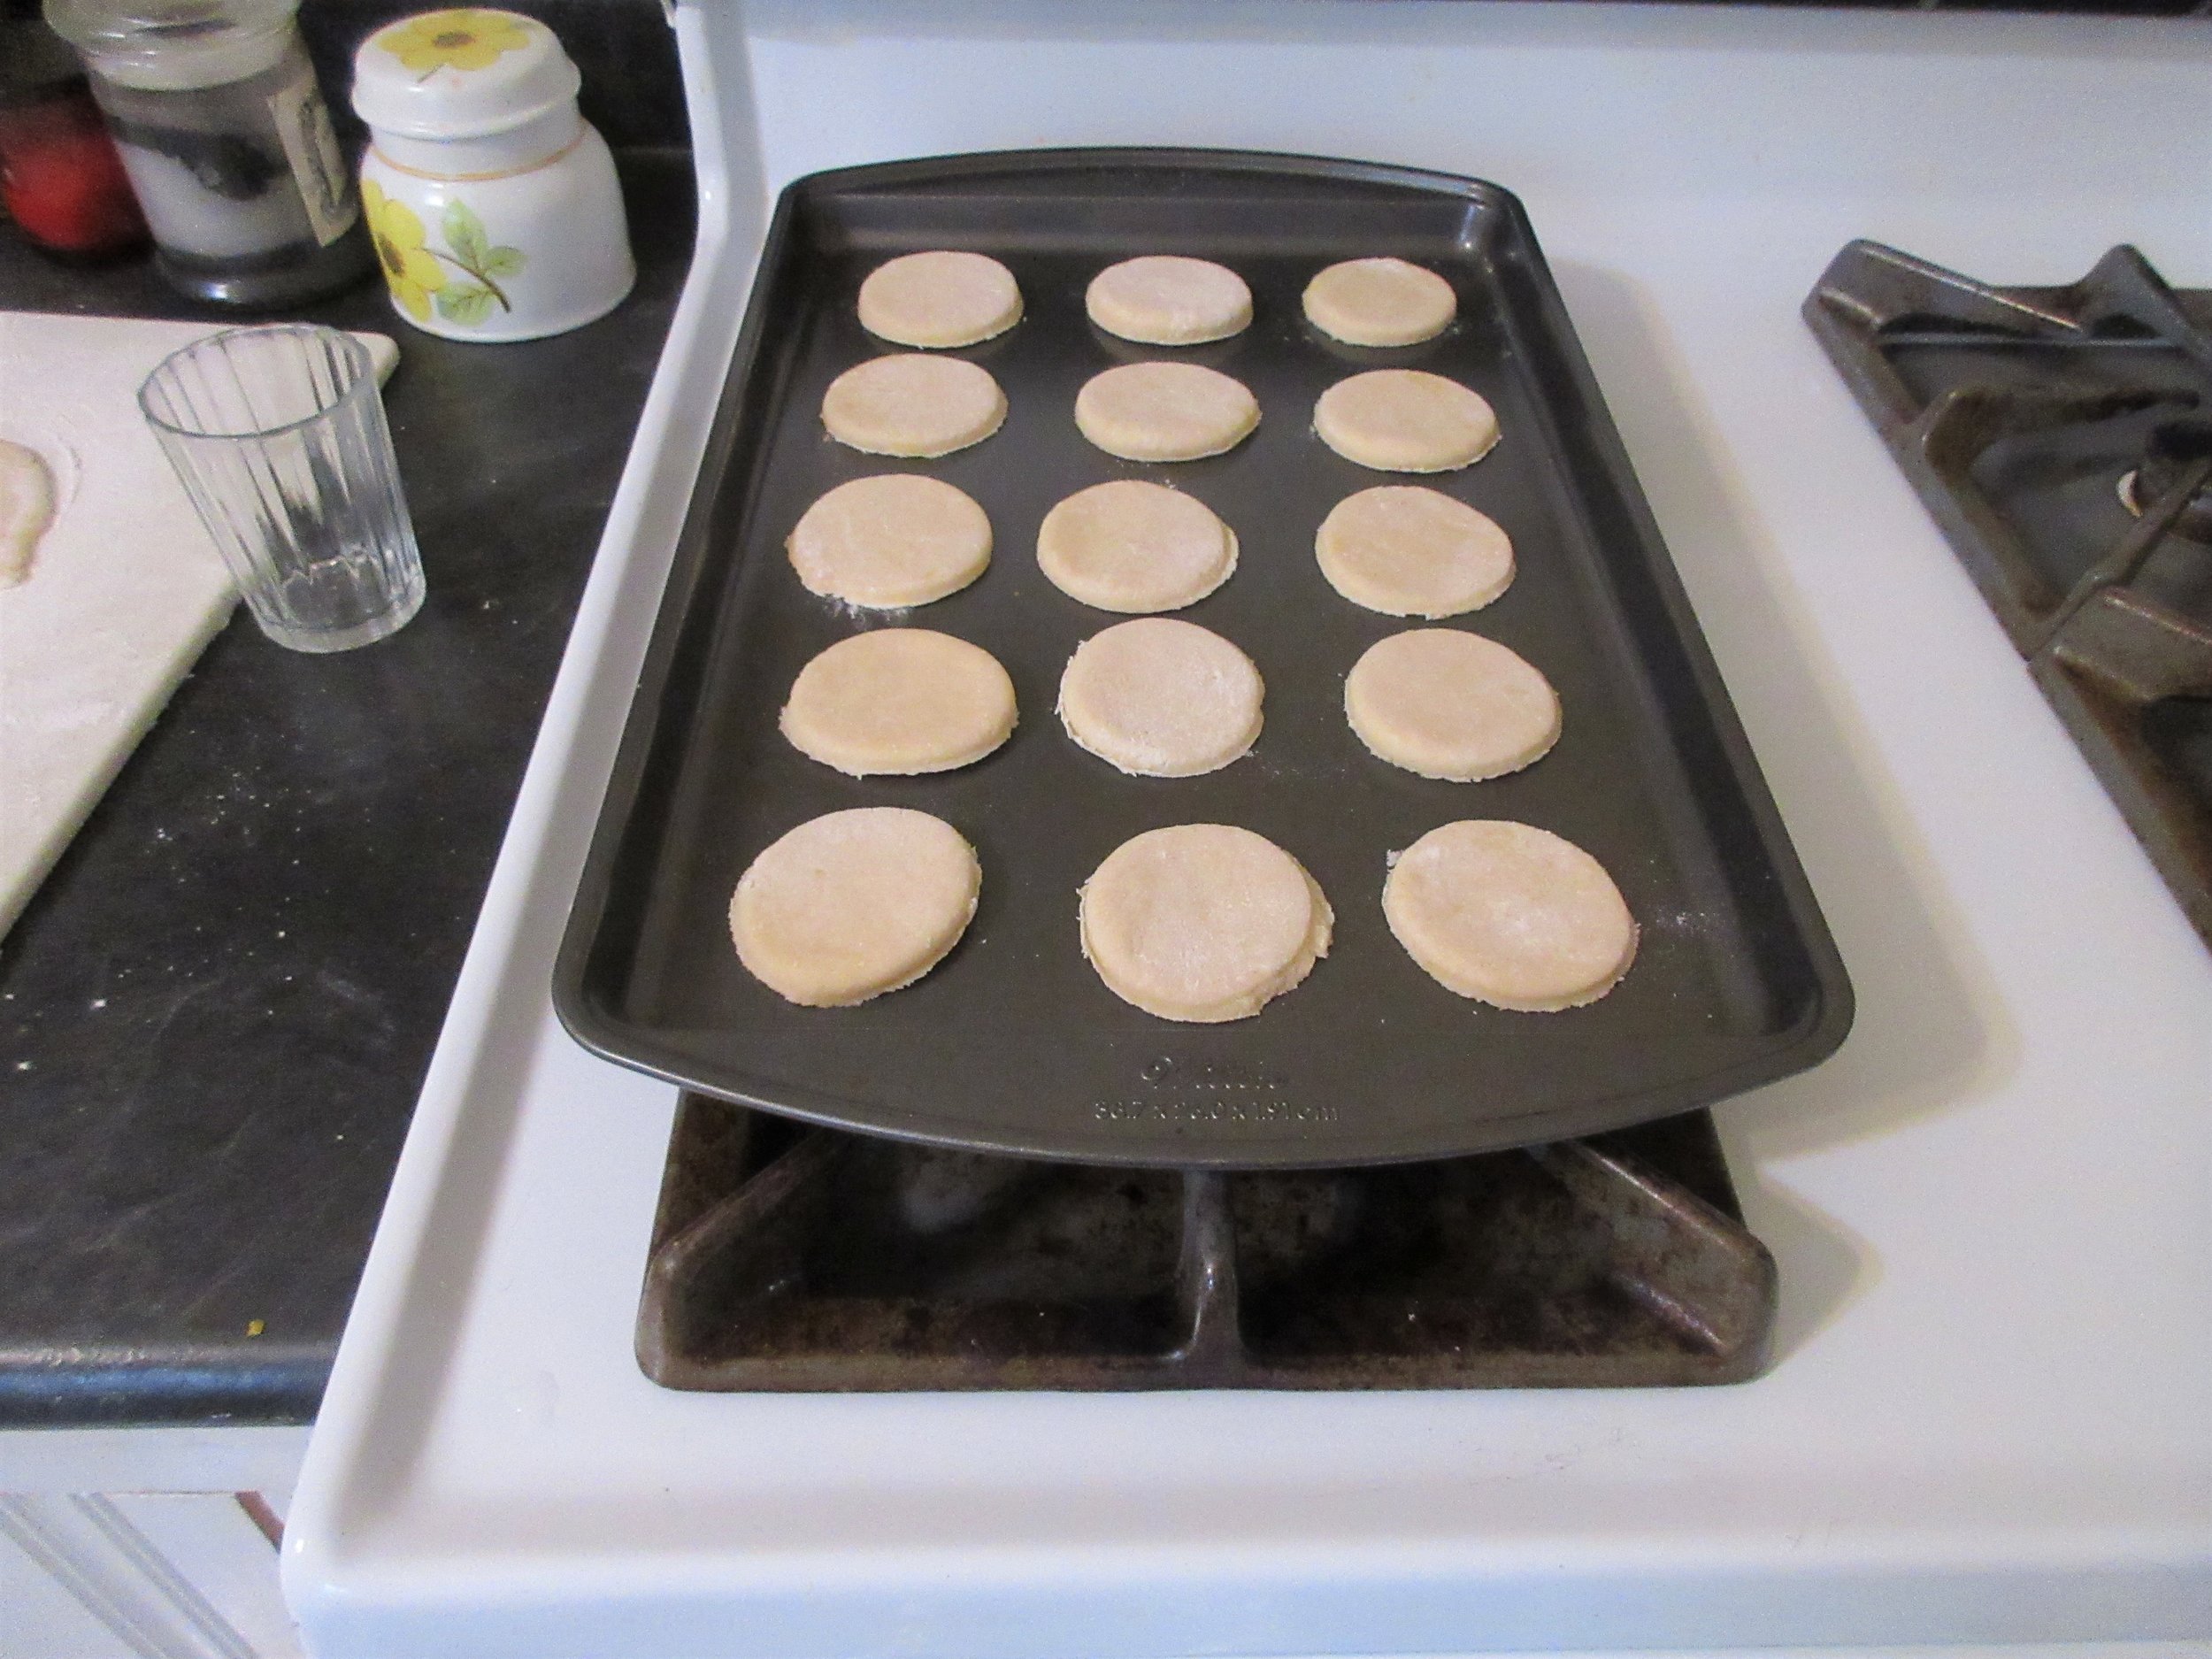
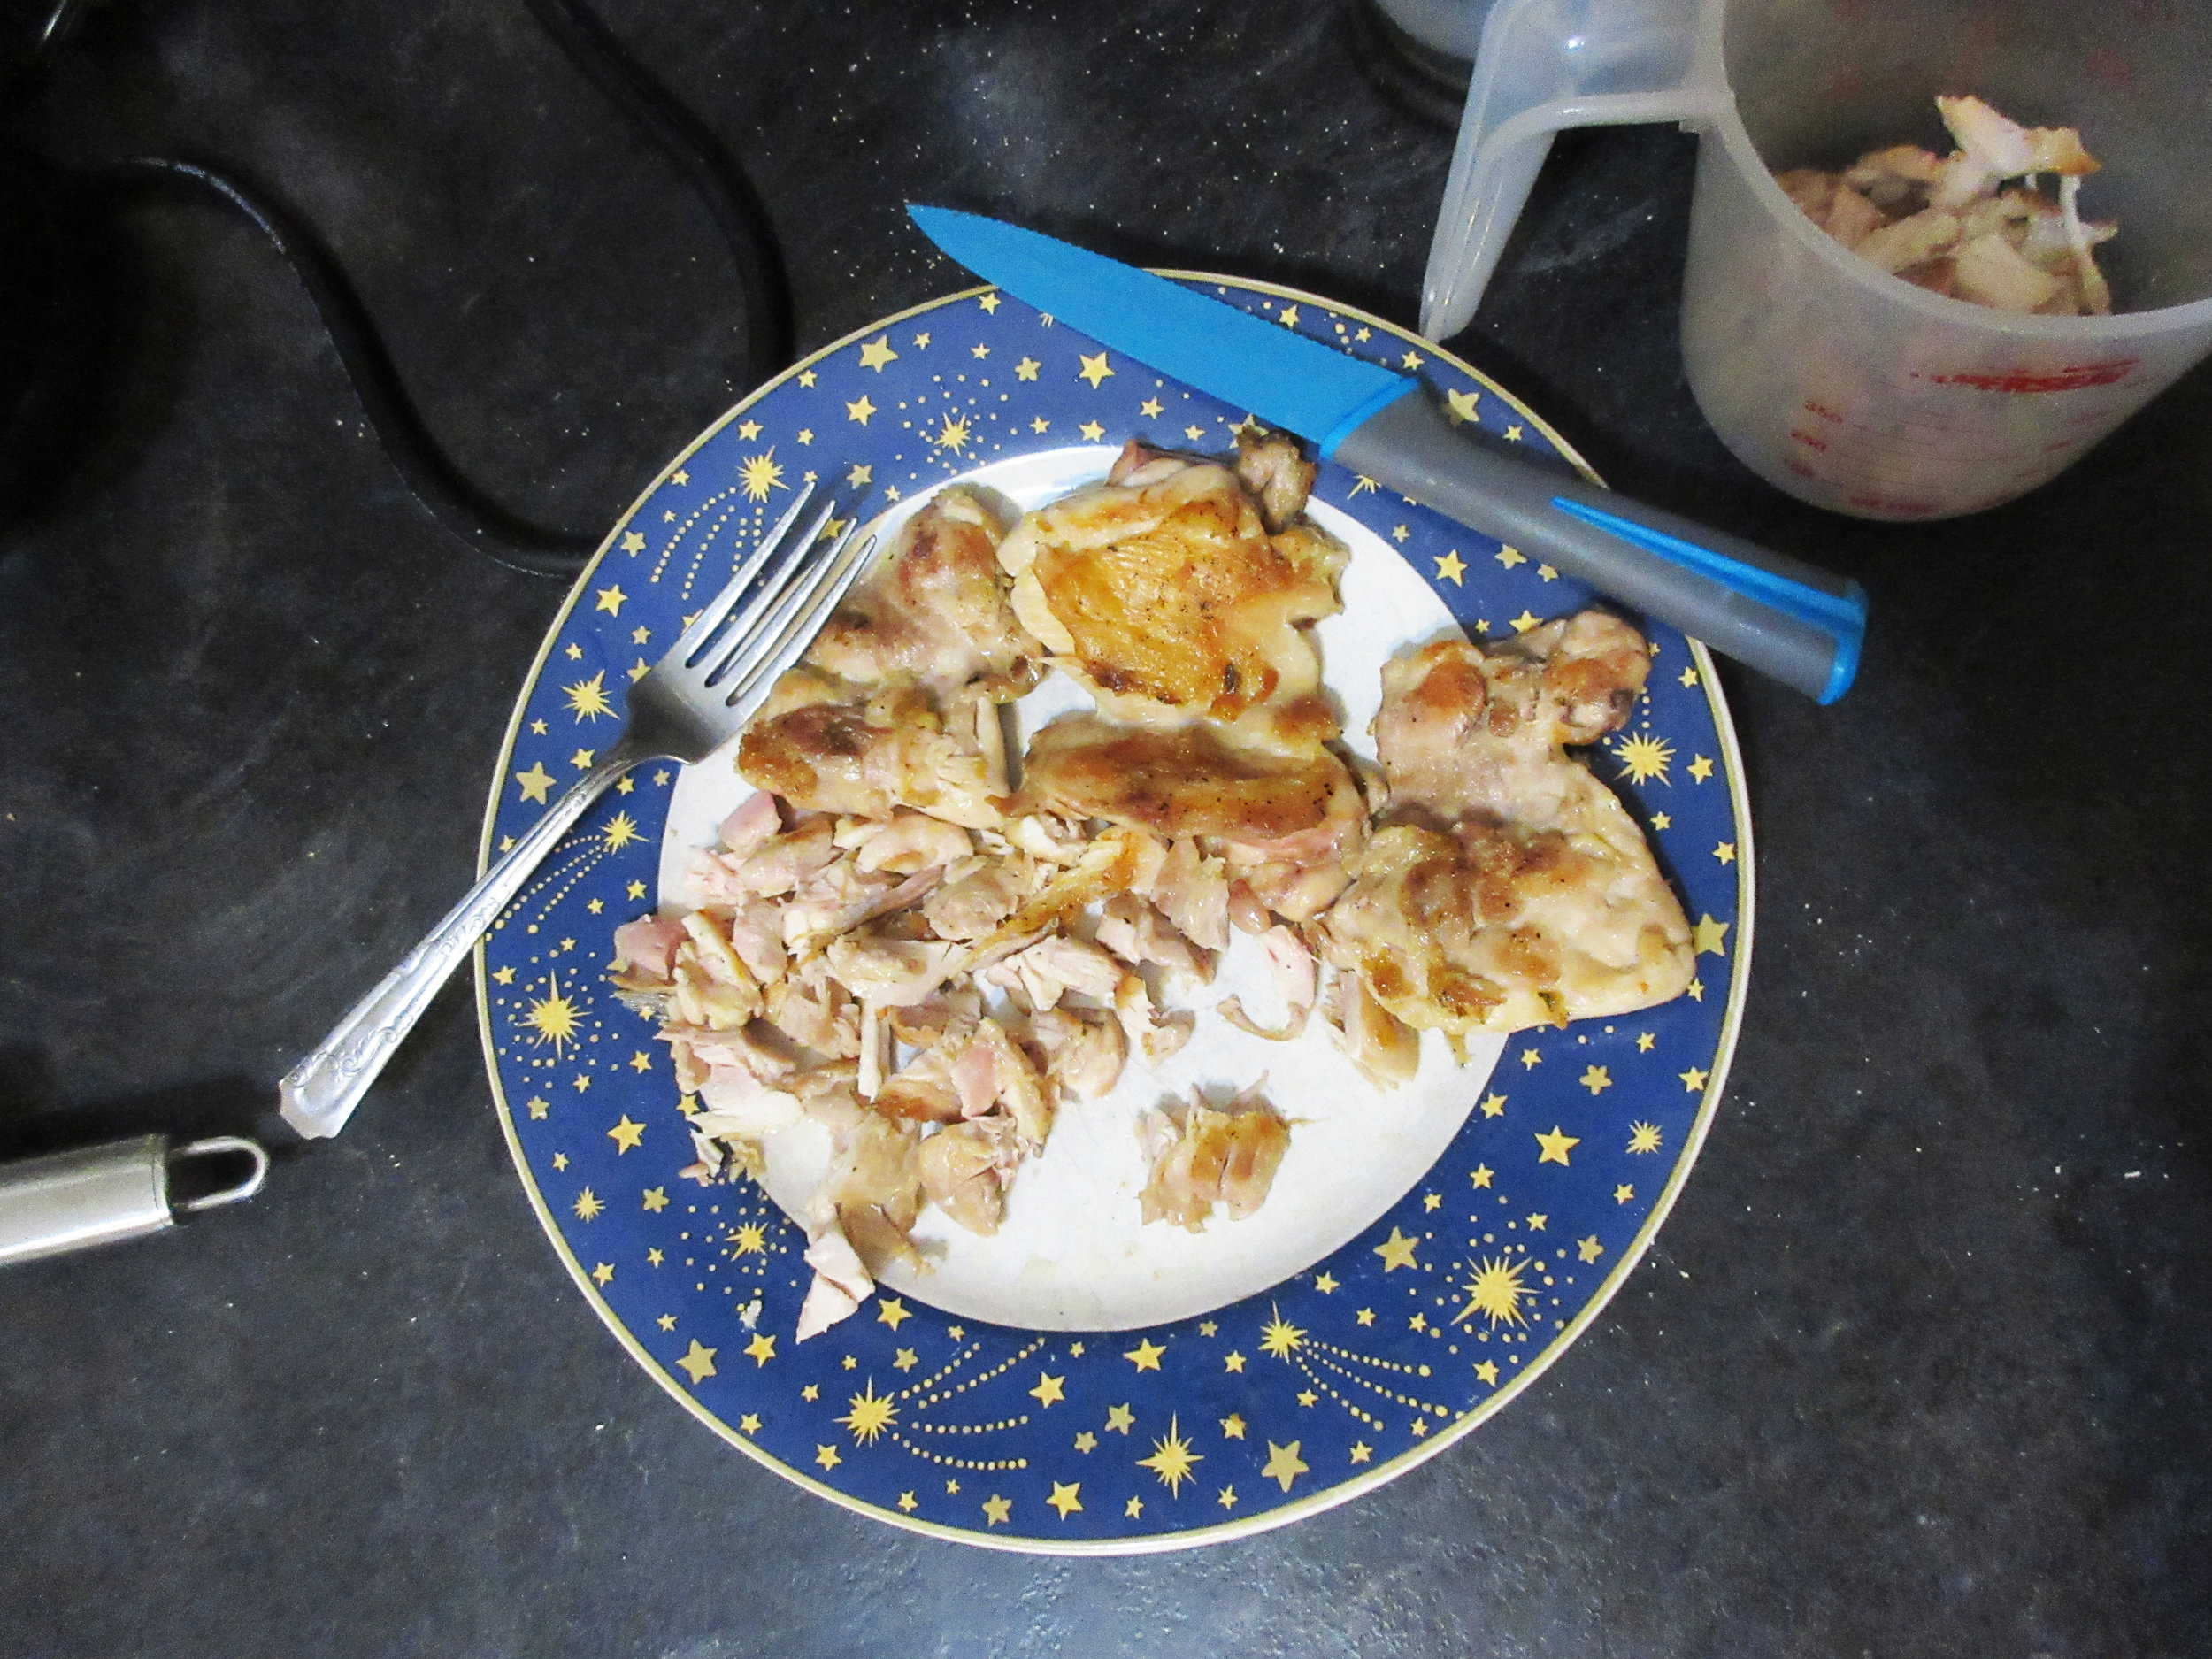
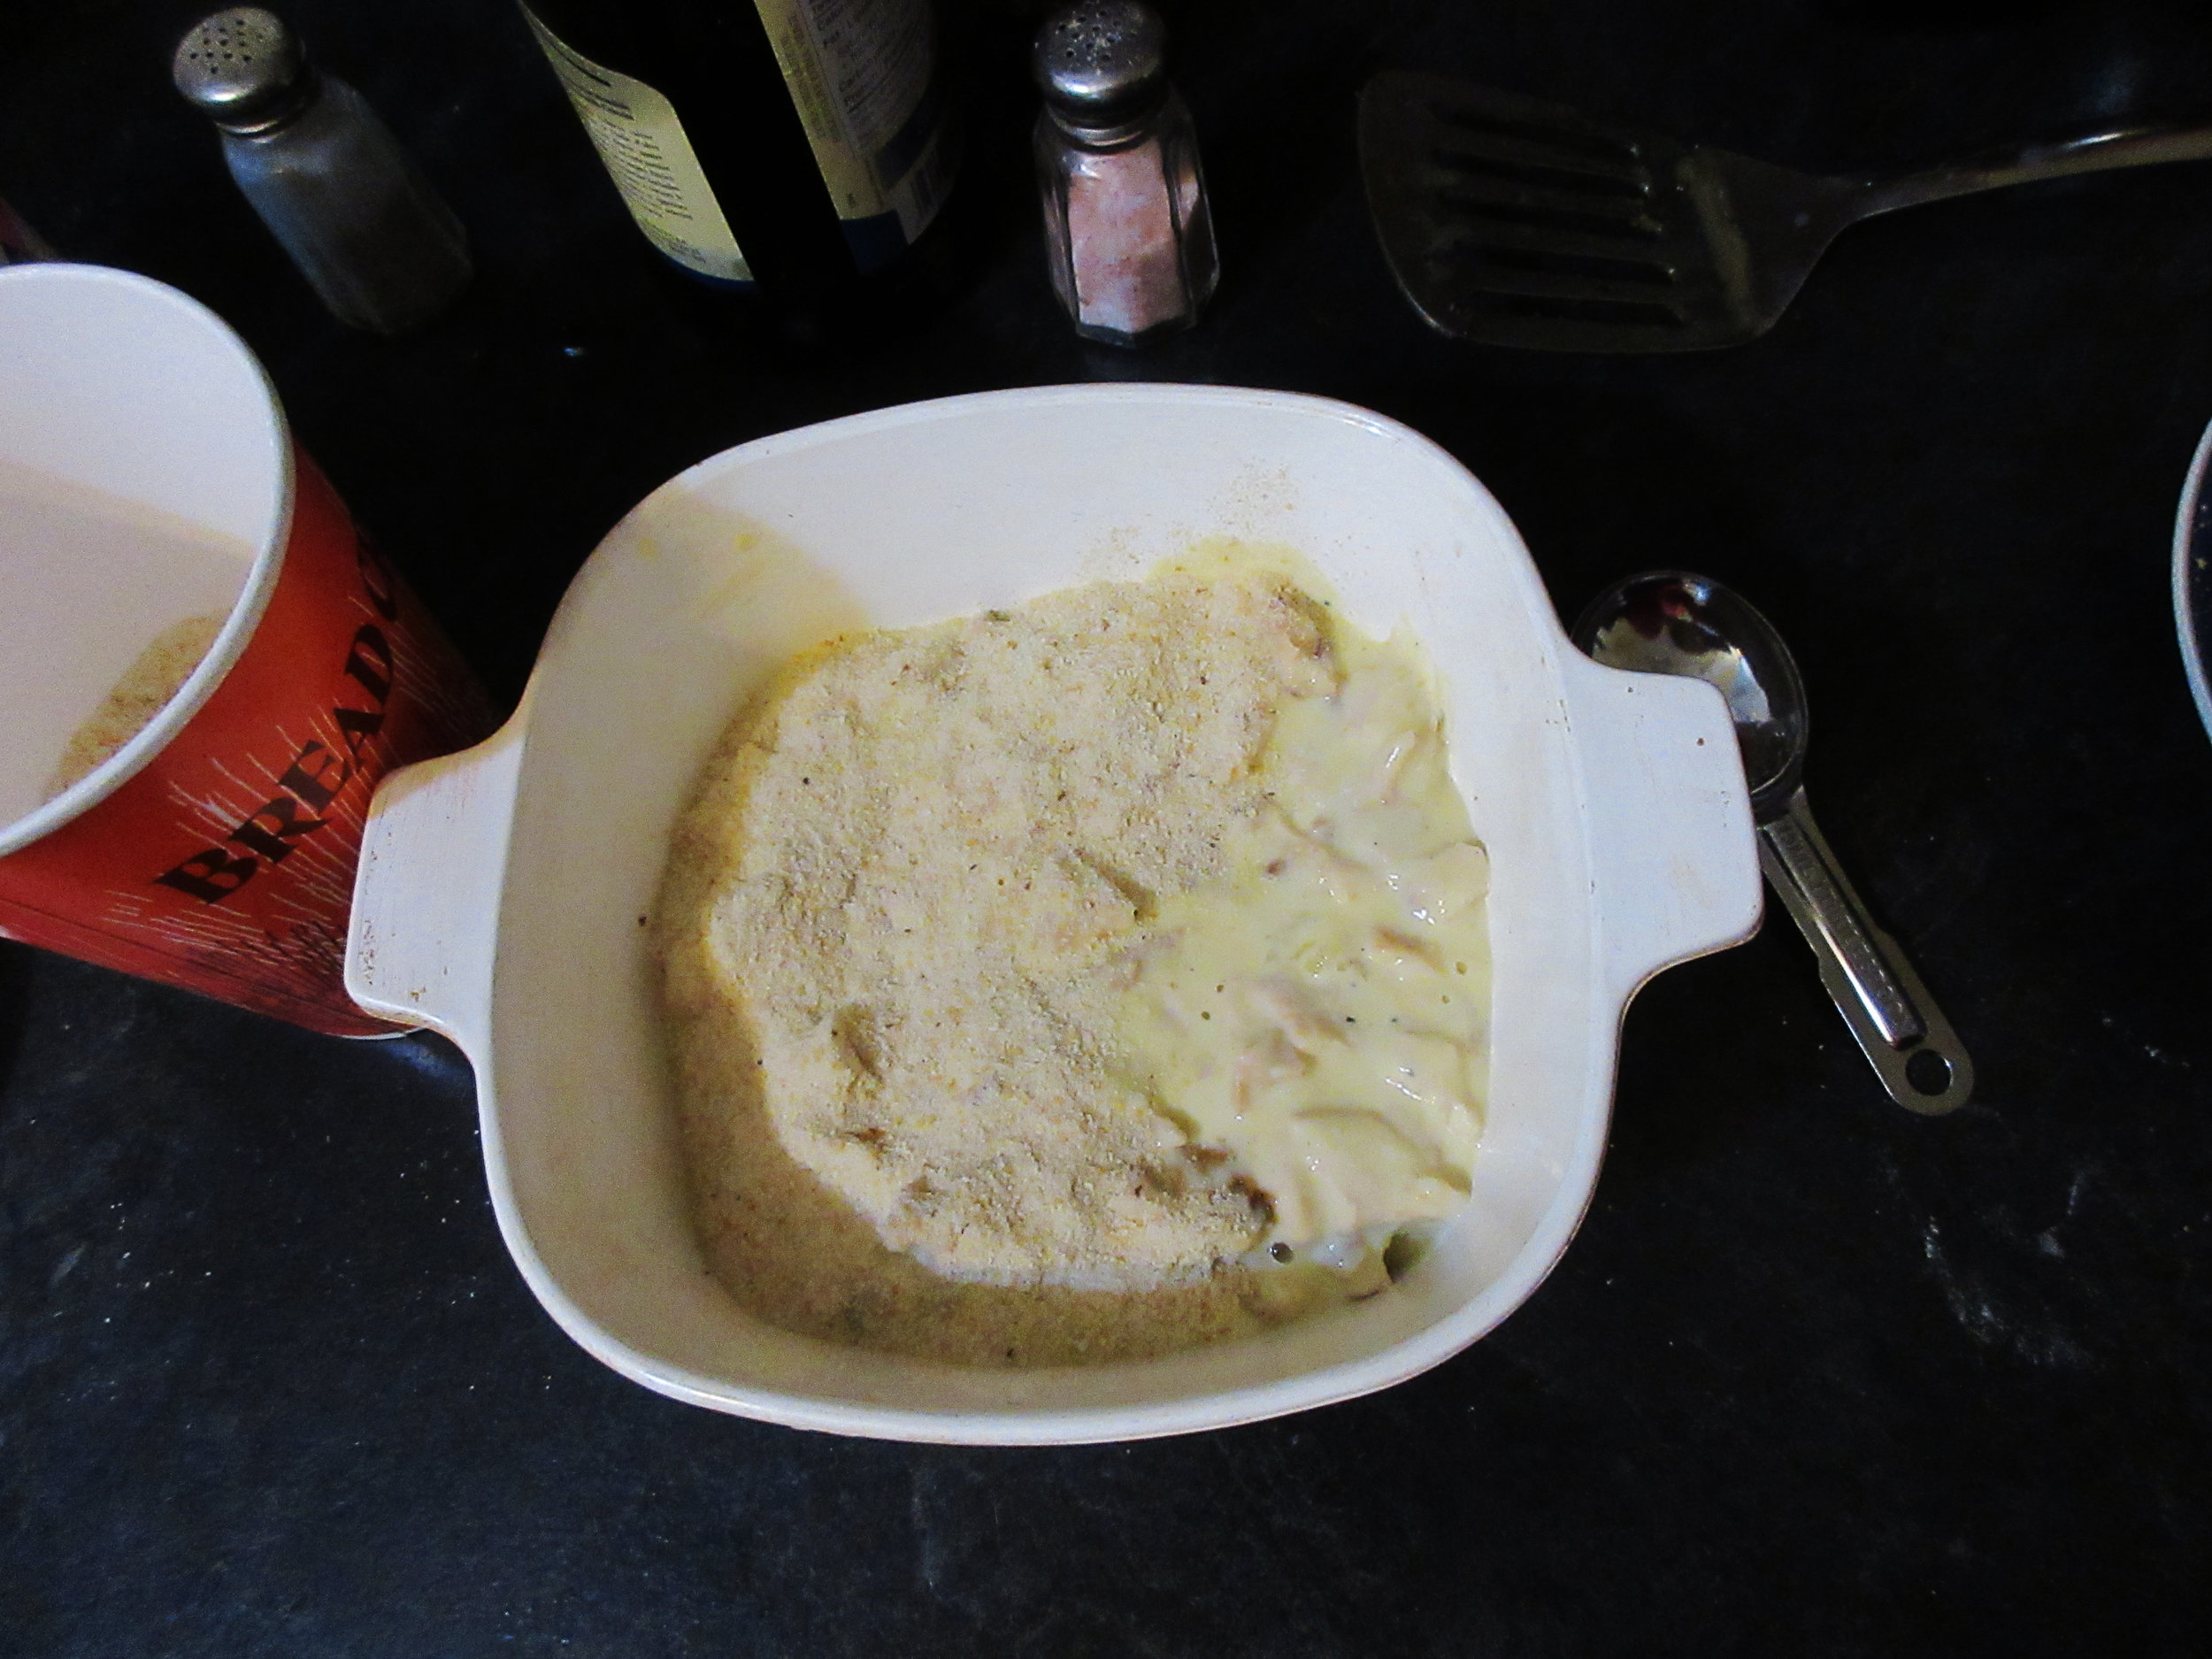
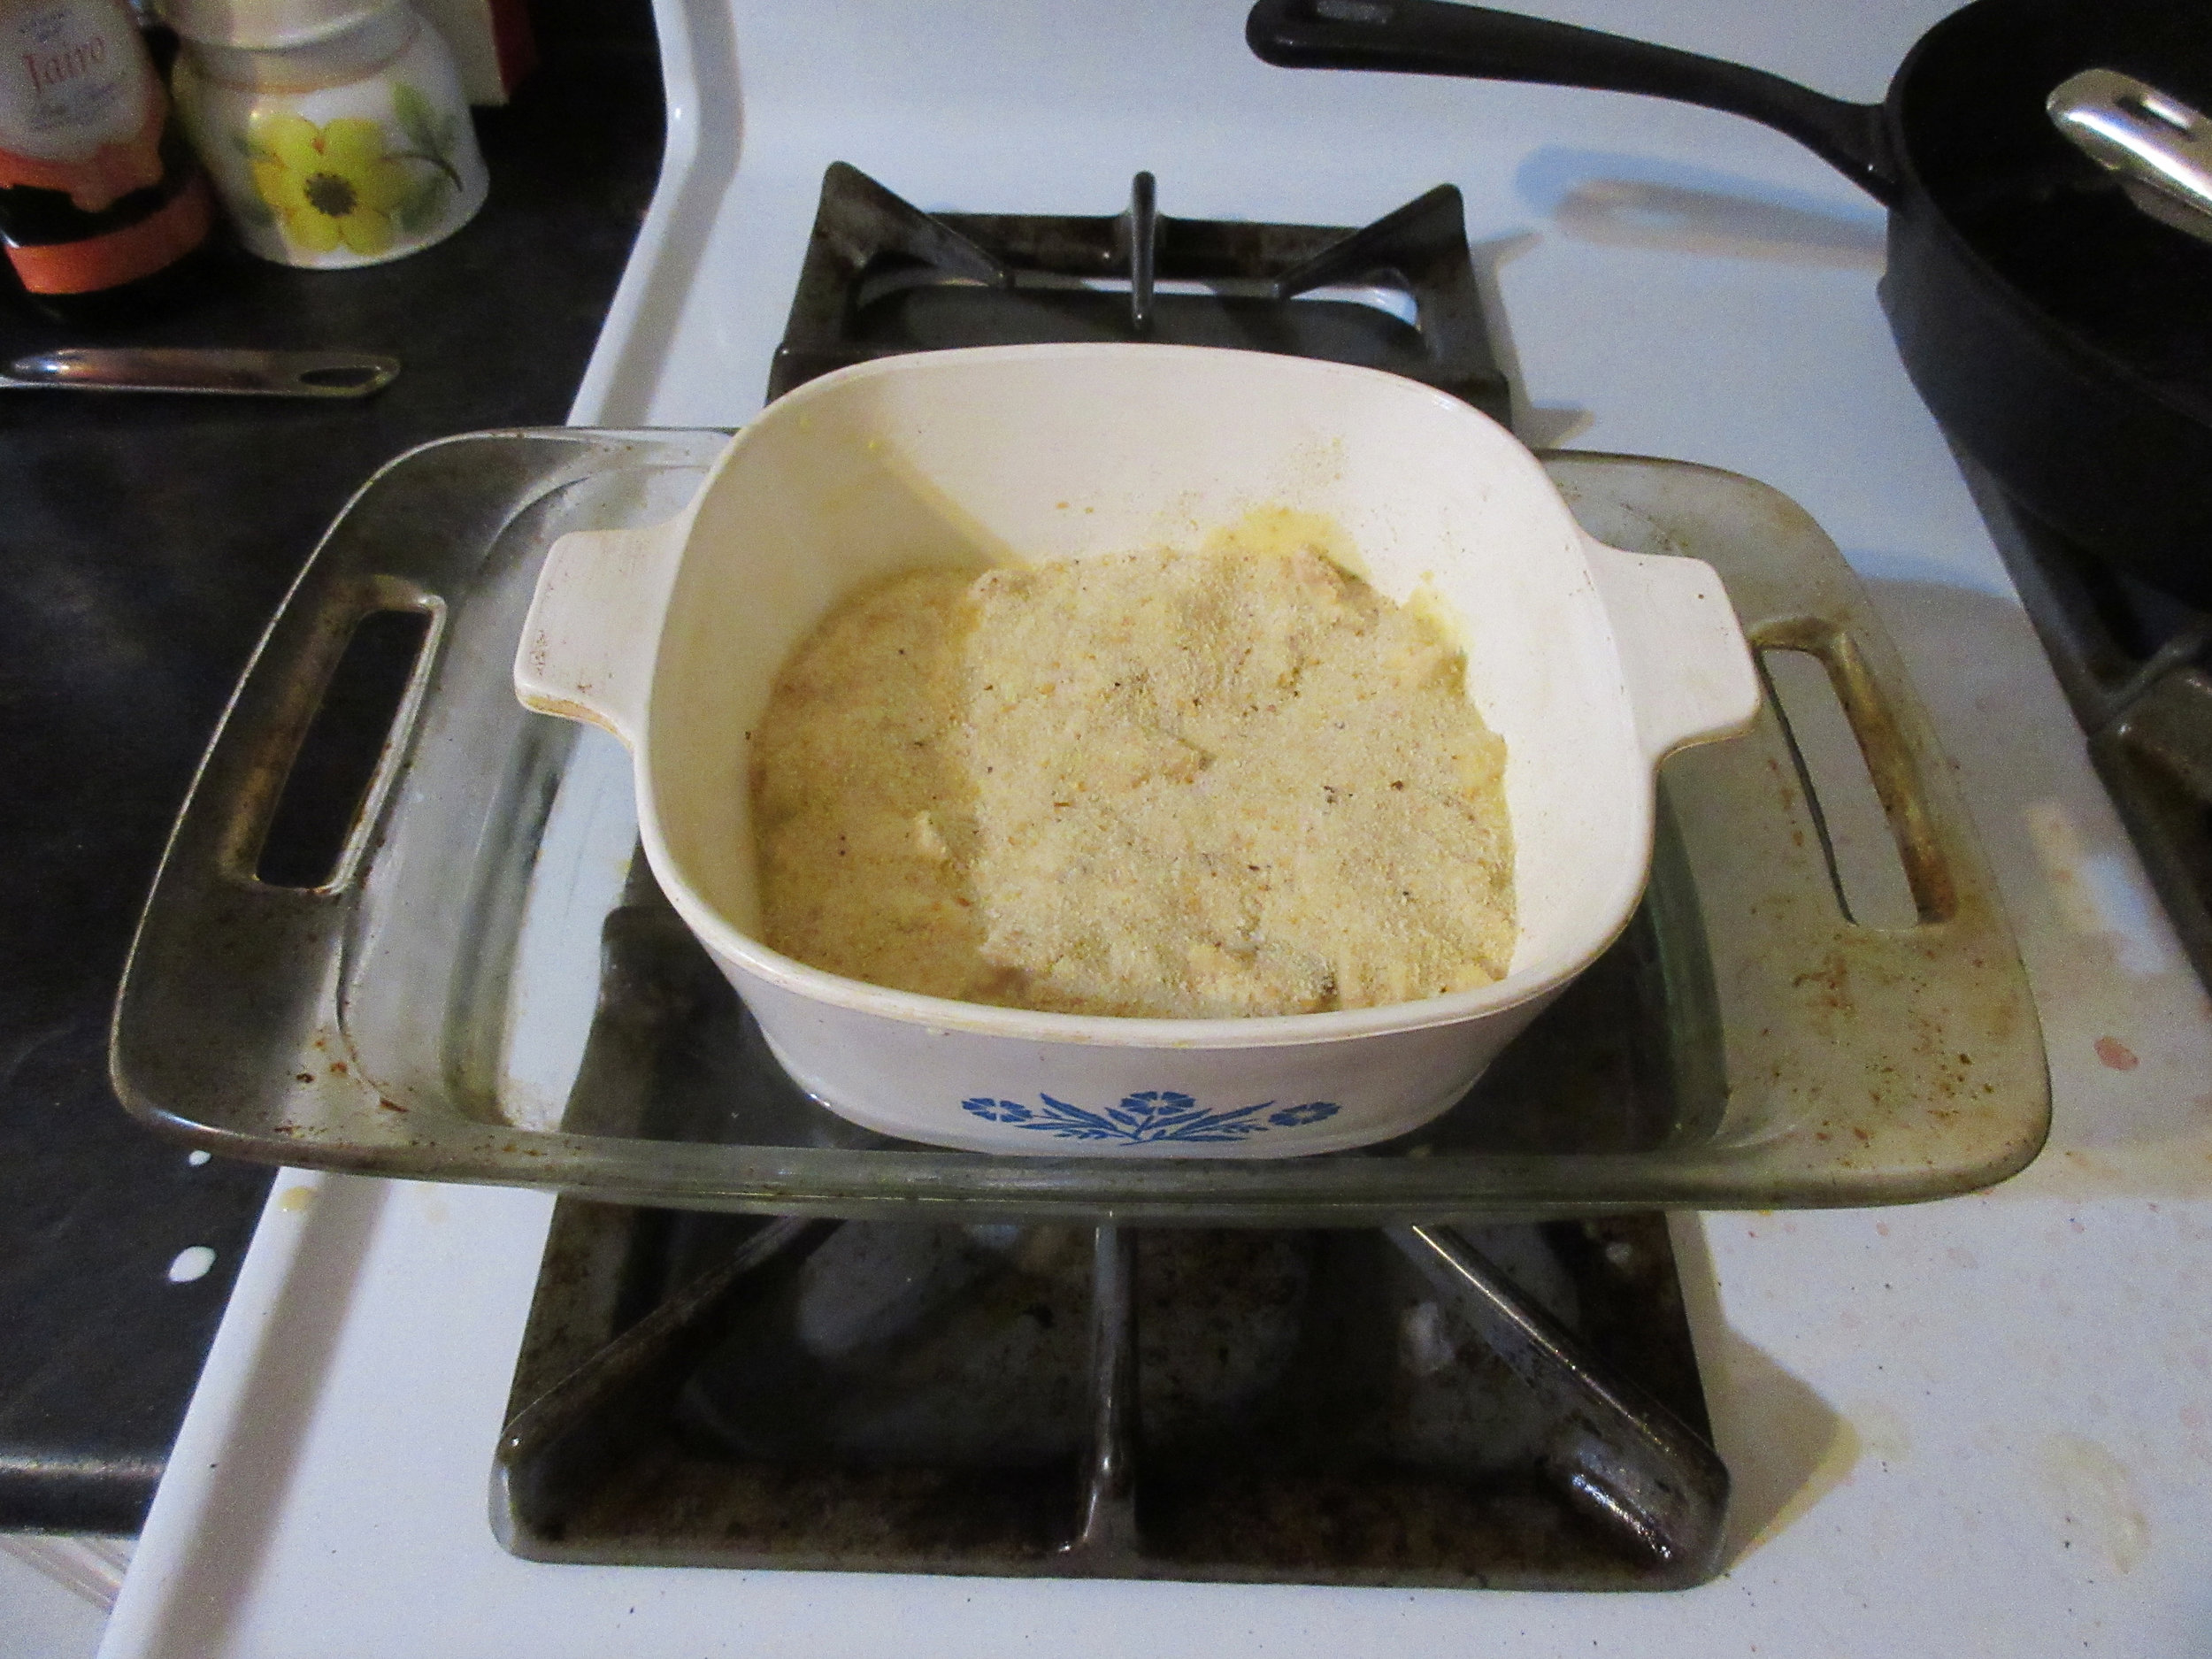
2) Preheat the oven to 350 F (175 C) while you roll and cut out all the cookies. Place the cakes on cookie sheets, then put them all in the oven at once. After a few minutes, you’ll start to smell a strong ammonia odour. The cakes are done when you open the oven door and smell cookies instead of ammonia, which should be about 15 minutes. This recipe made about 5 dozen 2 inch (5 cm) cookies.

A couple of weeks ago, I prepared the food served at a Victorian Tea held at the Fashion History Museum in Cambridge, Ontario. All of the recipes served came from The New Galt Cookbook, a Cambridge-area community cookbook published in 1898. Food Historian Carolyn Blackstock spoke during the Tea about her experience in 2014 when she made a recipe a day for a year from The New Galt Cookbook. Yes, amazingly she made 365 recipes and wrote about each one. I sometimes struggle with pulling off 2 or 3 blog posts a month.
Ammonia Cakes were on the menu, and to be honest, it’s one of my least favourite recipes served at the Victorian Tea. I certainly wasn’t planning to make them again, but when everyone was packing up afterwards, things changed. Johnathan, the Curator at the Fashion History Museum, said to me: “Julia, we’d like to present you with a parting gift.” He handed me the rest of the baking ammonia and announced that he would absolutely never make anything with it in the future!
I had never baked with Ammonium Bicarbonate as a leavening agent before, but thankfully Carolyn Blackstock explained the basics in her blog post about Ammonia Cakes. As I noted in my modern interpretation of this recipe submitted by Miss Roos, you will know when the cakes are in the process of being baked because your oven will stink like ammonia or cat urine. Eventually, you’ll open the oven door and only smell the aroma of delicious cookies. That’s how you know when Ammonia Cakes are baked.
After we had three trays of Ammonia Cakes in the oven when we were baking for the Victorian Tea, we realized that we wouldn’t be able to smell when they were done because we had put in the cookie sheets at different times. We solved the problem by firing up all the ovens and placing one tray in each oven. I suggest that you put all your trays in the oven at once, then you’ll be able to accurately follow your nose.
This form of ammonia is sometimes called Baking Ammonia, Baker’s Ammonia, Ammonia Carbonate, Ammonia Bicarbonate, Hartshorn or Hirschhornsalz. Not being familiar with baking with ammonia, I did some research about its history. These days, it is commonly found in traditional German or Scandinavian baking such as cookies, biscuits or crackers. In other words, any baking that is thin. If ammonia bicarbonate is used in something with more depth like a cake, the ammonia created when baking occurs wouldn’t be able to escape from the centre and the baking would taste disgusting. Baking risen with ammonia is light, crisp and keeps its form, so it’s especially good for moulded cookies like Springerle.
Baker’s Ammonia first started being used in the Middle Ages, but it rose in popularity during the seventeenth and eighteenth centuries. Originally, deer antlers were ground down and dry distilled in kilns. A British term for a stag is “hart” and “hart’s horn” eventually transformed into Hartshorn. In German, Hirschhornsalz translates to staghorn salt. Hartshorn was used as a smelling salt for fainting and was also used medicinally for diarrhea, fevers and a variety of bites.
The area surrounding Kitchener-Waterloo (which is next door to Cambridge) has a large German immigrant population and each October, Kitchener-Waterloo hosts the largest Oktoberfest celebration outside of Bavaria. Our Ammonia Cakes recipe was submitted by a Miss Roos of Waterloo, who most likely had German roots. One of the fascinating aspects of Carolyn Blackstock’s New Galt Cook Book project is that she not only made a recipe a day, but she also did research about the women who submitted the recipes. Many days, she provides details and pictures about that woman’s life, but unfortunately without knowing her first name, the identity of Miss Roos remains a mystery. Carolyn does present a few possibilities in her blog post, though.
If you’ve read all this and are wondering why anyone would use ammonia bicarbonate instead of sodium bicarbonate, baking soda wasn’t produced as a leavening agent until 1846. This Smithsonian Magazine article about the history of Baking Powder is a great place to start if you want to find out more.
I’ll end by clarifying why I’m not in love with Ammonia Cakes. It’s not because they taste bad. I assure you that they don’t taste like ammonia! They aren’t my favourite because they don’t have much flavour. Aside from historic baking, I don’t eat much refined sugar in my regular life so if I’m eating something with sugar in it, I want it to taste GOOD and Ammonia Cakes just tasted bland and boring to me. I also had almost 5 dozen of them and I prefer to give delicious food to others, rather than feeling like I need to apologize for the recipe.
I thought that if I could find a recipe for a thin icing that hardens from the 1890s, that would improve the taste and it turned out to be a very successful solution. I didn’t have to look far for this icing recipe. I just looked at Carolyn Blackstock’s blog and found Icing for Cake, also from The New Galt Cook Book. I made the icing and iced the Ammonia Cakes the next day, which transformed them from bland to shablam!

Have a look at Carolyn Blackstock’s Cooking with the Galt Cook Book blog project and try out some of the recipes.
Read the Cook Book:


Soda Bread
Baking Soda Bread is a shortcut to eating fresh baked bread when you’re short on time. You’ll be spreading butter on a warm bread slice in about an hour and a half! This Soda Bread recipe, from the 1861 Mrs. Beeton’s Book of Household Management, is a favourite of mine because it produces a more moist and less dense soda bread than most recipes that I’ve tried. Soda bread doesn’t have the longevity of risen breads, so it will be toast (literally) sooner than later.

You'll find this recipe in:
Mrs. Beeton's Book of Household Management
by Isabella Beeton
London, England – 1861
Original Recipe:
SODA BREAD.
1722. INGREDIENTS. - To every 2 lbs. of flour allow 1 teaspoonful of tartaric acid, 1 teaspoonful of salt, 1 teaspoonful of carbonate of soda, 2 breakfast-cupfuls of cold milk.
Mode. - Let the tartaric acid and salt be reduced to the finest possible powder; then mix them well with the flour. Dissolve the soda in the milk, and pour it several times from one basin to another, before adding it to the flour. Work the whole quickly into a light dough, divide it into 2 loaves, and put them into a well-heated oven immediately, and bake for an hour. Sour milk or buttermilk may be used, but then a little less acid will
be needed.
Time. - 1 hour.


My Recipe:
Makes one loaf – half of the historic recipe
2 ½ cups white flour – 454 g
½ tsp cream of tartar
½ tsp salt
½ tsp baking soda
2 cups milk – 500 mL
butter or oil for greasing the loaf pan
1) Preheat the oven to 375 F (190 C). Rub your loaf pan with butter or oil, then sprinkle in a spoonful of flour. Tap the pan with your hand, rotating the pan to distribute the flour evenly in a thin coat over the entire surface. Add more flour if needed and discard the excess. Adding flour makes a crustier bread, so you may skip this step and only butter the pan if you’d like.
2) Add the flour, cream of tartar and salt to a mixing bowl and stir to combine. Measure out the milk, and stir in the baking soda to dissolve before adding the milk to the flour mixture. Stir with a wooden spoon or spatula until the flour is completely integrated. This is a wet dough, so don't be concerned if it looks mushier than most bread dough.
3) Bake in the oven for 45 – 60 minutes. You'll know that your soda bread is baked all the way through when the centre of the bread sounds hollow when tapped – it should sound like you’re knocking on a door.

Baking Soda Bread is a shortcut to eating fresh baked bread when you’re short on time. You’ll be spreading butter on a warm bread slice in about an hour and a half! This Soda Bread recipe, from the 1861 Mrs. Beeton’s Book of Household Management, is a favourite of mine because it produces a more moist and less dense soda bread than most recipes that I’ve tried. Soda bread doesn’t have the longevity of risen breads, so it will be toast (literally) sooner than later.
This is one of the recipes we made when I taught Open Hearth Cooking Classes at Nelles Manor Museum last autumn. We also made our own butter, so you can imagine how good this bread tasted! We used the museum’s dutch oven to bake the Soda Bread, so I’ve included some pictures that I took at Nelles Manor on a recipe testing day when I used the museum’s dutch oven for the first time.


Read the Cookbook
Mrs. Beeton's Book of Household Management has its own website:
http://www.mrsbeeton.com/
Or peruse an original scanned copy on the Internet Archive:
Scalloped Turnips
I wanted to prepare one last root vegetable recipe before the greens & herbs start popping up here in Ontario, and I thought I'd turn to a local 1898 cookbook: The New Galt Cook Book. Galt is a town which is now part of Cambridge, Ontario and it's also close to where I grew up and where I live now in Hamilton. Scalloped Turnips is an interesting twist on scalloped potatoes. The turnips provide additional flavour to the dish, and it is creamy but also light because the sauce uses a butter & flour roux and the cooking water from the turnips instead of a white bechamel sauce.
Coincidentally, I had this recipe selected and the turnips purchased before I knew that cooking at an event using recipes from The New Galt Cook Book was even a possibility! I'll be preparing food from this cookbook for a Victorian Tea at the Fashion History Museum in Cambridge, Ontario on May 18th, and Food Historian Carolyn Blackstock will be speaking about her year-old journey making a recipe a day from The New Galt Cook Book.

You'll find this recipe in:
The New Galt Cook Book
Compiled and Edited by: Margaret Taylor and Frances McNaught
Toronto, 1898
Historic Recipe:
SCALLOPED TURNIPS.
Cut them into slices, stew them in water, adding a little butter and salt. When tender draw off what liquid is left and use it for sauce, which you make of a heaped teaspoonful of flour and the same of butter. Now butter a dish, put in a layer of the sliced turnips, dust with pepper and spread some of the sauce over it, then another layer of turnips, and so on until they are used up. Dust some grated Parmesan cheese over the top and put flakes of butter here and there. Bake in oven until light brown, and serve in the same dish. Bread crumbs may be used instead of cheese.


My Recipe:
Turnips
Butter
Salt
Flour
Pepper
Parmesan cheese and/or breadcrumbs
1) Preheat oven to 350 F (175 C) and butter your baking dish. Peel and slice your turnips. I used a 56 oz (1650 mL) casserole dish and I ended up using 6 turnips, but I probably could have gone with 7. Boil the turnips in water with a little butter and salt until tender. Strain, but be sure to keep the cooking liquid for the sauce.
2) To make the sauce, I melted a heaping tablespoon of butter in a pan, then added a heaping tablespoon of flour. Then I very gradually added 1 cup (236 mL) of the cooking water, stirring constantly. Once entirely incorporated, I allowed it to simmer until it began to thicken. I made this recipe 2.5 times to have enough sauce for my casserole.
3) Arrange a layer of turnips in your baking dish, dust with pepper and spoon a layer of sauce on top. Repeat until you've used all your turnip slices.
4) Sprinkle a layer of grated Parmesan cheese or breadcrumbs, or a combination of the two. The historic recipe suggests putting "flakes of butter here and there" with the Parmesan or breadcrumbs, but this method left little buttery pools and areas of dry breadcrumbs on top of my Scalloped Turnips. If you're using breadcrumbs,try melting some butter in a pan or microwave and stirring in the breadcrumbs in the butter before adding it to the top.
5) Bake about 20 minutes until golden on top.

I wanted to prepare one last root vegetable recipe before the greens & herbs start popping up here in Ontario, and I thought I'd turn to a local cookbook to find one. The New Galt Cook Book is a community cookbook that was published in 1898. I grew up quite close to Cambridge, Ontario and it's also close to where I live now in Hamilton. Cambridge is comprised of three towns which have run into each other over time: Hespler, Preston and Galt. I drive through Galt often when I decide to take a more scenic route to and from visiting my Mom and it has a picturesque downtown with beautiful stone buildings and bridges.
Scalloped Turnips is an interesting twist on scalloped potatoes. The turnips provide additional flavour to the dish, and it is creamy but also light because the sauce uses a butter & flour roux and the cooking water from the turnips instead of a white bechamel sauce. This recipe would be easy to make vegan and lactose & gluten free, just by substituting the flour and oil for the butter. I only had breadcrumbs in the house, but I think sprinkling grated Parmesan on top instead of or in combination with the breadcrumbs would be scrumptious. If you try this recipe with Parmesan, pop back and give a review in the comments.
Coincidentally, I had this recipe selected and the turnips purchased before I knew that cooking at an event using recipes from The New Galt Cook Book was even a possibility! It's funny how life lines up sometimes. I'll be preparing food from this cookbook for a Victorian Tea at the Fashion History Museum in Cambridge, Ontario on May 18th, and Food Historian Carolyn Blackstock will be speaking about her year-old journey making a recipe a day from The New Galt Cook Book.
Have a look at Carolyn Blackstock's experience making Scalloped Turnips on her Cooking with the Galt Cook Book blog. She proposes trying this recipe with both potatoes and turnips and I agree that it would be a great idea!

Read the Cookbook:
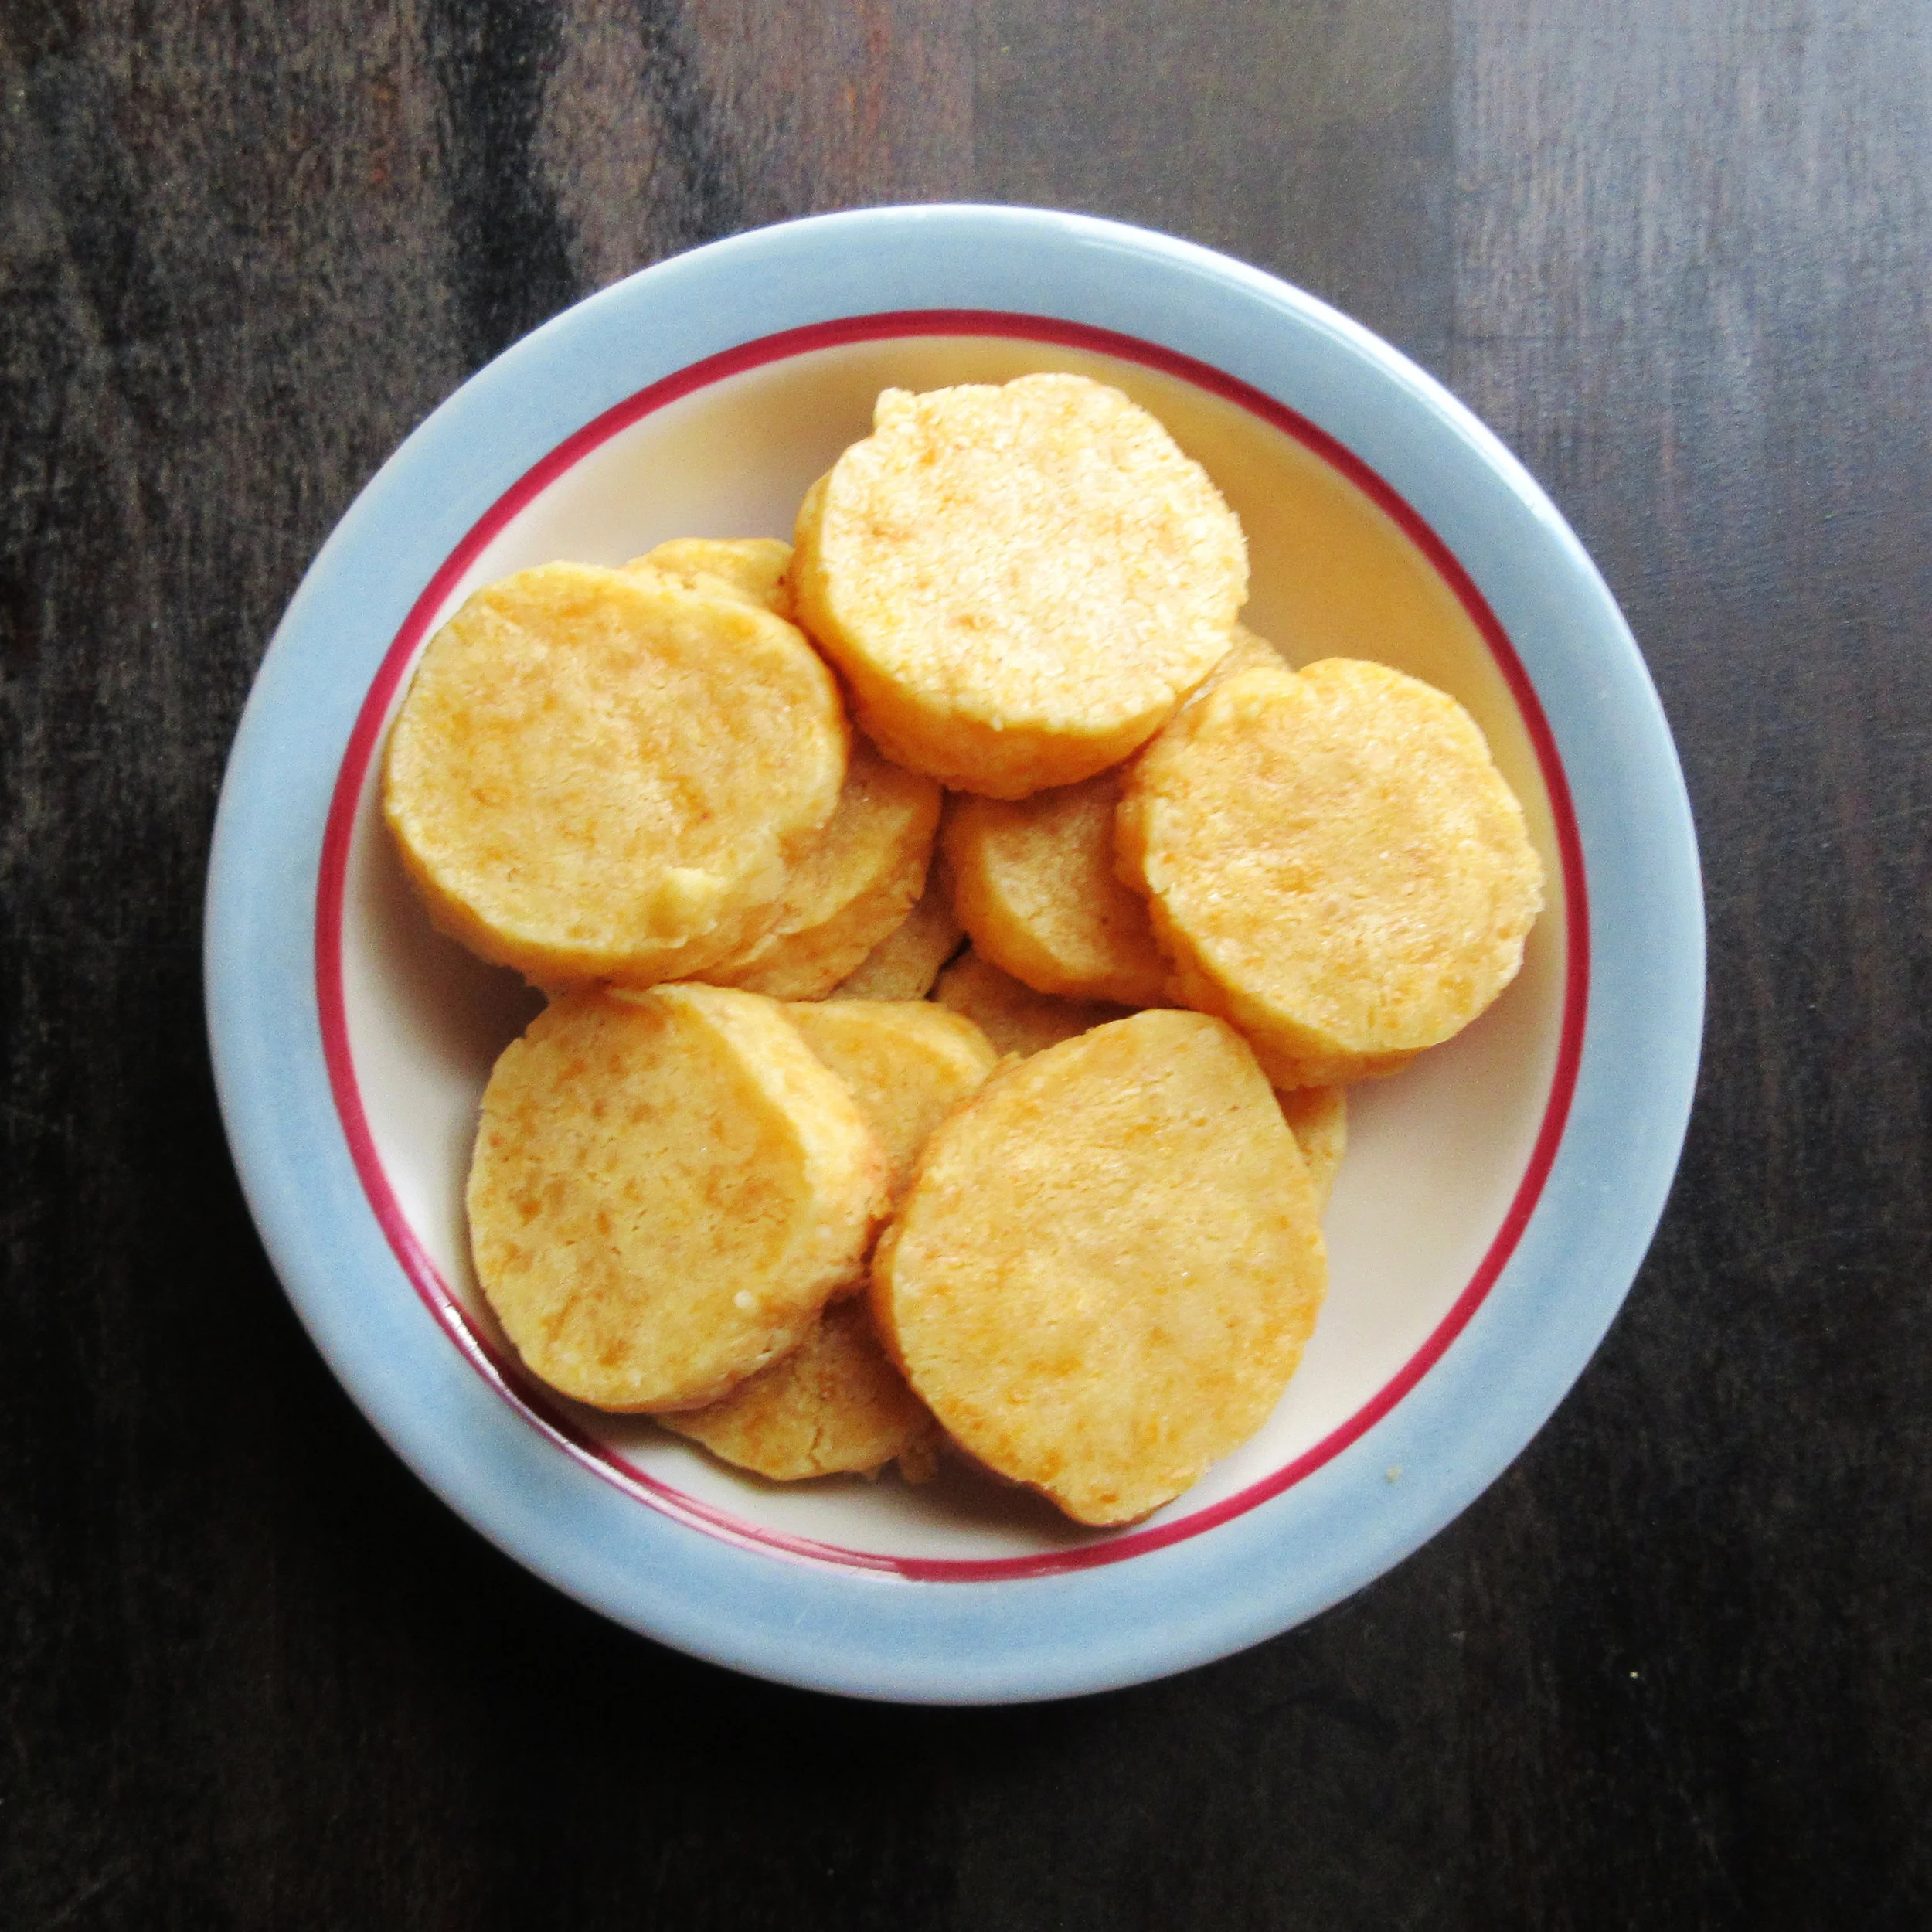
Cheese Hooies
One year ago today, on March 31st, I hit the "Publish" button for the first time and put out my first Food History blog recipe for the world to see and taste. I selected Cayenne Cheeses, a scrumptious cheese biscuit, from the 1861 Mrs. Beeton's Book of Household Management because it has been one of my favourite historic recipes since I began working in Historic House Museums. They are very delicious, you should try them!
When it came to picking out a 1-year anniversary recipe, I knew right away that I’d make Cheese Hooies. When I first read this recipe in the 1965 Stillmeadow Cookbook by Gladys Taber, I saw the ingredient list (butter, cheese, flour, salt and cayenne pepper) and thought, "These Hooies are basically Cayenne Cheeses". Cheese Hooies haven't kicked Cayenne Cheeses off my favourite recipes list, but making them was interesting look at how a century changes a recipe.

You'll find this recipe in:
Stillmeadow Cookbook
By: Gladys Taber
Philadelphia, 1965
Original Recipe:
CHEESE HOOIES
¼ lb butter
¼ lb strong American cheese
1 cup sifted flour
1 tsp salt
A good dash of Cayenne
Grate cheese into butter (I hope with a mouli grater). Cream well together, using a wooden spoon or your own clean hands. Add salt and Cayenne, then work in flour until thoroughly blended.
Knead on a board until smooth, roll into a long, thin roll and put in the the refrigerator to chill thoroughly. When chilled, slice thinly (use a sharp knife) and bake on a cookie sheet in a moderate oven (350°) until the hooies are beginning to brown (about to 10 minutes).
Dust with powdered sugar, if desired.
Serve with cocktails, highballs, tomato juice, soup or salads.
This was the chief cooking specialty of my Virginia friend, Ida Fitzgerald. When she visited me in the summer, we were not above a few cheese hooies with our breakfast coffee. She always doubled the recipe. They keep indefinitely, but are seldom allowed to.


My Recipe:
I followed Ida Fitzgerald's advice and doubled the recipe
1 cup softened butter – ½ lb – 225 g
2 ⅓ cups finely grated cheddar cheese – 225 g
2 cups all-purpose flour – 340 g
2 tsp salt (this is the amount in the original recipe - you probably want to use less salt)
A few shakes of cayenne pepper
Sugar (optional, I suggest using icing sugar)
Cream the softened butter and finely grated cheese together, add salt and cayenne pepper and gradually mix in the flour.
The mixture will probably be powdery once all the flour has been added, but if you use your hands to mix the dough, you should be able to roughly form it into balls. Knead the dough even more on a board, then use your hands to form it into tubes (mine were 2 – 3 cm or about 1" thick). Put the tubes in a container and put in the refrigerator until cool.
Preheat the oven to 350 F or 175 C. Thinly slice the Hooie tubes with a sharp knife, arrange on a cookie sheet and bake until slightly browned on the bottom. The original recipe suggests that this will take 8 – 10 minutes, but it was 15 minutes until my Hooies were golden.
Sprinkle with sugar if you'd like.

One year ago today, on March 31st, I hit the "Publish" button for the first time and put out my first Food History blog recipe for the world to see and taste. I selected Cayenne Cheeses, a scrumptious cheese biscuit, from the 1861 Mrs. Beeton's Book of Household Management because it has been one of my favourite historic recipes since I began working in Historic House Museums. They are really delicious, you should try them!
When I first read the Cheese Hooies recipe in the 1965 Stillmeadow Cookbook by Gladys Taber, I saw the ingredient list (butter, cheese, flour, salt and cayenne pepper) and thought, "These Hooies are basically Cayenne Cheeses". Cheese Hooies haven't kicked Cayenne Cheeses off my favourite recipes list, but making them was interesting look at how a century changes a recipe.
So how do the recipes compare? For the 1860s, the Cayenne Cheeses recipe lists quite specific measurements for the ingredients, so it's nice that we don't have to decipher something like "add flour until it is dough". The Cheese Hooies recipe features an ingredient list like we are used to today and the flour is measured out in cups instead of by weight, which would be typical of a century earlier.
The biggest alteration made by time is the appliances. We're instructed to bake the Cayenne Cheeses "in a moderate oven", which at that time would have been a wood stove, brick oven, or perhaps on a griddle over an open hearth. The Cheese Hooies recipe lists a specific oven temperature and makes use of a refrigerator.
Cheese Hooies are SALTY as is. They're probably on par with the saltiness of a potato chip, which is a bit surprising for a cheese biscuit. If you compared the ingredient amounts with the Cayenne Cheeses recipe, Cheese Hooies have double the flour and 6 times the salt! If you try them out, I'd suggest adding much less salt.
Cayenne Cheeses are crispy and flakey, and this is due to the fact that the recipe has less flour and also that it is prepared in a similar fashion as pastry, rubbing cold butter into the flour, then adding the cheese, cayenne, salt and a bit of water. Cheese Hooies are softer and fairly similar to a large goldfish cracker.
Gladys Taber lists "Strong American Cheese" in the ingredients for Cheese Hooies, which caused me to do some research and hemming and hawing about what kind of cheese to use. We don't typically call it American Cheese here in Canada, but when I travel to the United States and I'm asked if I want American Cheese, they are talking about processed cheese slices. Since we're instructed to grate this Strong American Cheese, I knew that cheese slices wasn't what I needed to use.
My research suggested that in the 1960s, Taber was probably referring to a processed cheese. Typically, American Cheese is a mixture of Cheddar and Colby, which makes up less than half of the "cheese product". The other ingredients allow it to melt and stay melted without becoming greasy. I didn't do an exhaustive search in cheese shops, but I couldn't find a block of processed American Cheese, except for Velveeta that you can find in any grocery store.
There was no way that I would be able to grate Velveeta with the grating implements in my kitchen, though. Taber strongly suggests using a mouli grater in her recipe, which is a metal rotary grater made in France at the time. They are an apparently incredible kitchen gadget that you just can't find new these days, so I'll be on the lookout for one when I'm in antique markets! From what I read, they can grate just about anything, so maybe you can grate Velveeta with a mouli grater. I settled on using Cheddar Cheese.
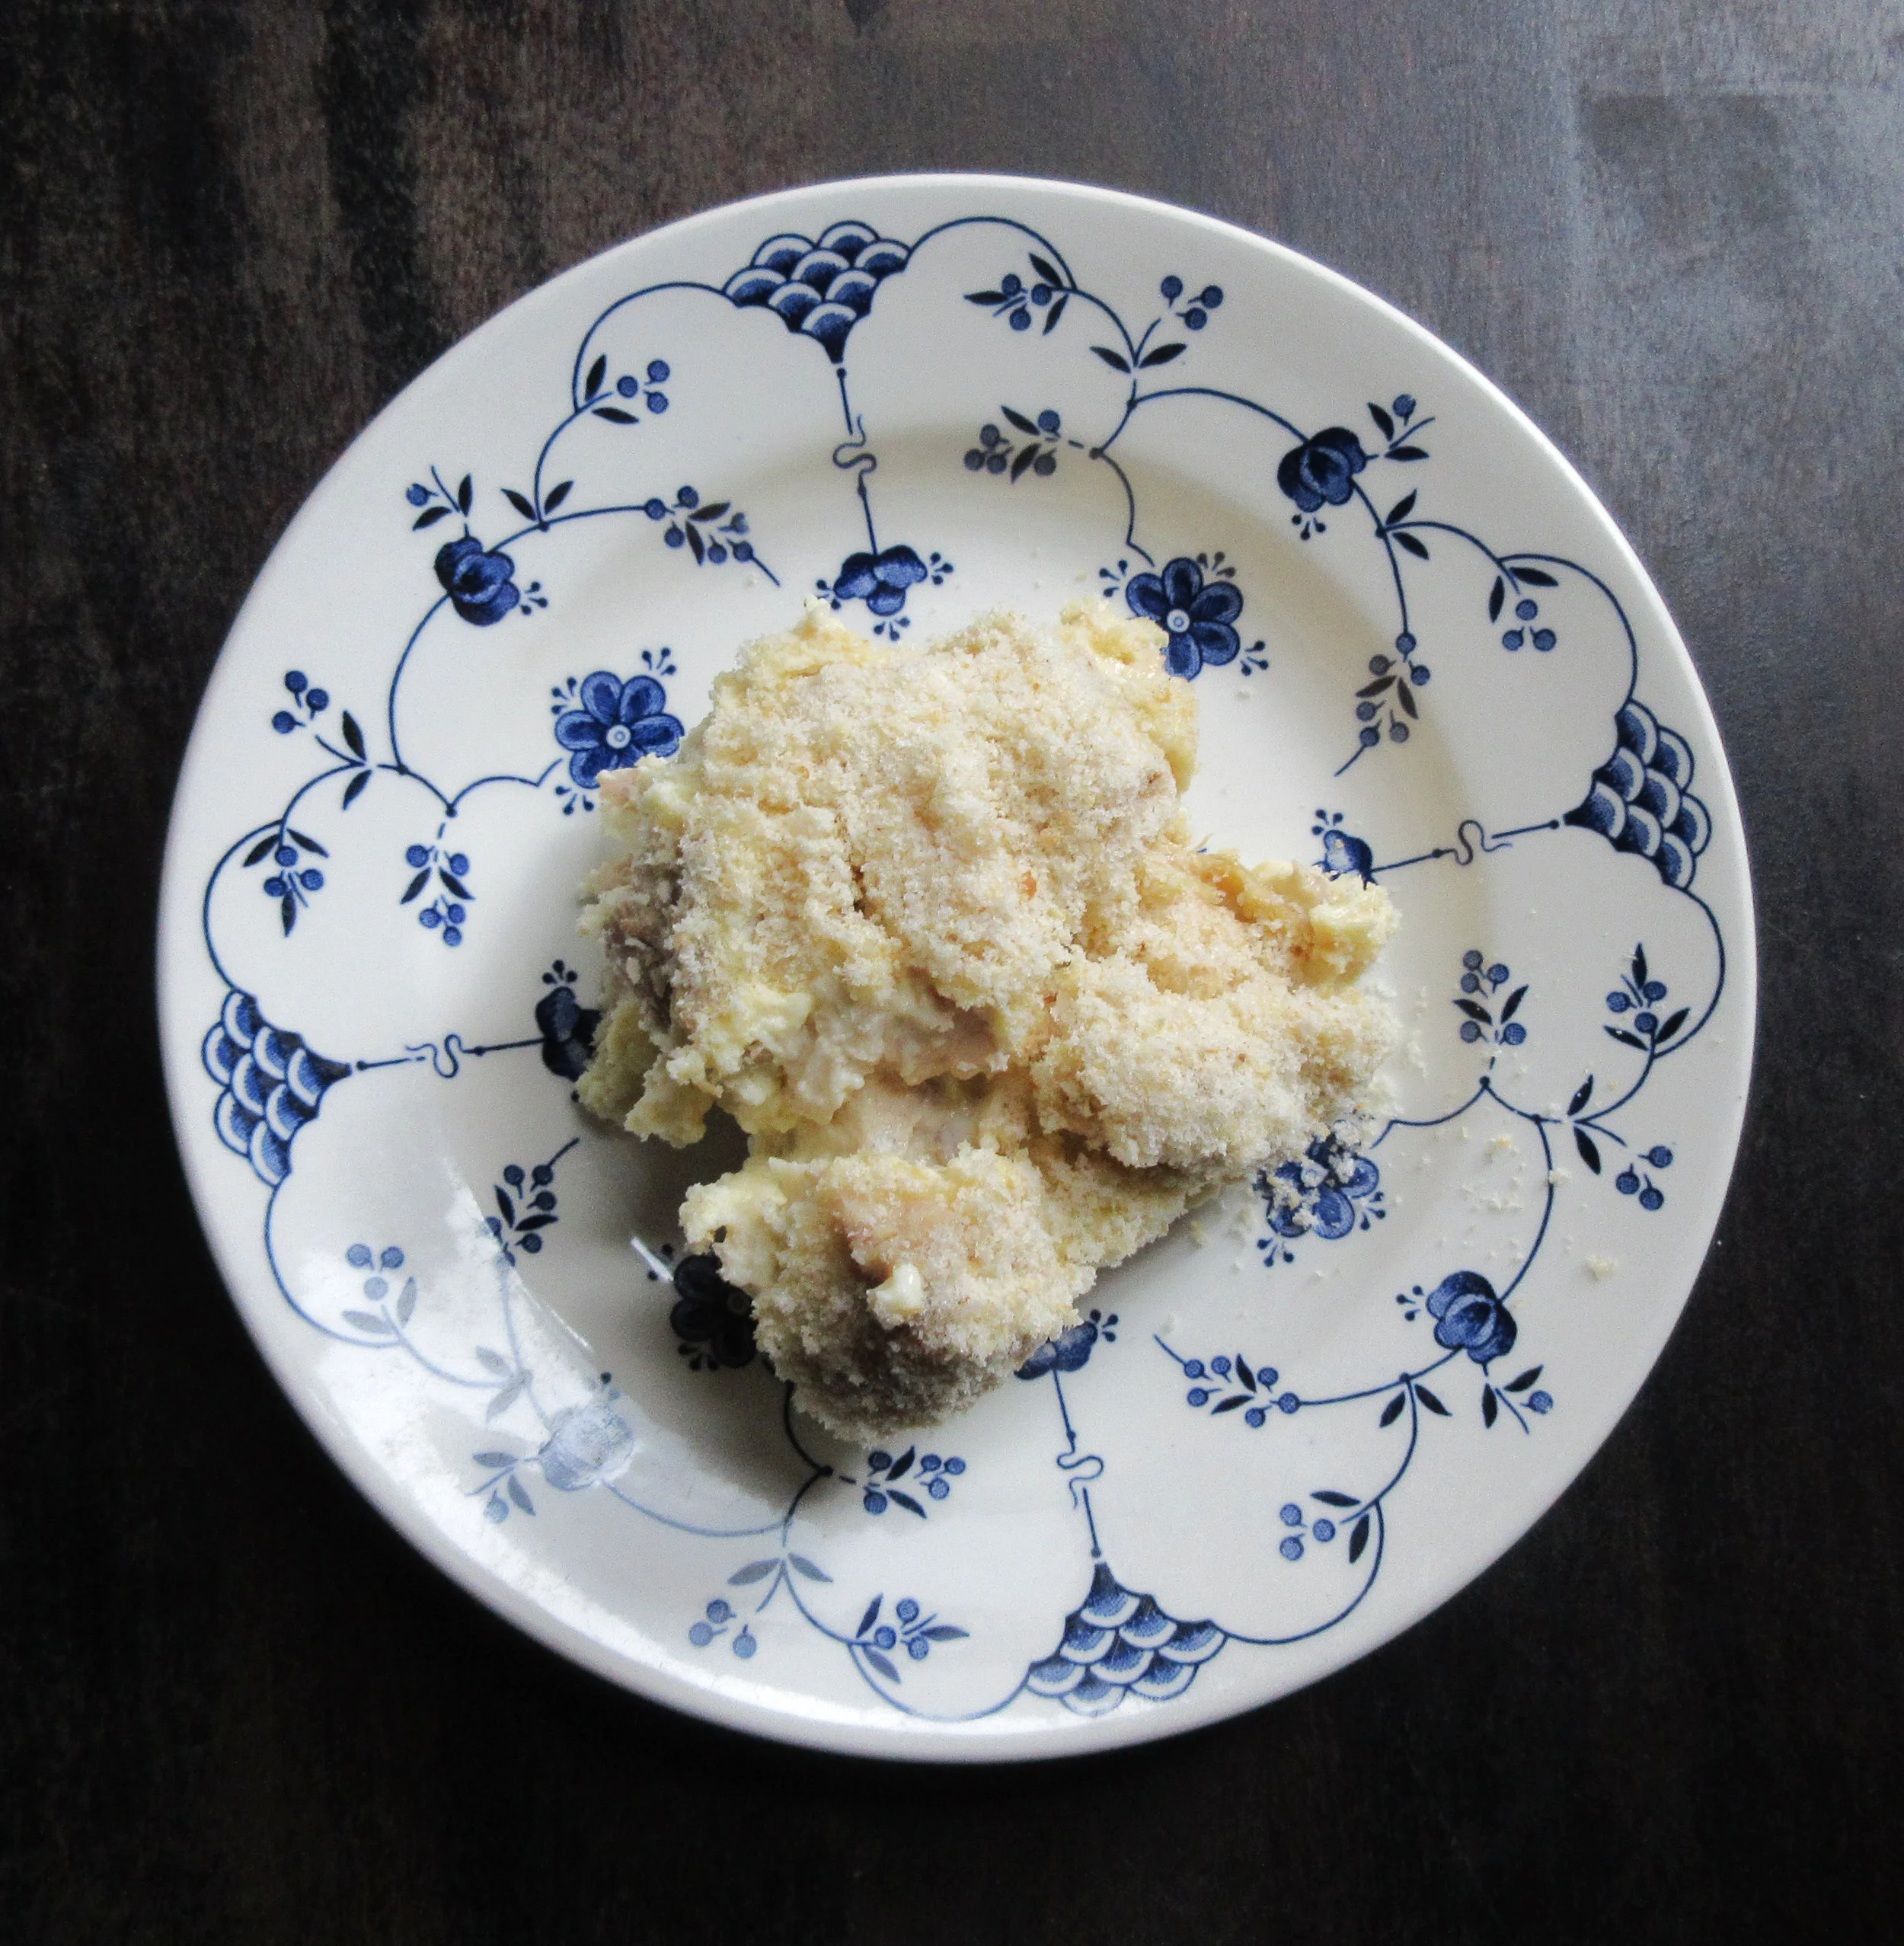
And finally, Gladys Taber writes that we can optionally sprinkle the Cheese Hooies with sugar. I was suspicious about adding sugar to a salty cheese biscuit, but I gave it a shot. I tried sprinkling with both icing and white sugar before and after baking. The Hooies are so salty that I couldn't taste the white sugar at all! The icing sugar melted into the Hooies as they baked, so if you do want to give the sugar sprinkling a try, I suggest icing sugar added after baking.


Cheese Hooies (sprinkled with icing sugar) versus Cayenne Cheeses
Read the Cookbook:
Chicken Terrapin
Chicken Terrapin, from the 1903 Good Housekeeping Everyday Cook Book, is a creamy and decadent casserole dish, perfect for using up leftover chicken. After selecting this recipe, my research began with the question "Why is this dish called Chicken TERRAPIN?" and quickly descended down a rabbit hole. Literally. Before beginning to piece together what I learned about Terrapin recipes, I had pulled my childhood copy of Alice in Wonderland off my bookshelf!
The chicken meat in this recipe is meant to take the place of Terrapin Turtle meat and I'll be delving into how one prepares Terrapin meat, the popularity of Turtle recipes, specialized Turtle Soup Tureens and the replacement of dishes featuring turtle meat with Mock Turtle recipes. I'll also explain the appearance of the Mock Turtle character in Alice in Wonderland, and why he is so melancholy in the story.

You'll find this recipe in:
Good Housekeeping Everyday Cook Book
New York, 1903
By: Isabel Gordon Curtis, Associate Editor of Good Housekeeping
Historic Recipe:
Chicken Terrapin
Make a sauce with two level tablespoons of butter, two of flour and one cup of cream, or half cream and chicken stock. Season with salt and pepper. When boiling hot remove from the fire, add two well-beaten eggs and one pint of chopped cold chicken. Butter individual dishes or one baking dish, pour in the chicken mixture and place the dishes in a pan of hot water. Spread crumbs on the top and bake in a moderate oven for twenty minutes. Serve at once.
My Recipe:
2 cups chicken meat, chopped - 350 g
2 tbsp butter
2 tbsp flour
1 cup (236 mL) cream, or 1/2 cup cream & 1/2 cup chicken stock
2 eggs
breadcrumbs
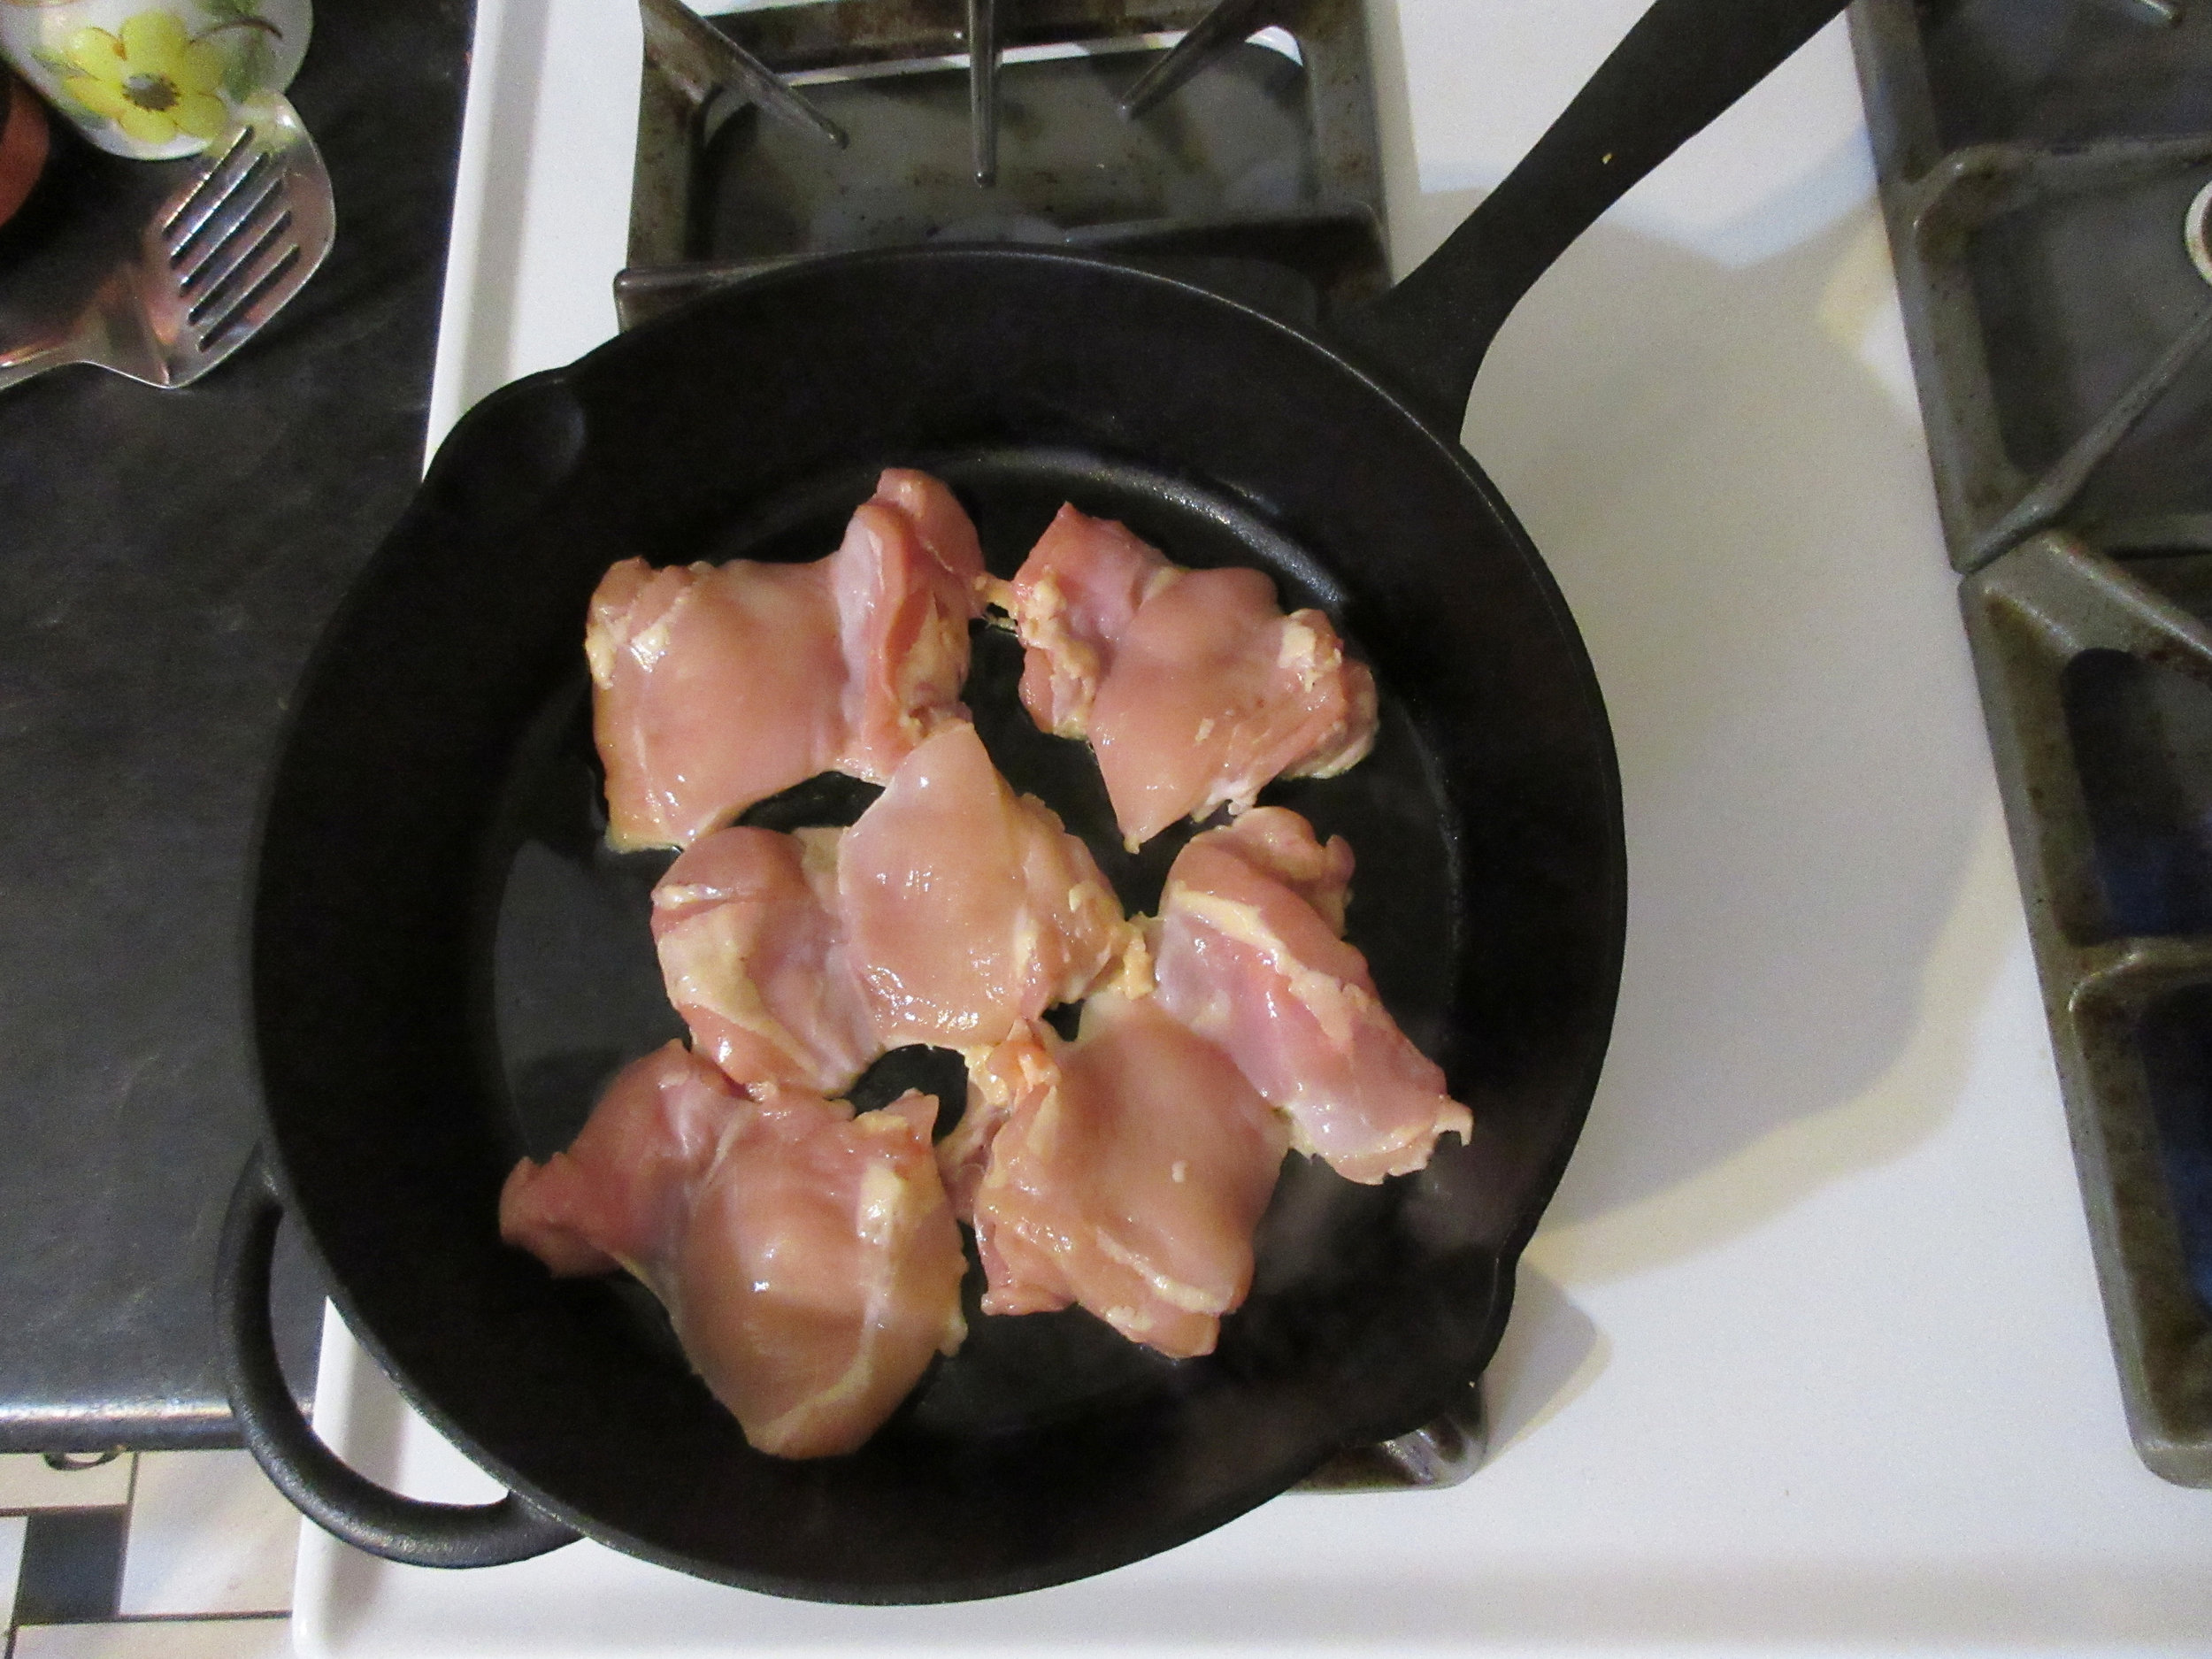
If you don't already have leftover chicken, begin by cooking and chopping the chicken meat. I fried chicken thighs in a frying pan.
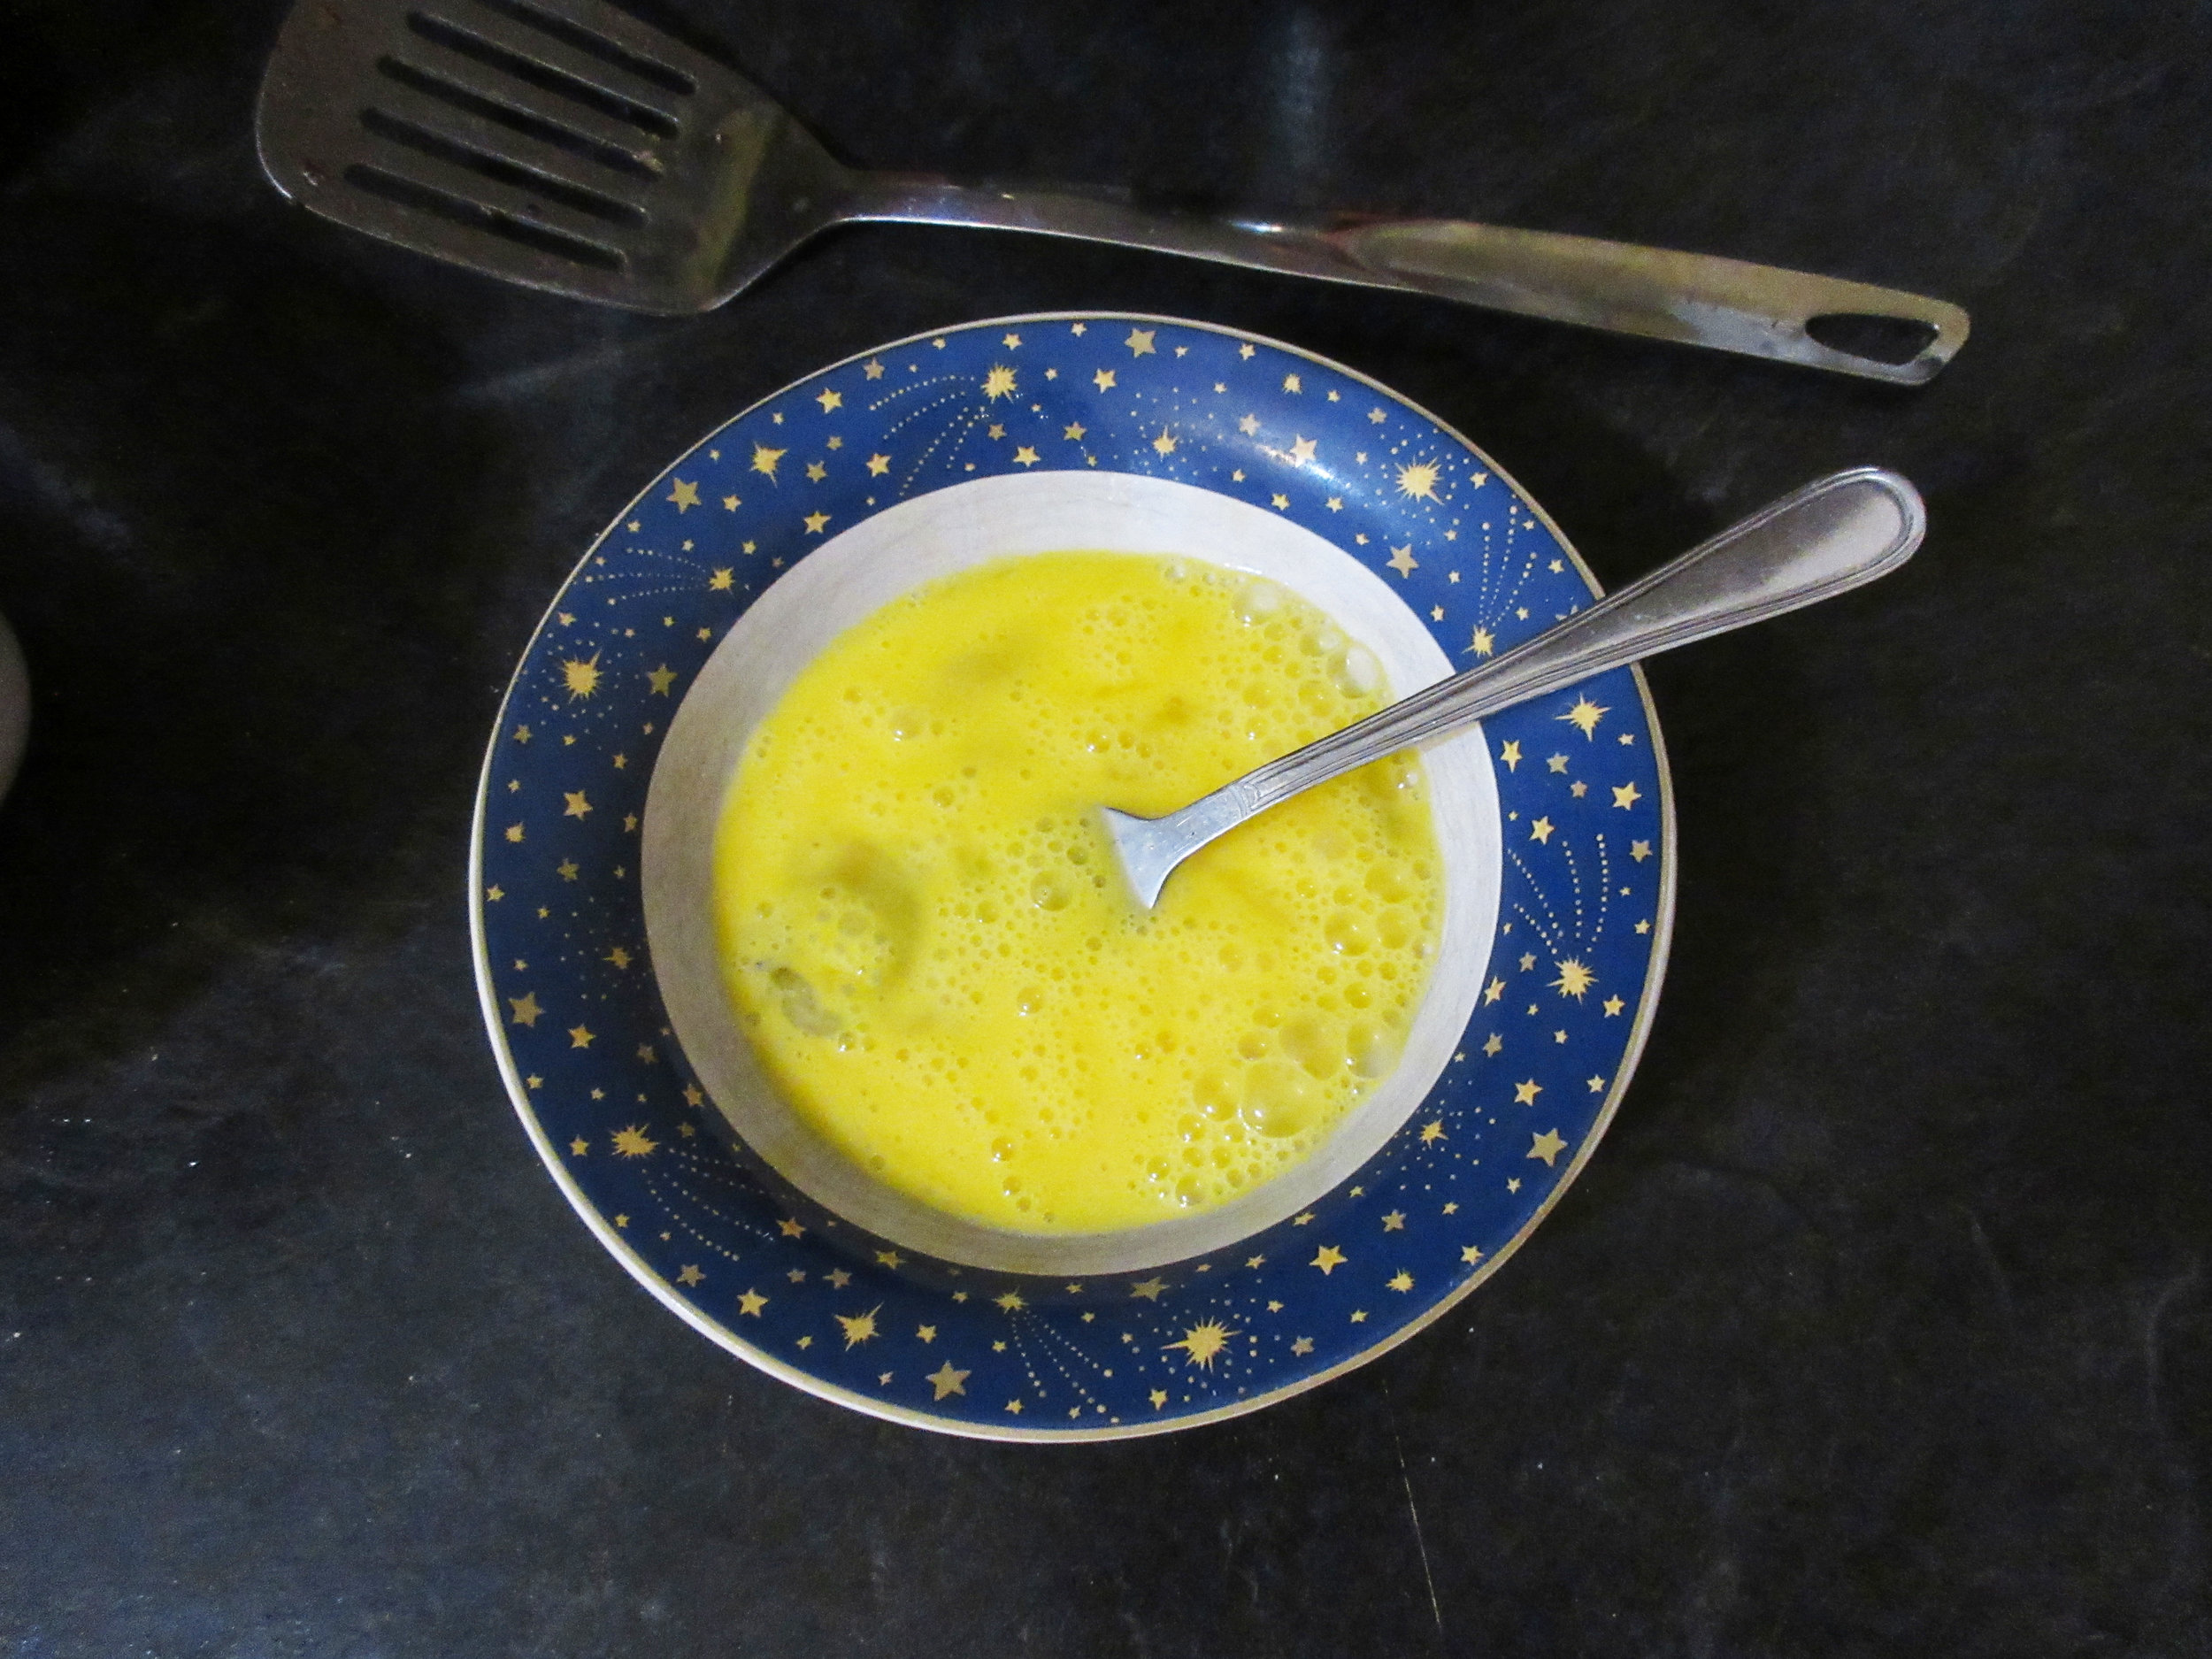
Preheat oven to 350 F/175 C. This recipe recommends either using one large casserole dish or individual ramekins. Grease your baking dish(es) and select a large baking dish or pan for your water bath that will fit the casserole dish or ramekins. Heat water in a kettle. Beat two eggs in a bowl.
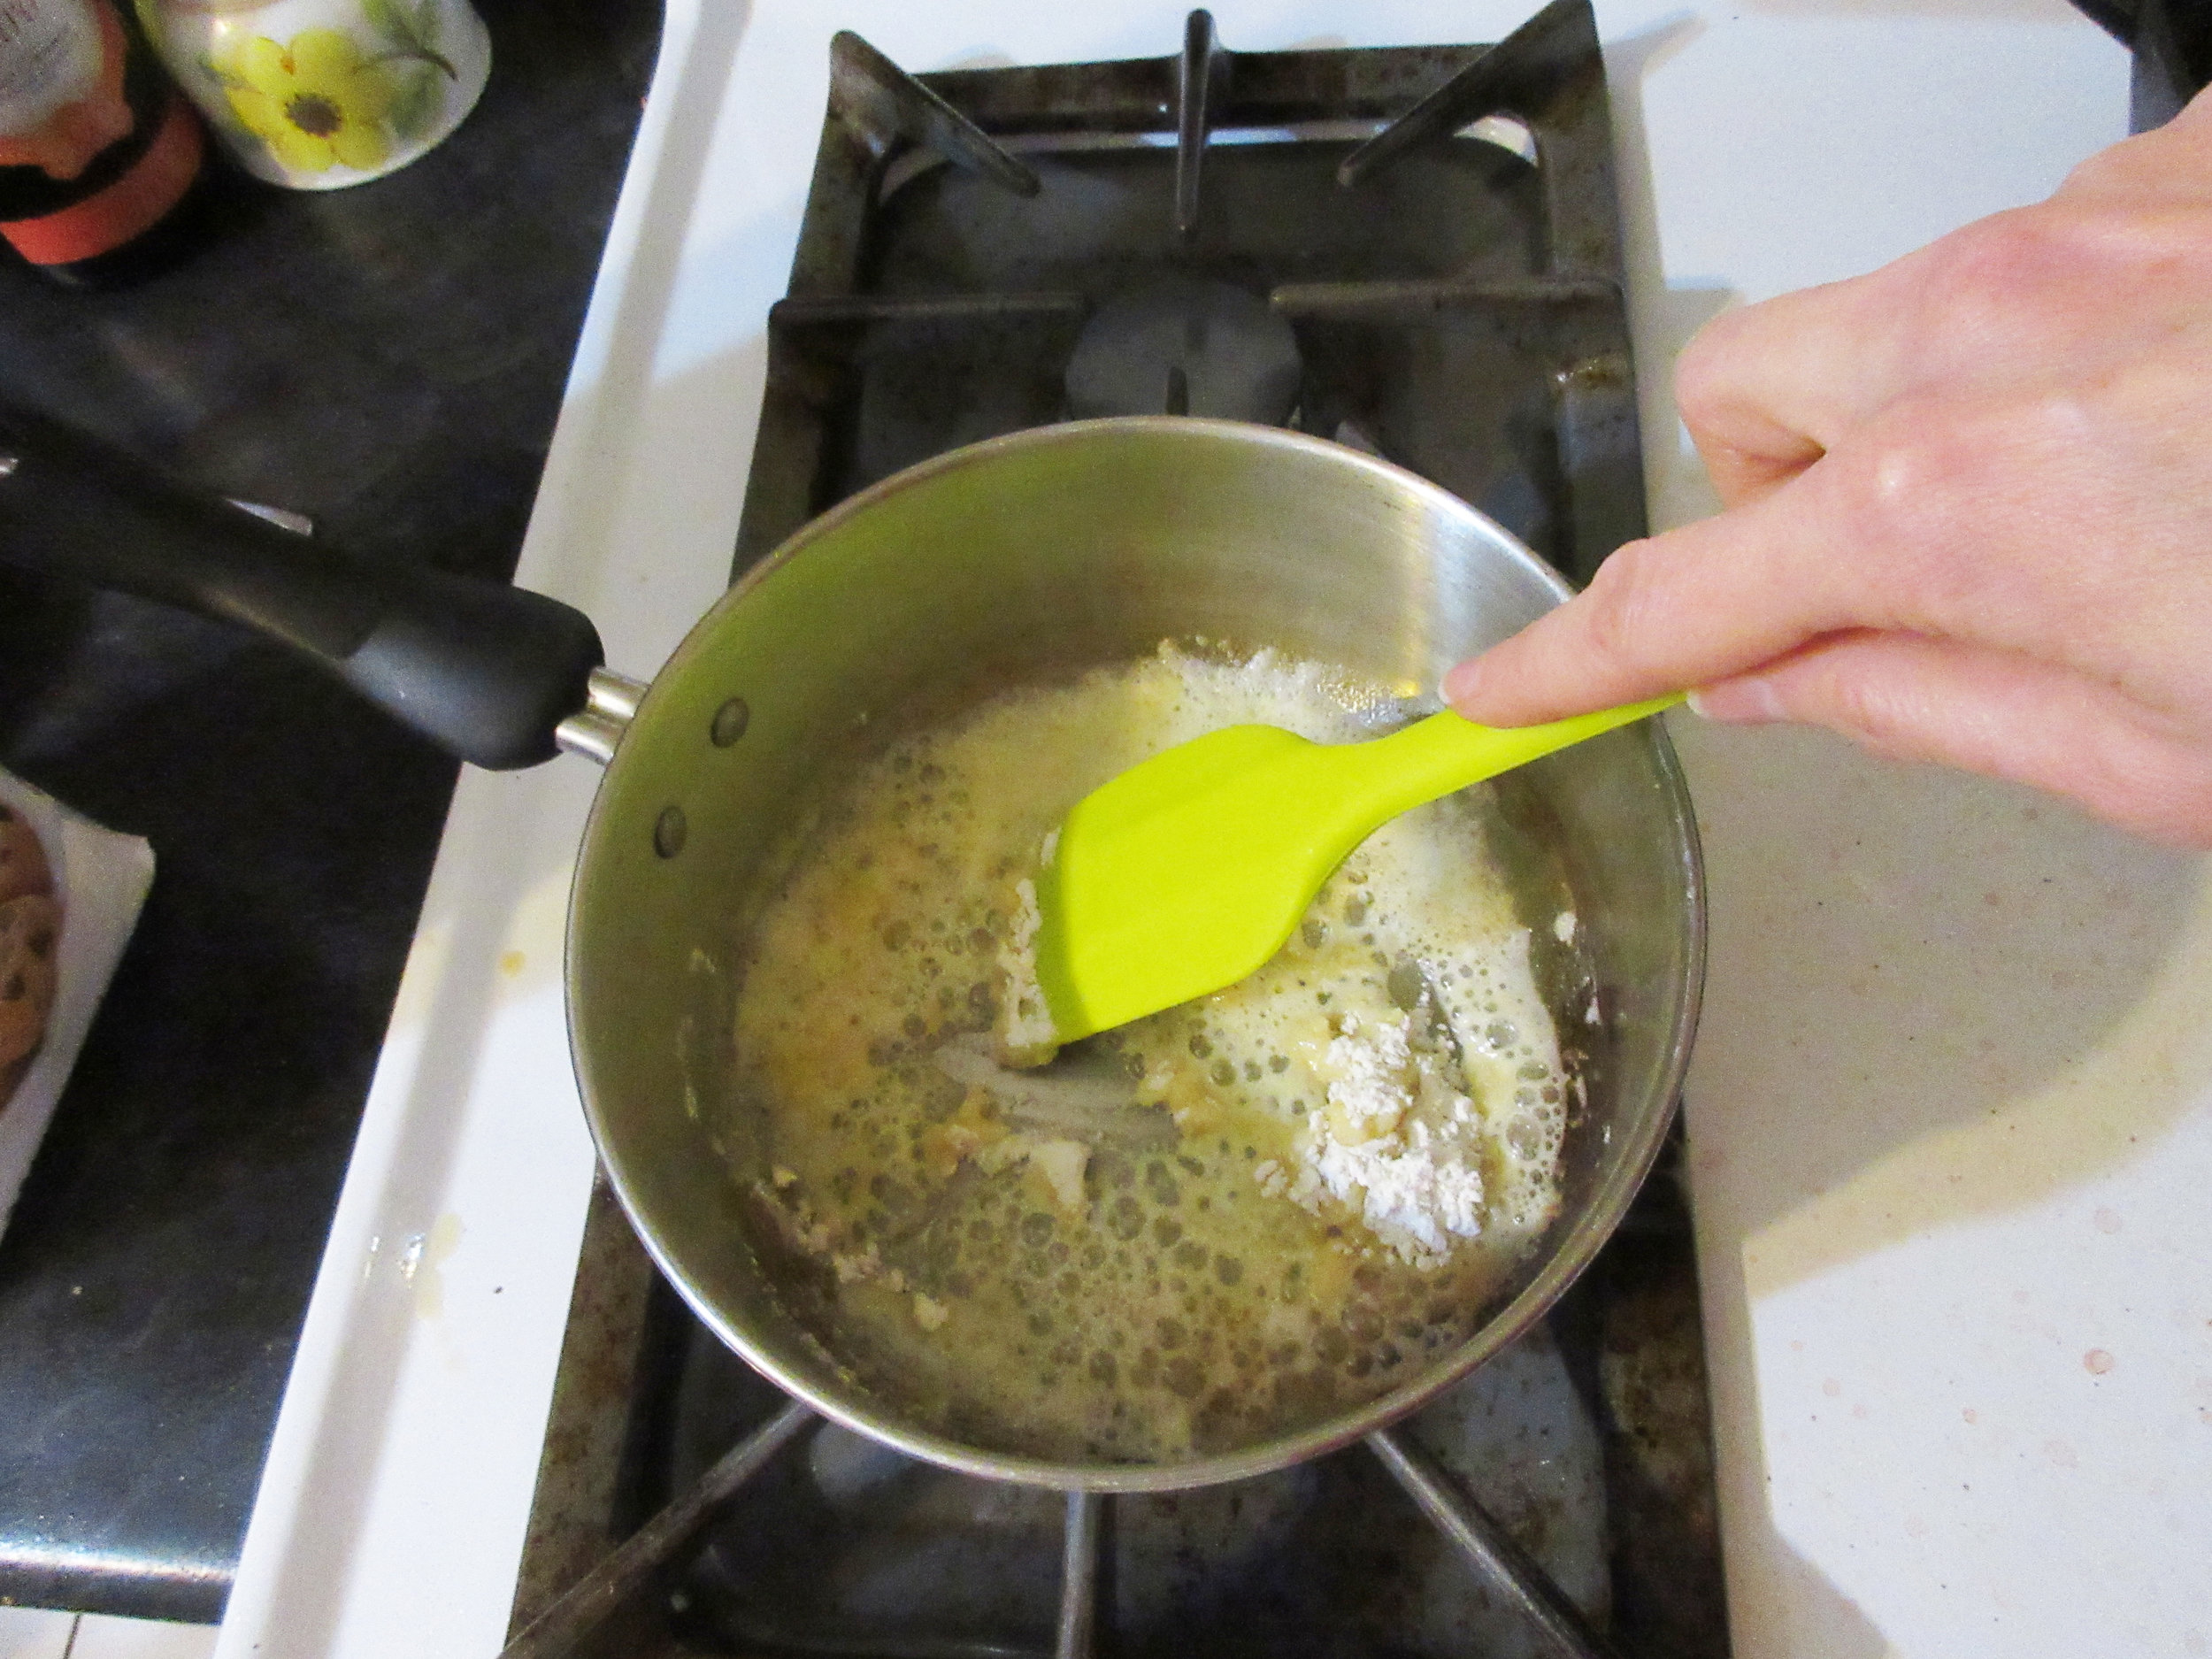
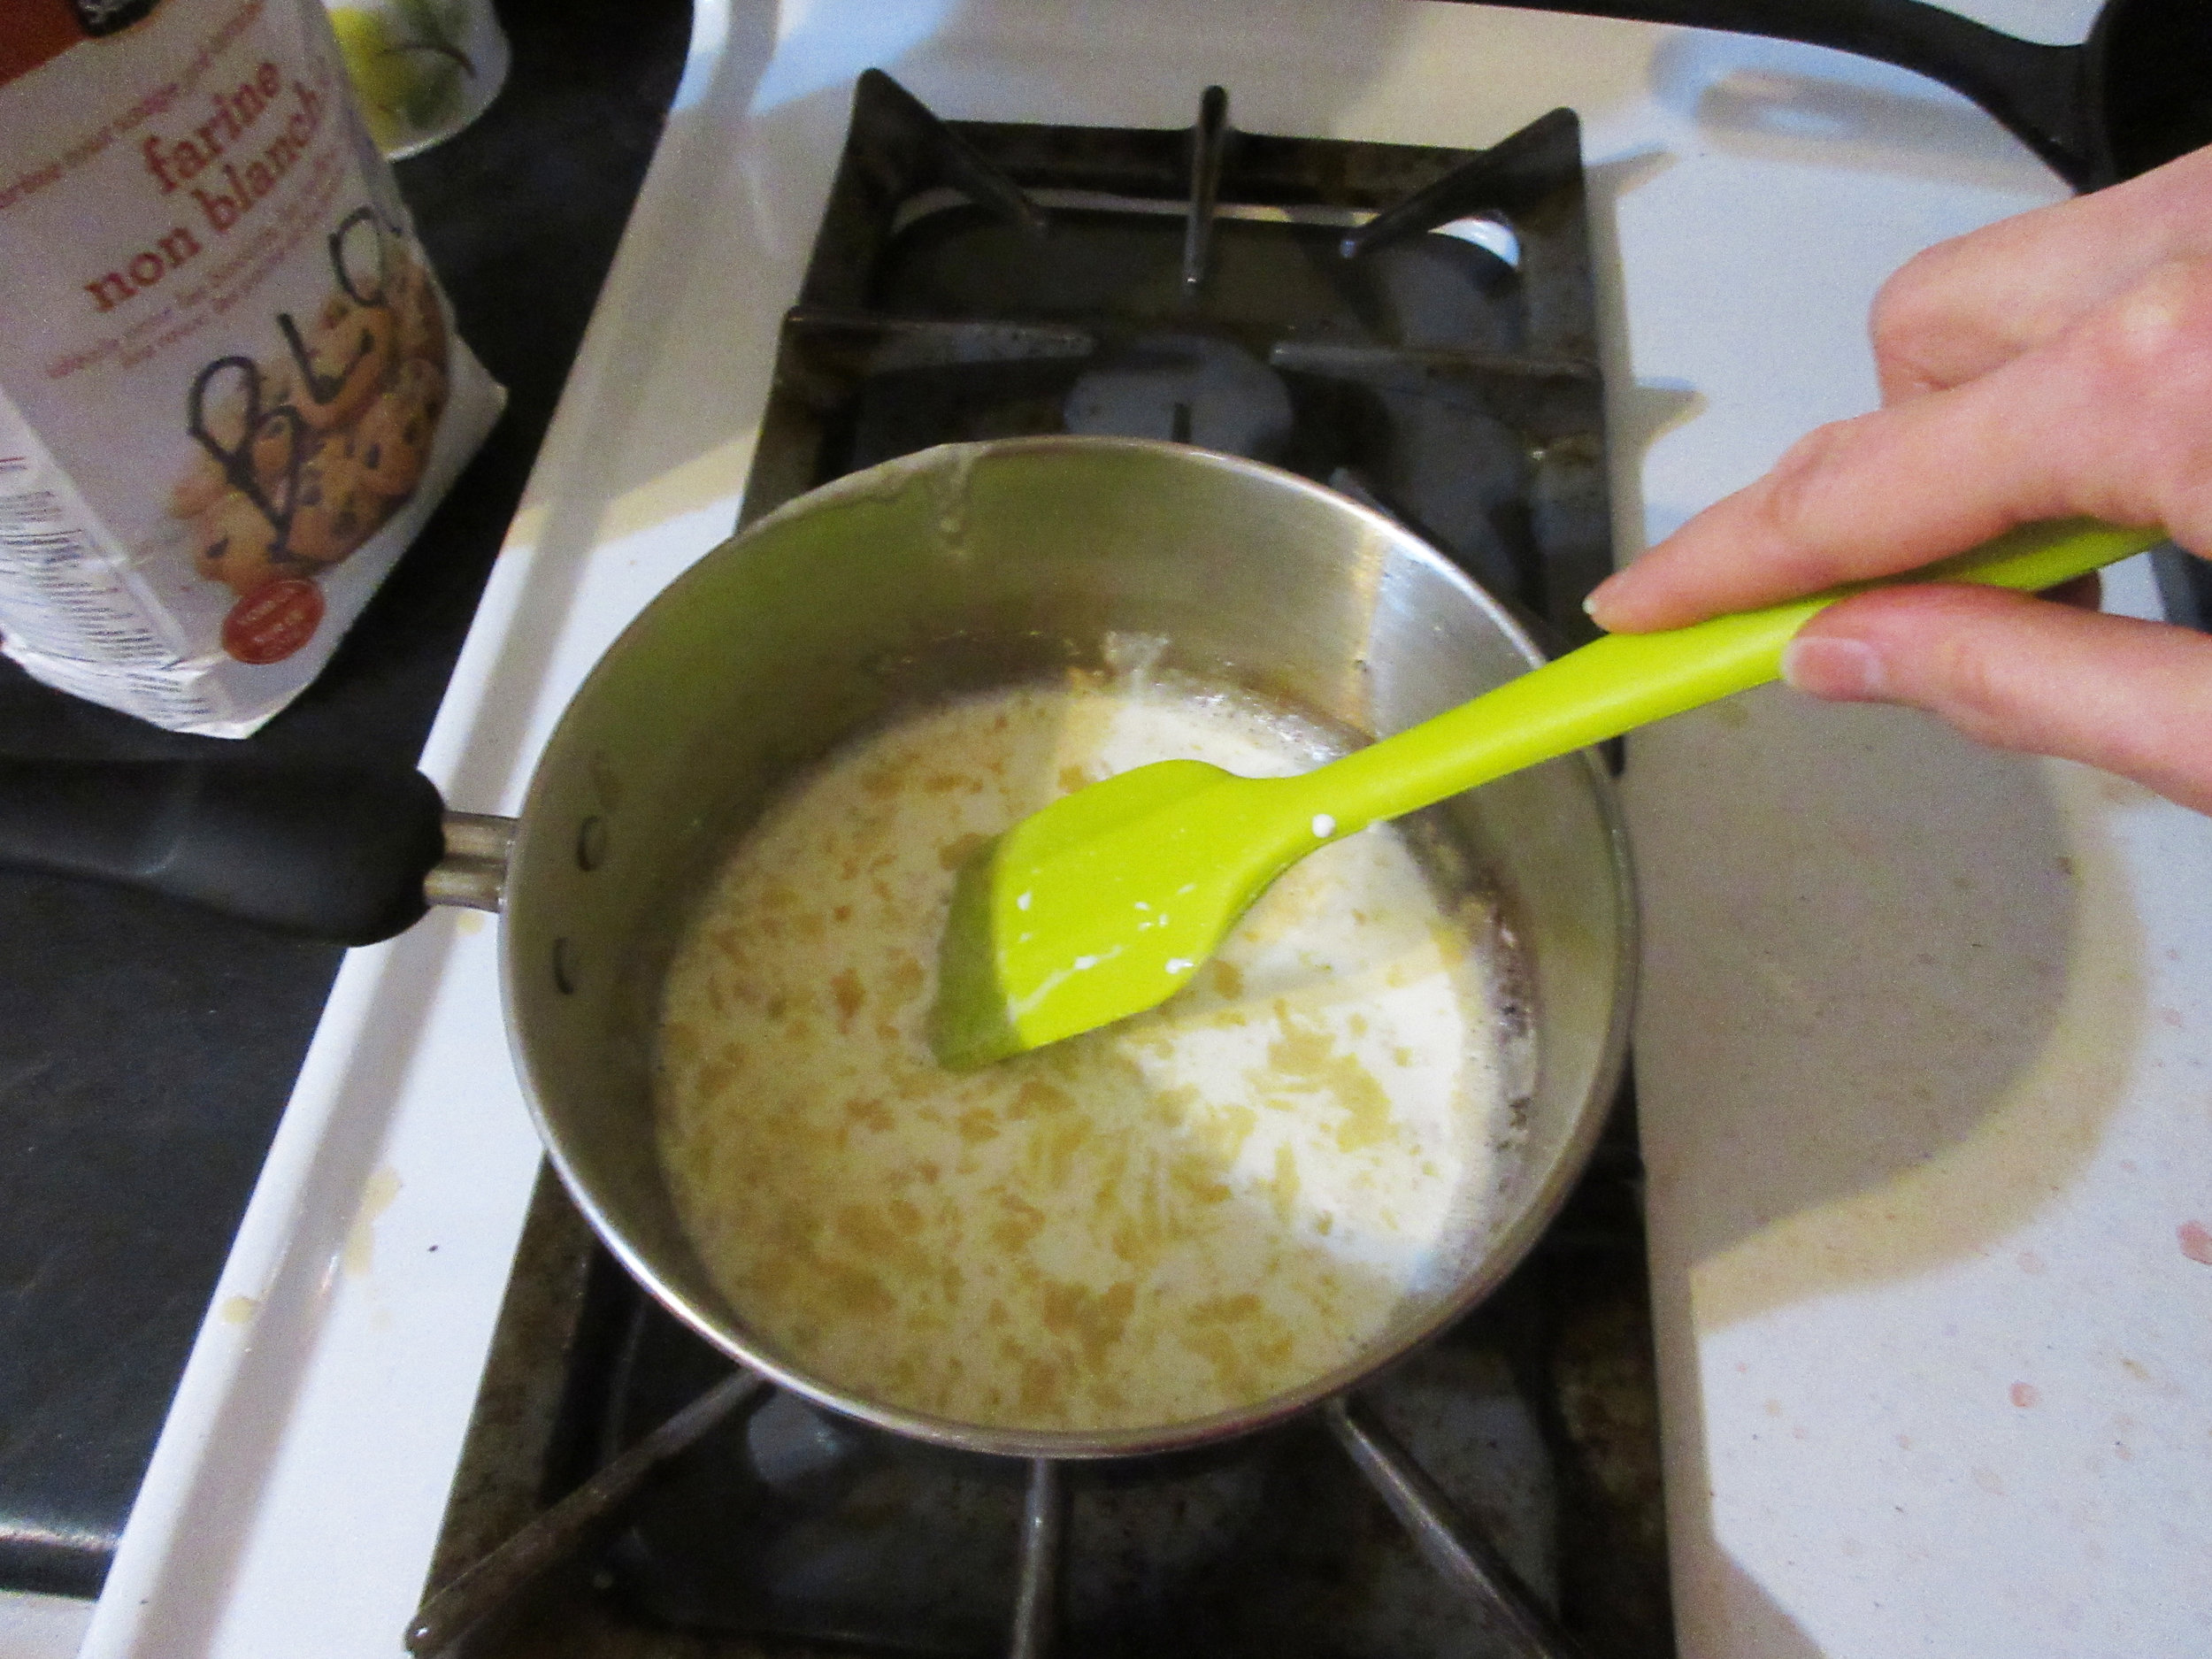
To make the sauce, melt the butter in a saucepan, add the flour while stirring constantly, then gradually stir in the cream or cream and chicken stock. Stir until bubbling, then remove from heat. Stir in the eggs and chopped chicken. Pour the chicken mixture into your baking dish(es) and spoon breadcrumbs on top.
Place the casserole dish or ramekins in the water bath pan and pour about 1 inch (2.5 cm) of hot water from the kettle into the pan surrounding your baking dish(es). Ideally, you want to fill the water bath to cover roughly the bottom half of the chicken mixture in your casserole or ramekins. The water bath will prevent the eggs from curdling and will also prevent browning.
Bake for about 20 minutes. I lost track of time, so my Chicken Terrapin was cooked for about half an hour, and it turned out just fine.

After selecting this recipe, my research began with the question "Why is this dish called Chicken TERRAPIN?" and quickly descended down a rabbit hole. Literally. Before beginning to pull together what I learned about Terrapin dishes, I had pulled my childhood copy of Alice in Wonderland off my bookshelf!
The chicken meat in this recipe is meant to take the place of Terrapin Turtle meat. Turtle recipes were especially popular from the mid nineteenth-century to the early twentieth-century and partially fell out of popularity because the turtle population couldn't support the demand due to over-hunting and lost habitat.
Turtle recipes were also replaced with mock turtle recipes such as Chicken Terrapin because turtles were expensive, tricky to source and very difficult to cook! In the 1851 Miss Leslie's Directions for Cookery , Eliza Leslie writes at the end of her Mock Turtle Soup recipe that "We omit a receipt for real turtle soup, as when that expensive, complicated, and difficult dish is prepared in a private family, it is advisable to hire a first-rate cook for the express purpose. An easy way is to get it ready-made, in any quantity you please, from a turtle-soup house."
How does one prepare Terrapins? Eliza Leslie tells us in the same cookbook. She instructs us to put them alive in a pot of boiling water "and let them remain in until quite dead". The cook would then remove them from the water to pull off the skin and toenails, then boil them again in a pot of salted water until "the flesh becomes quite tender so that you can pinch it off". Once out of the water, the cook should "take them off the shell, remove the sand-bag, and the gall, which you must be careful not to break, as it will make the terrapin so bitter as to be uneatable."
Miss Leslie suggests seasoning the chopped terrapin meat with cayenne pepper, nutmeg and mace, then continues on to suggest serving the terrapin with sauce made with butter, flour, Madeira wine and two beaten eggs. Sound familiar?
300 ways to cook and serve shellfish : terrapin, green turtle, snapper, oysters, oyster crabs, lobsters, clams, crabs and shrimp , 1901, is a source closer to the 1903 publishing date of the Good Housekeeping Everyday Cookbook, and author H. Franklyn Hall gets quite specific about preparing all the shellfish listed in the title. Terrapins have their own chapter in this cookbook.
If boiling terrapins alive makes you feel squeamish, you'll be relieved to find out that Hall suggests killing them in advance. In fact, he advises that cooks leave the slaughtered terrapins "in clear running water from twelve to thirty-six hours" before cooking.
"Wash them in luke-warm water, then dip them in scalding hot water several times; place them one at a time on their back on a table and take a small clean towel and quickly but gently, so as not to tear the flesh, rub all of the outer skin from the head, neck, legs and tail. After all are prepared in the above manner, place them in a pot of boiling water and boil steadily until the legs can be easily separated from the body without any effort. It usually takes from thirty to seventy-five minutes to boil terrapin, sometimes a little longer it all depends upon the age and condition of the terrapin."
Our Chicken Terrapin recipe is similar to the Stewed Terrapin a la Virginia recipe in 300 ways to cook and serve shellfish, and it is suggested that stewed terrapin dishes should use "salt water or diamond back terrapin only...providing they are fat". Stewed Terrapin a la Virginia features a sauce made of butter, broken crackers, cream and chopped parsley. Hall suggests serving the Stewed Terrapin in individual silver tureens or fine china dessert plates. Turtle recipes were popular enough that specific turtle-inspired tureens were created for those who could afford that bit of whimsy. Have a look below at a couple of gorgeous turtle tureens, as well as a photograph of a diamondback terrapin before meeting its end in somebody’s kitchen.


Left to right: Diamondback Terrapin and Turtle Soup Tureens from the Collections of Colonial Williamsburg (c. 1815) and Cooper Hewitt, Smithsonian Design Museum (c. 1880-90)
Then the Queen left off, quite out of breath, and said to Alice, "Have you seen the Mock Turtle yet?"
"No," said Alice, "I don't even know what a Mock Turtle is."
"It's the thing Mock Turtle Soup is made from," said the Queen.
"I never saw one or heard of one," said Alice.
"Come on then," said the Queen, "and he shall tell you his story."
I've heard of Mock Turtle Soup since i was a girl, thanks to the Mock Turtle character in Alice in Wonderland, but I never was fully in on the joke until I started my career in museums. I clearly remember the shock I felt the first time I flipped through a historic cookbook and came across a recipe for Mock Turtle Soup, and suddenly this character made much more sense to me!
Lewis Carroll doesn't actually physically describe the Mock Turtle in the book, other than the fact that he has flappers and is constantly sobbing because "Once...I was a real Turtle." Illustrations depict the Mock Turtle with the body of a sea turtle, hooved hind legs and the head & tail of a calf.

Alice in Wonderland illustration by John Tenniel (1865), depicting the Gryphon, Alice and the Mock Turtle
Let's return to Miss Leslie's Directions for Cookery for a sample Mock Turtle Soup recipe, shall we? I can't imagine how complicated making Turtle soup is, if Mock Turtle Soup is supposed to be simpler. Miss Leslie begins the recipe by stating that "This soup will require eight hours to prepare."
The cook begins with a large calf's head, which she will have prepared by cleaning and soaking. The calf's head, bacon, a knuckle of veal and a ham hock are covered in water in a large pot. The meats are boiled slowly for about four hours, making sure to skim the foam off the top regularly.
Then root vegetables and herbs are added and the pot is boiled for three more hours: "As soon as no more scum rises, put in six potatoes, and three turnips, all sliced thin; with equal proportions of parsley, sweet marjoram, and sweet basil, chopped fine; and cayenne pepper to your taste. The ham will salt it sufficiently."
At hour seven, the cook is instructed to make veal meatballs, which she rolls in flour and fries in butter. After the meatballs are completed, she removes all the meat from the pot and "Cuts the meat from the head in small pieces, and return it to the soup", along with the meatballs. When the soup is close to completion, stir in some Madeira wine, the juice of a lemon and about a dozen egg balls "in the form and size of boy's marbles", made of hard boiled egg yolks held together with raw egg yolks. Bring to a boil again and serve in a soup tureen. What a marathon!
The Mock Turtle sighed deeply and began, in a voice sometimes choked with sobs, to sing this:
"Beautiful Soup, so rich and green,
Waiting in a hot tureen!
Who for such dainties would not stoop?
Soup of the evening, beautiful Soup!"
I remember that day about a decade ago when I was sitting in the museum office, flipping through reprints of Victorian cookbooks to find recipes to make with campers at our Day Camp. When I came across my first Mock Turtle Soup recipe, before reading it I thought that it would be very interesting to make with the campers, knowing that some of them would be familiar with Alice in Wonderland. Then I read the ingredients and how long it would take to prepare and that idea went out the window! How many crying children and complaining parents would be born out of cooking with a calf's head at Day Camp?
Once I understood the Mock Turtle Soup recipe, I understood the Mock Turtle's appearance and why he felt melancholy. With time, the Turtle transformed into a Mock Turtle with body parts of the livestock that came to replace turtle meat in soups. Between tears, the Mock Turtle regales Alice with songs, stories and dance about the better days when he was a Real Turtle - his studies in school, the glorious Lobster Quadrille and finally a ballad about a Beautiful Soup idealized in his memory. Maybe this character mirrors Lewis Caroll's sentiments about a better time when Turtle Soup was available in abundance, and had mostly been replaced by a soup that sadly and vaguely mirrored the original.

Read the Cookbook:

Piquant Beets
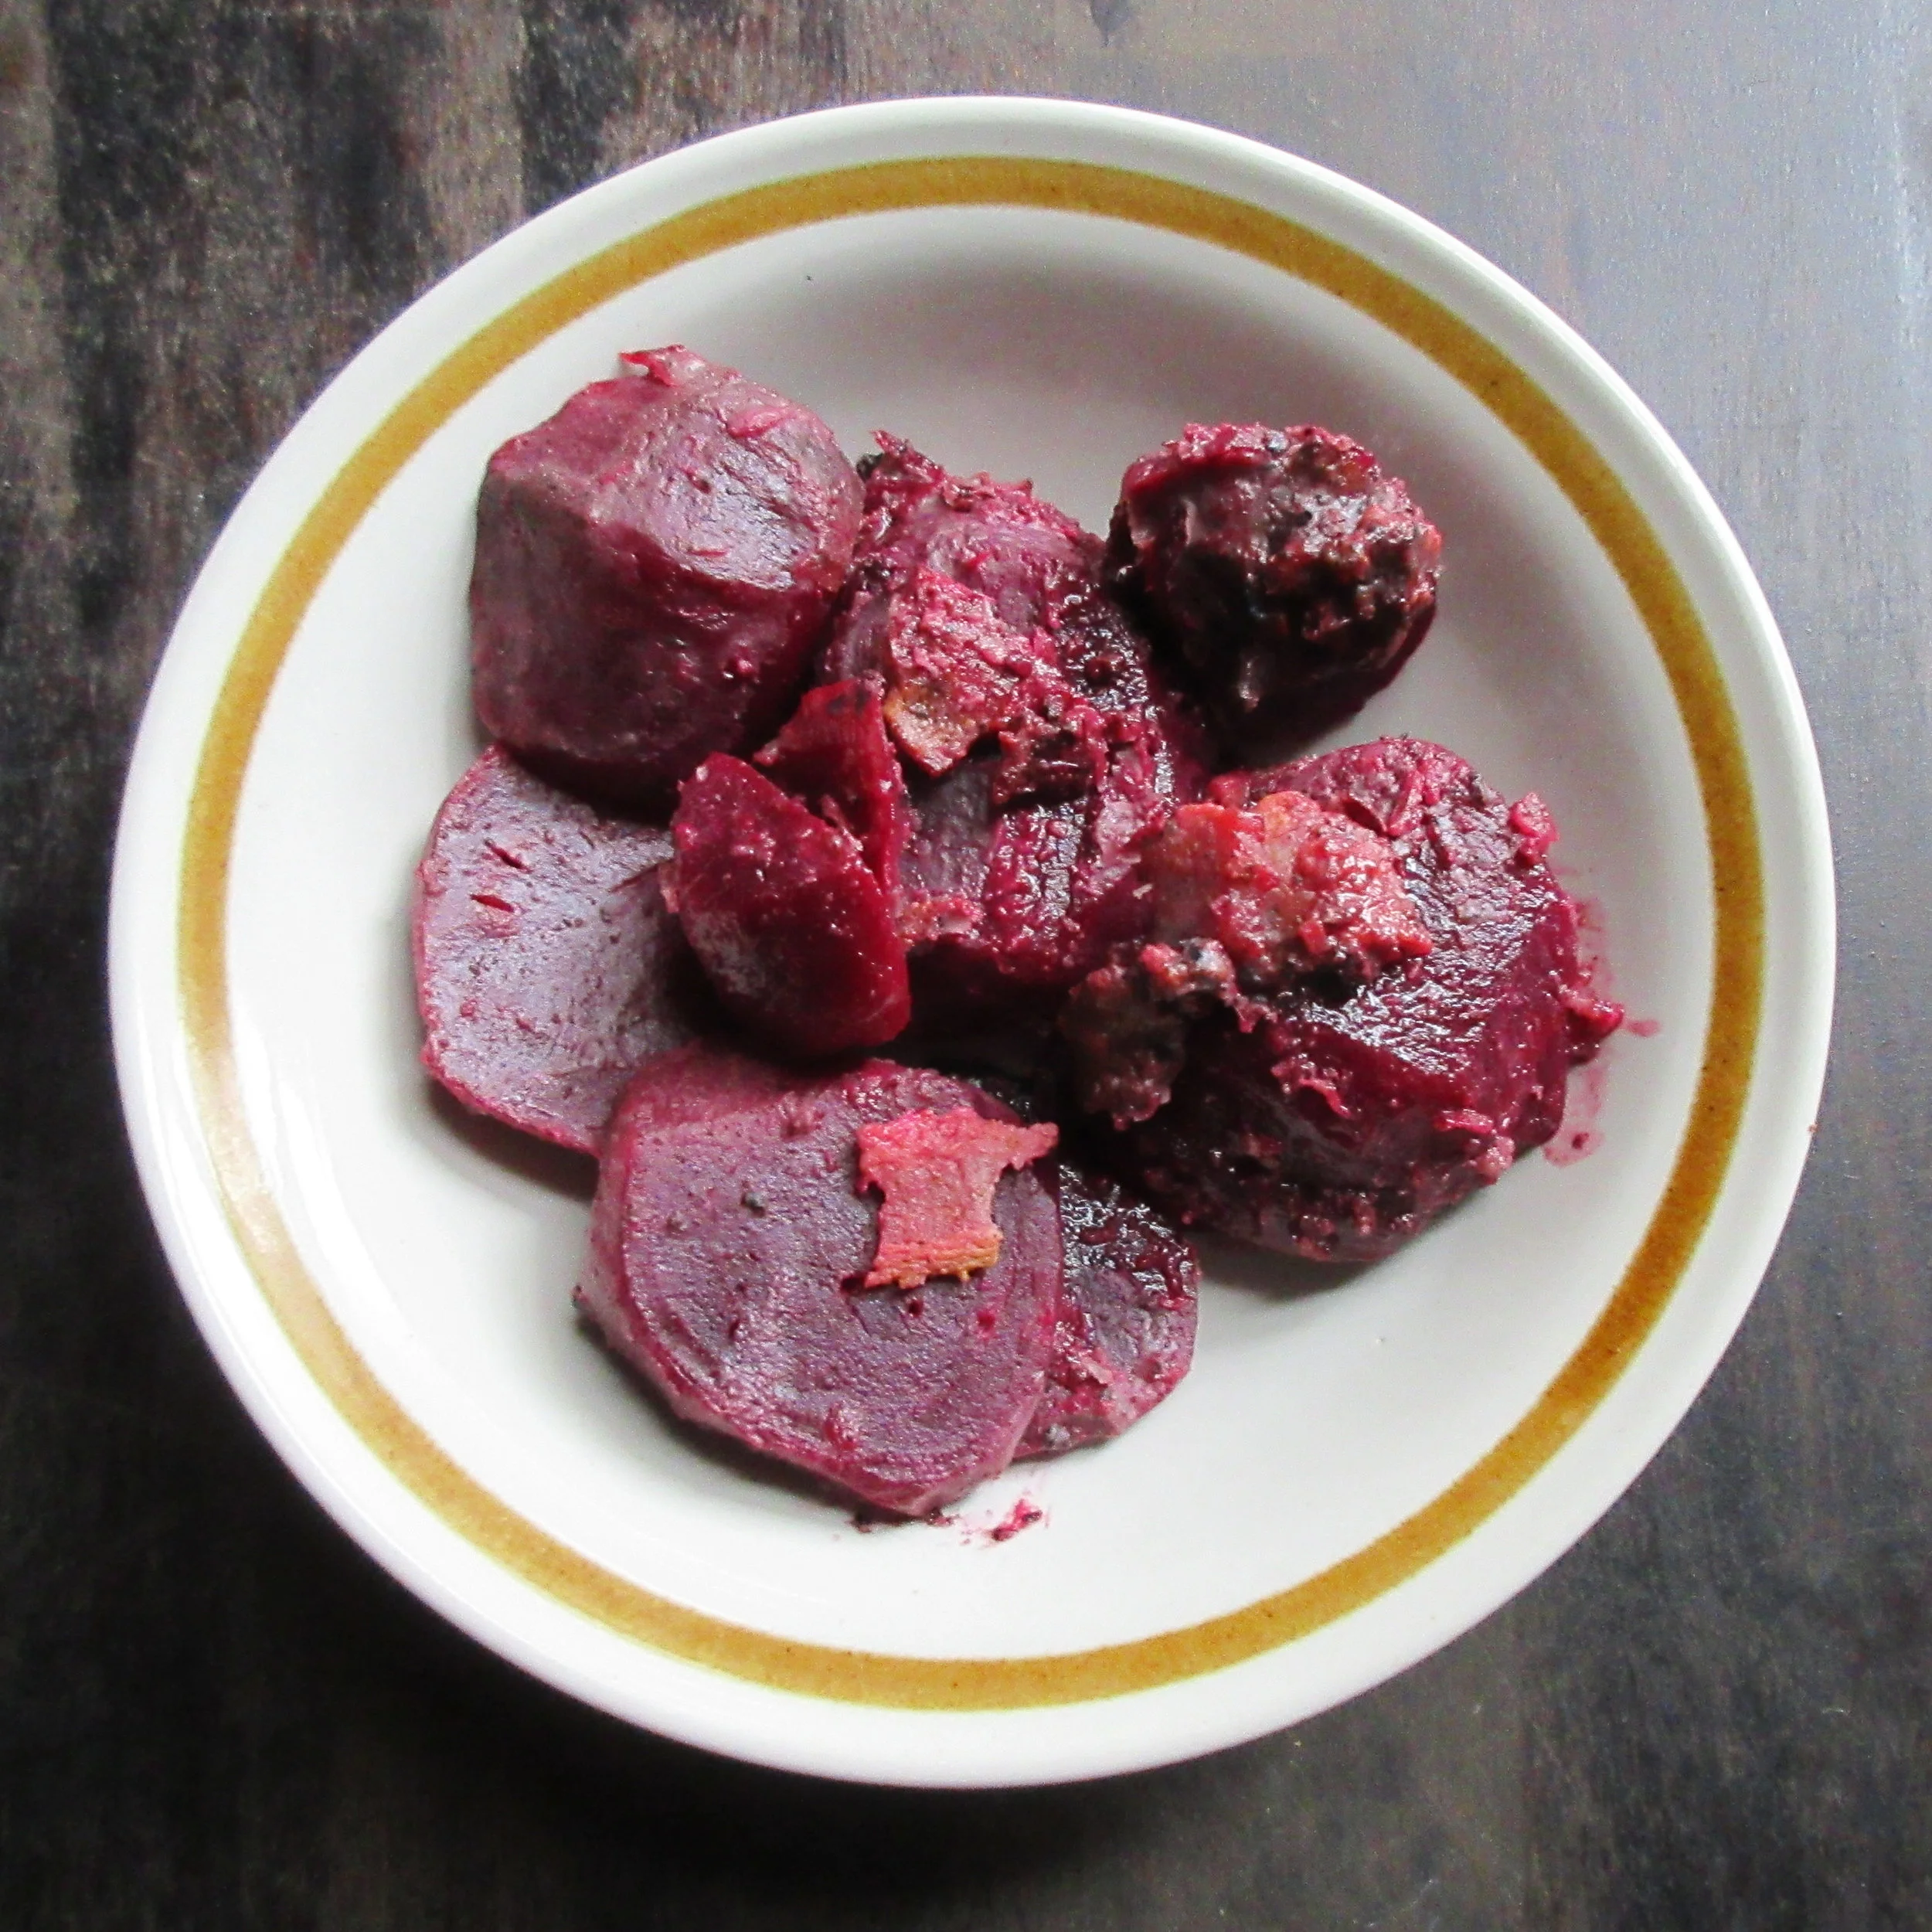
I'm not a fan of the taste of beets, although I have evolved enough to abide roasted and pickled beets on occasion. I liked Piquant Beets, though, and I can't say that I've ever thought that about a recipe made with boiled beets! This recipe takes those (in my mind at least) repulsive boiled beets and jazzes them up with horseradish, honey, lemon juice and...wait for it...bacon. Steve's response to tasting this dish was, "I don't even mind the beets", which is probably the highest praise he could give to this recipe. We can thank Elaine Collett and Mary-Etta Macpherson, who compiled the 1965 Canadian classic The Chatelaine Cookbook, for this culinary miracle.

You'll find this recipe in:
The Chatelaine Cookbook
Toronto, 1965
By: Elaine Collett
Edited by: Mary-Etta Macpherson
PIQUANT BEETS
3 slices side bacon, diced
2 tsp prepared horseradish
2 tsp honey
2 tsp lemon juice
4 cups sliced cooked beets
½ tsp salt
Sauté bacon in saucepan until crisp. Turn heat low and add next three ingredients. Stir in beets, sprinkle with salt, cover; let heat thoroughly. Serves 8.


My thoughts:
To cook the beets, I sliced off the ends and boiled in a pot of water. Begin this process well in advance, because it took 1 hour and 15 minutes until the beets were cooked. After I drained them, I submerged them in cold water until they were cool enough to handle and they were easy to peel and slice. For those of you who are accustomed to measuring beets by weight, 4 cups of cooked and sliced beets amounts to 650 g.
I did ere on the side of accuracy and initially only added the 3 slices of diced bacon in the recipe. It was good, but I have to admit that as I was eating the beets, I did sprinkle more bacon on top and it was even better.

I'm not a fan of the taste of beets, although I have evolved enough to abide roasted and pickled beets on occasion. I liked Piquant Beets, though, and I can't say that I've ever thought that about a recipe made with boiled beets! This recipe takes those (in my mind at least) repulsive boiled beets and jazzes them up with horseradish, honey, lemon juice and...wait for it...bacon. Steve's response to tasting this dish was, "I don't even mind the beets", which is probably the highest praise he could give to this recipe.
We can thank Elaine Collett and Mary-Etta Macpherson, who compiled the 1965 Canadian classic The Chatelaine Cookbook, for this culinary miracle. Chatelaine magazine is a Canadian woman's magazine that began publication in 1928, and is still a top magazine in Canada today. The book jacket explains that the editors narrowed down the contents of the book to roughly 1600 recipes from the over 10, 000 recipes that appeared in Chatelaine in its firsts 30 years of publication.
In her Introduction, Elaine Collett credits the collective effort responsible for the cookbook: "The old saying 'Too many cooks spoil the broth' just must be wrong. Because this first (and only) CHATELAINE Cookbook is the work of hundreds of Canadian cooks. For over thirty years in our CHATELAINE Institute kitchens we have created recipes for the homemakers of Canada and we have been guided in our planning by your letters, your questions and by the recipes you have shared with us year by year in our Family Favourites Recipe Contests."
I lucked out and found my copy at my favourite place to find vintage cookbooks in Hamilton, Bibles for Missions Thrift Store. I was lucky because not only is my copy in great condition, but it has the first owner's name and address written inside, and also came along with bonus newspaper clippings and handwritten recipes, as well as a bandaid and a plastic bag that must have been used as bookmarks. It's a treasure trove!
I have enough ideas for blog posts to tide me over until sometime in 2020 right now, but you know you're going to see at least one of those clipped and handwritten recipes on here at some point.
Want to read more?
Read the latest from Chatelaine Magazine: https://www.chatelaine.com/
The Special Collections & Archives at the University of Waterloo (my alma mater) has a blog post with a succinct summary of the editorial focus of the magazine over the years and some scans from a 1971 edition of Chatelaine.
There's a book written by Valerie J. Korinek about this era of the magazine called Roughing it in the Suburbs: Reading Chatelaine Magazine in the Fifties and Sixties
I normally link to digitally-archived copy of the featured cookbook so you're able to read the book yourself, but I couldn't find one this time around. Let me know if you know where to find a scanned copy online – I'd love to link to it
To Fry Fish
To Fry Fish is found in A Plain Cookery Book for the Working Classes, written by Charles Elmé Francatelli in London in 1852. Fortunately, I had some bacon fat in my fridge, so that's what I used to fry my fish. Let me tell you, fish dredged in flour and fried in bacon fat is scrumptious, and so were the fried onions that we ate on the side. I paired the fish with Sharp Sauce for Broiled Meats from the same cookbook. The main component of this sauce is a variety of pickles and it reminds of relish, albeit without the sweetness. I round out this blog post by delving a little bit into the Fish Slice, a serving utensil for fish.

You'll find this recipe in:
A Plain Cookery Book for the Working Classes
By Charles Elmé Francatelli
”Late Maître d’hôtel and Chief Cook to Her Majesty the Queen Victoria”
London, 1852
The Sauce:
'Sharp Sauce for Broiled Meats' goes very well with the fried fish recipe (which you'll find below). The main component of this sauce is a variety of pickles and it reminds of relish, albeit without the sweetness. I ended up with a double batch of this sauce, so before it was finished, I had eaten it with fish, sausages, chicken and pierogies. It paired well with everything, but it was especially delicious with the sausages.
No. 21. SHARP SAUCE FOR BROILED MEATS
Chop fine an onion and a pennyworth of mixed pickles; put these into a saucepan with a half-a-gill of vinegar, a tea-spoonful of mustard, a small bit of butter, a large table-spoonful of bread-raspings, and pepper and salt to season; boil all together on the fire for at least six minutes; then add a gill of water and allow the sauce to boil again for ten minutes longer. The sauce will give an appetizing relish to the coarsest meats or fish when broiled or fried, and also when you are intending to make any cold meat into hash or stew. In the latter case, the quantity of water and raspings must be doubled.


My Recipe:
1 small onion
1 ¼ cups mixed pickles – 225 g
(I used pickled green beans, cucumbers and red peppers)
⅔ cup apple cider vinegar – 156 mL
1 tsp mustard powder
1 tbsp butter
2 heaping tbsp breadcrumbs (this is double the historic recipe)
Salt and pepper to taste
1 ¼ cups water – 300 mL
Honey to taste (optional – not in the historic recipe)
Finely chop the onion and the pickles. Put in a small saucepan with the vinegar, mustard powder, butter, breadcrumbs, salt and pepper. Simmer over medium for 5-10 minutes, then add the water. Allow to bubble for at least another 10 minutes. Add honey to taste, if desired.
My thoughts:
A big issue with this recipe is the measurement of using "a pennyworth of mixed pickles", which literally means "an amount of pickles worth a penny" and is not very instructive for those of us living today! I just guessed and I think it was a good ratio for pulling an amount out of the air. I did find that I needed to double the breadcrumbs to thicken the liquid enough for a sauce, and maybe I wouldn't have had to if I had put more chopped pickles in the pot.
I'm usually a stickler for historical accuracy, but I HAD to add a bit of honey to this recipe to cut the edge from the extreme vinegariness of this sauce! When I sampled it from a spoon when it was cooking, I would immediately start coughing: not a desirable trait for a sauce. I didn't add enough honey to sweeten the sauce , just enough so I could actually eat it. You may like it without the honey, though.

The Fish
Fortunately, I had some bacon fat from when I made Piquant Beets, so that's what I used for frying my fish. Let me tell you, fish dredged in flour and fried in bacon fat is scrumptious, and so were the fried onions that we ate on the side.
No. 121. TO FRY FISH.
For this purpose you must have some kind of fat. Either lard, butter, or dripping fat, would be excellent; but they must be bought, and cost a little money. True; but then, if you can afford yourselves a bit of meat occasionally, by dint of good thrift you should save the fat from the boiled meat, or the dripping from your baked meats, and thus furnish yourselves with fat for frying your fish twice a-week; and let me tell you that by introducing fish as an occasional part of your daily food, your health, as well as your pockets would feel the benefit of such a symptom of economy. Suppose, then, that you have bought some cheap kind of fish, such as herrings, large flounders, plaice, small soles, or any other small or flat fish. First of all, let the fish be washed and wiped dry, and rubbed all over with a little flour. Next, put about two ounces of fat, free from water, in a frying-pan on the fire, and, as soon as it us hot, put the fish in to fry, one or two at a time, according to their size, as, unless they have room enough in the frying-pan they do not fry well; this must be carefully attended to, and when the fish is a little browned on one side, turn it over with a tin fish-slice, that it may be fried on the other side also; and, as soon as done, place the fried fish on a dish and then fry the others. When all your fish are fried, with what fat remains in the pan fry some onions, and place the round the fish, and, by way of adding an extra relish to your meal, just throw a few table-spoonfuls of vinegar, some pepper and salt, into the frying-pan, give it a boil up, and pour this round the fish.


My Recipe:
Fish fillets – herring, flounder, sole or plaice
Flour
Butter, oil or fat (I used bacon fat)
Onions
Vinegar (I used apple cider vinegar)
Salt and pepper
1) Chop the onions – how much depends on your love of onions and how many people you're serving. I cut up 3 medium & small onions for 6 sole fillets and it was a good amount for us.
2) Rinse the fillets with water and pat dry with a tea towel or paper towels. Lightly coat the fish in flour.
3) Warm up the butter, oil or fat in a frying pan over medium heat, then add the fish. Flip over when slightly browned on the bottom. When nicely browned on both sides, put the fillets on a plate to the side and fry the remaining fillets, adding butter/oil/fat as necessary.
4) When the fish is done, fry the onions in the same pan. Serve the onions on the side of the fish.
5) Remove the frying pan from the heat, then pour in some vinegar into the same pan. Stir, add salt and pepper and pour on top of the fish.

Our historic To Fry Fish recipe instructs us "and when the fish is a little browned on one side, turn it over with a tin fish-slice, that it may be fried on the other side also". I've never encountered anyone calling a fish slice by that name in Canada, but today a fish slice is considered an extra long or wide flipper with drainage holes or slots.

My understanding is that fish slices of this era were usually made of silver, not tin, and were used for serving, not flipping. The Encyclopaedic Dictionary (1887) describes a fish-slice as "A broad-bladed silver knife used for serving fish at table. The trowel-shaped blade enables a portion of fish to be removed from the backbone without breaking it into unsightly fragments".
Cassel's Household Guide (1869) delves even further into fish slices: "A silver or plated slice or knife...is used for this, as for other kinds of fish, because steel spoils the flavour of fish. A knife needs to be broad to divide the flakes without breaking them. A fish-knife has a sharp curved point to disengage the bones, and is perforated with holes to allow any water retained about the fish to run off. A fork is not used in helping fish." There's also very specific instructions for using a fish slice to carve different types of fish, so if learning that skill interests you, have a look at Cassel's Household Guide for some fish-carving tips fit for a Butler.
Nineteenth-century silver fish slices are gorgeous, often featuring the shape of a fish and intricately designed perforations. I had a look at the Royal Ontario Museum's online collections and found four beautiful Canadian examples of Fish Slices created from c.1815-1840 in Montreal and Quebec City, crafted by Nelson Walker, Laurent Amiot, James Ellis and Henri Polonceau; and I'll leave you with this little slice of fish-slice eye candy.


Read the Cookbook:


Nut and Spinach Loaf
Nut and Spinach Loaf is found in the "High-Protein Non-Meat Dishes" chapter of the 1929 Physical Culture Cook Book, written by fitness and health guru Bernarr MacFadden. This vegetarian loaf holds together well when its being formed, but doesn't slice well. Nevertheless, it is tasty and satisfying and I'd make it again! Bernarr MacFadden spoke out passionately against white bread, so I made my own whole-grain breadcrumbs for this recipe, and paired the loaf with a Tomato Sauce, which is thick sauce that tastes a bit like ketchup.

You'll find these recipes in:
Physical Culture Cook Book
By Bernarr MacFadden
With the collaboration of Milo Hastings
New York City, 1929


Making Bread Crumbs (Optional)
I opted to make my own breadcrumbs for the Nut and Spinach Loaf out of my whole-grain sprouted bread because of our cookbook author's opinions about white bread and flour. Let's just say that he was not a fan! I wasn't able to find pre-made whole wheat bread crumbs, so that's why I went with DIY. Conveniently, Bernarr MacFadden also included a recipe for Bread Crumbs in the Physical Culture Cookbook. If this extra prep work doesn’t appeal to you, feel free to skip this step and use purchased breadcrumbs in your Nut & Spinach Loaf.
Historic Recipe:
TO PREPARE BREAD CRUMBS
Cut stale bread into slices. Put into oven not hot enough to toast but merely to thoroughly dry them. When brittle, remove and pound fine, or put through a coarsely-set hand-mill. Crackers can be crumbled fine enough with the hands, but in the case of bread grinding is easier.

My Recipe:
A good guideline for making your own breadcrumbs is that you'll end up with ¼ - ⅓ cup of breadcrumbs per slice of bread. Since we'll need a bit more than 1 cup for this recipe, make sure that you use at least 5 slices. Since my bread slices were on the small side, I used 7 slices and had a bit left over.
Put your bread on a cookie sheet and place in the oven. I started with 175F (80C) for 15 minutes without much effect, so I increased my temperature to 275F (135C) and they were dried out after an additional 20 minutes. Do yourself a favour and set your oven to 275F the entire time!
Cut the bread into smaller pieces and pulverize into crumbs in a blender.


Nut and Spinach Loaf
Nut and Spinach Loaf is found in the "High-Protein Non-Meat Dishes" chapter of the Physical Culture Cook Book. This vegetarian loaf holds together well when its being formed, but doesn't slice well. Nevertheless, it is tasty and satisfying and I'd make it again! This loaf is on the small side, so if you’re preparing a meal for more than a few people, I’d make a double recipe.
Historic Recipe:
NUT AND SPINACH LOAF
1 cup chopped walnuts
½ lb spinach
1 egg
1 ounce finely chopped onion
1 cups bread-crumbs
Any desired seasoning
Cook the spinach in the double boiler with very little water, and chop fine. Add the nuts, onion and seasoning, the beaten egg, and lastly the bread-crumbs. Mix well and let stand for a few minutes. Make into a loaf and roll in bread-crumbs. Brush with melted butter, and bake twenty-five to thirty minutes. Serve with a savoury sauce.

My Recipe:
10 cups chopped spinach – 225 g
1 cup chopped walnuts - 115g
⅓ cup finely chopped onions – 30g
½ tsp salt
1 tsp black pepper
1 egg
1 cup bread crumbs - 85g
Additional bread crumbs for rolling (1/4 – 1/3 cup)
Butter (roughly 2 tbsp)
1) Chop the spinach, then put in a large pot with a small amount of water (I put 2 cups of water in with the 10 cups of spinach). Steam until wilted, then drain. Thoroughly remove the water by pressing the spinach against a mesh sieve with a spatula.
2) Chop the onion and chop the walnuts into small pieces in a blender. Stir the spinach, nuts, onion, salt, pepper, egg and bread crumbs in a bowl until well combined. Put the bowl in the fridge for a while to allow the mixture to set.
3) Preheat the oven to 325F-350F (165C-175C). Melt butter and gather more bread crumbs. Remove the bowl from the fridge once cooled, then use your hands to form it into a loaf shape. Gently roll the loaf in the breadcrumbs, then brush the outside of the loaf with the melted butter. This loaf was baked after 35 minutes at 325F, but turn the temperature up to 350F and it'll be done sooner.


Tomato Sauce
Since the Nut and Spinach Loaf Recipe suggests that you serve it with a "savoury sauce", I chose this Tomato Sauce recipe because I was intrigued by the cloves and wondered what it would taste like. The answer is that it tastes a tiny bit like a very thick ketchup!
With the suggested measurements, this sauce has the consistency of a paste so if you'd like a runnier sauce, I suggest either cutting the butter & flour or adding more crushed tomatoes. I used crushed tomatoes, so I didn't need to carry out the step of straining out the seeds mentioned in the historic recipe. This meant, unfortunately, that I needed to look through the sauce and remove all twelve whole cloves by hand, which was a pain. If you don't want to do this step, why not skip the whole cloves and add a shake or two of ground cloves when you add the salt and pepper?
Historic Recipe:
TOMATO SAUCE
1 cup canned tomatoes
2 tablespoons butter
1 onion
1 dozen cloves
Salt and pepper
2 tablespoons flour
Cook the tomato, onion and cloves ten minutes. Heat the butter in a small frying-pan, and add the flour. Stir over the fire until smooth and brown; then add the tomatoes. Cook two or three minutes. Season, then run through a strainer fine enough to keep back the seeds.

My Recipe:
1 cup crushed or strained tomatoes
½ cup chopped onion
1 dozen whole cloves, or a shake or two of ground cloves
2 tbsp butter
2 tbsp flour
Salt and pepper to taste
1) In a small pot, add the tomato, onion and whole cloves and simmer for about 10 minutes. If you're not using whole cloves, just add the tomato and onion for now and add ground cloves later on when you add salt and pepper at the end of the recipe.
2) Remove the whole cloves from the tomatoes. In another pot or pan over medium-low heat, melt the butter and stir in the flour. Stir this mixture until it bubbles, then slowly add the tomato and onions, stirring well, until it is all combined. Add salt, pepper and ground cloves to taste.

Bernarr MacFadden and Physical Culture
Physical Culture was a health, wellness and physical fitness magazine that was published from 1899-1955. Its editor and publisher, Bernarr MacFadden was a charismatic and passionate man who was not afraid of sharing his wellness ideology. I like to think that the story of his name change sums up his personality well: he changed his name from Bernard McFadden when he was 26 years old because he thought that MacFadden sounded stronger than plan ol' McFadden. He altered his first name to Bernarr because he thought it sounded like a lion's roar: BERNARR!
In his preface to the Physical Culture Cook Book, MacFadden writes that "We advocated natural foods in contrast to the artificial foods, obviously made to please the eye and palate, and with no comprehension of their actual nutritional worth. We believed that science could and should find out what was the correct diet for man and what foods would best support life and health. In the absence of positive scientific knowledge, we taught that natural foods and natural flavours were more to be trusted than artificial products and artificial flavours created without any knowledge as to their actual worth to the human body."
In the Physical Culture Cook Book, there are chapters outlining the Nut and Fruit Diet, the Raw Diet, the Vegetarian Diet and The Mixed Diet (eating meat in moderation). Other chapters have a look at eating only when you are hungry, the benefits of fully chewing your food, whether or not you should drink water with meals and how to detect adulteration in foods like milk, olive oil and coffee.


Left to right: Bernarr MacFadden posing as Michalengelo’s David in 1905, a portrait of Bernarr MacFadden in the 1929 edition of the Physical Culture Cook Book, and the September 1934 Physical Culture magazine cover
I don't think anyone could truthfully say the Bernarr MacFadden's life was boring. He advocated loudly for fasting, eating less meat and physical exercise for both men and women and opposed alcohol, tobacco, processed foods, white bread, pharmaceutical medications, vaccinations, corsets, high heels and shoes in general. He opened health spas, restaurants, hotels and ran a large publishing empire. He once declared his candidacy as the President of the United States. When he turned 81, he began an annual tradition of parachuting from an airplane into a river each year on his birthday.

In the early 1900s, MacFadden began organizing bodybuilding competitions for both men and women. This video (filmed by Thomas Edison) showcases Beatrice Marshall and Albert Treloar, the winners of the Physical Culture Exhibition in Madision Square Garden in 1904:
Want to read more? Read Physical Culture magazine online, courtesy of Ball State University Library. Bernarr MacFadden also has his own website at bernarrmacfadden.com
Read the Cookbook:


To restore from stroke of lightning
Cookbooks used to not only be a resource for learning how to prepare food, but would also contain medicinal recipes and household tips. I’ve been wanting to explore other facets of cookbooks, so to start with, I chose my favourite remedy, To Restore from Stroke of Lightning. This “cure” is my favourite because it makes me chuckle every single time, no matter how many times I read it.
This helpful tip is found in the Medicinal Receipts chapter in The Home Cookbook, published in 1877, which was Canada's first fund-raising community cookbook and the best selling Canadian cookbook in the 19th-century. I had the vague thought that I had an ancestor who was killed by lightning, so I did some research and found out who it was! In this blog post, you’ll read the story of my Great-Great-Great-Great Grandfather’s death, along with a few other tales from that branch of my family tree.

The first photograph taken of lightning in 1882 by William Jennings, from the collections of The Franklin Institute
Found in:
The Home Cook Book
Toronto, 1877
TO RESTORE FROM STROKE OF LIGHTNING. - Shower with cold water for two hours; if the patient does not show signs of life, put salt in the water, and continue to shower an hour longer.

Cookbooks used to not only be a resource for learning how to prepare food, but would also contain medicinal recipes and household tips. I’ve been wanting to explore other facets of cookbooks, so to start with, I chose my favourite remedy, To Restore from Stroke of Lightning. This “cure” is my favourite because it makes me chuckle every single time, no matter how many times I read it.
This helpful tip is found in the Medicinal Receipts chapter in The Home Cookbook, published in 1877. This cookbook was "Compiled by recipes contributed by ladies of Toronto and other cities and towns: Published for the benefit of the Hospital for Sick Children", and was Canada's first fund-raising community cookbook. It became the best selling Canadian cookbook in the 19th-century, selling over 100, 000 copies by 1885. Most of the recipes & suggestions bear the name of its contributor, but somehow this suggestion remains unclaimed.
This would have been a very short blog post, because I don't have much else to say about this technique for reviving someone after being hit by lightning other than "don't try this at home" and to wonder how much adding salt to the water would improve the situation. The blog post would end here, except that I had this vague thought:
Don't I have an ancestor who was killed by a lightning strike?
It turns out that I do! I did a little bit of digging and would like to introduce you to my Great-Great-Great-Great-Grandfather, John Yake Sr.

Since John Yake Sr. died in the year 1840, I don't have any photographs of him to show you, but I can show you this photograph of his last home on Tenth Line near Main Street in Stouffville, Ontario. It was in this home that he may or may not have been hit by lightning.
The story of his death varies according to the account. In all cases, John was with his fifteenth & youngest child, Anna, who was about 5 years old at the time. John and Anna may have been walking in a field when the lightning hit. Some stories specify that they were walking in a corn field. John also may have been comforting Anna on his knee in their home, potentially in the second room on their house's main floor, and Anna may have been knocked under a bed by the lightning. In all the stories, Anna survives the lightning strike and her father was killed.
This would have been the end of this blog post, but...
...then I had a closer look at his fifteen children, born between 1808 and 1835. The first extraordinary fact is that all fifteen children made it to adulthood! The second slightly unsettling fact is that four of the fifteen (including my Great-Great-Great Grandfather John Yake Jr.) married members of the Kester family. Then I had a closer look at the years of their births and deaths. Rachel Yake, #10, was the sibling who passed away at the youngest age: 58 years old, which is remarkable for that time period. Jacob (#1) and Catherine (#14) lived to be 94 and 90 years old. The second-born Adam Yake lived to be 105, his brother David (#3) lived until he was 107 and amazingly the thirteenth child, Elizabeth Yake, lived to see her 110th birthday.
This blog post could have ended on this impressive note, but I continued to research...
...and found out that John Yake Sr. and his son Hiram Yake were Innkeepers. John Yake Sr. operated a hotel next to his home on the southeast corner of Main Street and Tenth Line in Stouffville. After his death, his son Hiram took over the enterprise. Hiram was a go-getter, let's just say. He was a tanner by trade, a farmer, a landlord, an innkeeper and also owned a shoemaking shop.
In 1854, Hiram purchased the building across the street on the southwest corner of Main Street and Tenth Line and turned that building into the second Yake Hotel. His father's hotel building was turned into a tinsmith's shop on the main floor with Hiram Yake's shoemaking shop on the second floor, where he employed twelve men to cobble shoes from the leather treated at his tannery. After the tinsmith & shoemaking shops, the first Yake hotel building housed general & dry goods stores and was used for storage before it was demolished in 1938.


Here we have an undated photograph of the second Yake Hotel, along with a screen capture from Google maps of the same building today. It looks like the building is used as an apartment building these days.
I found some rose-coloured stories about Hiram Yake nestled in the family histories. These Yake histories recount that Hiram went by the nickname Old King Barney and that he claimed that everything he touched turned to gold. Hiram is reputed to not have smoked or drank himself, and only sold these vices to others as a part of his livelihood. The words 'determined', 'naturally generous' and 'ruled the roost' are used to describe him. It is also claimed that Hiram always had a second dinner table ready in his home to feed anyone who was hungry, and that he always gave $20 in church collections.
With two hotels and plenty of family living nearby, it's not a surprise that the corner of Main Street and Tenth Line in Stouffville became known as Yake's Corners. But it also had another nickname: Brimstone Point.
In 1895, the Stouffville Free Press ran an article about the good ol' days earlier in the nineteenth century: "Yake's corner became known by the somewhat suggestive, yet euphonious name of Brimstone Point. Cock-fighting and horse-racing were familiar village sports. It was not unusual to close the week with a 'sport' and settle the accounts at the taverns. The Justice of the Peace generally gave a final settlement by disposing of several cases in his 'court' on Monday morning."
This article doesn't articulate that it was specifically the Yake family who ran the cock fights, horse races and the gambling that went along with it. We could assume that it might have been other unsavoury residents of Yake's Corners/Brimstone Point who were responsible. Or it could have been another business opportunity seized by Hiram to find his gold at the end of the rainbow. If you know the answer, I'd be curious to find out!
The hotel business was booming until the 1870s, when the hotel closed and Hiram's son Calvin turned the hotel building into a family home. In total, the Yake hotel building was in the family for 114 years before it moved on to other hands.
This blog post could have also ended here...
...but I thought there was a loose end that needed some tidying up. What happened to 5 year old Anna Yake, who was with her father when he was killed by lightning?
Looking into Anna Yake's life was complicated by the fact that there's a Japanese skincare, make-up and perfume line called ANNAYAKE. Anna seems to have gone by Annie at least part of the time, and she married Abraham Lehman who is described as being a Labourer, Carpenter and a Mennonite German Butcher in directories and census records.
Annie and Abraham lived in Altona, Ontario, which is very close to Yake's Corners and they had 12 children together. Alice and Charles passed away at 4 and 1 years old, and twins were stillborn. Willis Lehman never married & lived to be 93 years old, but his 7 brothers and sisters who married produced 31 grandchildren for Anna and Abraham.
In 1877, the family moved north to Manitoulin Island on Lake Superior. In the 1881 census, Abraham is listed as a Baptist Farmer of American Dutch origin, and all 8 children are living with them at that time, from the ages of 4 to 24. Abraham died in 1890 when he was 57 years old. A year later, Annie, her 23 year old son Willis, and her two youngest children Jesse and Nancy are living together on the family farm. Anna passed away a few week's shy of her 74th birthday in 1909 and she is buried with her husband in Mindemoya, Ontario on Manitoulin Island.
I do believe that this blog post has reached its end...
...but if you are a distant Yake relative and have anything you'd like to add, please comment below!
Read the Cookbook:

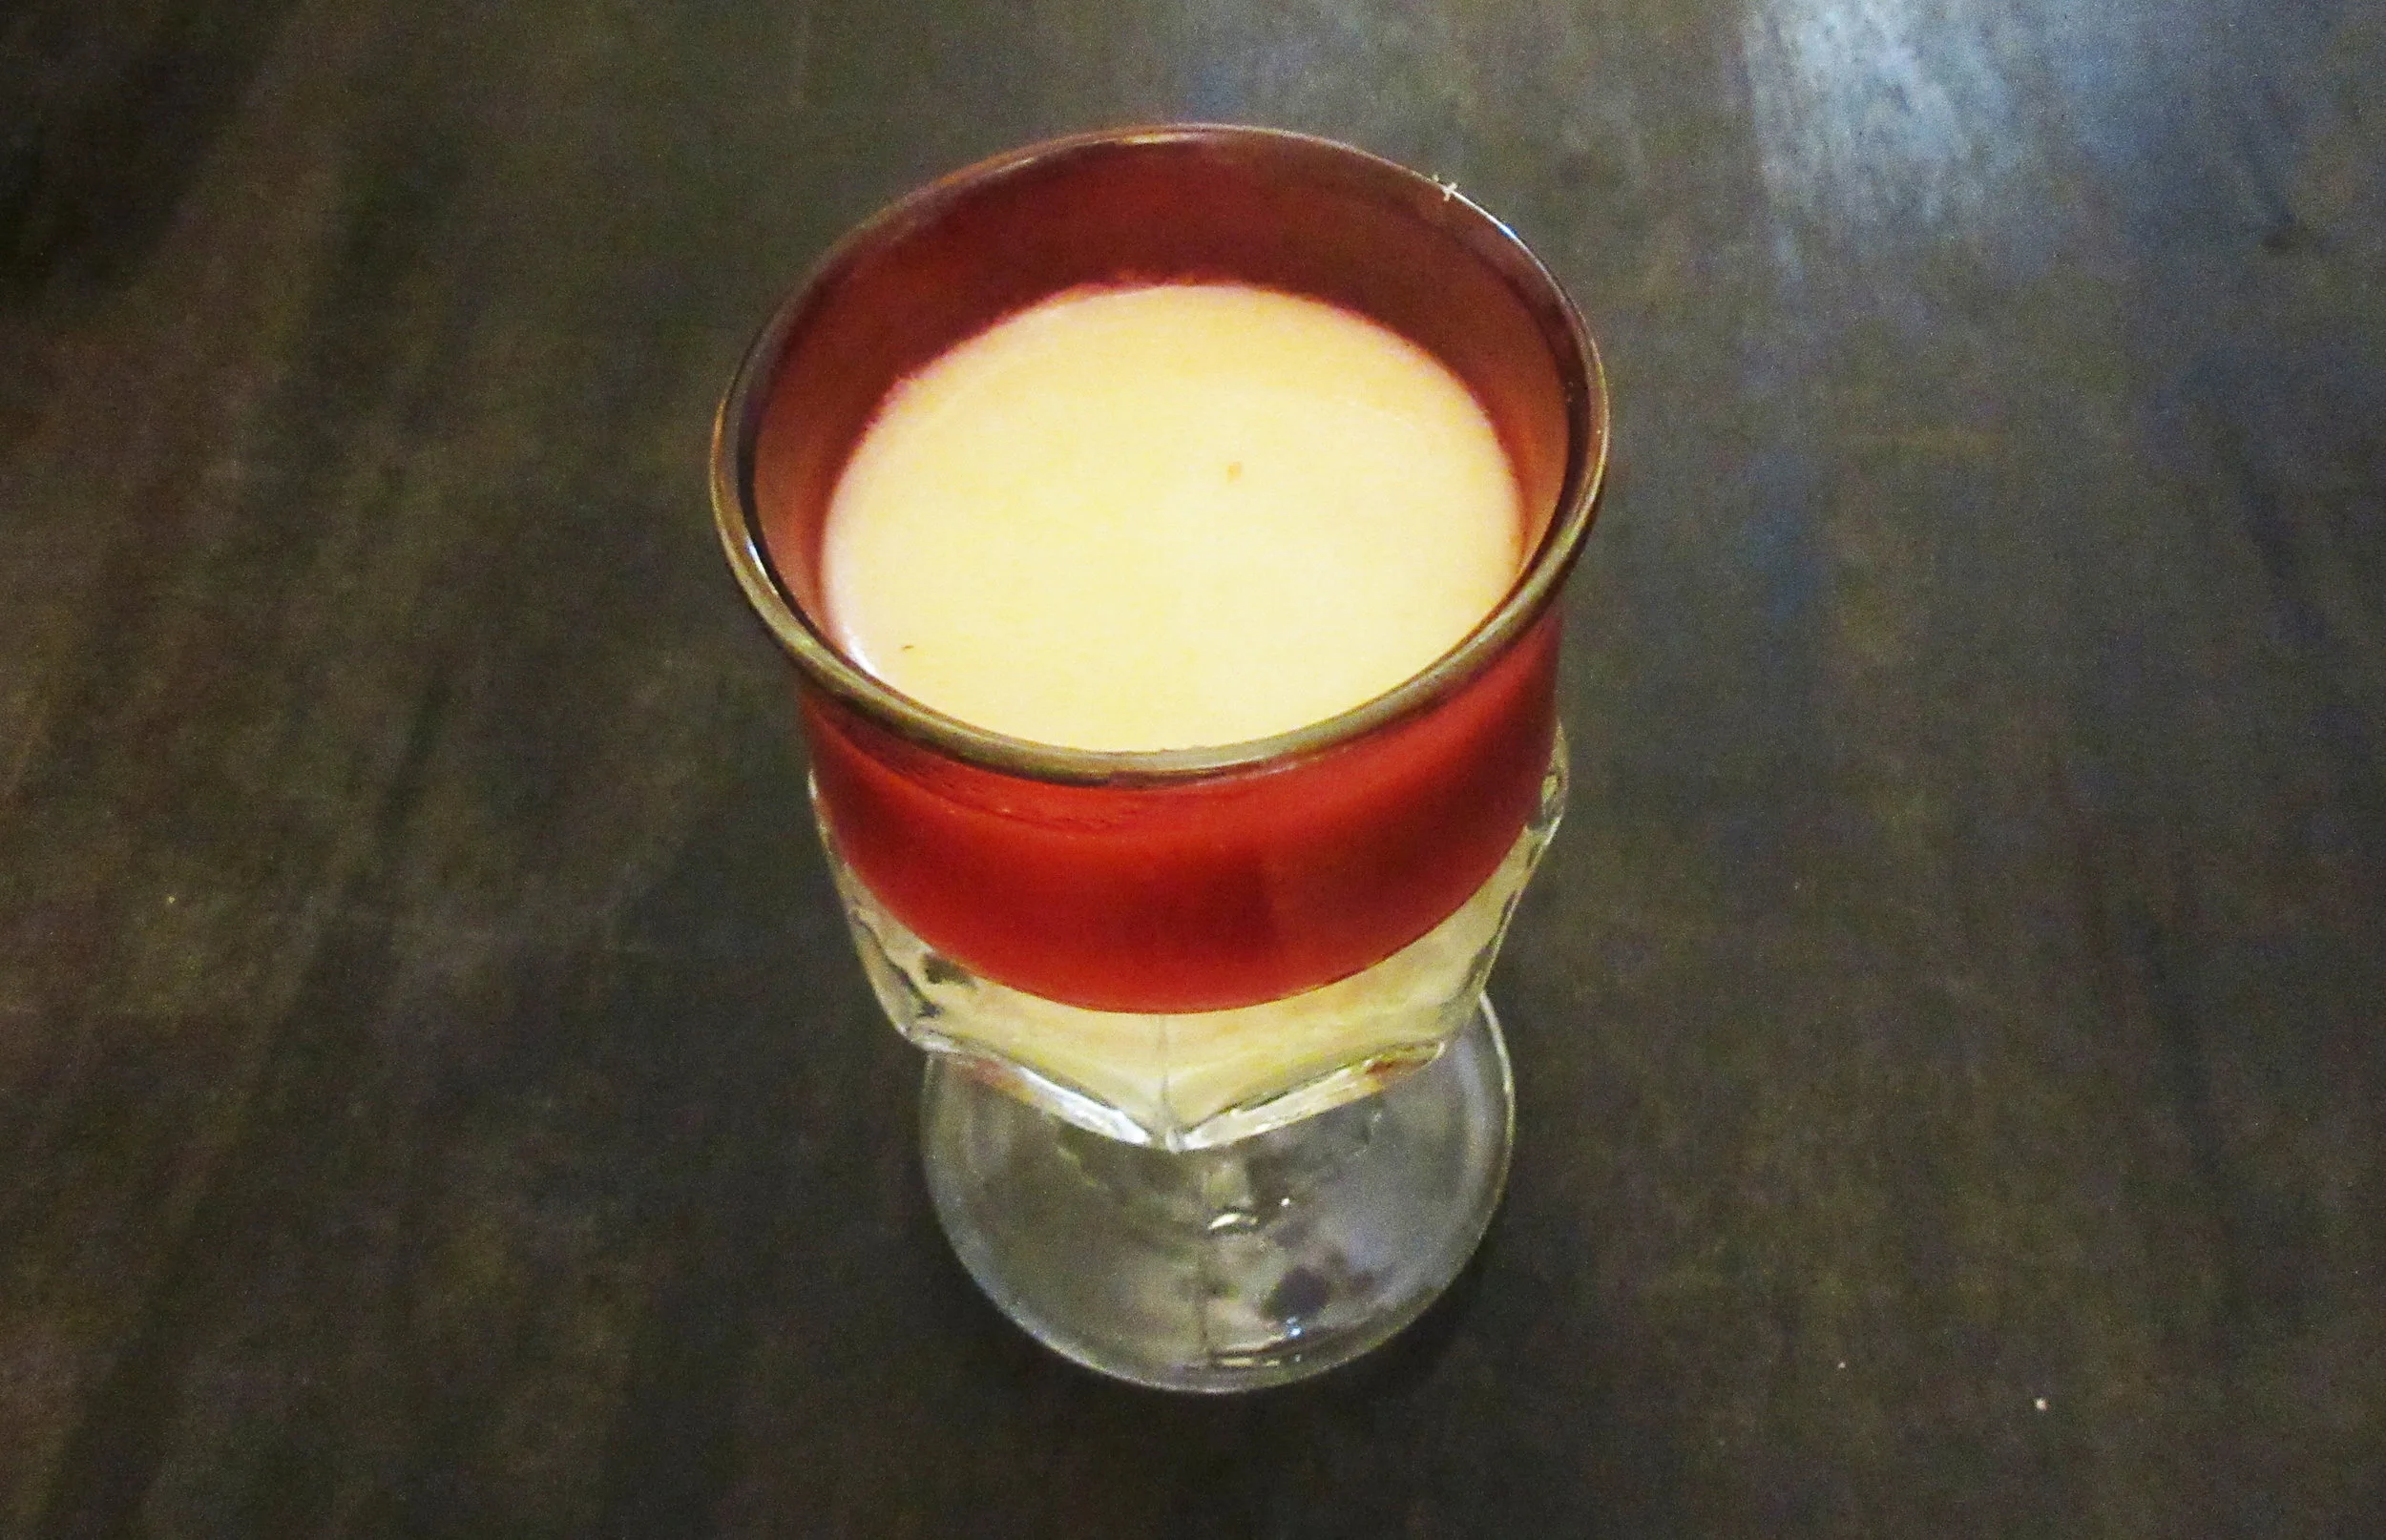
Cawdel of Almaund Mylk
Cawdel of Almaund Mylk is a rather boozy and thick warm beverage that is slightly silty, made with white wine, ground almonds, sugar and ginger. This is a drink that you'll want to sip and be prepared for a strong alcohol taste, but if you are vegan and miss drinking eggnog, this is a recipe that you may want to try out.
So far, Cawdel of Almaund Mylk is the oldest recipe I've ever made on this blog. It is found in The Forme of Cury, which is a scroll of recipes written by the Master-Cooks of King Richard II in the 1390s. This is my first foray into Medieval Cookery, so I was surprised that many of its recipes contain almond milk! I did some research and found out that almond milk was a favourite of the British upper class in that era because there were many days in the Christian calendar when eating dairy was forbidden.
You’ll find this recipe in:
The Forme of Cury
Compiled by the Master-Cooks of King Richard II
England, 1390s
Historic Recipe:
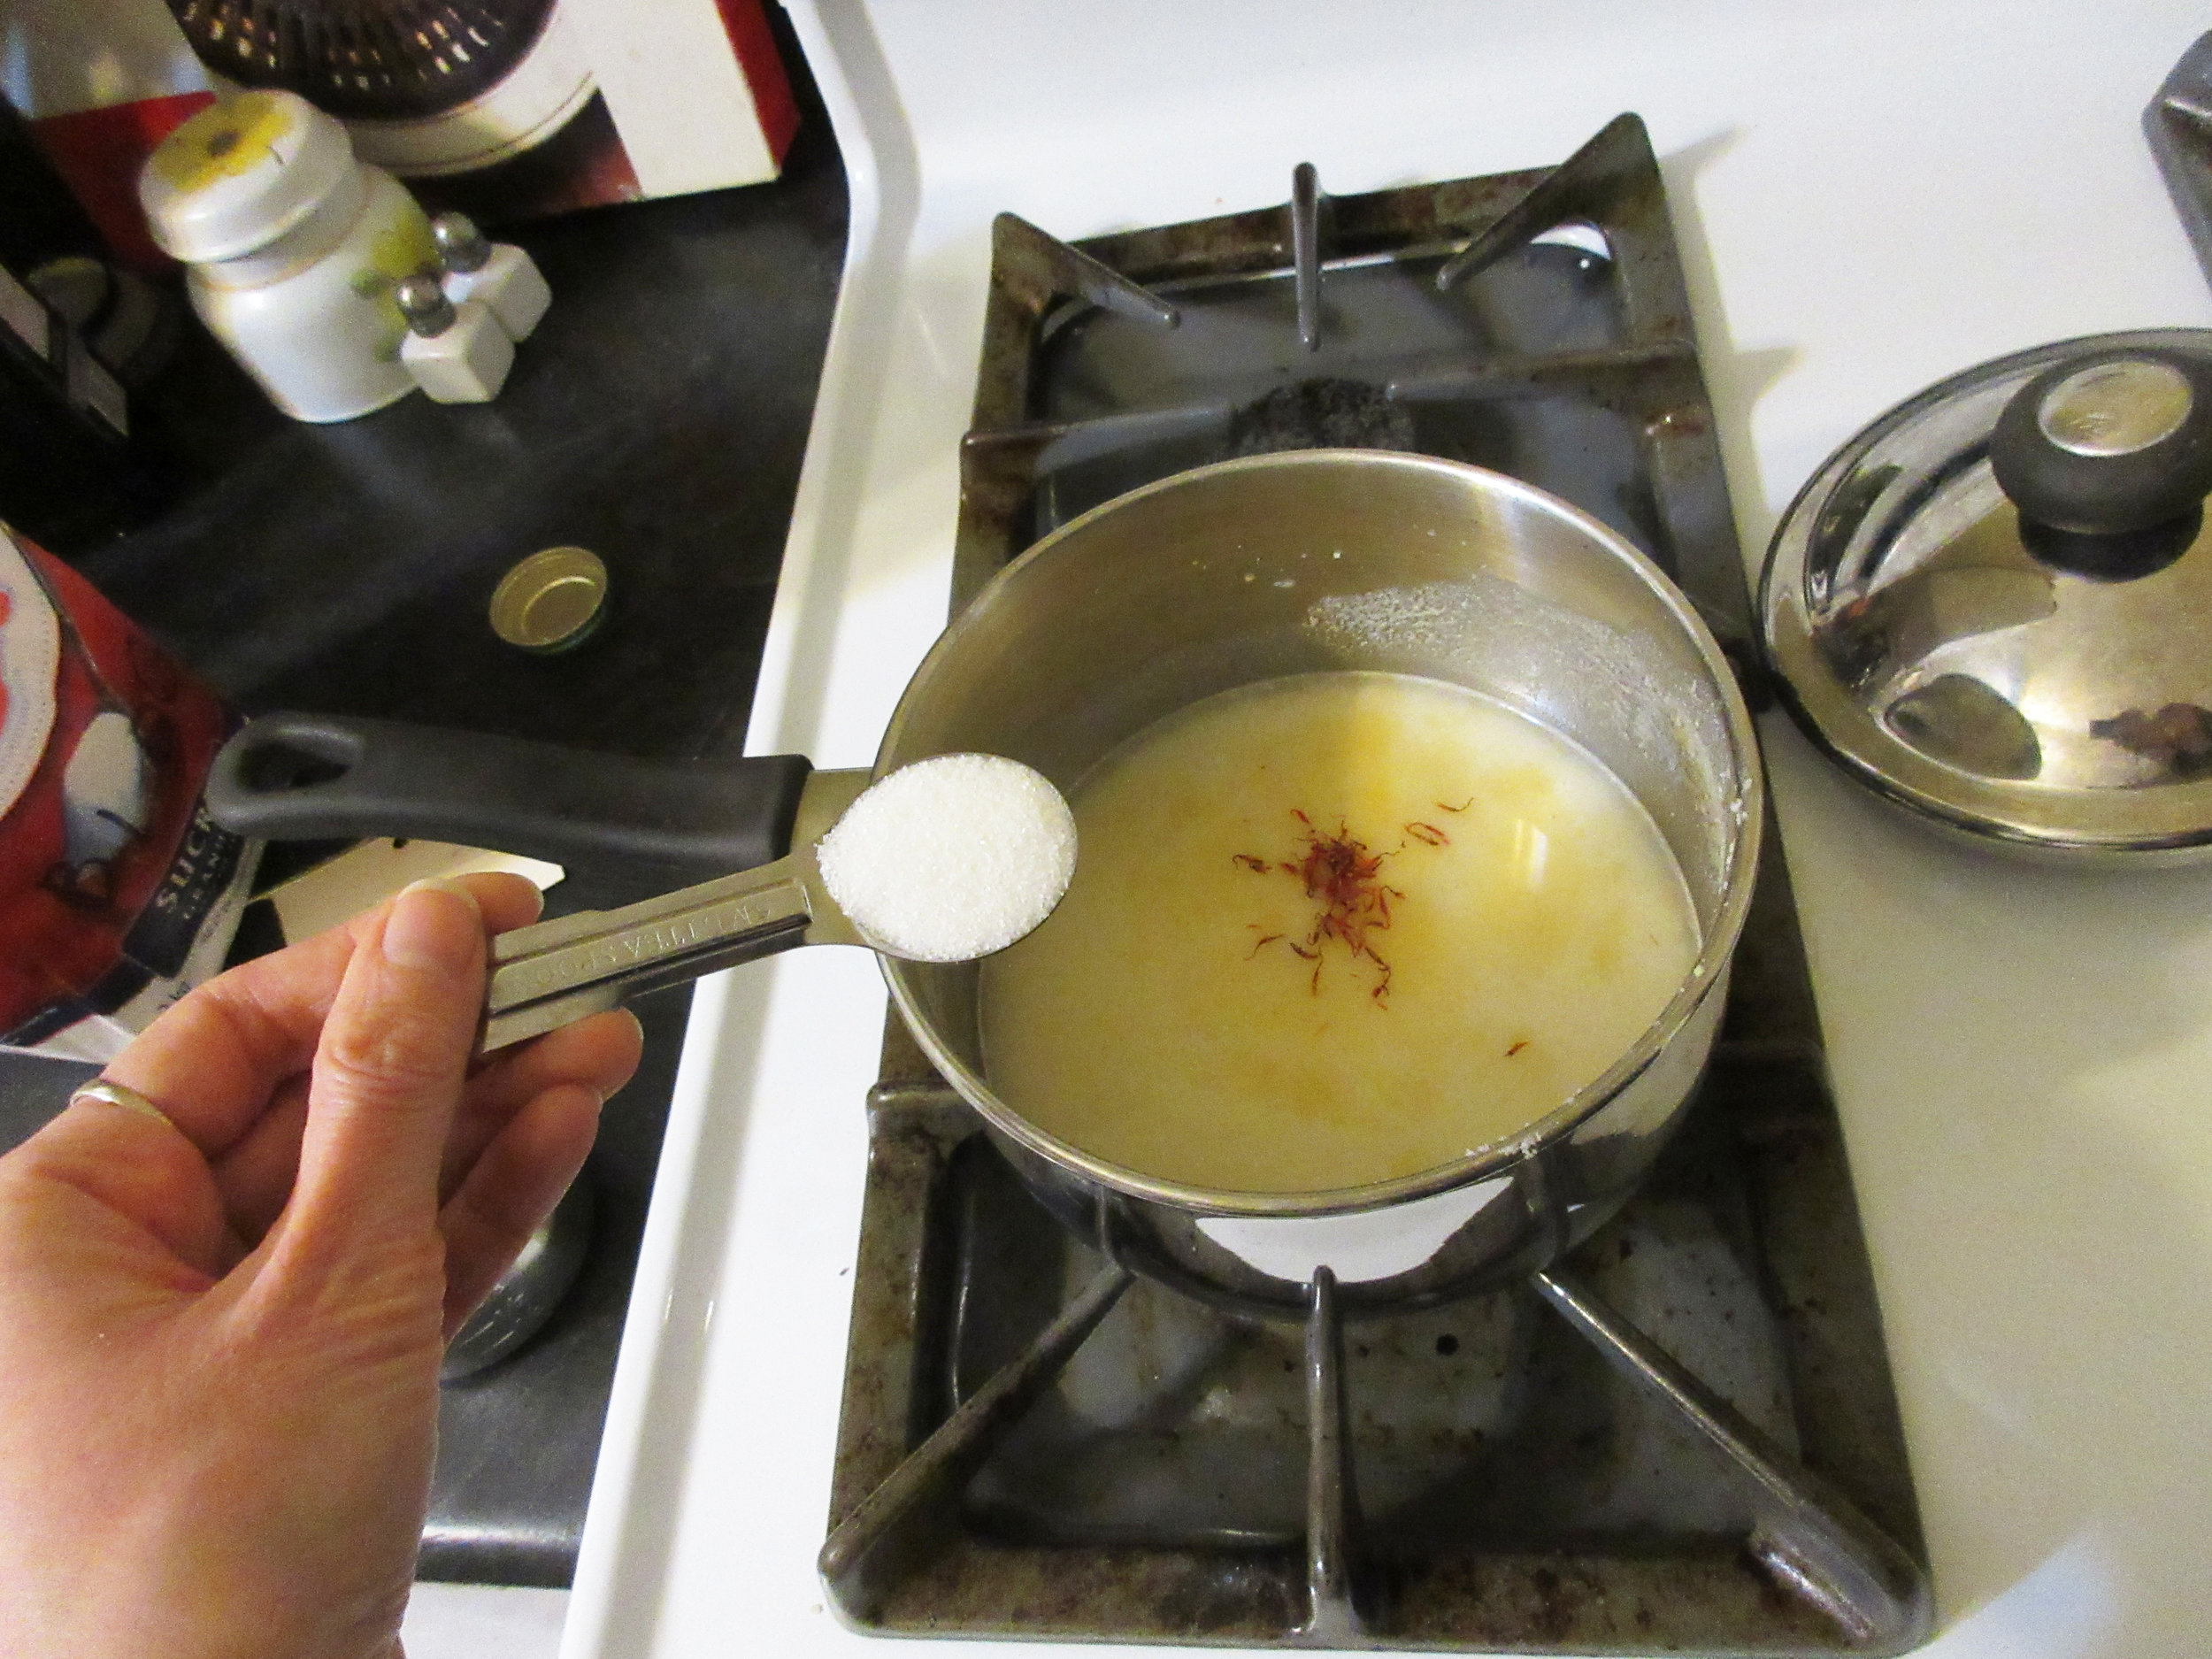
Cawdel of Almaund Mylk
Take Almaundes blaunched and drawe hem up with wyne, do þerto powdour of gyngur and sugur and colour it with Safroun. boile it and serue it forth.
My Recipe:
⅔ cup almond flour
2 cups (473 mL) white wine
1½ tsp powdered ginger
½ tsp saffron
2 tbsp white sugar
In a saucepan, slowly add the wine to the almond flour and mix well using a fork or whisk. Add the ginger, sugar and saffron. Heat until it bubbles, strain and serve.
Notes: I saved myself some work and used almond flour, but you could blenderize some almonds instead, or use a mortar and pestle if you want to be historically accurate!
The recipe doesn't what type of wine to use, but I assumed that since the recipe suggests that we colour the Cawdel with saffron, I should use white wine. I had a bottle of Vidal Chardonnay in the house, which is middle of the road when it comes to sweetness, so that's what I used.
A caudle is traditionally a thick beverage, so I ran with that idea. The ratio of 2/3 cup almond flour to 1 cup wine produced a drink that is a bit thicker than egg nog. If that's not to your taste, adjust accordingly.
The saffron in my pantry isn't fresh, probably isn't the best quality and didn't do much to colour the Cawdel. I strained it before drinking, mostly because I didn't think that having blood vein-like saffron strings in my beverage would be appealing. After I strained it, I thought that using a blender to incorporate the saffron might bring a better golden colour to the Cawdel. If you blenderize the cawdel and use almond flour, you'll be able to skip the step of straining the drink, but if you are starting with whole almonds, you'll still want to strain out the larger chunks before serving.

Cawdel of Almaund Mylk is a rather boozy and thick warm beverage that is slightly silty, made with white wine, ground almonds, sugar and ginger. This is a drink that you'll want to sip and be prepared for a strong alcohol taste, but if you are vegan and miss drinking eggnog, this is a recipe that you may want to try out!
One of the reasons why I started this blog back in March was so I had the freedom to explore recipes from different eras than the Historic House Museums where I've cooked. So far, I've made recipes from the 1740s to the 1970s, but Cawdel of Almaund Mylk is by far the most out of my Victorian comfort zone.
I've written about some of the first English-language cookbooks printed in Canada lately, so I thought I'd look into some of the first English-language cookbooks, period. I came across The Forme of Cury, which is a scroll of recipes written by the Master-Cooks of King Richard II in the 1390s. Despite what how we use the word "curry" today, this collection of recipes isn't about how to make Indian food. The word "cury" at the time meant to cook, derived from cuire, the French word with the same meaning.
What surprised me the most about reading The Forme of Cury is how many recipes used almond milk! I did some research and found out that almond milk was a favourite of the British upper class in that era because there were many days in the Christian calendar when eating dairy was forbidden.
I also did some research into what types of wine that were available at that time. I didn't find out many specifics about the grapes that were used, but that wine probably didn't taste as delicious as our wines today, wine in that era couldn't be preserved over the long term and in late 1390s Britain, the wine was likely imported from the Bordeaux region of France. In the end, I went with an Ontario wine that wasn't too sweet or dry.
If you're not familiar with what a cawdel is (today, it is spelled like caudle) it is a thick, warm liquid. A caudle could be considered a beverage, sauce, soup or pudding, and often caudles contain sugar and spices, egg yolk, bread or oats to thicken and use ale or wine as a base. Caudles were considered good for digestion and were often given to the sick to bring them back to health, so this beverage is probably the roots of the word coddle.
If you are someone who specializes in Medieval Cookery, I'd love to hear what you have to say about my attempt at making Cawdel of Almaund Mylk and I really look forward to continuing my culinary history exploration even further past the Victorian era.
Read the Cookbook:


Honeycomb, or Roll Gingerbread
I was intrigued by this gingerbread cookie recipe from The Cook's Complete Guide (1810): gingerbread cookies rolled like wafers! The historic recipe instructs us to "bake it gently; when hot cut it in squares, and while warm roll it over a stick, like wafers, till cold". But yet, my gingerbread cookies that I ended up with are flat squares. This is one of those occurrences when a historic recipe doesn't turn out as expected the first time around (they instantly cracked and broke when I tried to bend them). This is a delicious lightly flavoured Lemon Gingersnap, so I recommend it, whether it is rolled or flat.
You’ll find this recipe in:
The Cook's Complete Guide, on the Principals of Frugality, Comfort, and Elegance
By A Lady (Esther Copley)
London, 1810
Historic Recipe:
Honeycomb, or Roll Gingerbread.
Rub together half a pound of flour, a quarter of a pound of butter, a quarter of a pound of fine moist sugar, a teaspoonful of ground ginger, ditto of allspice, ditto of cinnamon, in powder, the rind of one lemon, grate, and as much treacle as will make it in a paste to spread on tins very thin, bake it gently; when hot cut it in squares, and while warm roll it over a stick, like wafers, till cold; keep it in a dry place.


My Recipe:
Grated zest of 1 lemon
1½ cups white flour – 225 g
1 tsp ginger
1 tsp allspice
1 tsp cinnamon
½ cup softened butter – 113 g
¾ cup packed brown sugar – 113 g
¼ cup molasses
In a large bowl, combine the flour, ginger, allspice, cinnamon and grated lemon zest. In a smaller bowl, cream together the sugar and softened butter. Add the butter & sugar to the dried ingredients and mix. Add the molasses and mix until combined.
Lightly flour your rolling surface and rolling pin. Roll out thin, cut out into shapes and bake at 275 F/135 C until slightly browned on the bottom. This recipe made 44 2" square cookies.

After I made the dough, that's when things started to go wrong...
You've probably noticed that the recipe is called Roll Gingerbread, and the historic recipe instructs us to "bake it gently; when hot cut it in squares, and while warm roll it over a stick, like wafers, till cold". But yet, my gingerbread cookies are flat squares. What happened?
I rolled out the gingerbread thinly directly onto the cookie sheets and cut it into large square or rectangle shapes. Once baked, I cut it into squares roughly 2"x 2" and then I rolled it around various round stick-like items that I had around the house. The cookies instantly crumbled and cracked!
I had a small window of time before the cookies were cool, so that's when I gave up and decided that these gingerbread cookies were destined to be flat squares. This recipe makes a delicious lightly flavoured Lemon Gingersnap, so I recommend it, either rolled or flat.
When I make this recipe again, I'm going to try changing up some aspects of this recipe and I'll see if I can get the Honeycomb, or Roll Gingerbread to bend without cracking. If you try it out, take a moment to share your experiences in the comments and we'll figure it out together!
I can think of a short list of reasons why this recipe may have not behaved as expected, and solving mysteries such as this one is part of the joy of working from historic recipes. It is very satisfying when, after an arduous series of attempts, a finally recipe comes together and I'm eating the food that I imagined when I first read the recipe. Going through this process always makes me a better cook.
1) Add more or less molasses. Every other ingredient has a very specific measurement, especially for a recipe from 1810. But when it comes to the molasses, we're just told to add "as much treacle as will make it in a paste to spread on tins very thin".
2) Bake it at a higher temperature. I chose to bake it 275 F/135 C because our original recipe tells us to "bake it gently". Most contemporary recipes tell us to bake gingerbread at 350 F/175 C, so maybe the higher temperature will give the gingerbread more structural integrity?
3) Roll it out thinner.
4) Use white sugar, not brown sugar.
5) Try to roll the gingerbread around a stick directly out of the oven. The historic recipe instructs us to cut it in squares after it comes out of the oven, then roll the cookies. Maybe this takes up too much cooling time, and the way to go is cut out the gingerbread before baking. Then you'll be able to bend the cookies around a stick ASAP when it's hot.
6) Perhaps the historic recipe just doesn't work! I have searched for a contemporary recipe for a similar rolled gingerbread cookie for reference, and couldn't find one. The closest I could find is someone creating a slightly curved gingerbread house roof by allowing it to cool while draped over a swooped cardboard structure. Maybe rolled gingerbread cookies only stands up on paper and not in reality.
