Apple Butter
Besides the fact that Apple Butter is very delicious, I had an ulterior motive for making this recipe. I made Apple Butter because I wanted to make use of the discarded apples from the historic cooking classes that I taught at Nelles Manor Museum this fall, so you'll find a bonus Apple Water recipe in this blog post.
Our Apple Butter recipe is found in Miss Leslie's Directions for Cookery, published in Philedelphia in 1851. Making Apple Butter is much, much easier in our era because we're able to cook down our apples in a slow cooker, without having to stir the apples " nearly all the time with a stick" in a kettle suspended over a fire!

You'll find this recipe in:
Miss Leslie's Directions for Cookery
By: Eliza Leslie
Philadelphia, 1851
Historic Recipe:
APPLE BUTTER.- This is a compound apples and cider boiled together till of the consistence of soft butter. It is a very good article on the tea-table, or at luncheon. It can only be made of sweet new cider fresh from the press, and not yet fermented.
Fill a very large kettle with cider, and boil it till reduced to one half the original quantity. Then have ready some fine juicy apples, pared, cored, and quartered; and put as many into the kettle as can be kept moist by the cider. Stir it frequently, and when the apples are stewed quite soft, take them out with a skimmer that has holes in it, and put them into a tub. Then add more apples to the cider, and stew them soft in the same manner, stirring them nearly all the time with a stick. Have at hand some more cider ready boiled, to think the apple butter in case you should find it too thick in the kettle.
If you make a large quantity, (and it is not worth while to prepare apple butter on a small scale,) it will take a day to stew the apples. At night leave them to cool in the tubs, (which must be covered with cloths,) and finish next day by boiling the apple and cider again till the consistence is that of soft marmalade, and the colour a very dark brown.
Twenty minutes or half an hour before you finally take it from the fire, add powdered cinnamon, cloves, and nutmeg to your taste. If the spice is boiled too long, it will lose its flavour.
When it is cold, put it into stone jars, and cover it closely. If it has been well made, and sufficiently boiled, it will keep a year or more.
It must not be boiled in a brass or bell-metal kettle, on account of the verdigris which the acid will collect in it, and which will render the apple butter extremely unwholesome, not to say poisonous.

My Recipe:
Apples - sliced, peeled & cored
Apple Cider
Powdered cinnamon, nutmeg & clove – to taste
A 4:1 ratio of apples to apple cider works well – that is, for every 4 cups of sliced apples, add 1 cup of cider.
Add the apples & apple cider to a slow cooker and cook on high, stirring occasionally, until the apples break down and it begins to thicken.
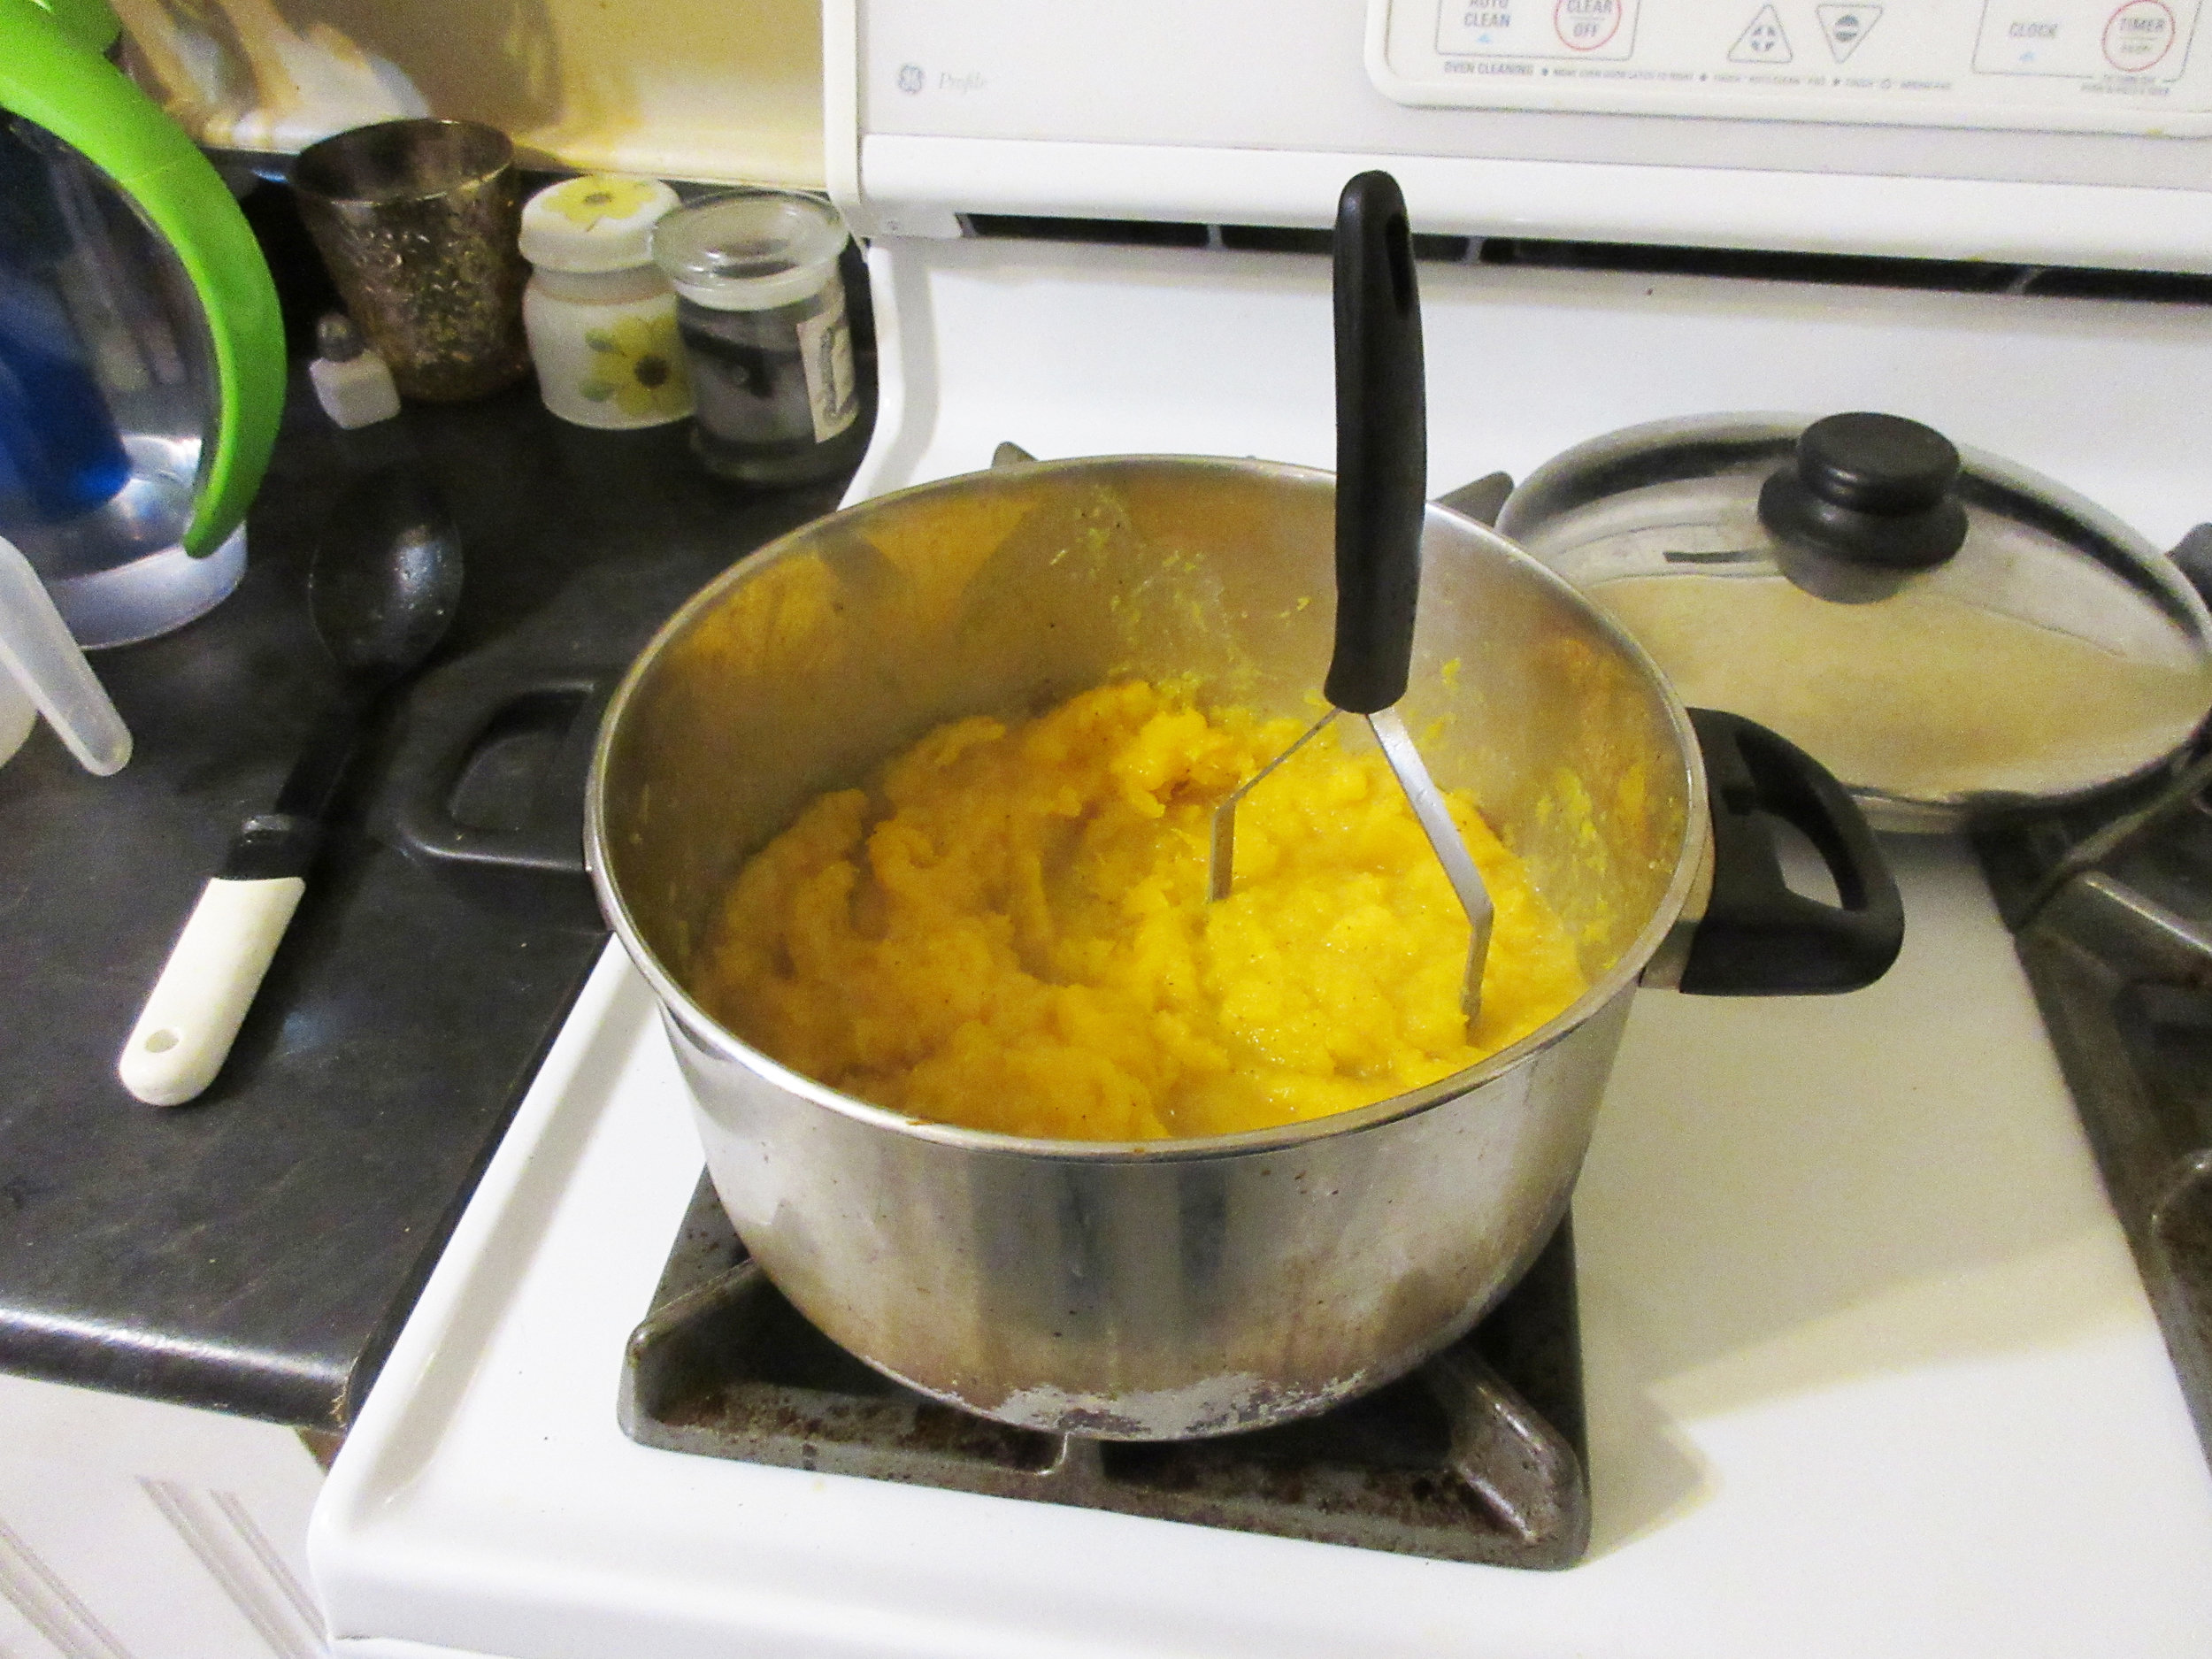
Turn the heat to low and stir more frequently, until, as Miss Leslie instructs, your Apple Butter is "the consistence of soft butter" and "the consistence is that of soft marmalade, and the colour a very dark brown". Cooking the apple butter down in my slow cooker took about 20 hours.
Just before the apple butter is finished, add powdered cinnamon, nutmeg and clove to taste.

My Experience:
Besides the fact that apple butter is very delicious, I had an ulterior motive for making this recipe. We made Apple Water at the historic cooking classes that I taught at Nelles Manor Museum this fall, and at the September classes, it broke my heart to toss the apples that were leftover from making this beverage! When I taught this class again in November, I planned ahead and brought a large container so these apples were not wasted.
What is Apple Water? This recipe is typically found in the Invalid Cookery chapter of nineteenth-century cookbooks. Not that I was suggesting that the class attendees were invalids! I chose this recipe because it was a beverage that we could easily make in the time period of the class. It is sometimes called Apple Tea, and that's a more accurate description of what it is. Here are the two historic recipes that we used for inspiration, one of them from Miss Leslie's Directions for Cookery, the same cookbook as our Apple Butter recipe:
APPLE WATER. - Pare and slice a fine juicy apple; pour boiling water over it, cover it, and let it stand till cold.
Miss Leslie's Directions for Cookery
Eliza Leslie, Philadelphia, 1851
No. 297. Apple Water for sickness.
Cut two large apples in slices, and pour a quart of boiling water on them; or on roasted apples; strain in two or three hours, and sweeten lightly.
The Cook Not Mad
Kingston, 1831
Basically, to make Apple Water or Apple Tea, you slice and core the apples. Leave the skin on, though, because that's where much of the flavour comes from. Place the apples in a container, pour boiling water over them and allow it to steep. The Cook Not Mad suggests a ratio of about 2 cups of water per apple, and if you go the extra step to roast your apples beforehand, you'll get a more flavourful Apple Water. Once you strain the apples from the liquid, taste and decide if you'd like to sweeten with sugar, or leave it as is.
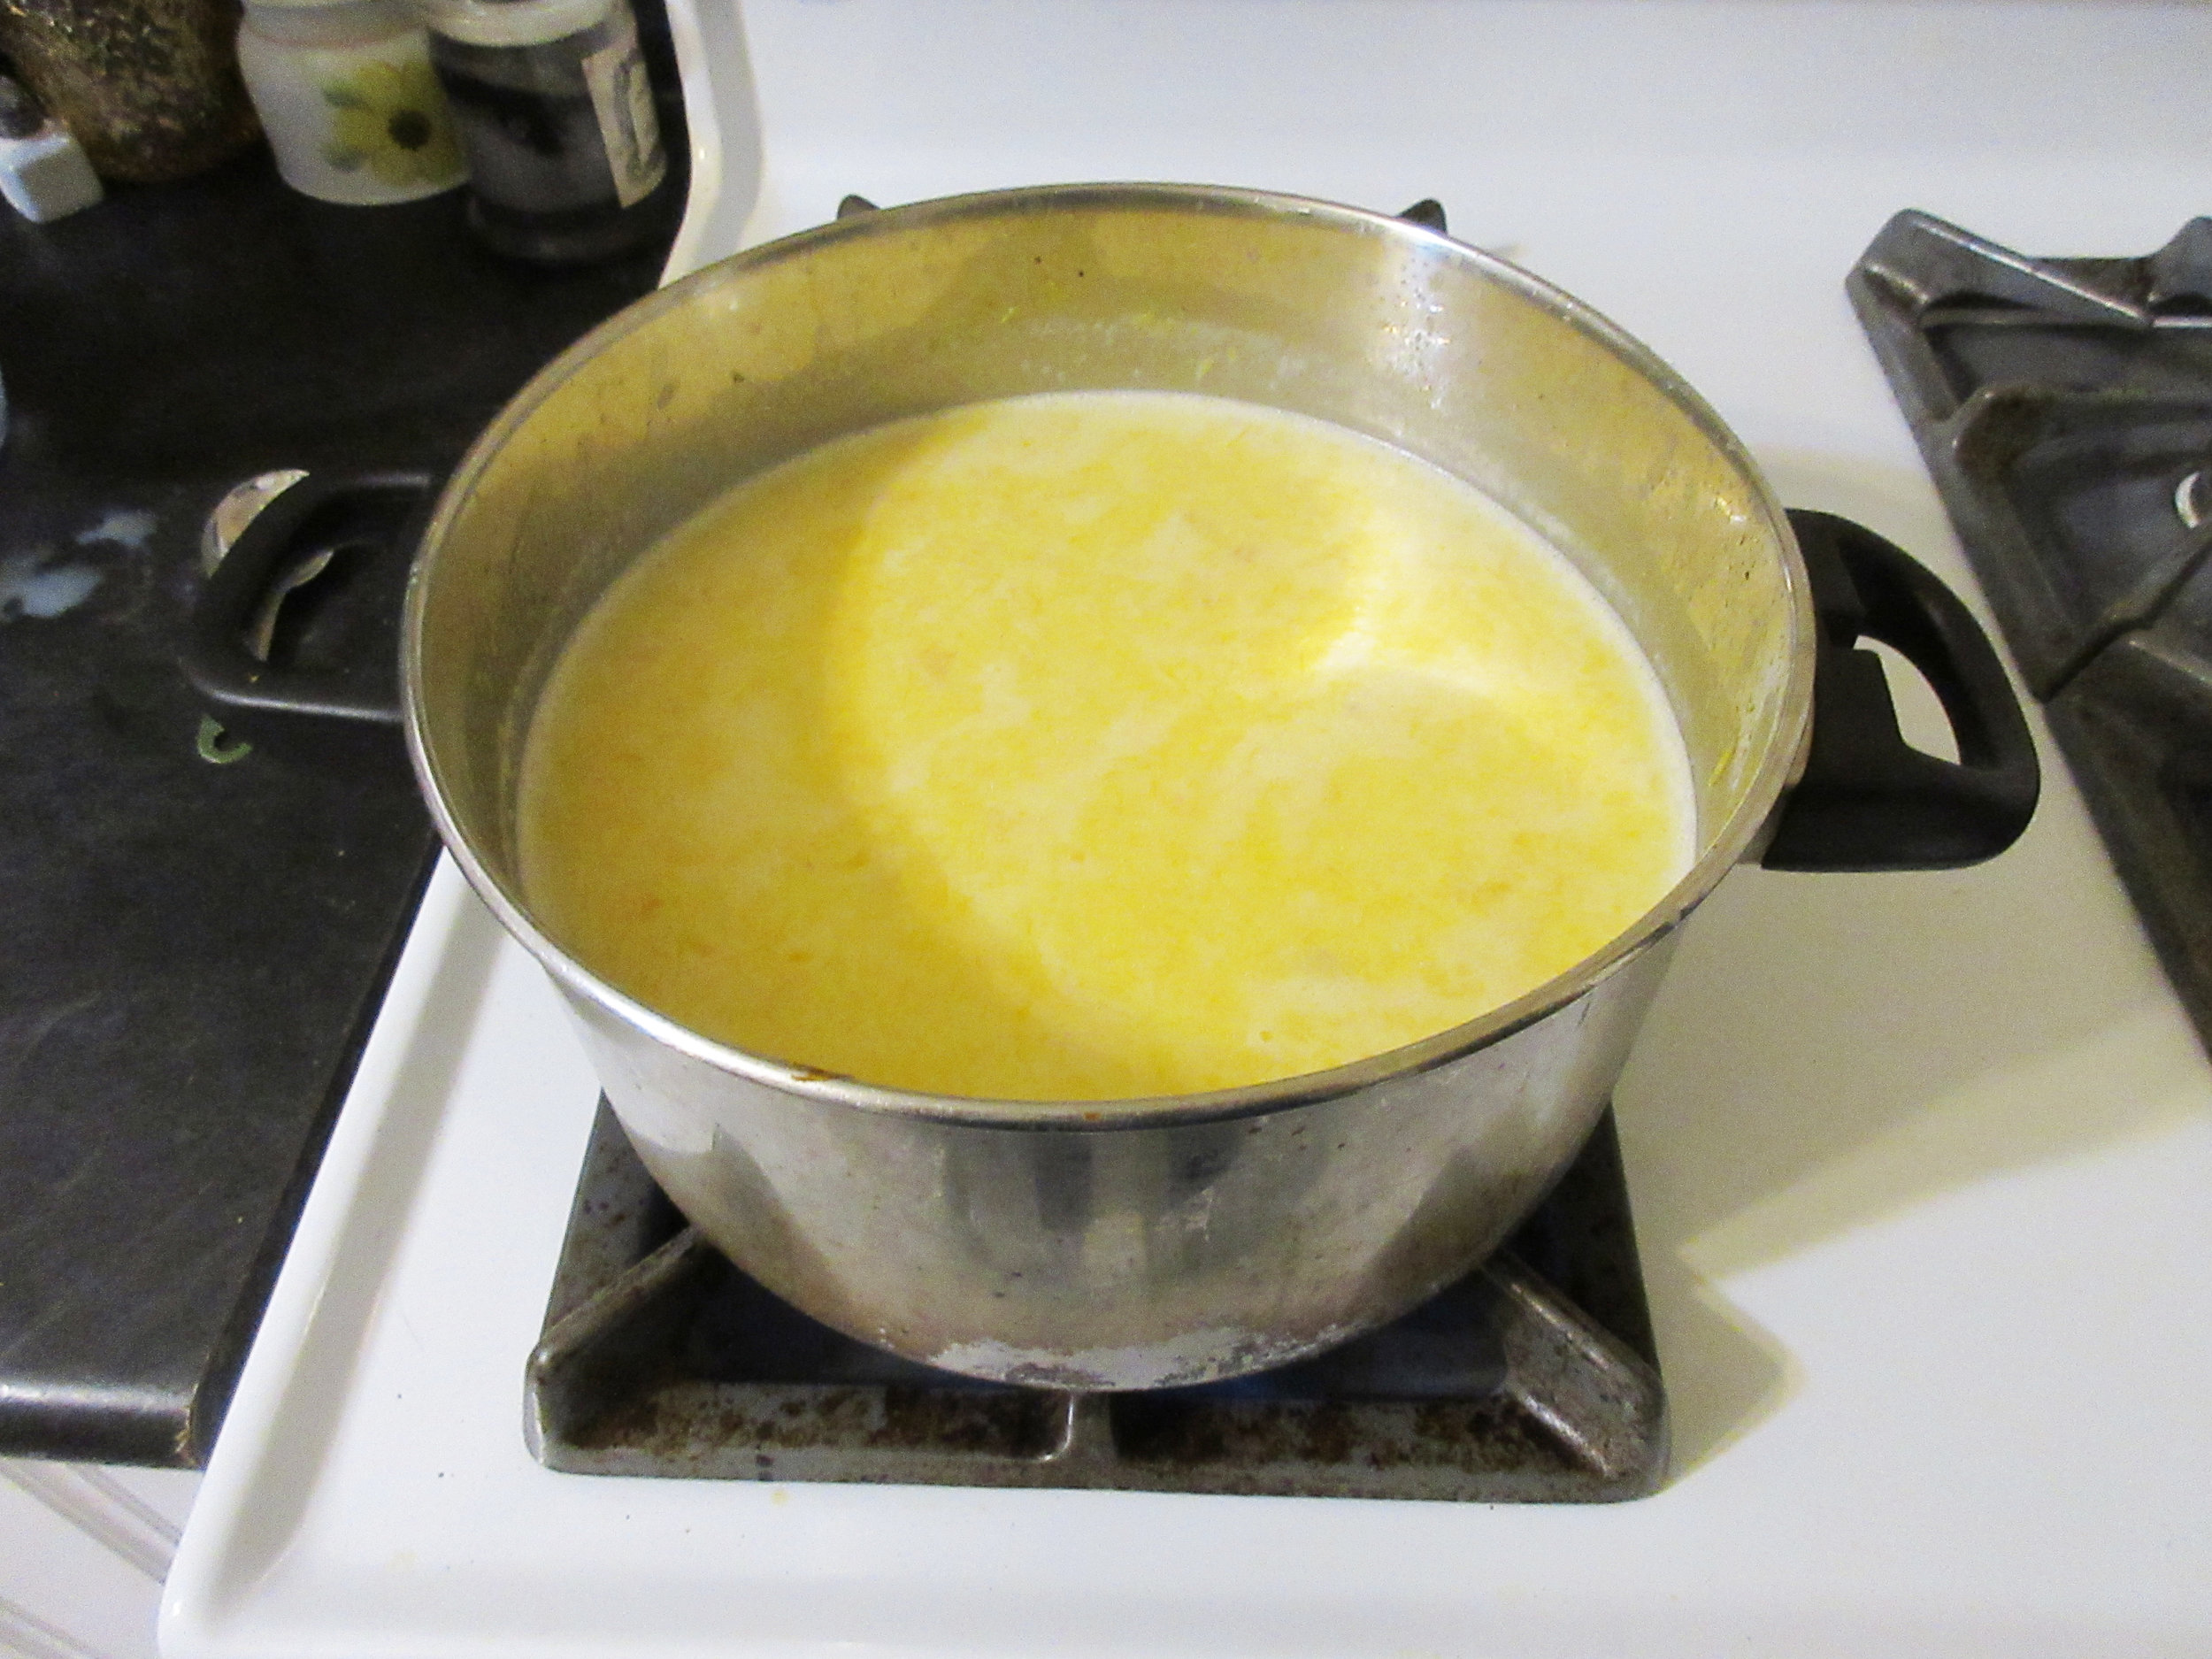
Since my apples were the discarded Apple Water apples, they were softened apples with the skins...so I began making Apple Butter with a step that you will not have to do.
To remove the skins, I decided to cook the apples and cider until mushy on the stove, then push the cooked apples through a sieve with a spatula. This certainly was not easy to do, so please save yourself the headache! Just peel, slice and core your apples and put them in your slow cooker with the apple cider.


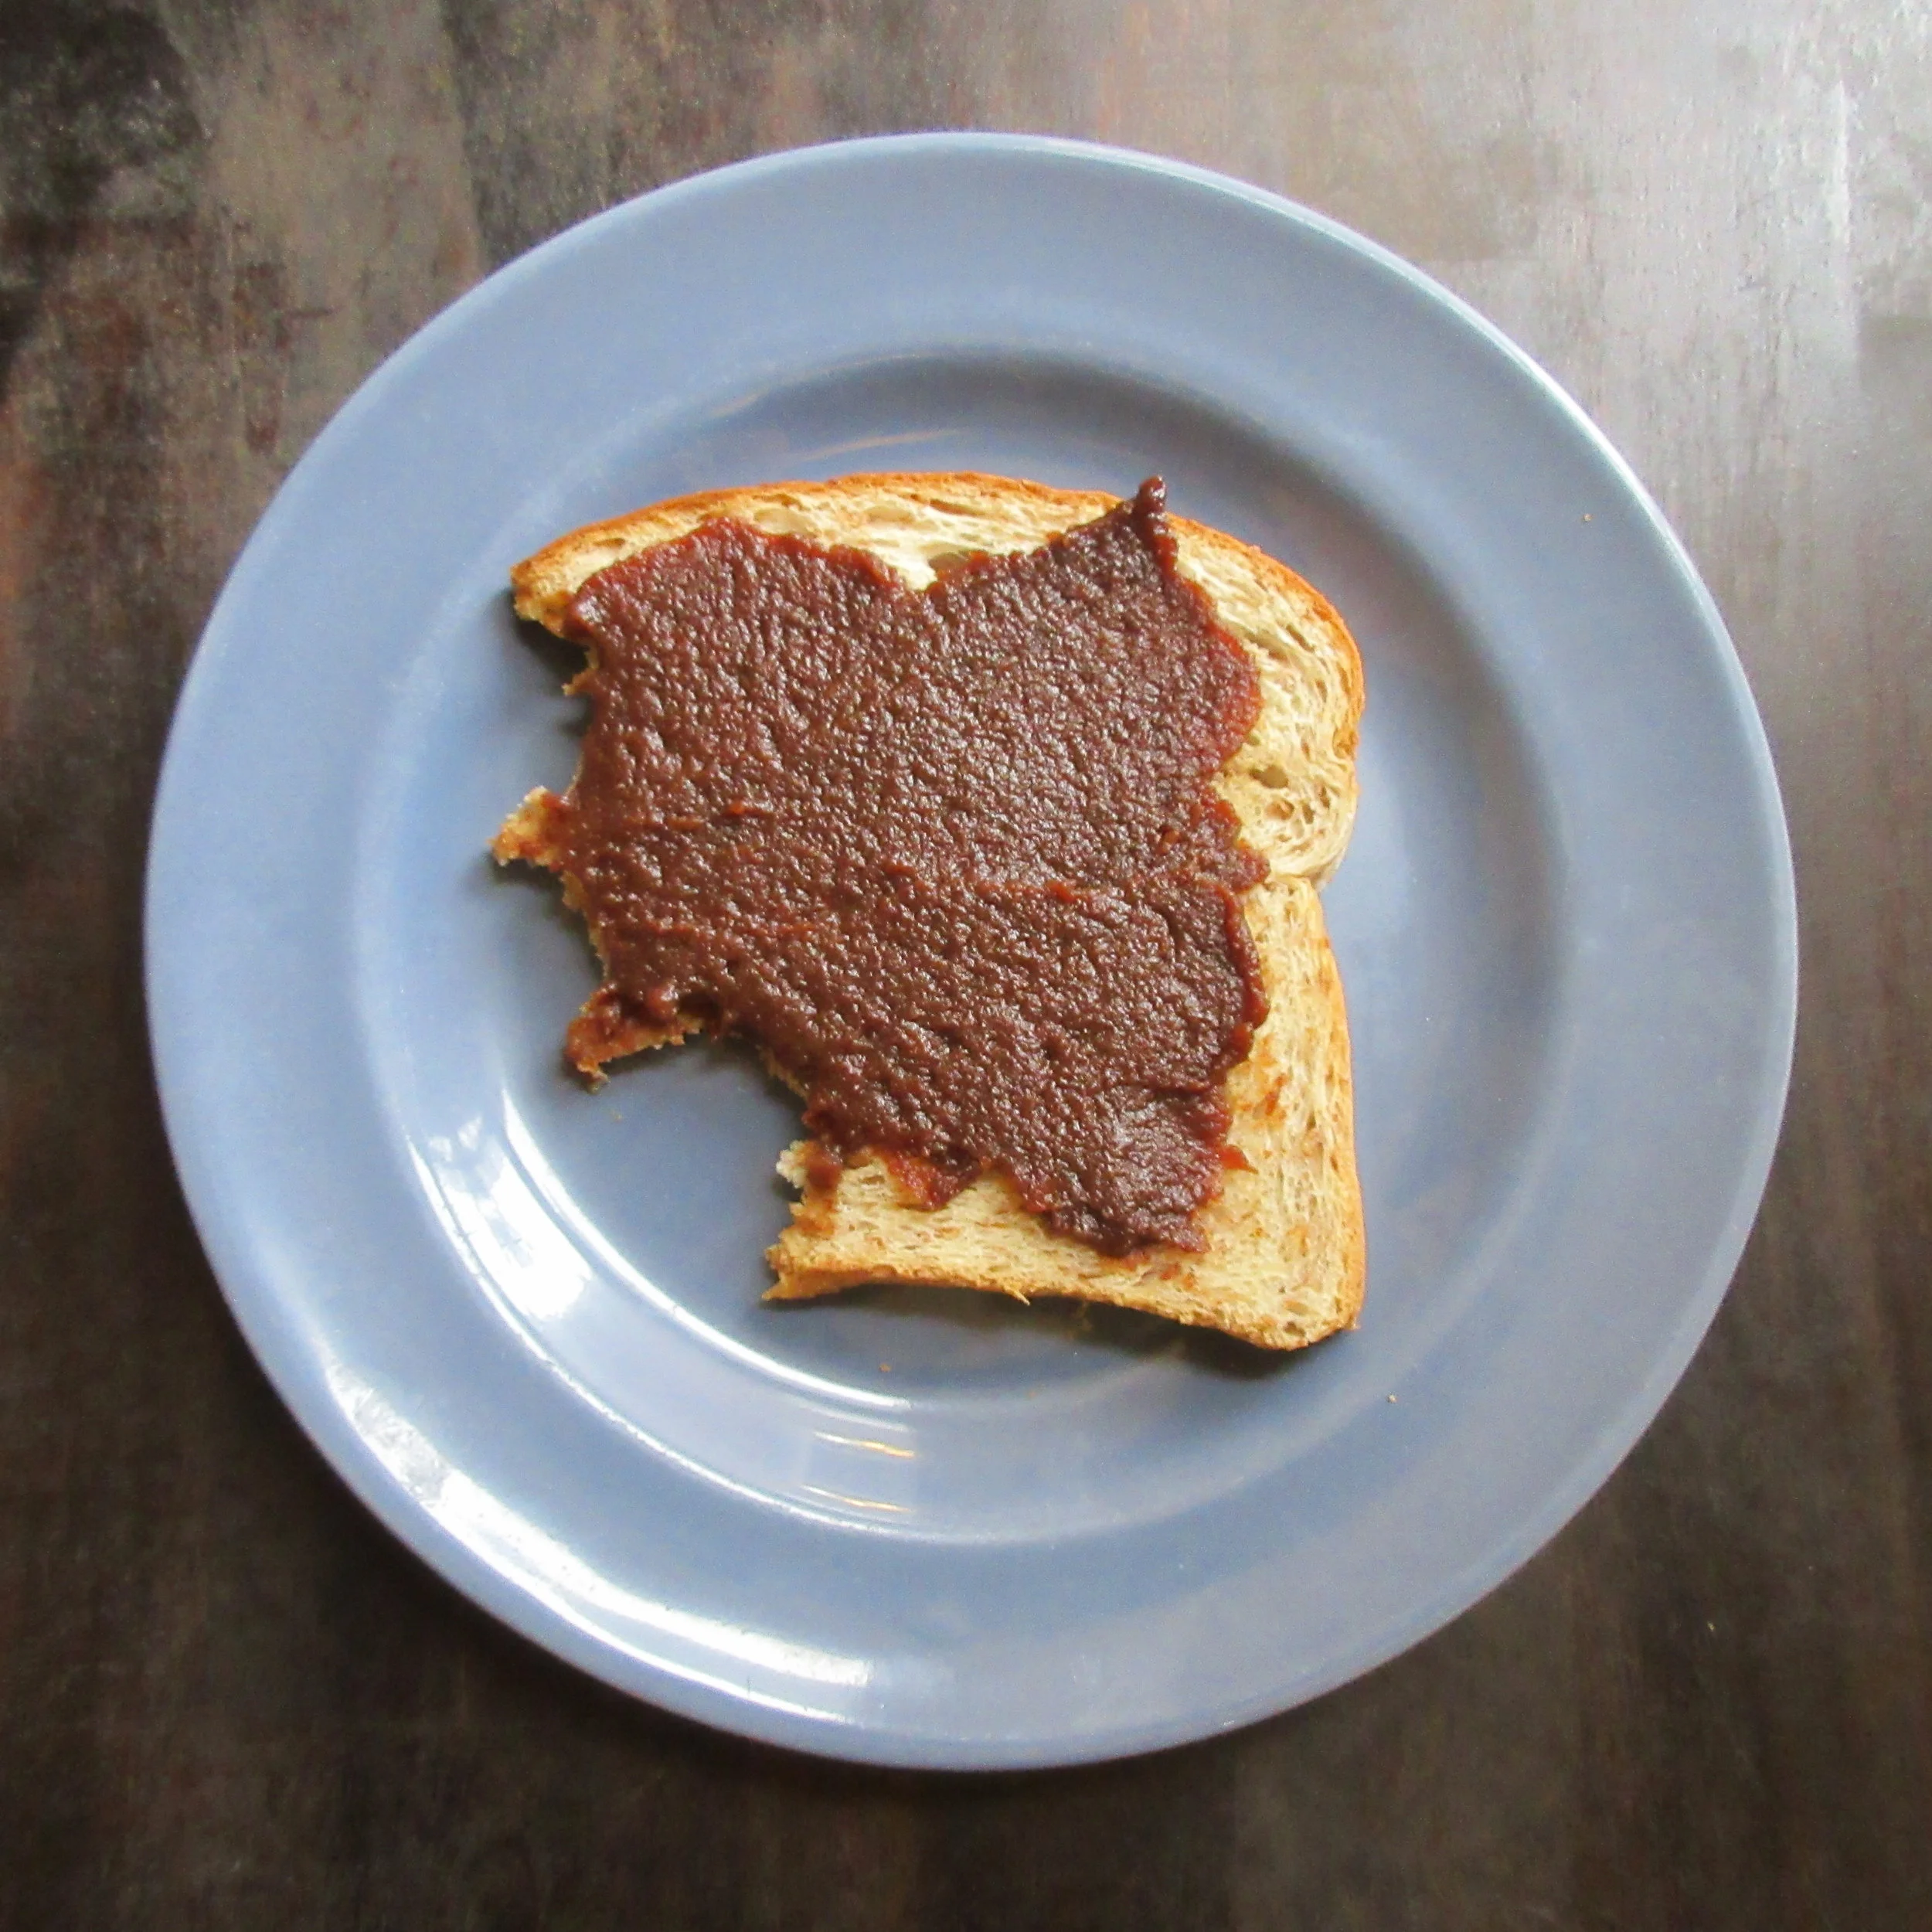
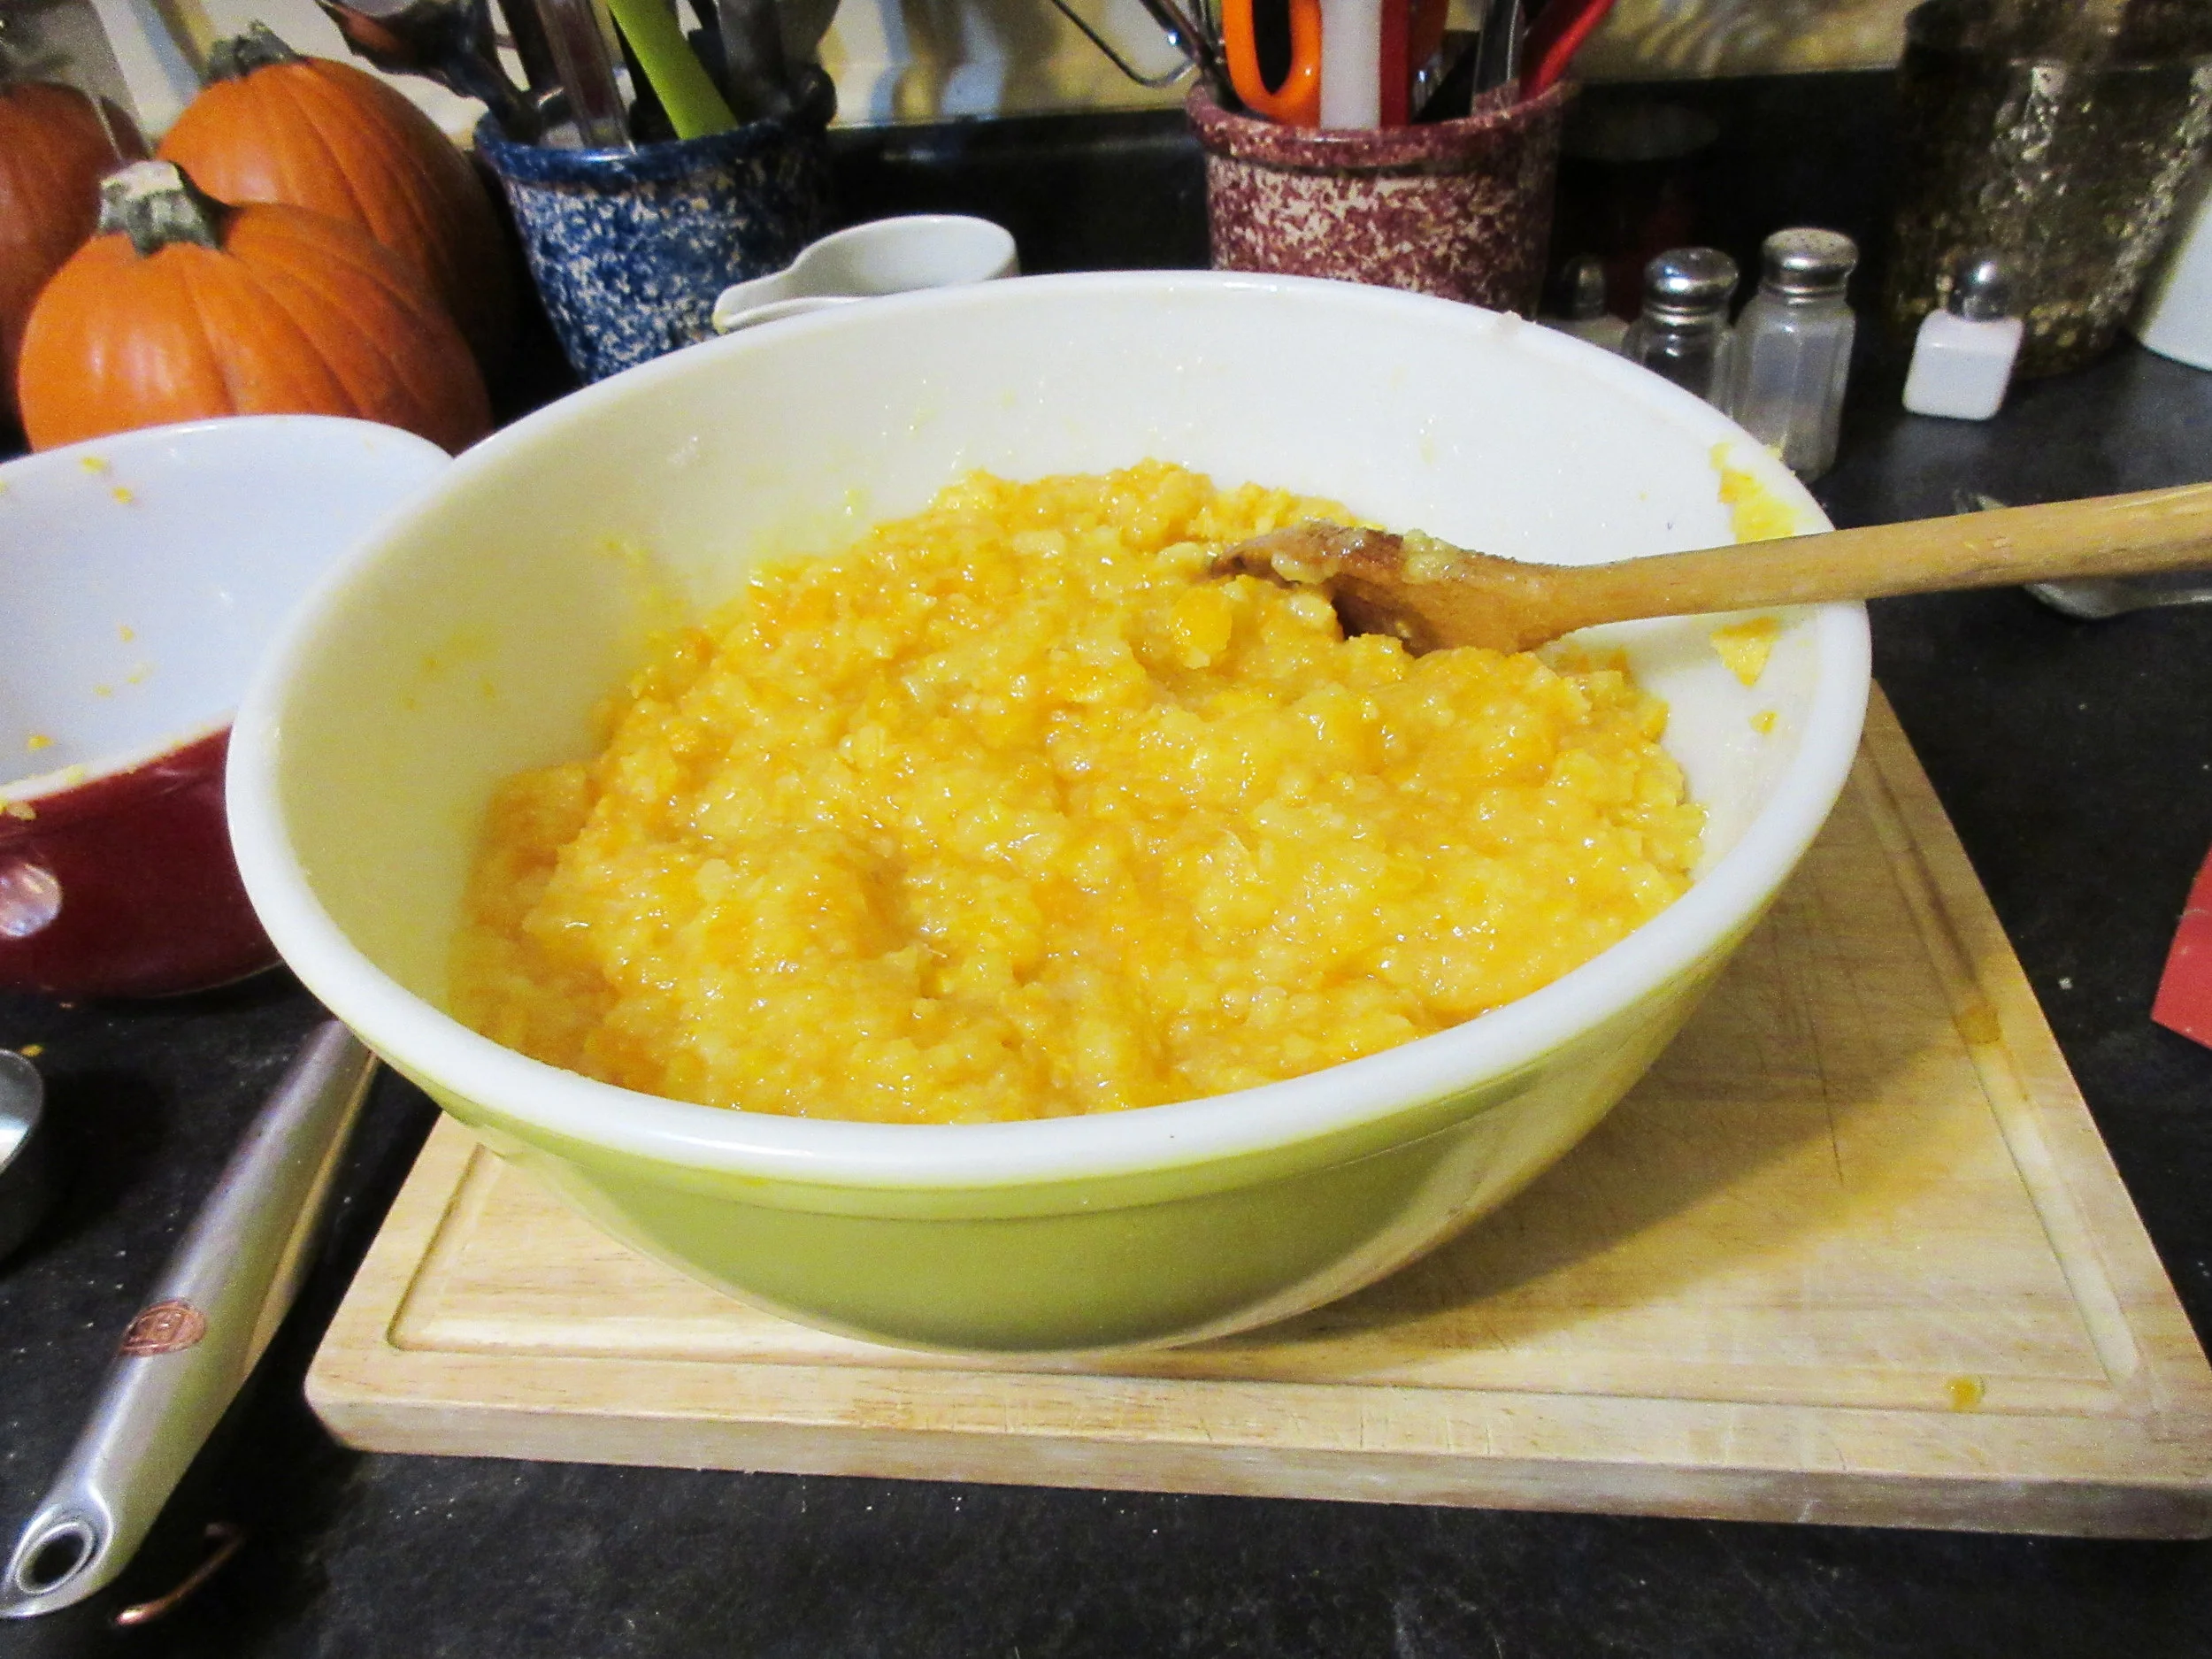
After the skins were removed, I finished the cooking process in my slow cooker. Miss Leslie wrote that "If you make a large quantity, (and it is not worth while to prepare apple butter on a small scale,) it will take a day to stew the apples." I started with 25 apples, which amounted to about 17 cups when sliced. The Apple Butter was thick after being in my slow cooker for 20 hours, but I only ended up with between 2 – 3 cups of apple butter!
The nice thing about a slow cooker is that it doesn't require you to stir "nearly all the time with a stick", and you can also cook the apples overnight, instead of "At night leave them to cool in the tubs, (which must be covered with cloths,) and finish next day by boiling the apple and cider again". I started cooking my apples & cider in the evening, so it could cook overnight while I slept. Then when the apples needed to be stirred more frequently as it thickened, I could stir when I was around during the day.
For preserving, Miss Leslie suggests: "When it is cold, put it into stone jars, and cover it closely. If it has been well made, and sufficiently boiled, it will keep a year or more." Our spoiled western digestive systems would probably not appreciate this preservation method, but I didn't have to worry about water bath canning, considering that I had less than 3 cups of Apple Butter.
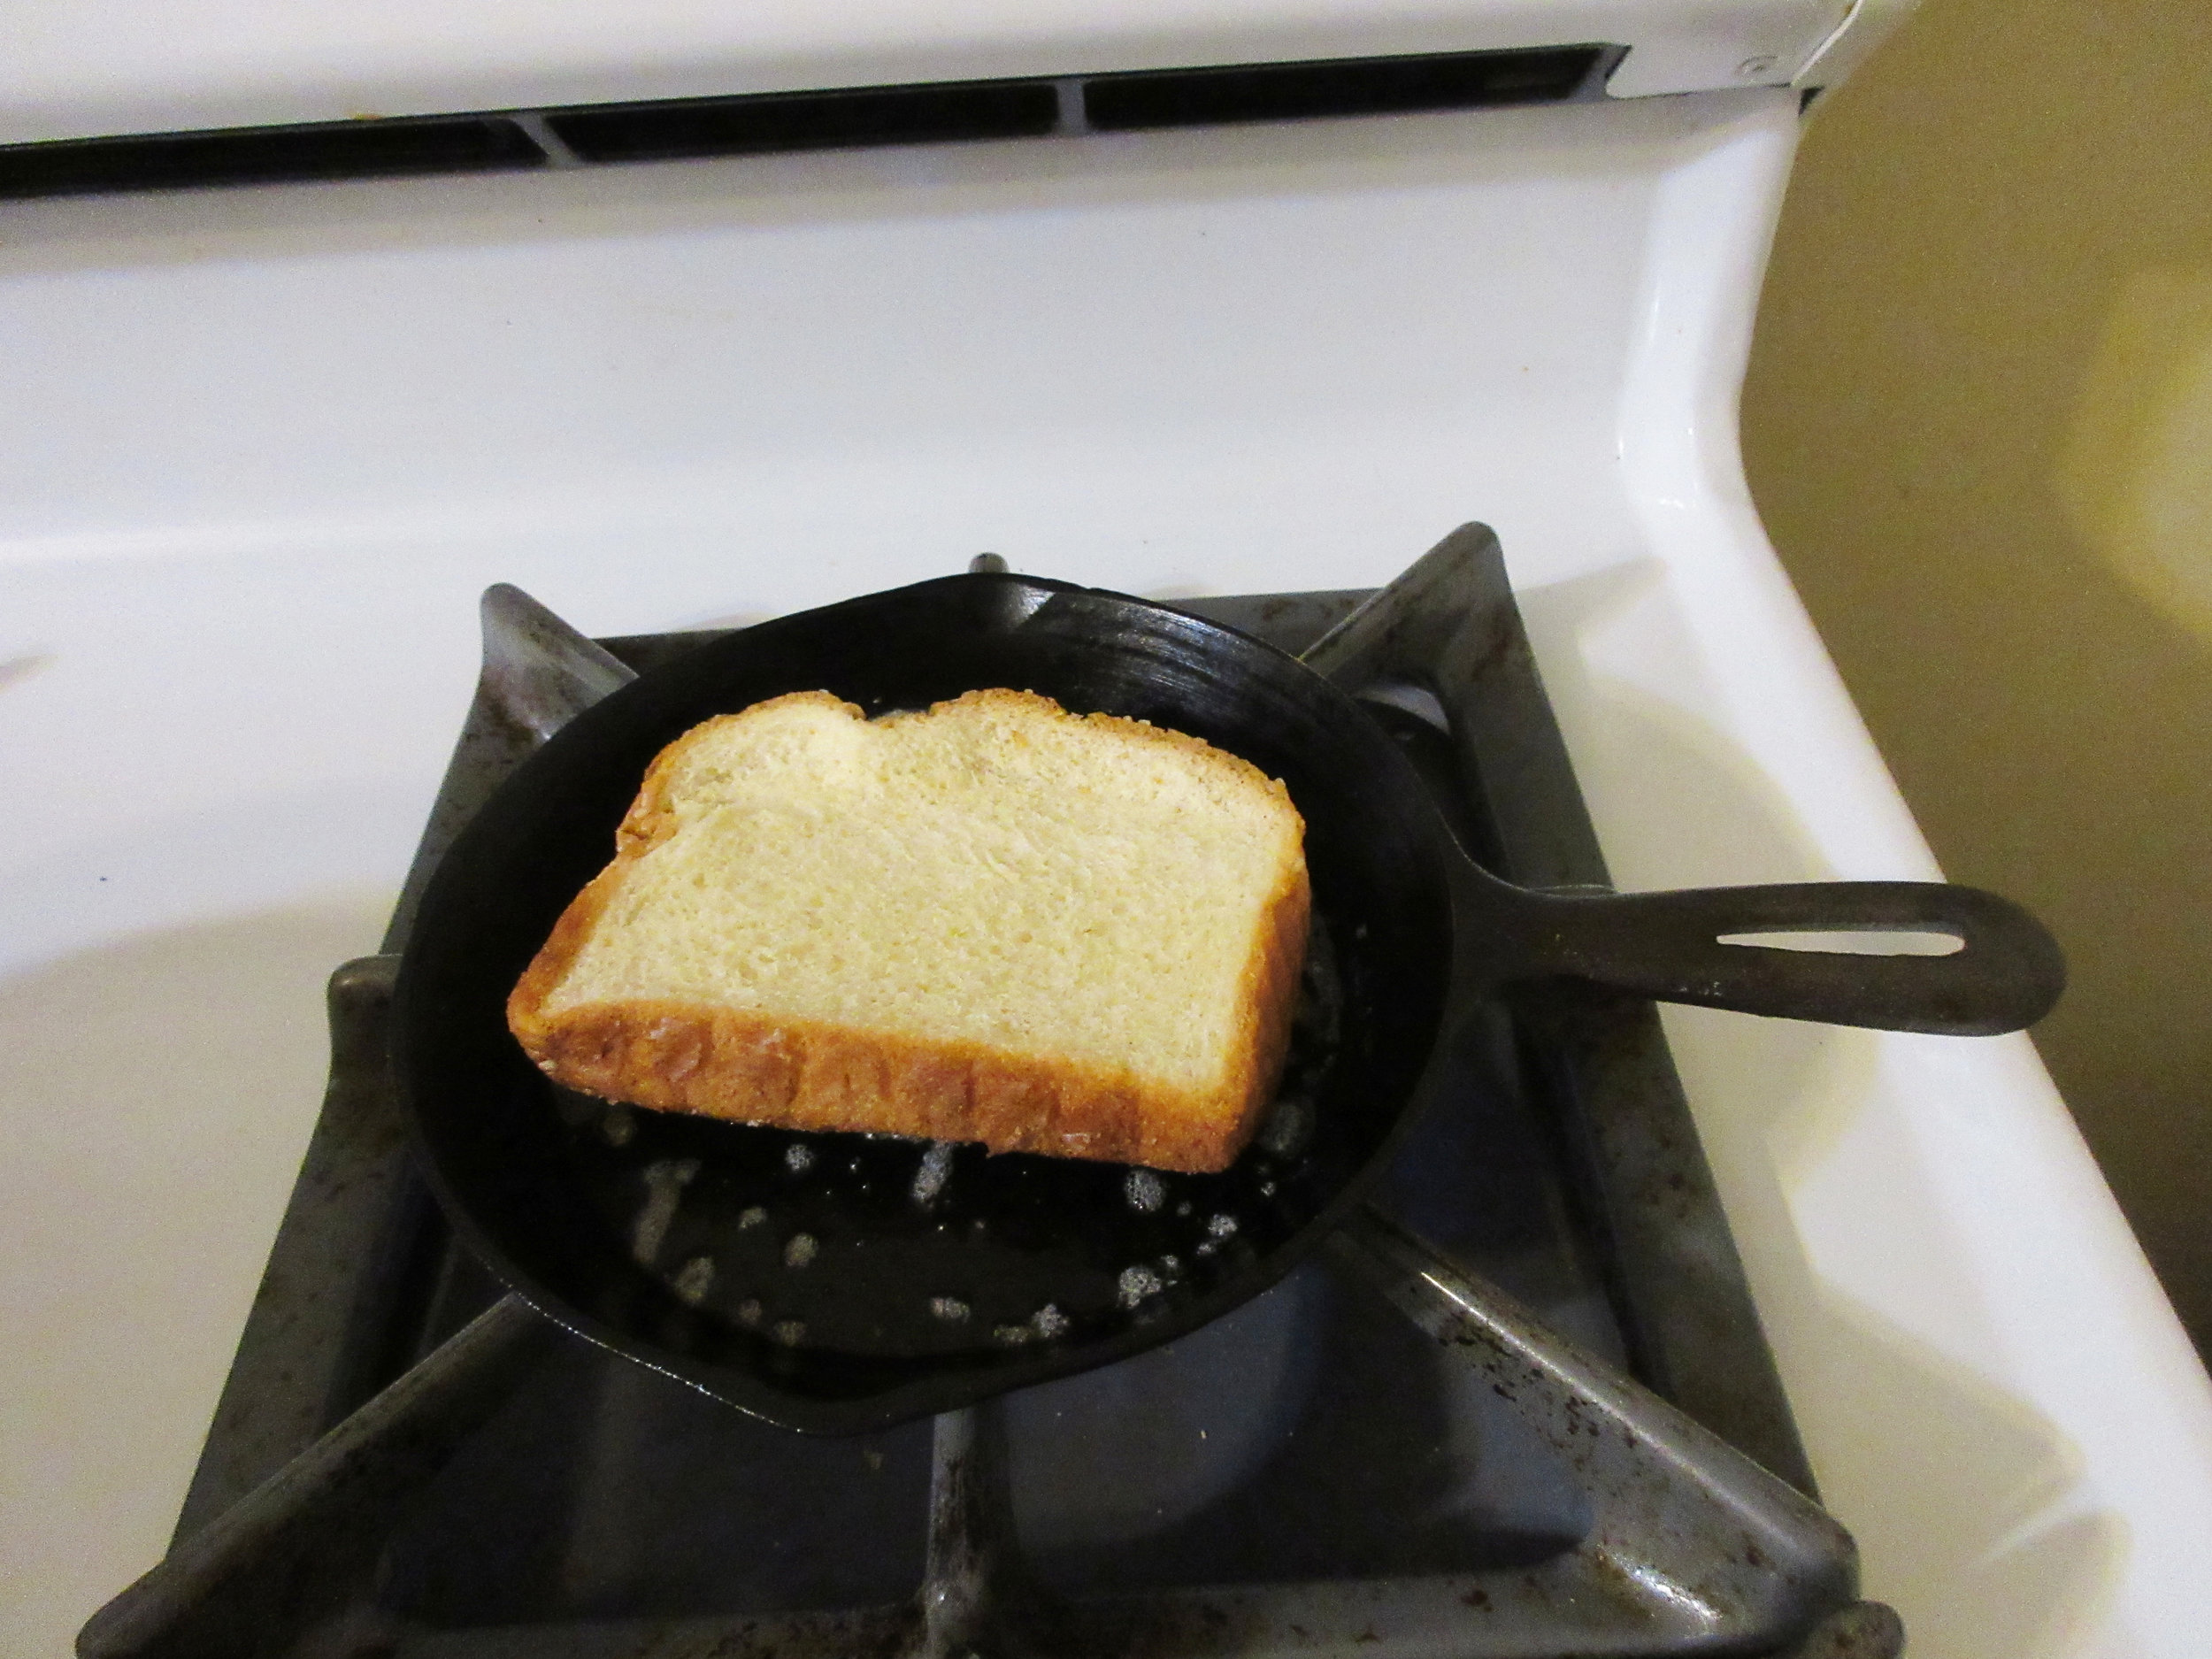
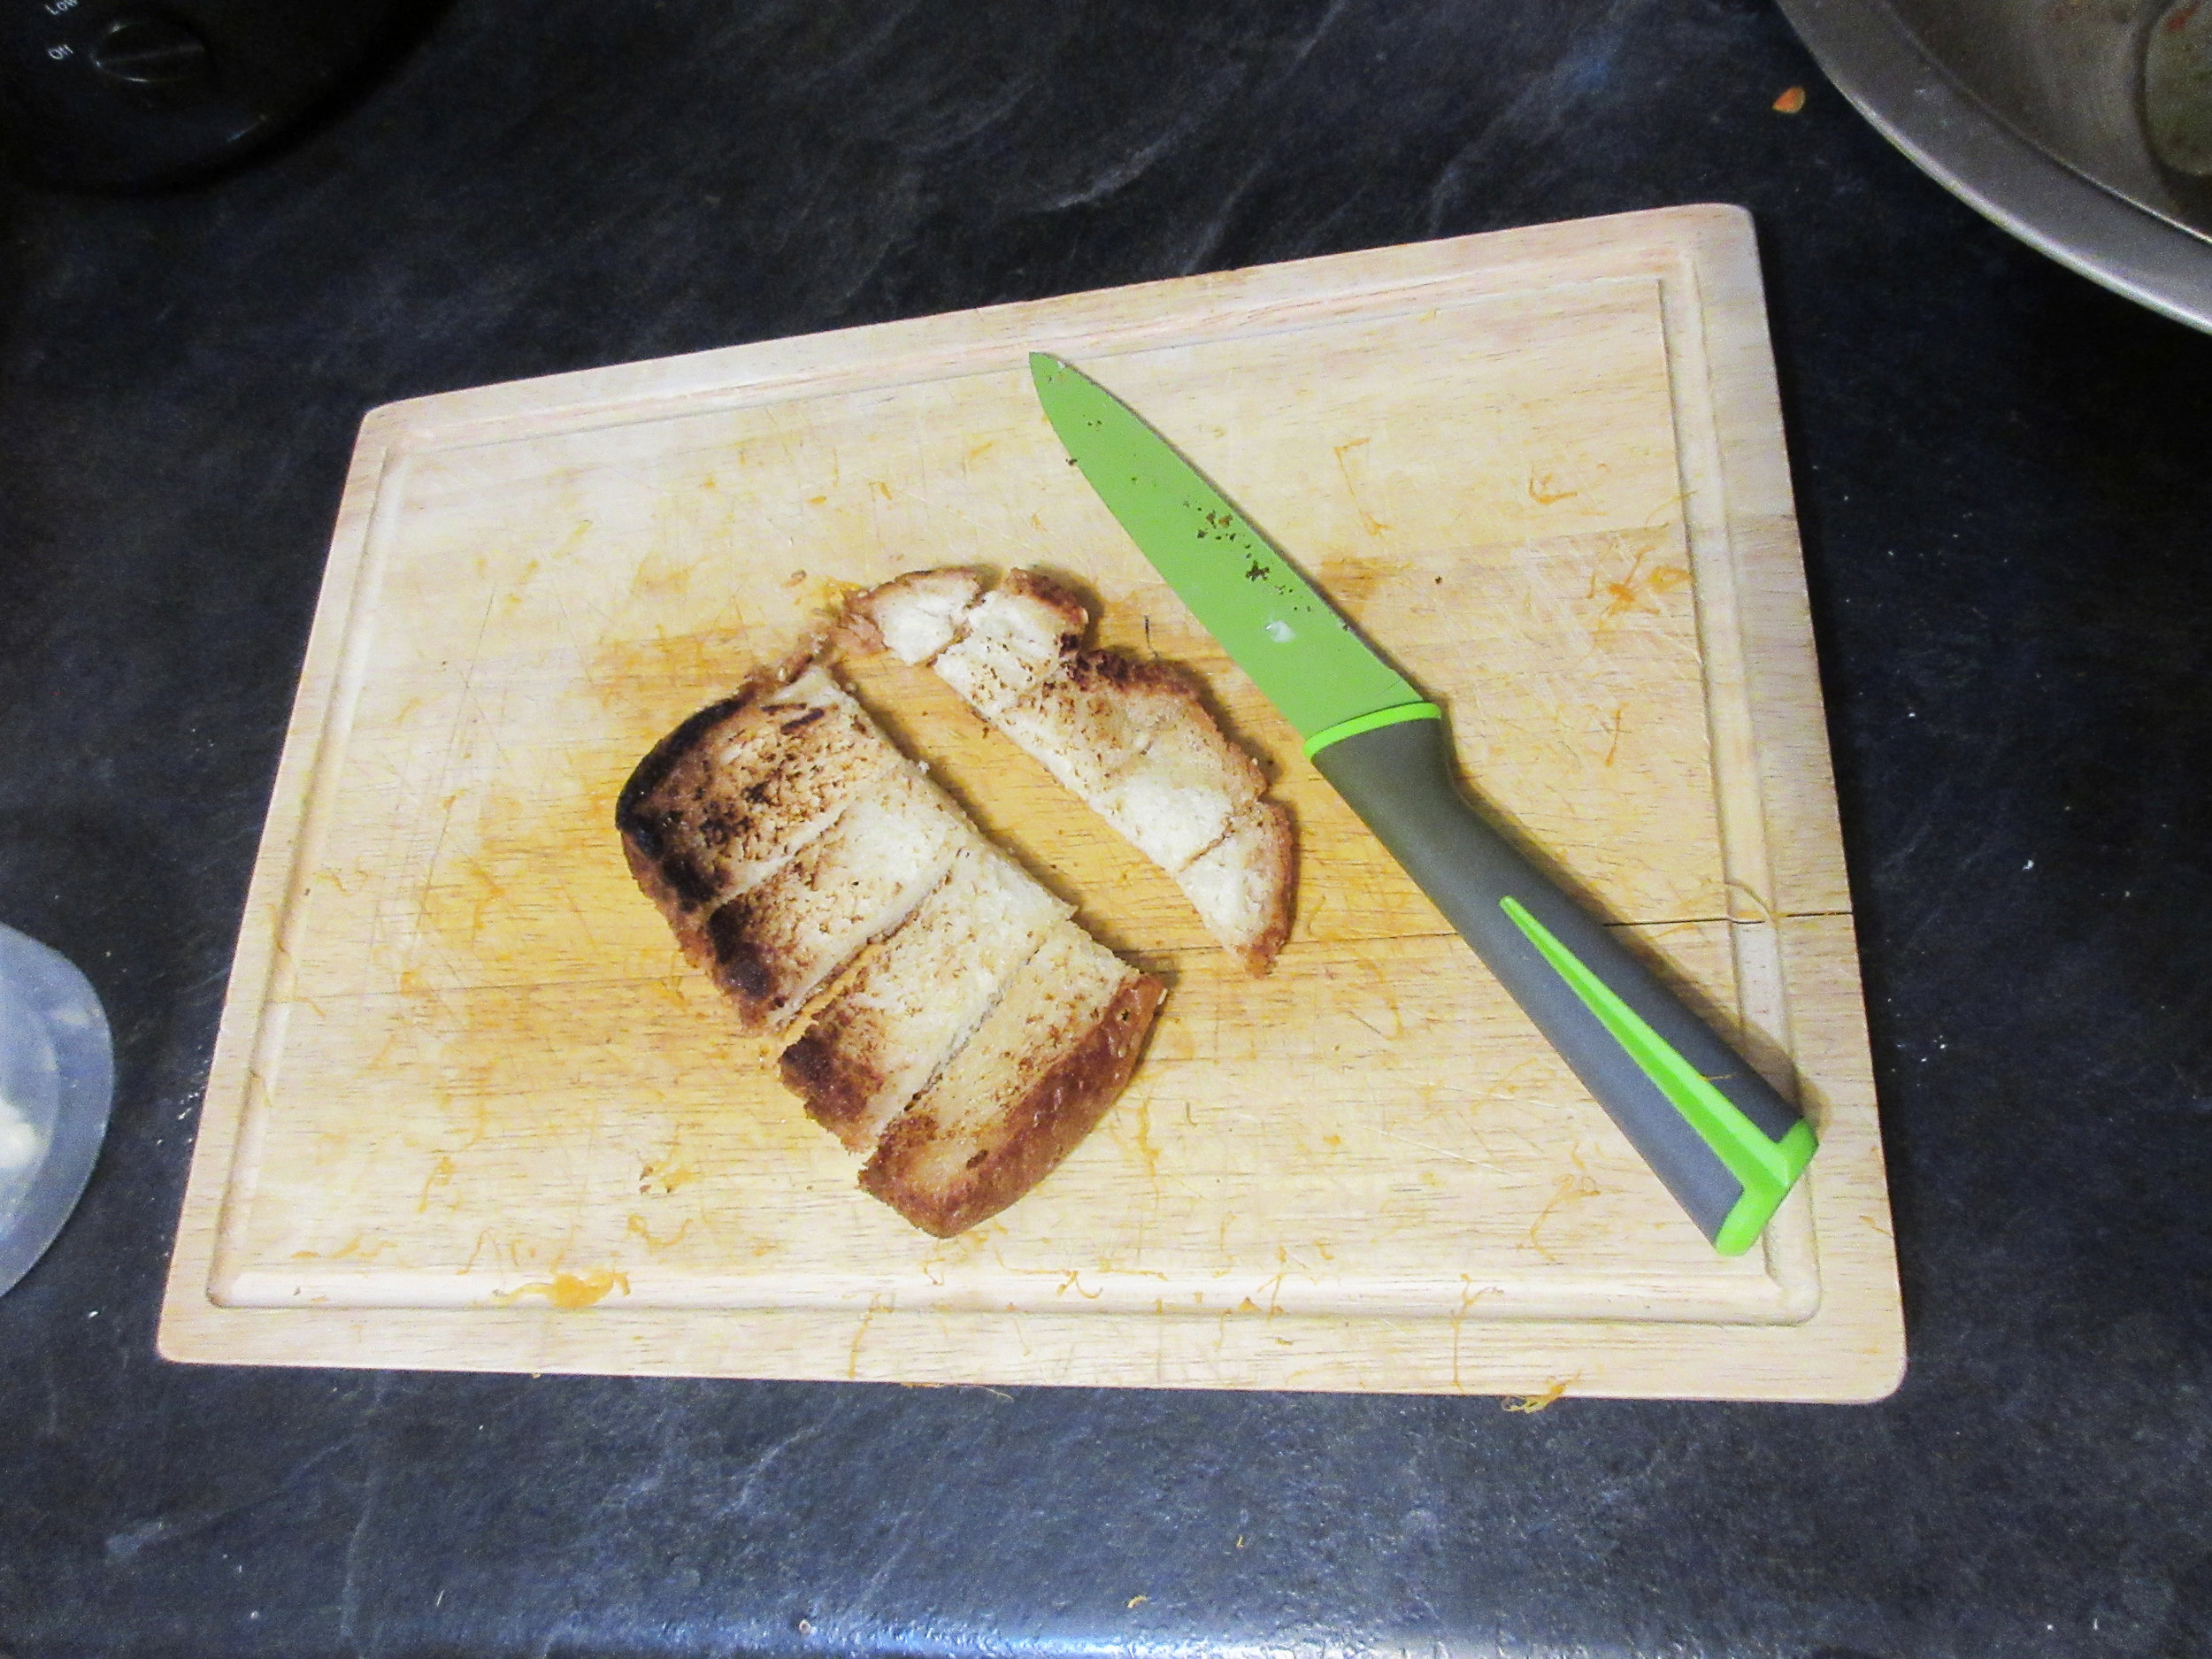
The day my Apple Butter finished, I was actually invited to two birthday parties, so I walked down the street to my neighbourhood bakery, picked up a loaf of French Bread and took bread & a little container of Apple Butter to the parties. I also kept some for myself, and it was so delicious that I certainly didn't have to worry about preserving it for a year, let alone a week!


Read the Cookbook:
Albany Cake
If a sweet scone and a cookie got married and had a baby, that baby would be Albany Cakes. However you classify Albany Cakes, this sweet bit of bakery with cinnamon and rose water flavours is deelish! This was another recipe that we made at the cooking classes that I taught this autumn at Nelles Manor Museum in Grimsby. Our Albany Cakes recipe comes from The Frugal Housewife's Manual, published in Toronto in 1840, but written by “A.B.”, a mysterious resident of Grimsby who likely would have known the Nelles family.

You'll find this recipe in:
The Frugal Housewife's Manual
By “A.B. of Grimsby”
Toronto, 1840
Historic Recipe:
12. Albany Cake.
Take one pound and a half of flour, one of sugar, half a pound of butter, a tablespoon-ful of lard, two-tablespoonsful of rose water, a little cinnamon, one egg; a teaspoonful of saleratus, put in a tea cup of cream. Cut them out, and bake them on tin.


My Recipe:
½ lb (1 cup) softened butter
2 cups white sugar - 450 g
4 1/3 cups white flour - 450 g
2 tbsp rose water
1 tsp cinnamon
1 egg
1 tsp baking soda
1 cup (236 mL) cream
1) Preheat oven to 350 F (175 C). Cream softened butter and sugar together, then stir in the flour.
2) Add rose water, cinnamon and egg. Stir the baking soda into the cream to dissolve before adding the cream to the dough and stirring well until all the flour is incorporated.
3) This is a wet dough, so flour your rolling pin and rolling surface well. Roll out to your desired thickness and cut out into rounds. Bake for about 15 minutes, or until slightly golden on the bottom.
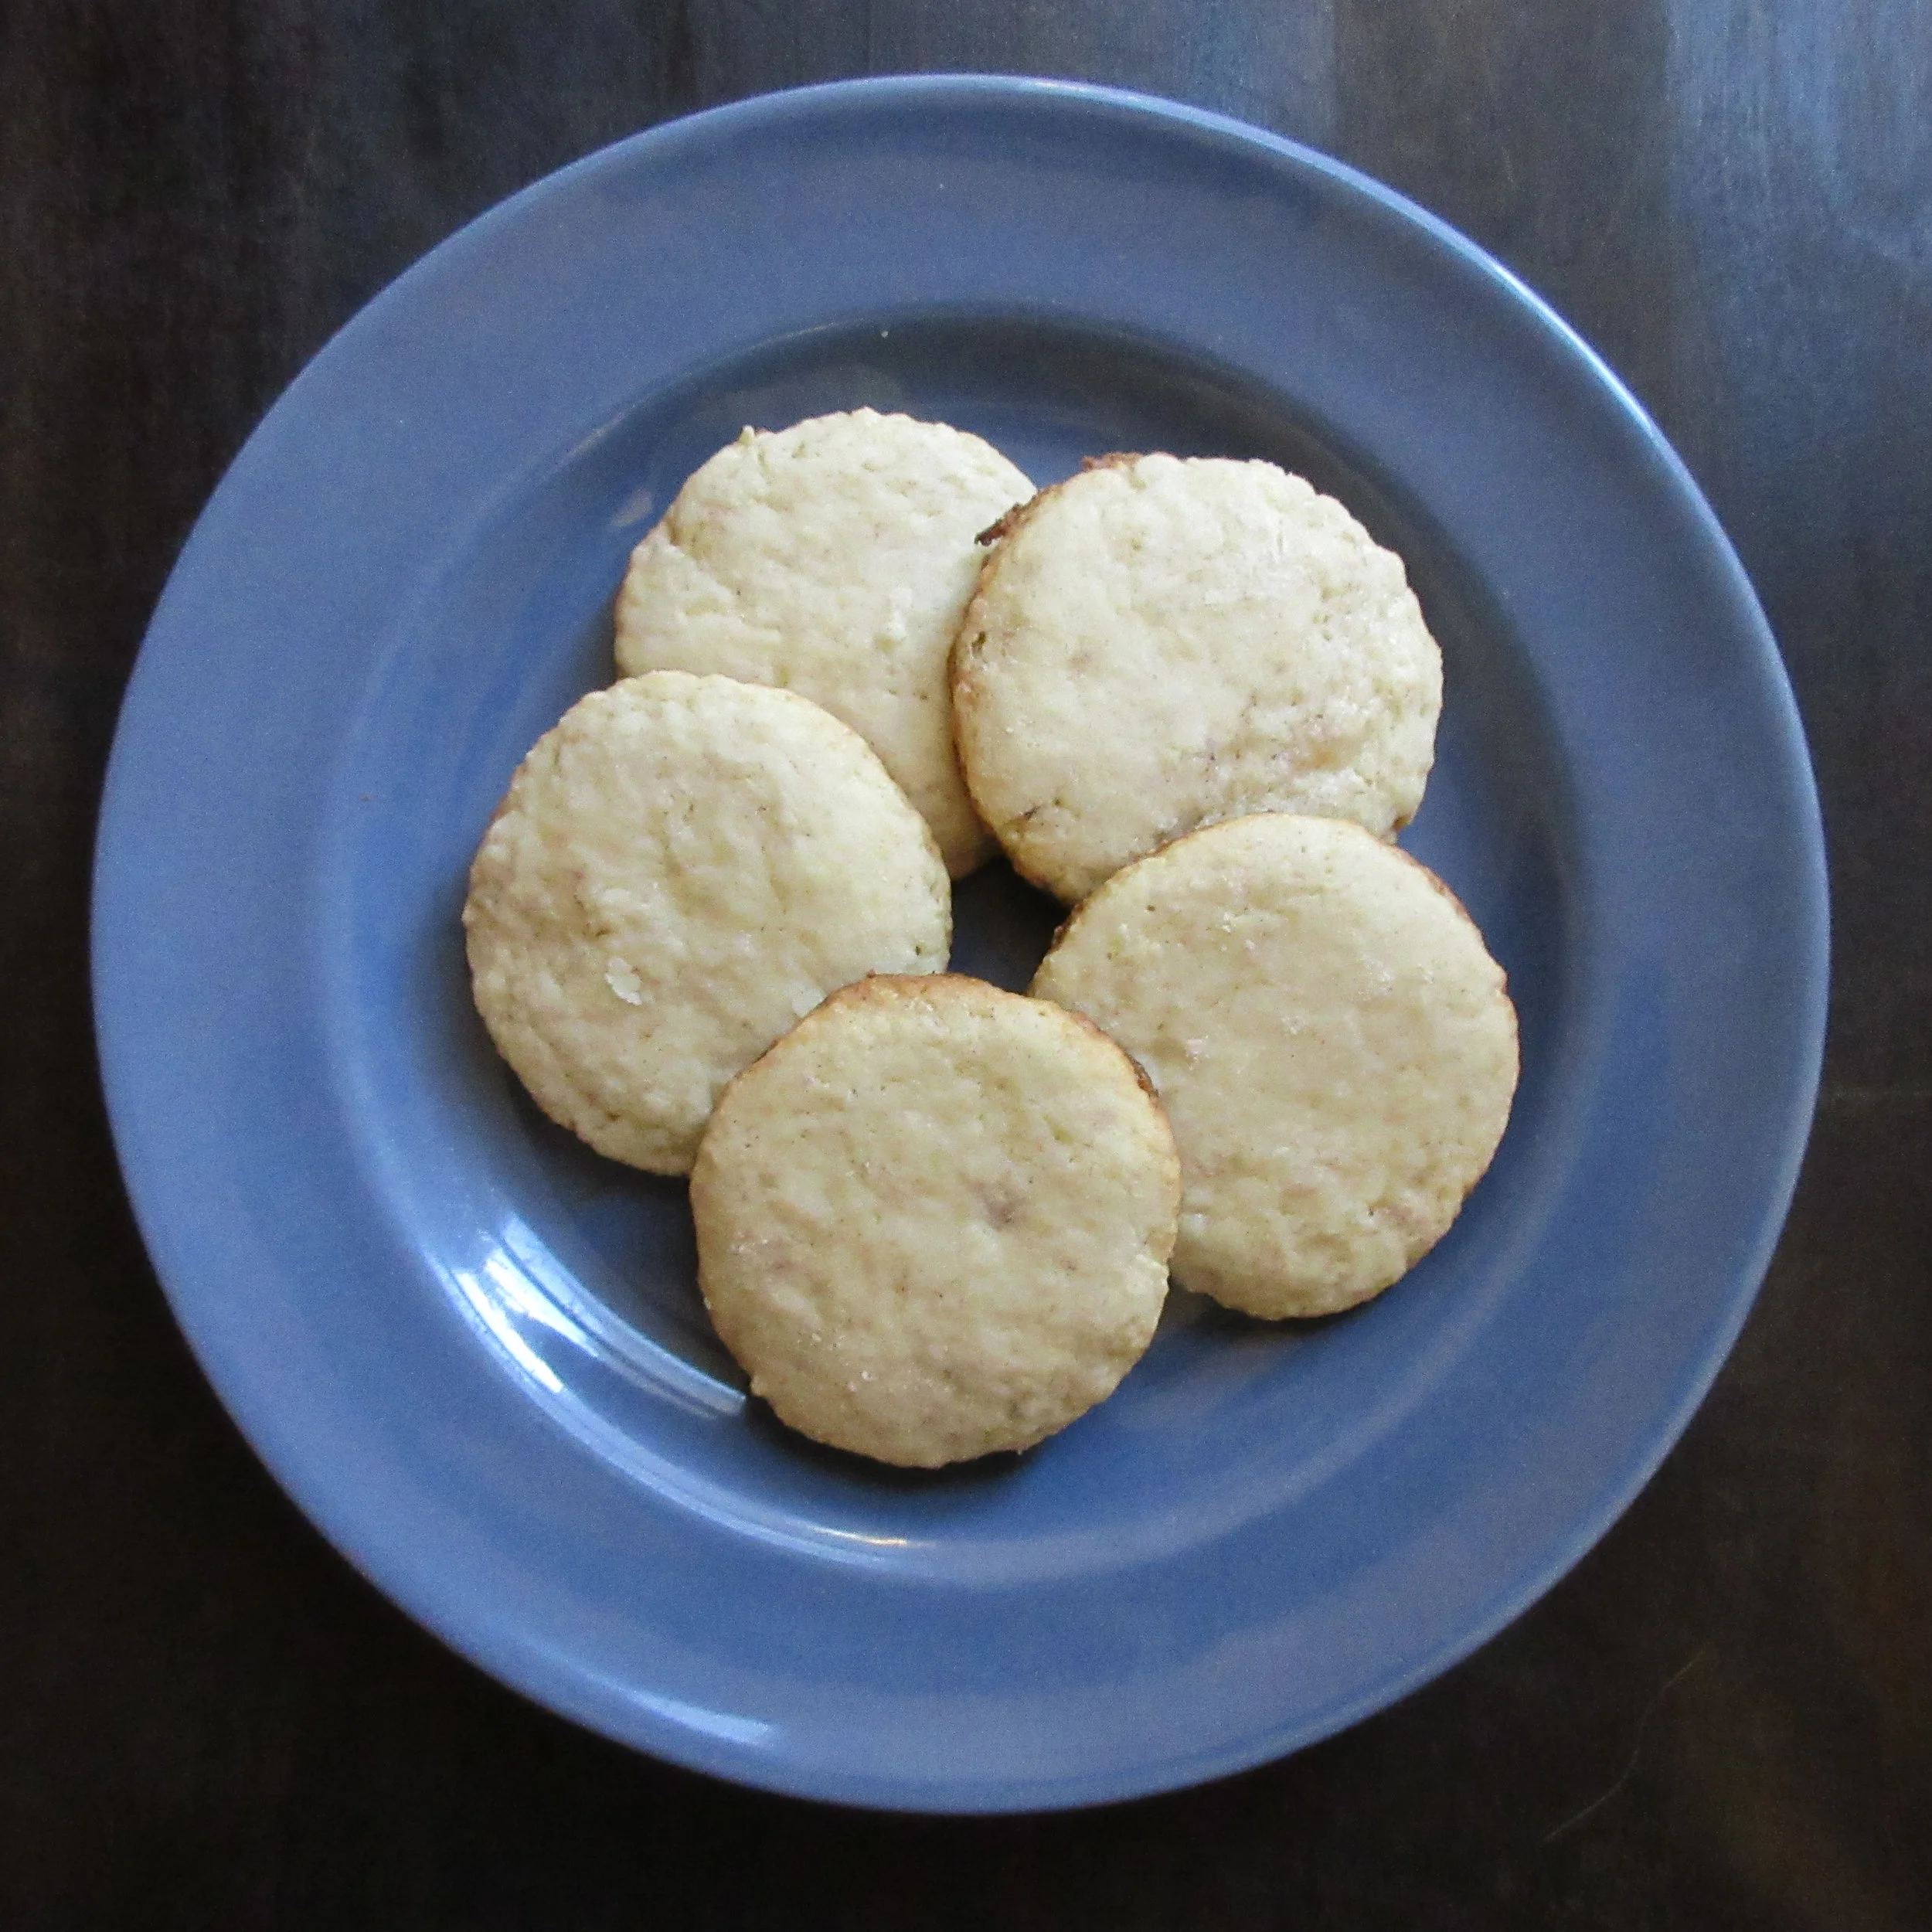
This recipe makes about 7 dozen 2-inch thin Albany Cakes.


If a sweet scone and a cookie got married and had a baby, that baby would be Albany Cakes. However you classify Albany Cakes, this sweet bit of bakery with cinnamon and rose water flavours is deelish! This was another recipe that we made at the cooking classes that I taught this autumn at Nelles Manor Museum in Grimsby. Our Albany Cakes recipe comes from The Frugal Housewife's Manual, published in Toronto in 1840, but written by “A.B.” a mysterious resident of Grimsby who likely would have known the Nelles family.
The historic recipe doesn't stipulate how thickly to roll the Albany Cakes, or even that you need to roll out the dough. It does tell you to “Cut them out”, so I read between the lines that the dough should be rolled out first.
I rolled the Albany Cakes that I baked in my oven at home quite thinly, and these Albany Cakes were more cookie-like. At the cooking classes, the attendees rolled them out thicker (about 1 cm), so those Albany Cakes ended up being more like a scone. This worked out great for everyone because we made fresh butter together at the class, so everyone was able to enjoy using the Albany Cakes as vessels to get butter into their mouths!
I was often asked at the classes where to get Rose Water and in Canada at least, I'm able to just go to my regular grocery store to buy it. You'll find it either in the baking aisle, or sometimes in the International section with the Middle Eastern food.

Our Albany Cake recipe was found in The Frugal Housewife's Manual, which became the first English-language cookbook to be both published & compiled in Canada in 1840. The author was credited as “A. B. of Grimsby”, and as far as I've heard, the identity of A. B. hasn't been sorted out yet. Maybe this is a future blog post?
Canadians slowly eased themselves into the cookbook game. In 1825, the first cookbook published in the colony was La cuisinière bourgeoise, but it wasn't actually printed in Quebec. This cookbook was printed in France, but bore the nameplate of Quebec City bookseller Augustin Germain. This Quebec version captured the third edition of La cuisinière bourgeoise. The first edition of the cookbook was printed in 1746 in France and was written by Menon, the pseudonym of a very popular, but anonymous, eighteenth-century French cookbook author.
In English Canada, The Frugal Housewife's Manual was preceded by The Cook Not Mad; or Rational Cookery, being published in Kingston, Ontario in 1831. It was almost an exact replica of the cookbook of the same name that was printed the year before in Watertown, New York, with the word “American” changed to “Canadian”.
The first French-language cookbook to be written and published in Canada was La cuisinière canadienne, which was printed in Montreal in 1840 (the same year as The Frugal Housewife's Manual). The author of La cuisinière canadienne still remains anonymous today, but this cookbook became a Quebeçois classic, with eleven editions produced well into the twentieth-century.
Unfortunately for “A. B. of Grimsby”, The Frugal Housewife's Manual didn't enjoy the same wildfire popularity. This slim volume is comprised of 66 pages and roughly the first half of the book contains 72 food recipes. Then the book morphs into a gardening manual, filled with “Practical Directions for Cultivation of Vegetables”.
Despite the fact that only one edition was ever produced, I recommend both the recipes I've made from this cookbook so far: Albany Cake (recipe #12) and Shrewsbury Cake (recipe #10). I hear there's a rare original copy of The Frugal Housewife's Manual at the McMaster University Archives here in Hamilton, and the two of us may have a date sometime in the future.
Read the Cookbook:

Pumpkin Soup
This Pumpkin Soup recipe comes from The Canadian Housewife's Manual of Cookery, which was compiled & published in my hometown of Hamilton, Ontario in 1861. It is hearty & flavourful, and I think the reason for this can be found in a one-word answer: butter. Expect a creamy robust soup with small chunks of pumpkin (or squash, if you can't find pumpkin). This soup is so rich that it might make a better side dish rather than the main component of your meal, but if you do try this recipe out, I highly recommend the historic recipe's suggestion of adding croutons made of fried bread to your bowl!

You'll find this recipe in:
The Canadian Housewife's Manual of Cookery
Henry & Elizabeth Richards
Hamilton, 1861
Historic Recipe:
Pumpkin Soup.
16. Is a favourite dish in many parts of France, especially with the juveniles; and when, in season, there is not a school, college, hospital, convent or monastery, where it is not made; a proof that it must be very wholesome. The Vegetable Marrow, the American Butter Squash, and the Mammoth Gourd, are good substitutes.
Cut about two pounds of the flesh of the pumpkin into large dice, put it into your pan, with three ounces of butter or fat; add two teaspoonfuls of salt, the same of sugar, a little pepper, and half a pint of water; set on the fire, and stew gently for twenty minutes. When in pulp, add two table-spoonfuls of flour, stir round, and moisten three pints of either milk, skim-milk, or water, boil ten minutes longer, and serve with fried or toasted bread, cut in dice.
☞This soup is on the list of meagre soups, and freely partaken by Catholics during Lent, the word meagre meaning, want of strength. But this soup, and many others in the same category, are well worth the attention of the middle class of this country, it only being meagre in name, and not in fact, as it possesses a large quantity of farnaceous matter; bread also being served with it.
My Recipe
2 lbs (907 g) pumpkin or squash – 8 cups when chopped
1/3 cup butter, oil or fat – 3 oz
2 tsp salt
2 tsp sugar
Dash of black pepper
1 cup water – 236 mL
2 tbsp flour
6 cups milk and water – 1.4L
(I like 3 cups milk & 3 cups water)
Optional:
Bread
Butter
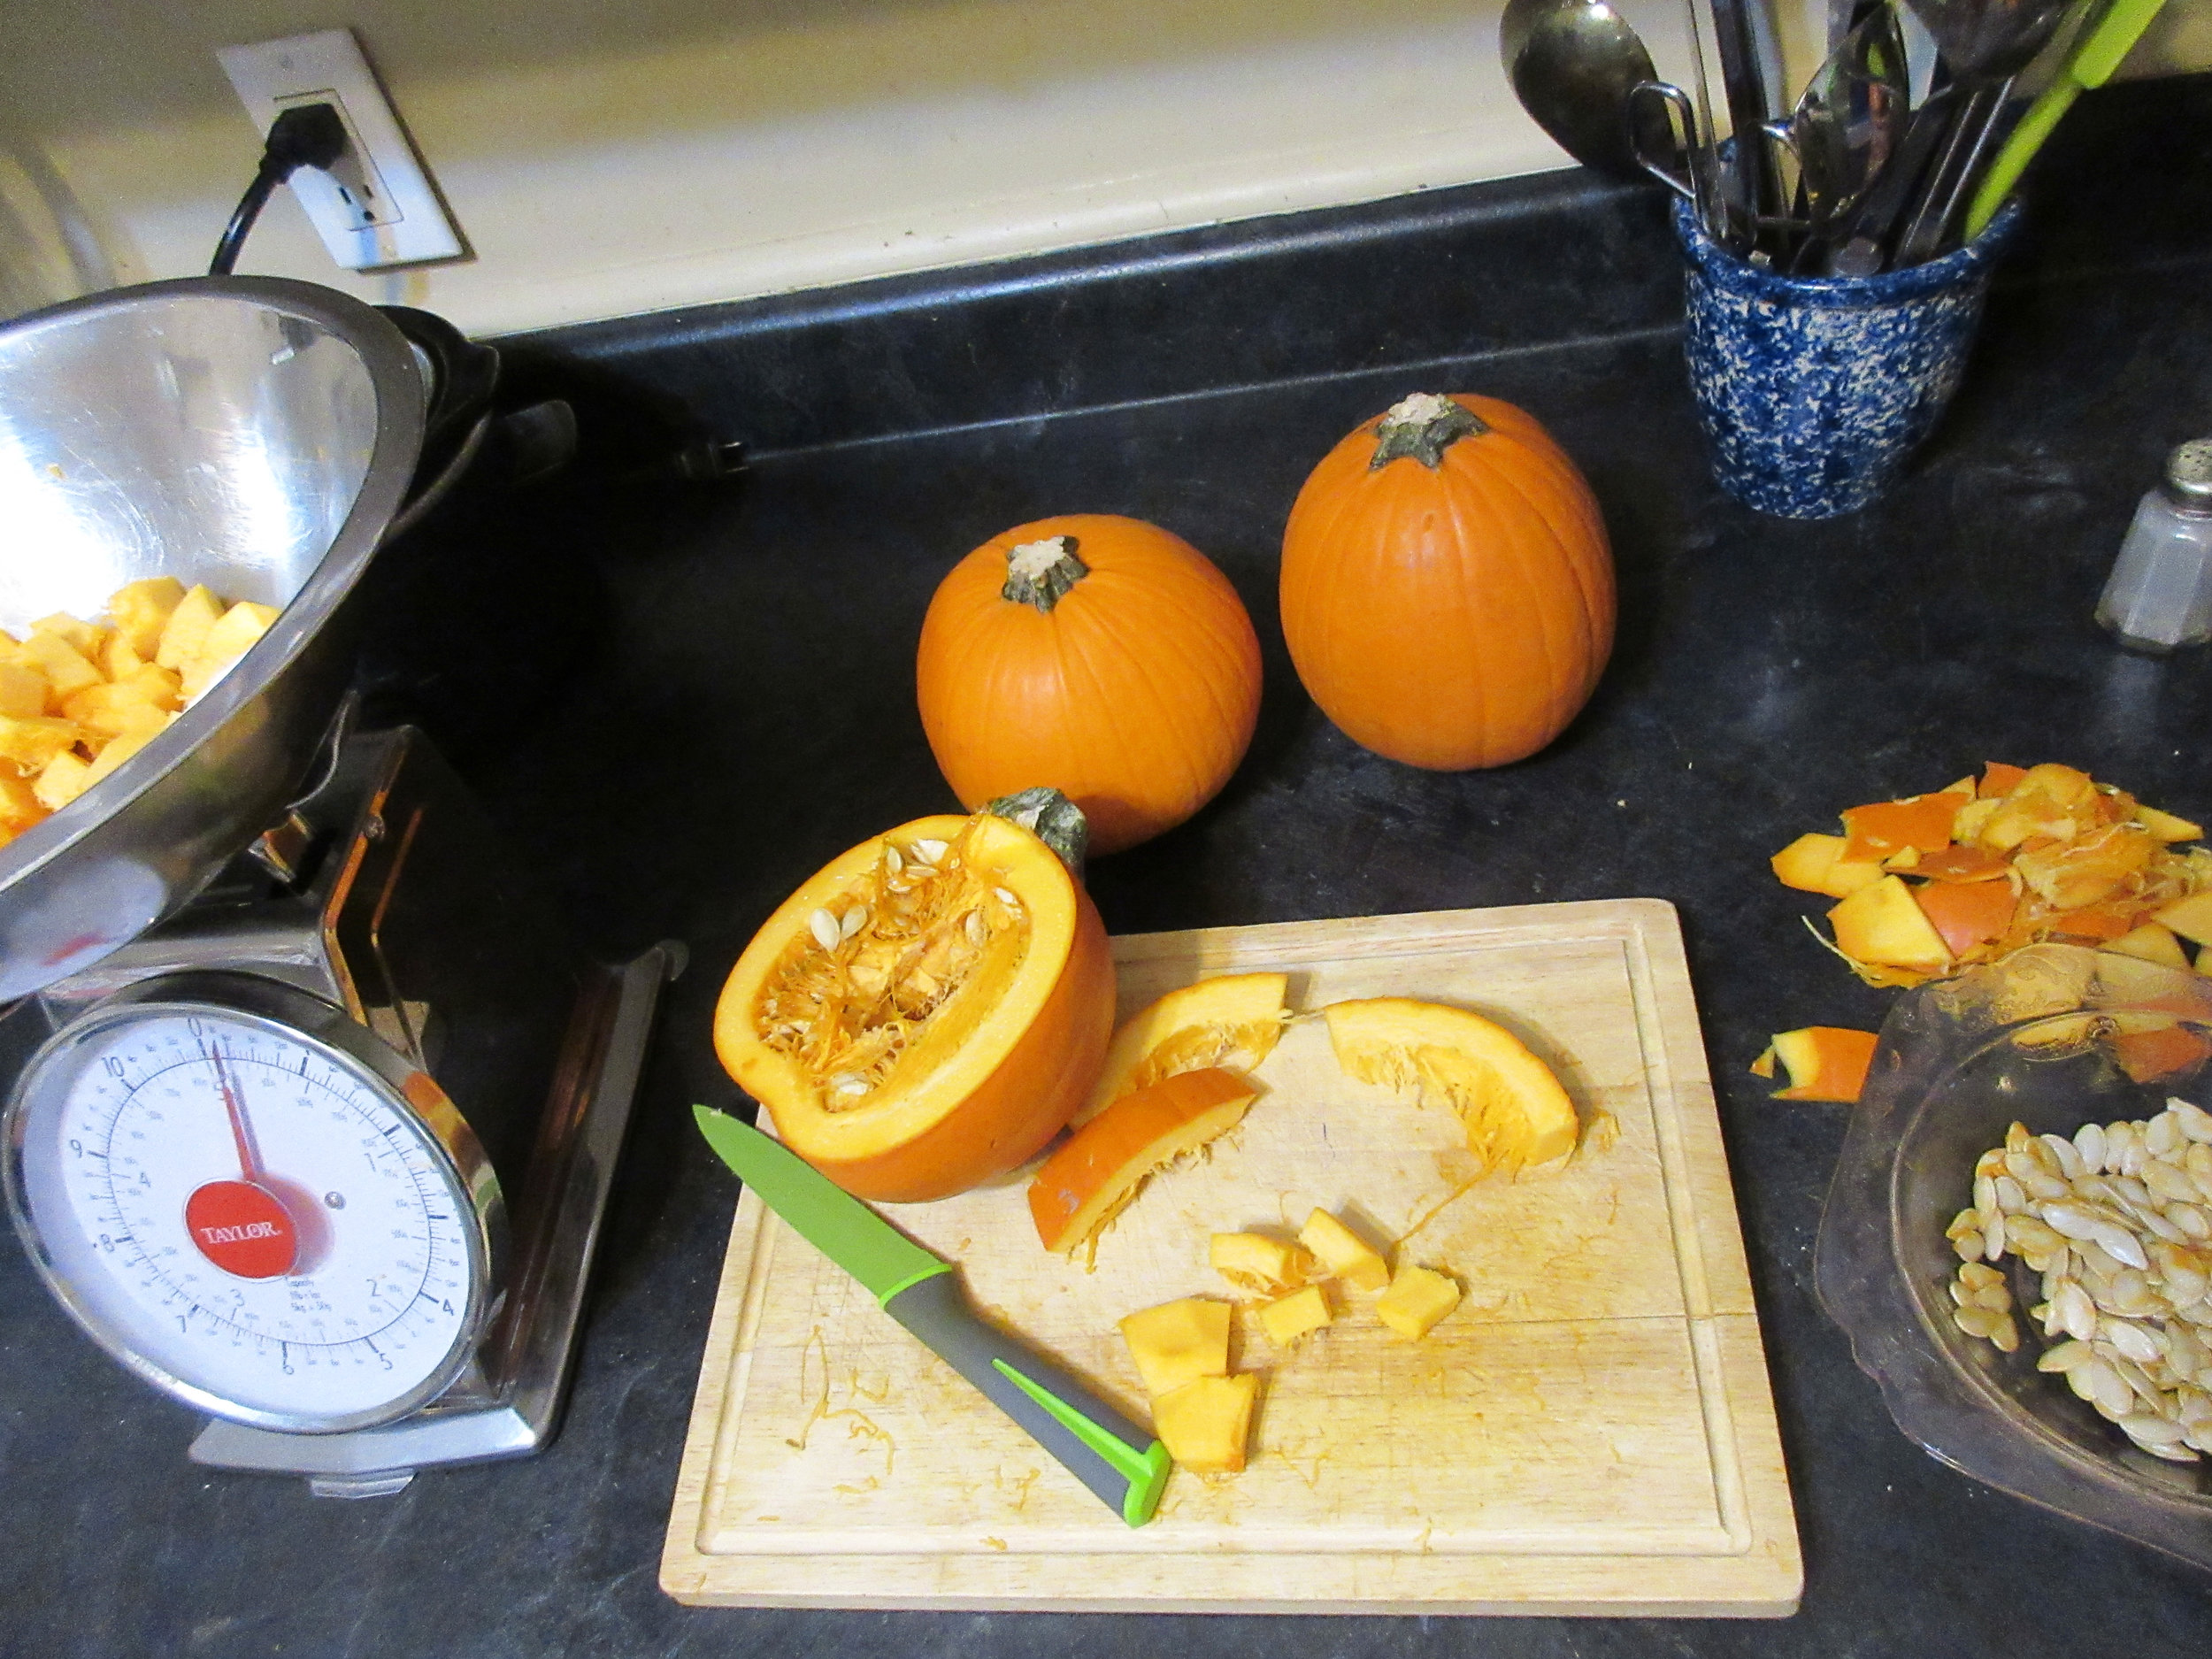
1) Peel, seed and chop the pumpkin or squash into small pieces. I've made this recipe with both pumpkin and butternut squash and both are delicious.
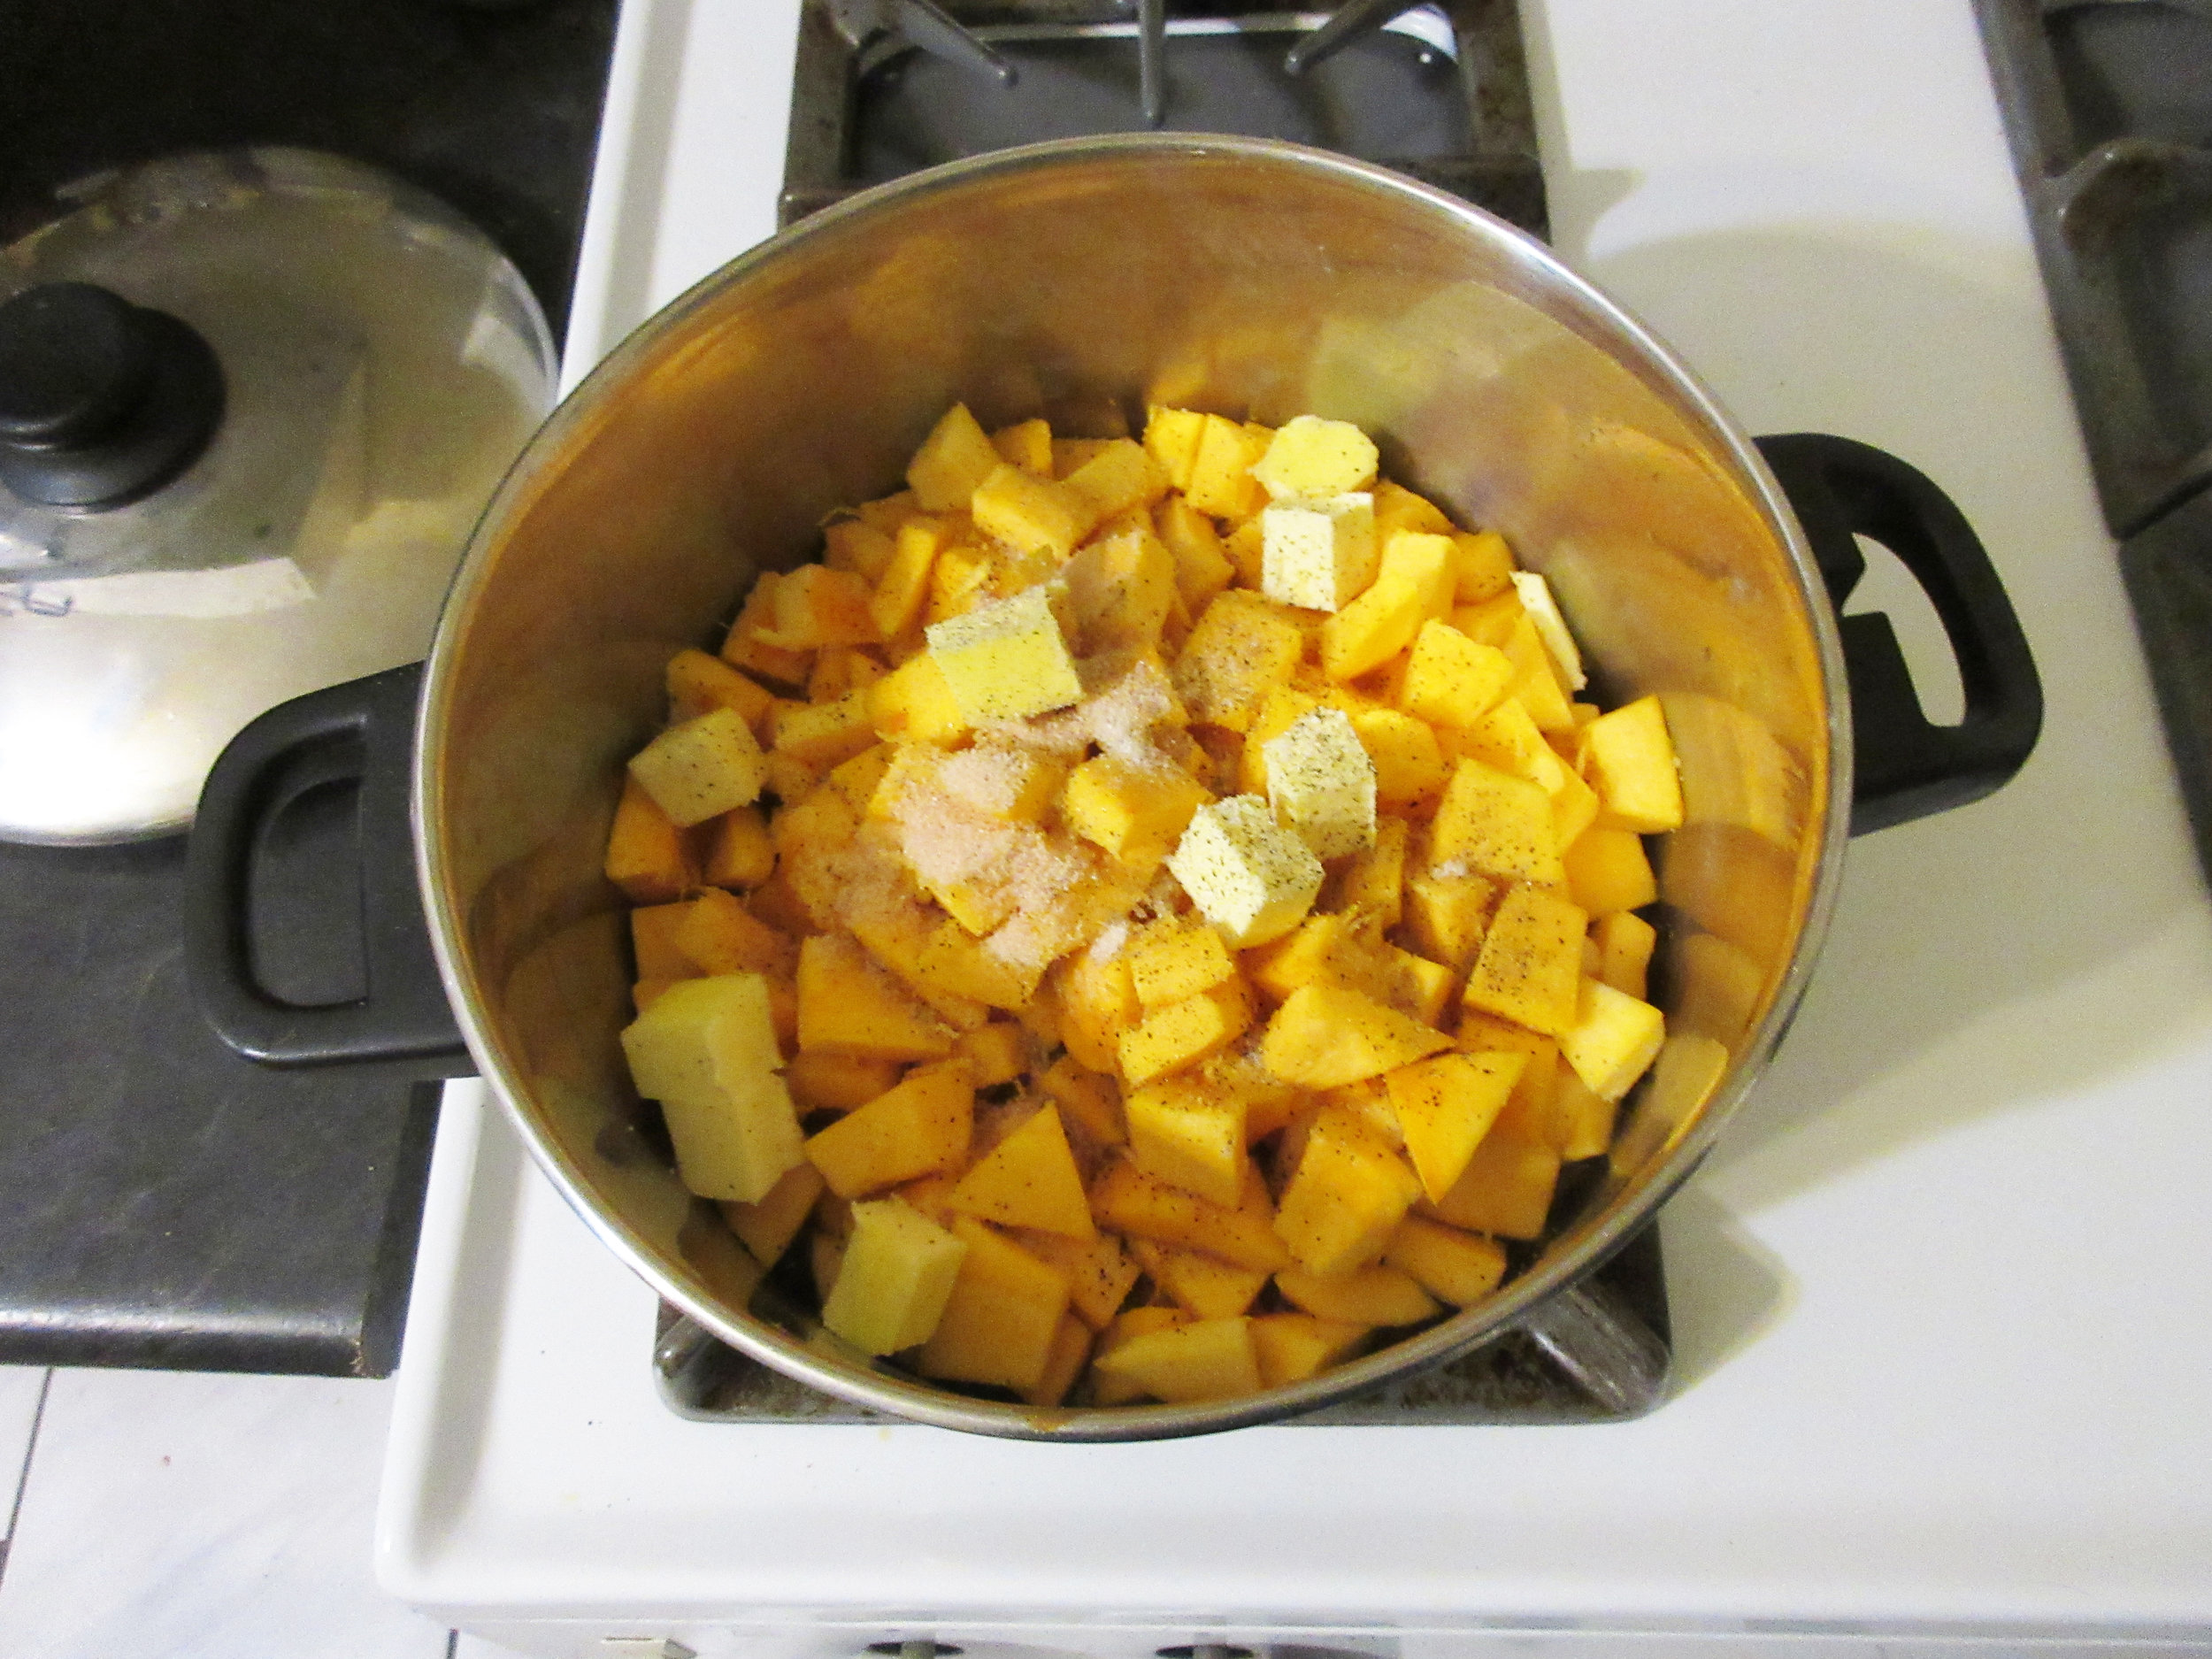
2) Put the chopped squash in a large soup pot with the butter, salt, sugar, pepper and 1 cup water. Put on the lid and simmer until soft and mushy, stirring often. 1 cup probably won't seem like enough water to you, at least it didn't to me, but I've made this recipe 5 times (once at my house and 4 times at cooking classes) and it's just the right amount.
3) Once the squash is mushy, mash with a potato masher, then stir in the flour. Add the milk & water, mix well and reheat.
Optional: the historic recipe suggests "serve with fried or toasted bread, cut in dice". Instead of popping my bread in the toaster, I fried it in a pan of butter before I diced the bread. Recommended!

This Pumpkin Soup is hearty & flavourful, and I think the reason for this can be found in a one-word answer: butter. Expect a creamy robust soup with small chunks of pumpkin (or squash, if you can't find pumpkin). This soup is so rich that it might make a better side dish rather than the main component of your meal, but if you do try this recipe out, I highly recommend the historic recipe's suggestion of adding croutons made of fried bread to your bowl!
We made Pumpkin Soup at the open hearth cooking classes I taught at Nelles Manor Museum in Grimsby this fall. I really wanted to make some recipes with a local connection at these classes, so I perused a scan of The Canadian Housewife's Manual of Cookery online to find a seasonable autumn recipe and Pumpkin Soup is what I found.
The Canadian Housewife's Manual of Cookery was compiled by Henry & Elizabeth Richards and published in my hometown of Hamilton, Ontario in 1861, which is about a 30 minute drive to Grimsby these days (unless the highway is jammed with traffic going to Niagara Falls). Henry Richards was was a printer and was employed at the time of The Canadian Housewife's Manual of Cookery's publication at the Hamilton Spectator, which is still Hamilton's local newspaper today.
In his Preface, Richards writes that "the compiler has been somewhat indebted to a late work by M. SOYER's, the celebrated French Cook, as well as to some of the latest English, French, and American works on the same subject; and having thus carefully culled and collated from these sources all that was valuable and applicable to this country, he most respectfully admits the same for the approval and patronage of the Canadian Housewife".
Considering Canada's social identity as a quilt assembled from many cultures, I find it fitting that Henry and Elizabeth Richards turned to recipes from other countries and put them together to create a cookbook for Canadians. The Canadian Housewife's Manual of Cookery features some ingredients native to Canada, such as pumpkin, but also has an unusual number of tomato recipes for that era, sections on cooking wild fowl, rabbit & hare and a chapter on "Ale, Beer, Wines and Summer Drinks".
Read the Cookbook:

Orange Drops
I wanted to make a candy recipe in honour of Halloween this year, so I did a search on my favourite place to discover new old cookbooks, the Internet Archive, and found the 1788 gem A new collection of receipts in confectionary.
Orange Drops are a candy made of a dehydrated purée containing orange peel, white sugar and a bit of orange juice. Depending on how you dehydrate them, Orange Drops can be crispy or soft like a jujube. If you love Candied Orange Peel, you'll probably enjoy these Orange Drops! They’re less sweet than Candied Orange Peel (probably because they don't have the white sugar coating found on candied peels), so expect a balanced sweet & sour citrus flavour.

You'll find this recipe in:
A new collection of receipts in confectionary
"Collected by Several Hands"
London, 1788
The Original Recipe:
To make ORANGE-DROPS.
TAKE about a Dozen Oranges, ſqueeze out the Juice boil the Rind very tender, cut out moſt of the white, and beat the yellow Rind very fine; Rub it through an Hair Sieve; and to a Pound of the Pulp put a Pound and a half of fine Sugar, ſifted thro an Hair Sieve; mix it well in, and put in the Juice 'till you make it thin enough to drop from a Tea-Spoon: Drop it on Glaſſes, and ſet it by the Fire; let it ſtand there about two Hours, and put it in a Stove; the next next day turn it: it will be dry in twenty-four Hours.

Orange Drops are a candy made of a dehydrated purée containing orange peel, white sugar and a bit of orange juice. Depending on how you dehydrate them, Orange Drops can be crispy or soft like a jujube. If you love Candied Orange Peel, you'll probably enjoy these Orange Drops! They’re less sweet than Candied Orange Peel (probably because they don't have the white sugar coating found on candied peels), so expect a balanced sweet & sour citrus flavour.
Warning: Don't make the full recipe using 12 oranges unless you're interested in making hundreds of Orange Drops! Luckily, this is a recipe that can be very easily scaled up or down according to the number of oranges you'd like to use. Orange Drops can be prepared over days in steps, and will probably take more than one day if you factor in the time it will take to dehydrate the drops.
If you've had a look at the Orange Drop recipe from 1788 and are wondering about those strange-looking letters that appear where an 's' should be, give my To boil green peas post a read where I give a brief history about the use of the Long S in the English language.
My Recipe:
Step 1 – Prepare the Peels
The historic recipe suggests using a dozen oranges, so that's what I went with. I used navel oranges, so their size may be part of the reason why this recipe makes so much.
Peel the oranges and place the peels in a pot.
I only juiced 3 out of the 12 oranges and popped the rest of the peeled oranges in the fridge to be eaten later. I had over twice as much juice as I needed to moisten the drops.
I added just enough water to the peels in a large pot to cover them, then let it simmer while covered for about an hour, until the peels were soft.
Drain the peels, rinse them well and allow them to cool.


Step 2 – Make the Orange Drop Goo
The measurements using 12 oranges:
4 cups puréed orange peel = 907 g (2 lbs)
6 cups white sugar = 1360 g (3 lbs)
1 cup (236 mL) orange juice
The ratio for this recipe is:
1 puréed peel : 1.5 white sugar
+ Just enough orange juice to moisten the sugar
Once cool, put the orange peels in a blender or food processor. I managed to get the peels down to a chunky marmalade consistency, then I put them in the bowl.
Add the white sugar: The historic recipe suggests a ratio of 1 lb peel purée to 1.5 lbs white sugar. I weighed everything, then measured it out in cups and it seems that white sugar and puréed orange peel weigh the same, because the ratio works out in both pounds and cups. If you don't have a kitchen scale, don't worry, just measure the ingredients out in cups!
"put in the Juice 'till you make it thin enough to drop from a Tea-Spoon". I slowly added the orange juice until the sugar was incorporated.
If your mush has chunks of peel in it like mine did, put the mush back into the blender again to blenderize it into a smoother goo.


Step 3 – Dehydrate
Oven dehydration:
Put parchment paper on cookie sheets and preheat your oven to the lowest temperature possible (my oven's lowest temperature is 170 F or 75 C). Drop your orange peel goo onto the cookie sheets using a teaspoon and spatula.
I put in 3 cookie sheets containing about 100 Orange Drops and they took between 6.5 to 9 hours to dehydrate! I didn't move the trays around, so making this recipe ended up being a study in the nuances of my oven's temperature fluctuations.
When you think your Orange Drops might be fully dehydrated, allow them to cool then try peeling off the parchment paper. When they no longer break or bend and peel off in a solid piece, your drops are done! If they do break or bend, just mush them back together, put them back in the oven and they'll reattach themselves as they continue to dehydrate.
Dehydrator:
I tried dehydrating them in the oven first, but considering I had only used a fraction of my orange peel goop, I decided to borrow some dehydrators from the lovely people in my life*
I cut parchment paper to fit the trays, dropped out the drops and turned it on. Using a dehydrator is definitely more user-friendly than trying to dehydrate in the oven. I left it running in the background and after a day, more or less, the Orange Drops were done.


The difference? I think the dehydrator Orange Drops look prettier than the oven Orange drops. The candies dried out in the oven are flatter and crispier, and the dehydrator drops have a softer consistency similar to jujubes. They taste the same, though. I wouldn't say one is better than the other, though. I prefer the softer jujube dehydrator Orange Drops, but Steve thinks the crispy oven drops are better!
*A big thank you goes to Cindy, Anna and Helen for loaning me their dehydrators when I found myself lost under a wave of Orange Drop goo, and to Caroline who also generously offered me hers, although our paths never crossed in time to make the exchange.

On the left, Oven, and to the right, Dehydrator
Read the Cookbook:

Squash Puff
If you asked anyone in my family about our traditional family recipes, probably the first dish listed by everyone would be Squash Puff. I'd describe Squash Puff as a cross between squash pudding and soufflé. It is light, fluffy and very flavourful considering it doesn't contain any onions or herbs. My Mom cut the recipe out of a newspaper at some point and it's been in her giant binder of recipe clippings ever since I can remember. Give Squash Puff a try at your next Thanksgiving, potluck or family gathering...or when you've got a hankering for some satisfying comfort food.

Recipe Origins:
An Ontario newspaper
Probably clipped in the 1960s-1970s
The Original Recipe:
Squash Puff
(Serves six to eight)
2 ½ pounds Hubbard or pepper squash – three cups mashed.
One-half cup chopped mild onion.
Two tablespoons butter.
Two large eggs – yolks and whites separated.
One-quarter cup milk.
Three tablespoons flour.
Three teaspoons baking powder.
Three-quarter teaspoon salt.
One-eighth teaspoon pepper.
One-half cup buttered crumbs (see below).
Cut up squash with heavy knife and steam until tender on rack in large shallow pot with boiling water underneath, covered. Scoop and scrape flesh from skin and mash using electric or rotary beater. You should have three cups.
Gently saute onion in butter until limp but not brown. Add to squash. Beat in egg yolks and milk until smooth. Stir in flour, baking powder, salt and pepper. Fold in stiffly beaten egg whites.
Turn into buttered six-cup baking dish. Top with buttered crumbs. (This last step is important – stir one tablespoon melted butter into one-half cup fine breadcrumbs.)
You may break it now at 375 degrees for 25 minutes or until lightly browned OR you may refrigerate it for 24 hours and bake it a little longer.


A couple of notes about the recipe:
As the recipe says, the buttered bread crumbs are key. If you're using a shallow dish with more surface area, make sure you use more buttered bread crumbs so it has a generous coating on top.
The recipe lists that you'll need 2 ½ lbs of squash, which will produce 3 cups of cooked & mashed squash. When I went grocery shopping, I assumed that the 2 ½ lbs was referring to raw squash. I wanted to make a double batch so we had plenty (it is VERY popular with my family), so I bought a 4 kg (almost 9 lb) squash, thinking that I'd have enough squash for a double recipe and some left over. But once it was cooked and mashed, I ended up with only 4 cups, so I showed up to my family's Thanksgiving with only a single batch. The lesson learned: buy more squash!

If you asked anyone in my family – my Mom, brother, sister, nieces, nephews & spouses – about our traditional family recipes, probably the first dish listed by everyone would be Squash Puff. This recipe is so popular that when my family gets together for Thanksgiving or Christmas, one of the first things that is settled is "Who is making the Squash Puff?" Most of us were able to gather for Canadian Thanksgiving earlier this month, so this time I volunteered to make it.
Squash Puff is a cross between a squash pudding and souffle. It is light, fluffy and very flavourful considering it doesn't contain any onions or herbs. My Mom cut the recipe out of a newspaper at some point and it's been in her giant binder of recipe clippings ever since I can remember.
I asked my Mother about iconic moment that she clipped the Squash Puff recipe out of the newspaper at Thanksgiving. The truth is that she clipped it out of desperation. She said that she decided to save the recipe because her children hated squash and she was always on the lookout for a way to get us to eat vegetables. We hated squash, but we loved Squash Puff. That's what I remember as a child. I dreaded when squash was on the menu, but I rejoiced when I knew that Squash Puff would be on the dinner table!
I always remember Squash Puff being served at special occasions, but my oldest sister remembers Squash Puff making its debut in the early 1970s. Who knows which southern Ontario newspaper it came from, but if I had to bet I'd place my money on the Kitchener-Waterloo Record.
Give Squash Puff a try at your next Thanksgiving, potluck or family gathering...or when you've got a hankering for some satisfying comfort food. And while you're enjoying it, raise a glass to the Baird family, my Mom's practically and her brood of picky eaters.

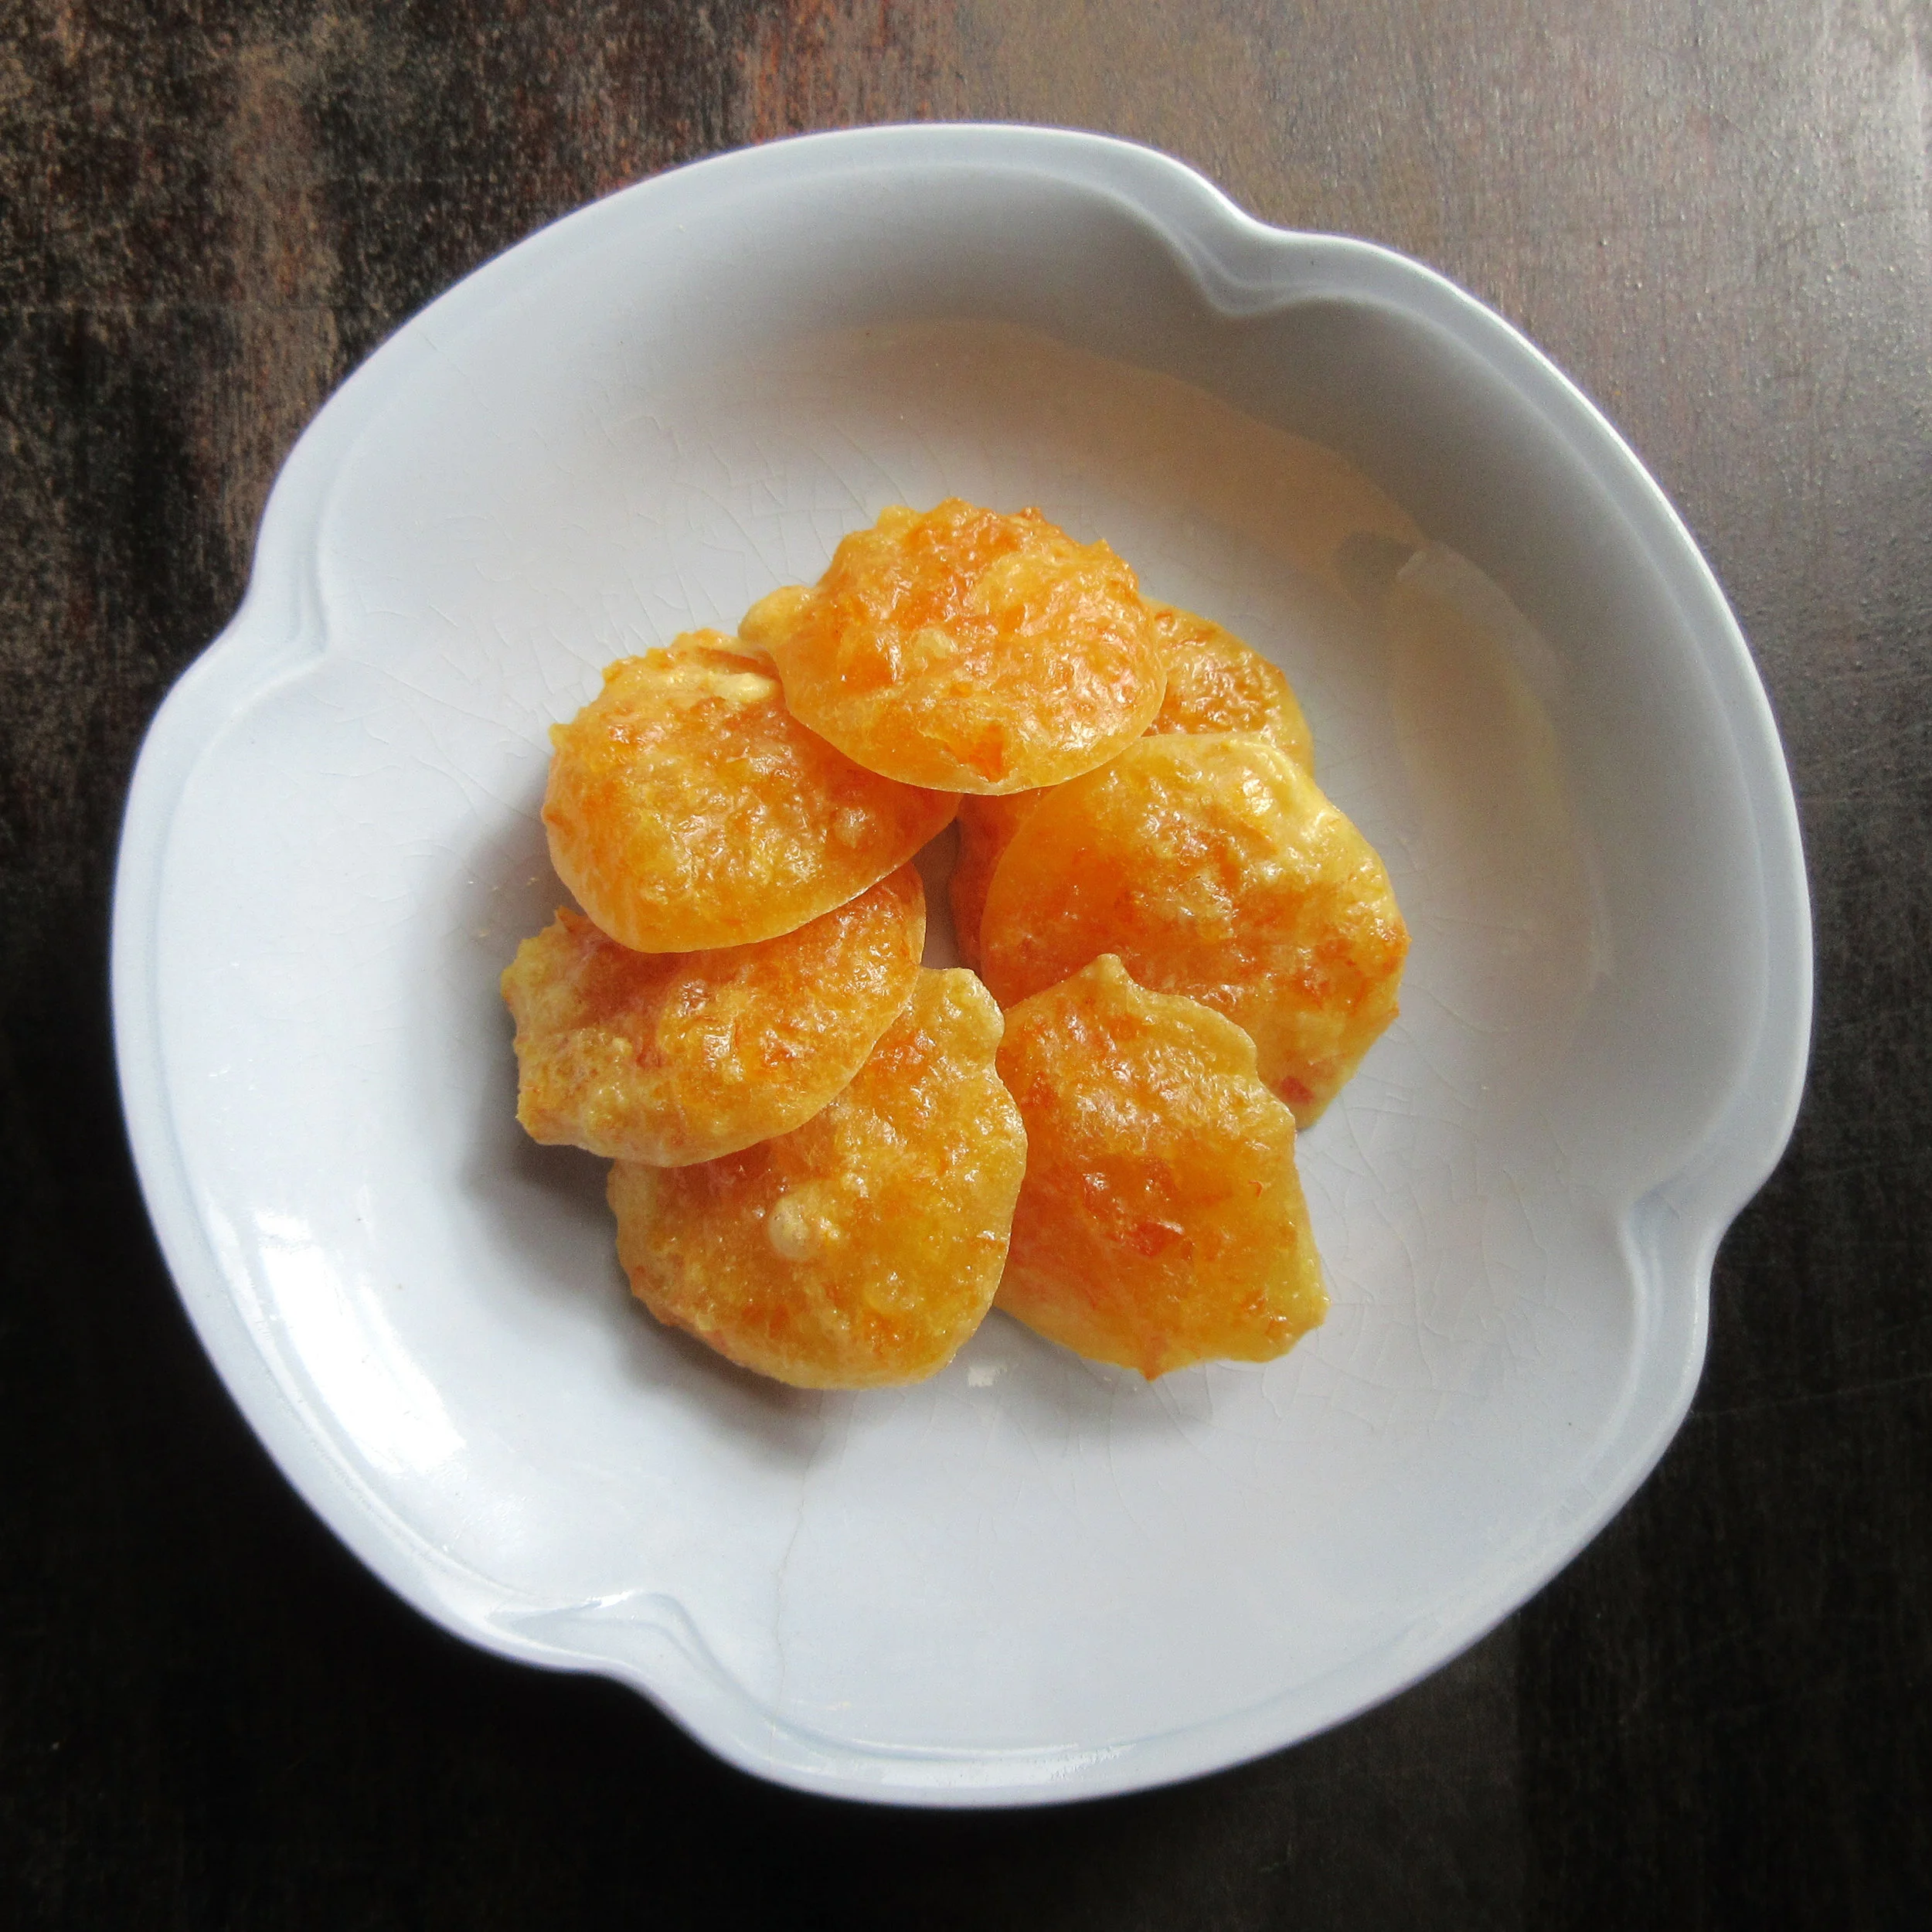
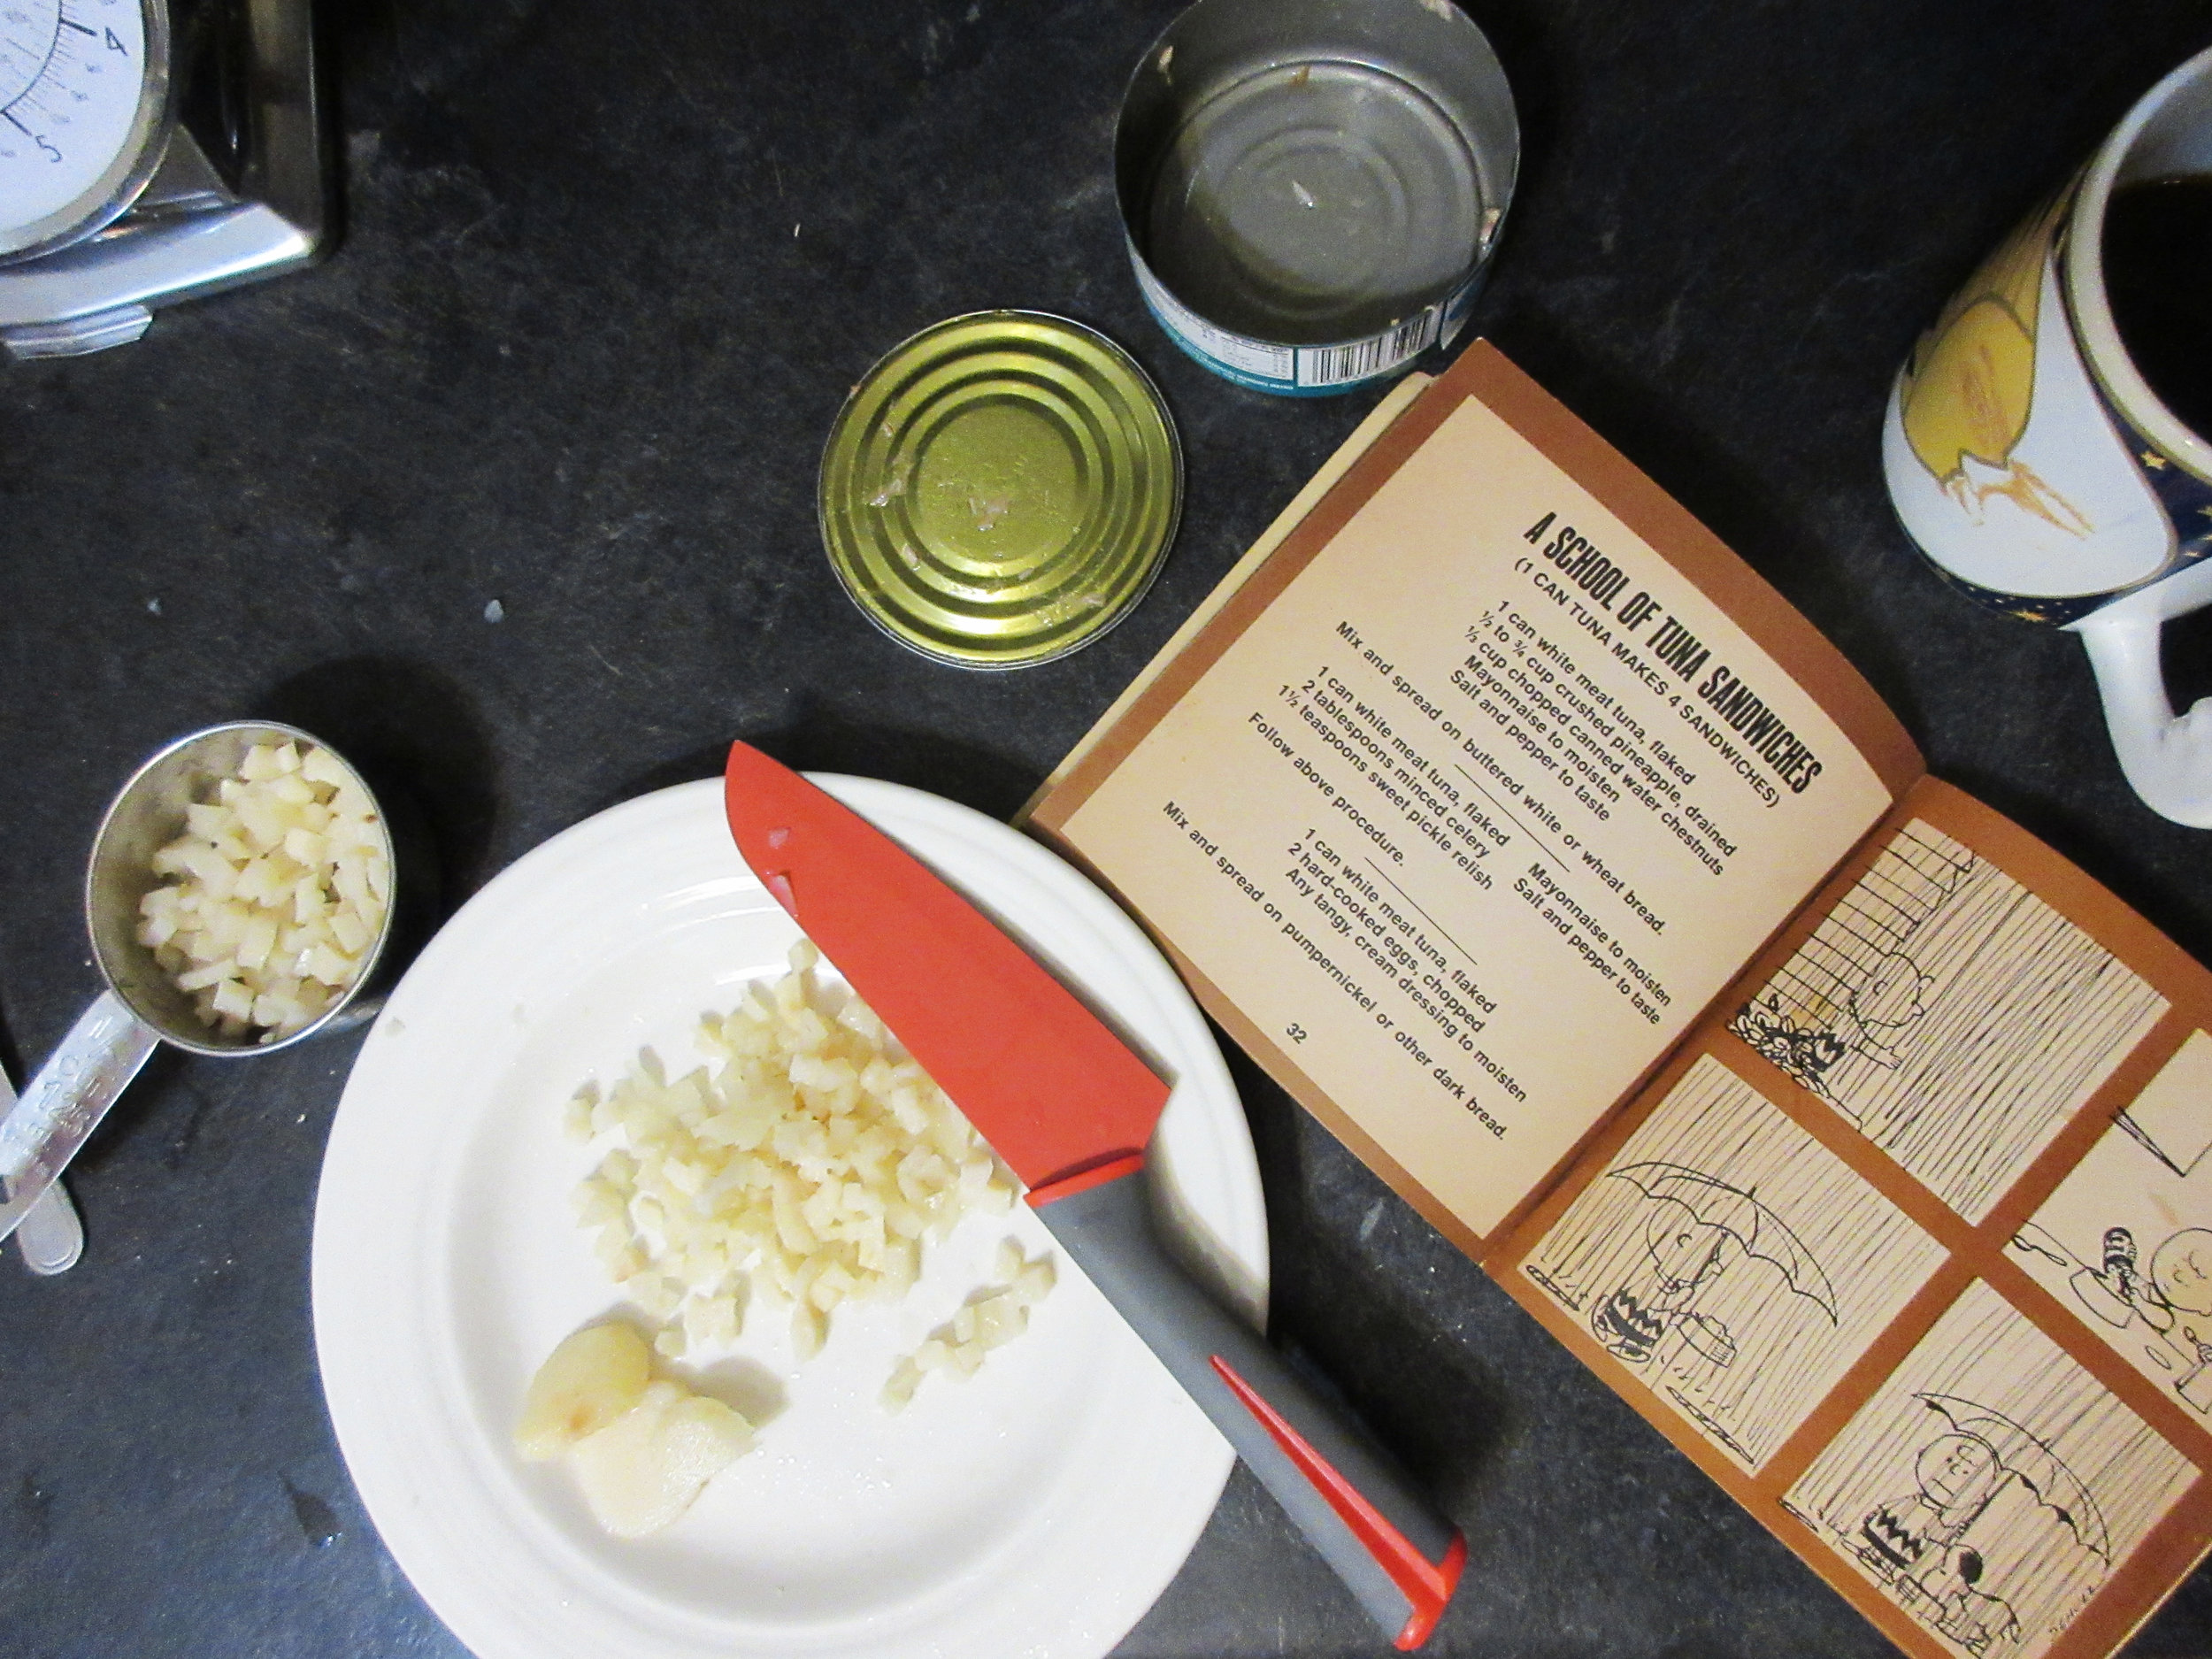
Tuna Sandwiches
This Tuna Sandwich recipe comes from the Peanuts Lunch Bag Cookbook (1974), which is a cookbook that was in our house when I was growing up. I don't remember anyone ever making a recipe from this cookbook when I was a kid, but I remember flipping through this book to read the Peanuts comics that are nestled amongst the recipes. About 6 months ago, I found this book in an antiques market...and all the memories flooded back.
In this sandwich filling, you'll find flaked tuna, crushed pineapple and chopped water chestnuts. When I selected this recipe, my hunch was that it would either be delicious or disgusting and I had no idea which way it would go! I'm happy to report that it was delicious. The pineapple is very subtle. You can taste something a little bit sweet in there but you aren't quite sure what that is, and the water chestnuts add a nice crunch to the sandwich filling. The pineapple and water chestnuts cut the fishiness of the tuna, so you end up with a low-key tuna flavour (and smell), so this recipe would make tunafish sandwiches more palatable for someone who isn't a fan.

You'll find this recipe in:
Peanuts Lunch Bag Cookbook
Cartoons by Charles M. Schulz
Recipes by June Dutton
New York, 1974
The original recipe:
1 can white meat tuna, flaked
½ to ¾ cup crushed pineapple, drained
½ cup chopped canned water chestnuts
Mayonnaise to moisten
Salt and pepper to taste
Mix and spread on buttered white or wheat bread.


My Experience:
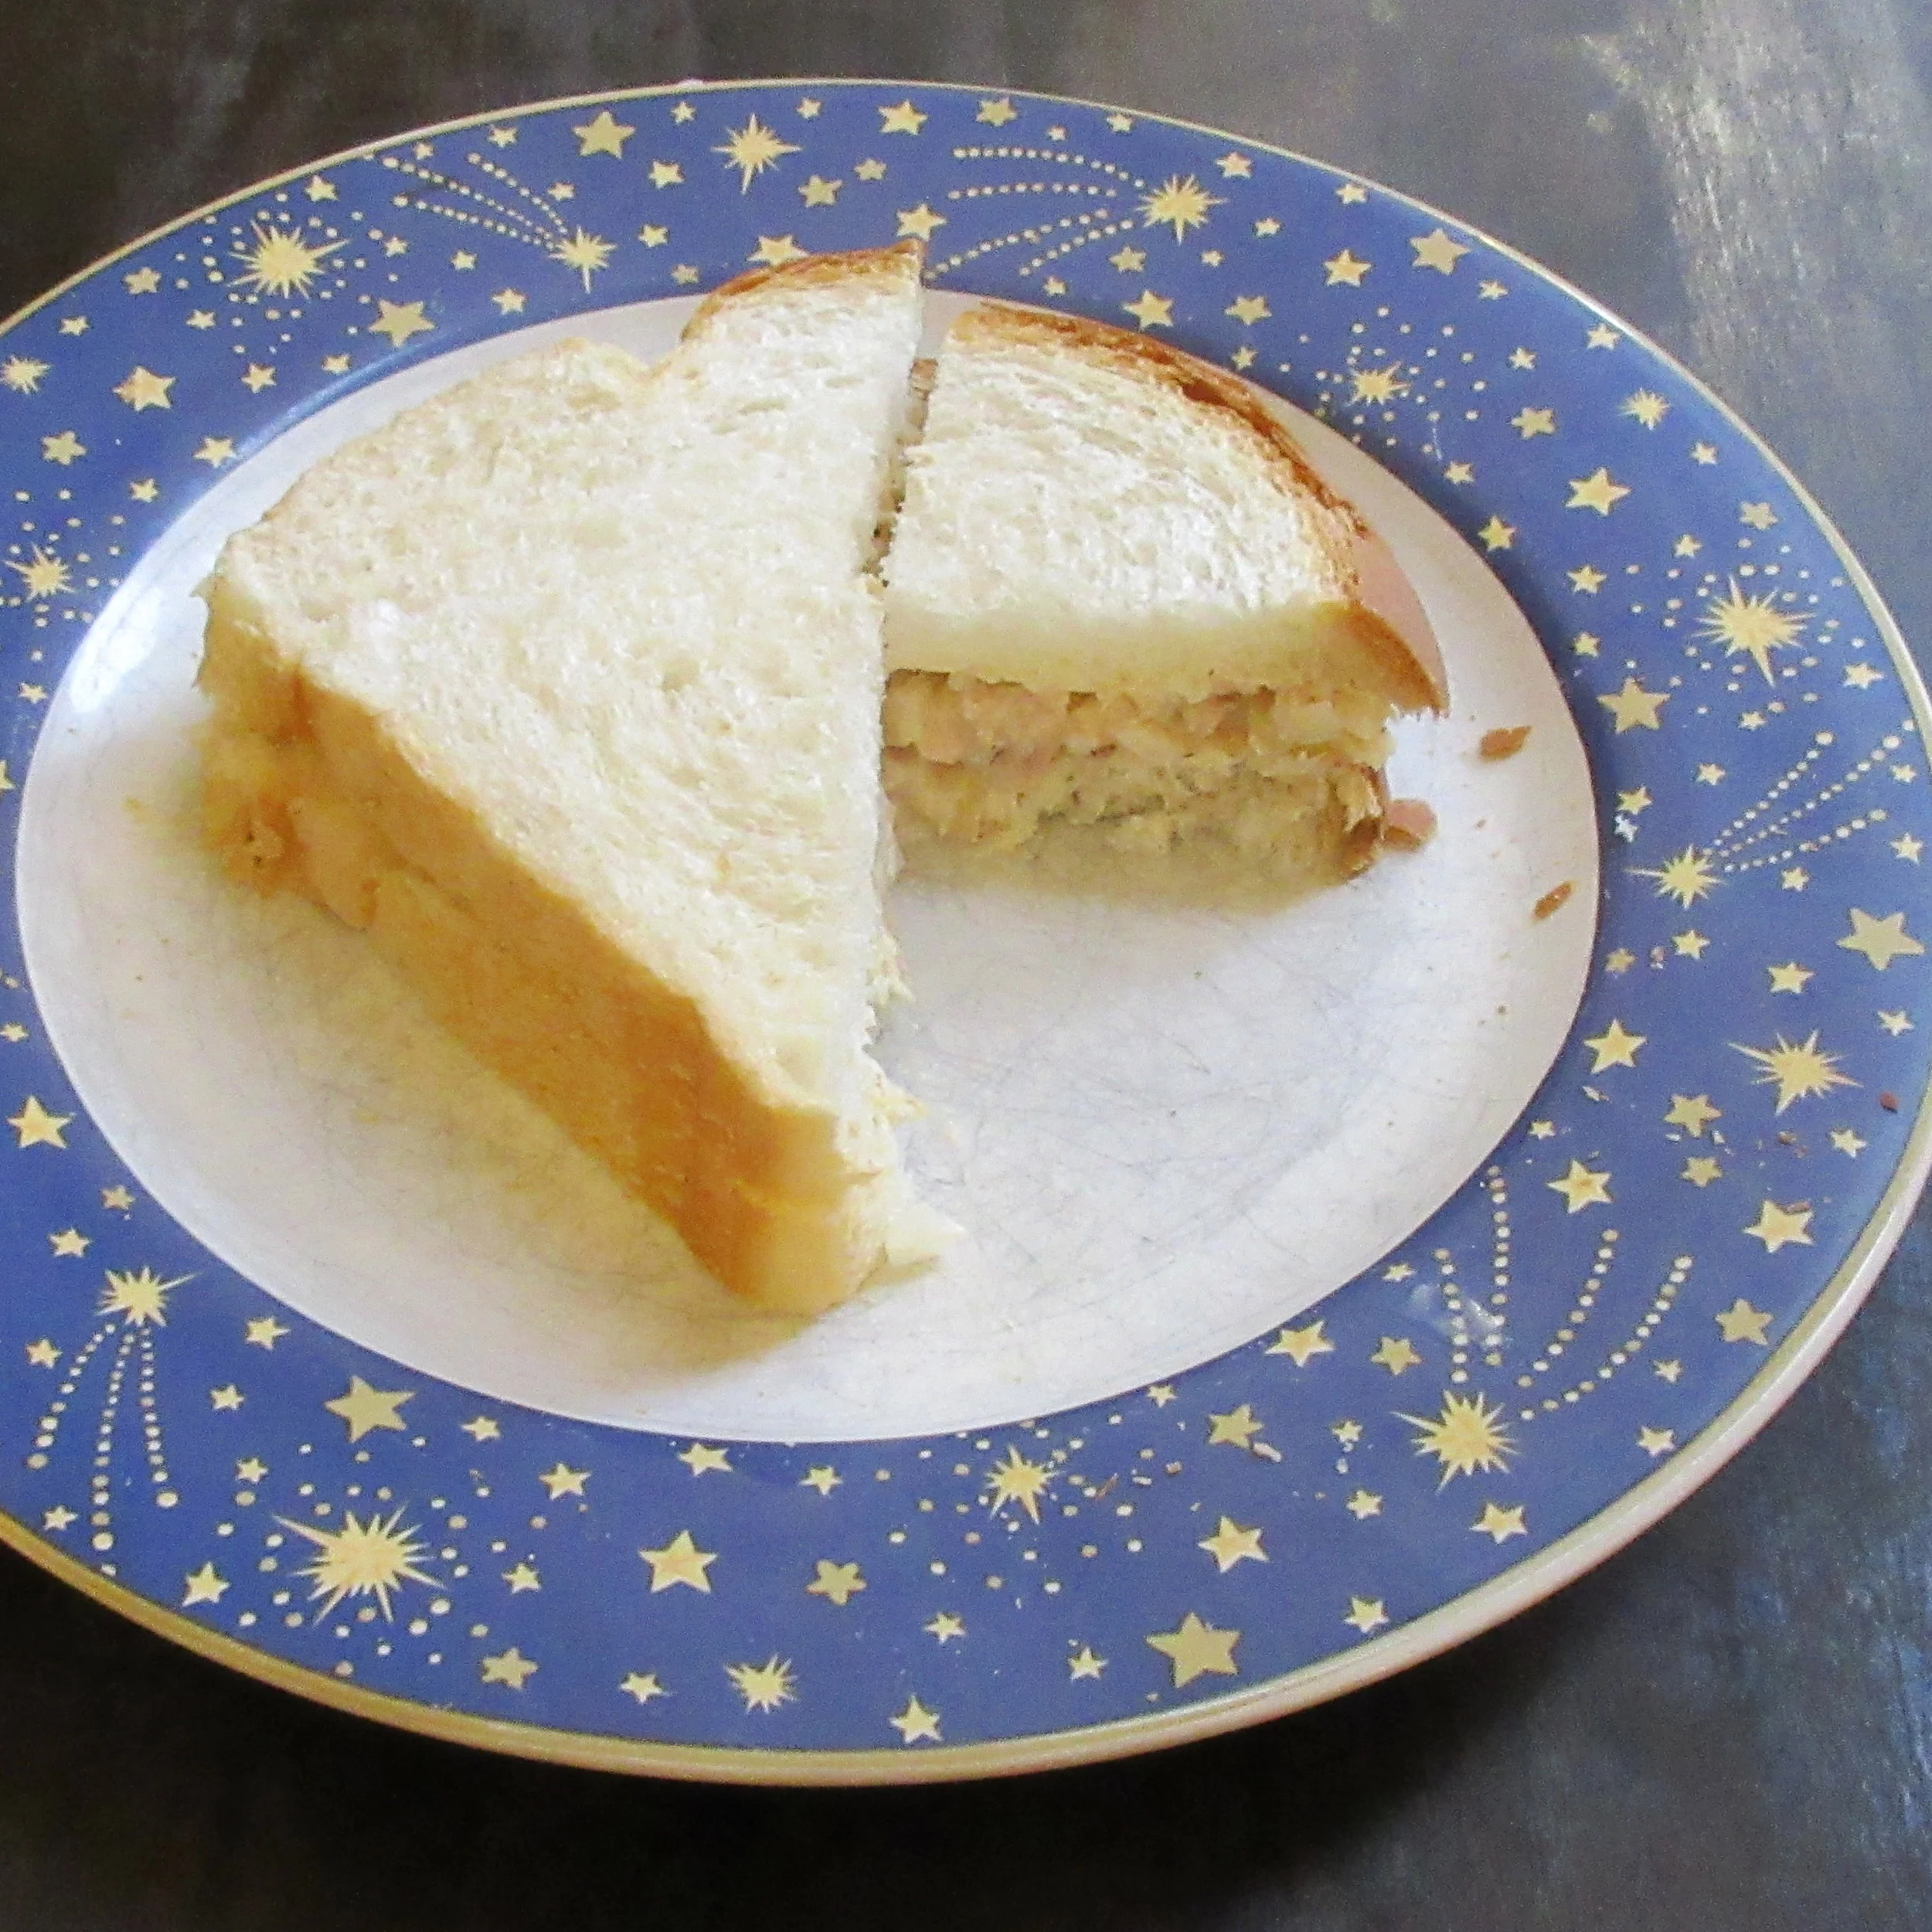
This Tuna Sandwich recipe comes from the chapter entitled "A School of Tuna Sandwiches" (very punny) and when I selected this recipe, my hunch was that it would either be delicious or disgusting and I had no idea which way it would go! I'm happy to report that it was delicious. I made them to take to a potluck at a staff meeting and one of my coworkers gave them the review of being "delightful". I ended up coming home with only one little sandwich in my container.
Since I was suspicious of how the sandwiches would turn out, I only added ½ cup of the crushed pineapple. I also made sure that I had some really good bread by taking an early morning scroll to the bakery down the street to pick up a fresh loaf. The taste of the pineapple is very subtle. You can taste something a little bit sweet in there, but you aren't quite sure what that is, and the chopped water chestnuts add a nice crunch to the sandwich filling. The pineapple and water chestnuts cut the fishiness of the tuna, so you end up with a low-key tuna flavour (and smell), so this recipe would make tunafish sandwiches more palatable for someone who isn't a fan.

Last March, right about the time that I was working on getting this blog up and running, Steve and I went on a daytrip to Waterford, Ontario where we checked out the Waterford Antiques Market and Steve discovered his favourite vintage musical instrument store, Fishin' Musician in the same building. There's also a lot of great hiking trails in the area – we'll probably be back in the winter to do some cross country skiing there.
Of course in all the booths filled with antiques, I went straight to the books to search for old cookbooks or interesting history books. Nothing really stuck out to me until I spotted a thin faded book spine that said Peanuts Lunch Bag Cookbook. When I pulled it out and saw the book cover, I was greeted by an old friend who I honestly had forgotten about over the years...but all the memories flooded back.
We had a copy of Peanuts Lunch Bag Cookbook in our house when I was growing up. I don't remember anyone ever making a recipe from this cookbook when I was a kid, but I do remember spending time slowly flipping through the pages to read the Peanuts comics that are nestled amongst the recipes.
The chapters are organized by main ingredient and the titles are quite cute: Lucy's Crabby Sandwiches, Full of Baloney Sandwiches and Linus Loves Liverwurst Sandwiches. I love that this is a recipe book geared towards children to teach them how to make their own lunches. The first page starts off with the title 'READ THESE TIPS!', and is followed by a list of handy tips such as to wash your hands, read the recipe before beginning and to ask permission before using a sharp knife.
I have always been surprised by how many children have never prepared food or have never used a sharp knife in their lives when doing museum cooking programs with schoolchildren, so I appreciate the respectful tone of the book. Peanuts Lunch Bag Cookbook is funny, but the recipes aren't dumbed down for the children, and it's assumed that a child is capable of using a sharp knife & can figure out a recipe with a bit of adult help.

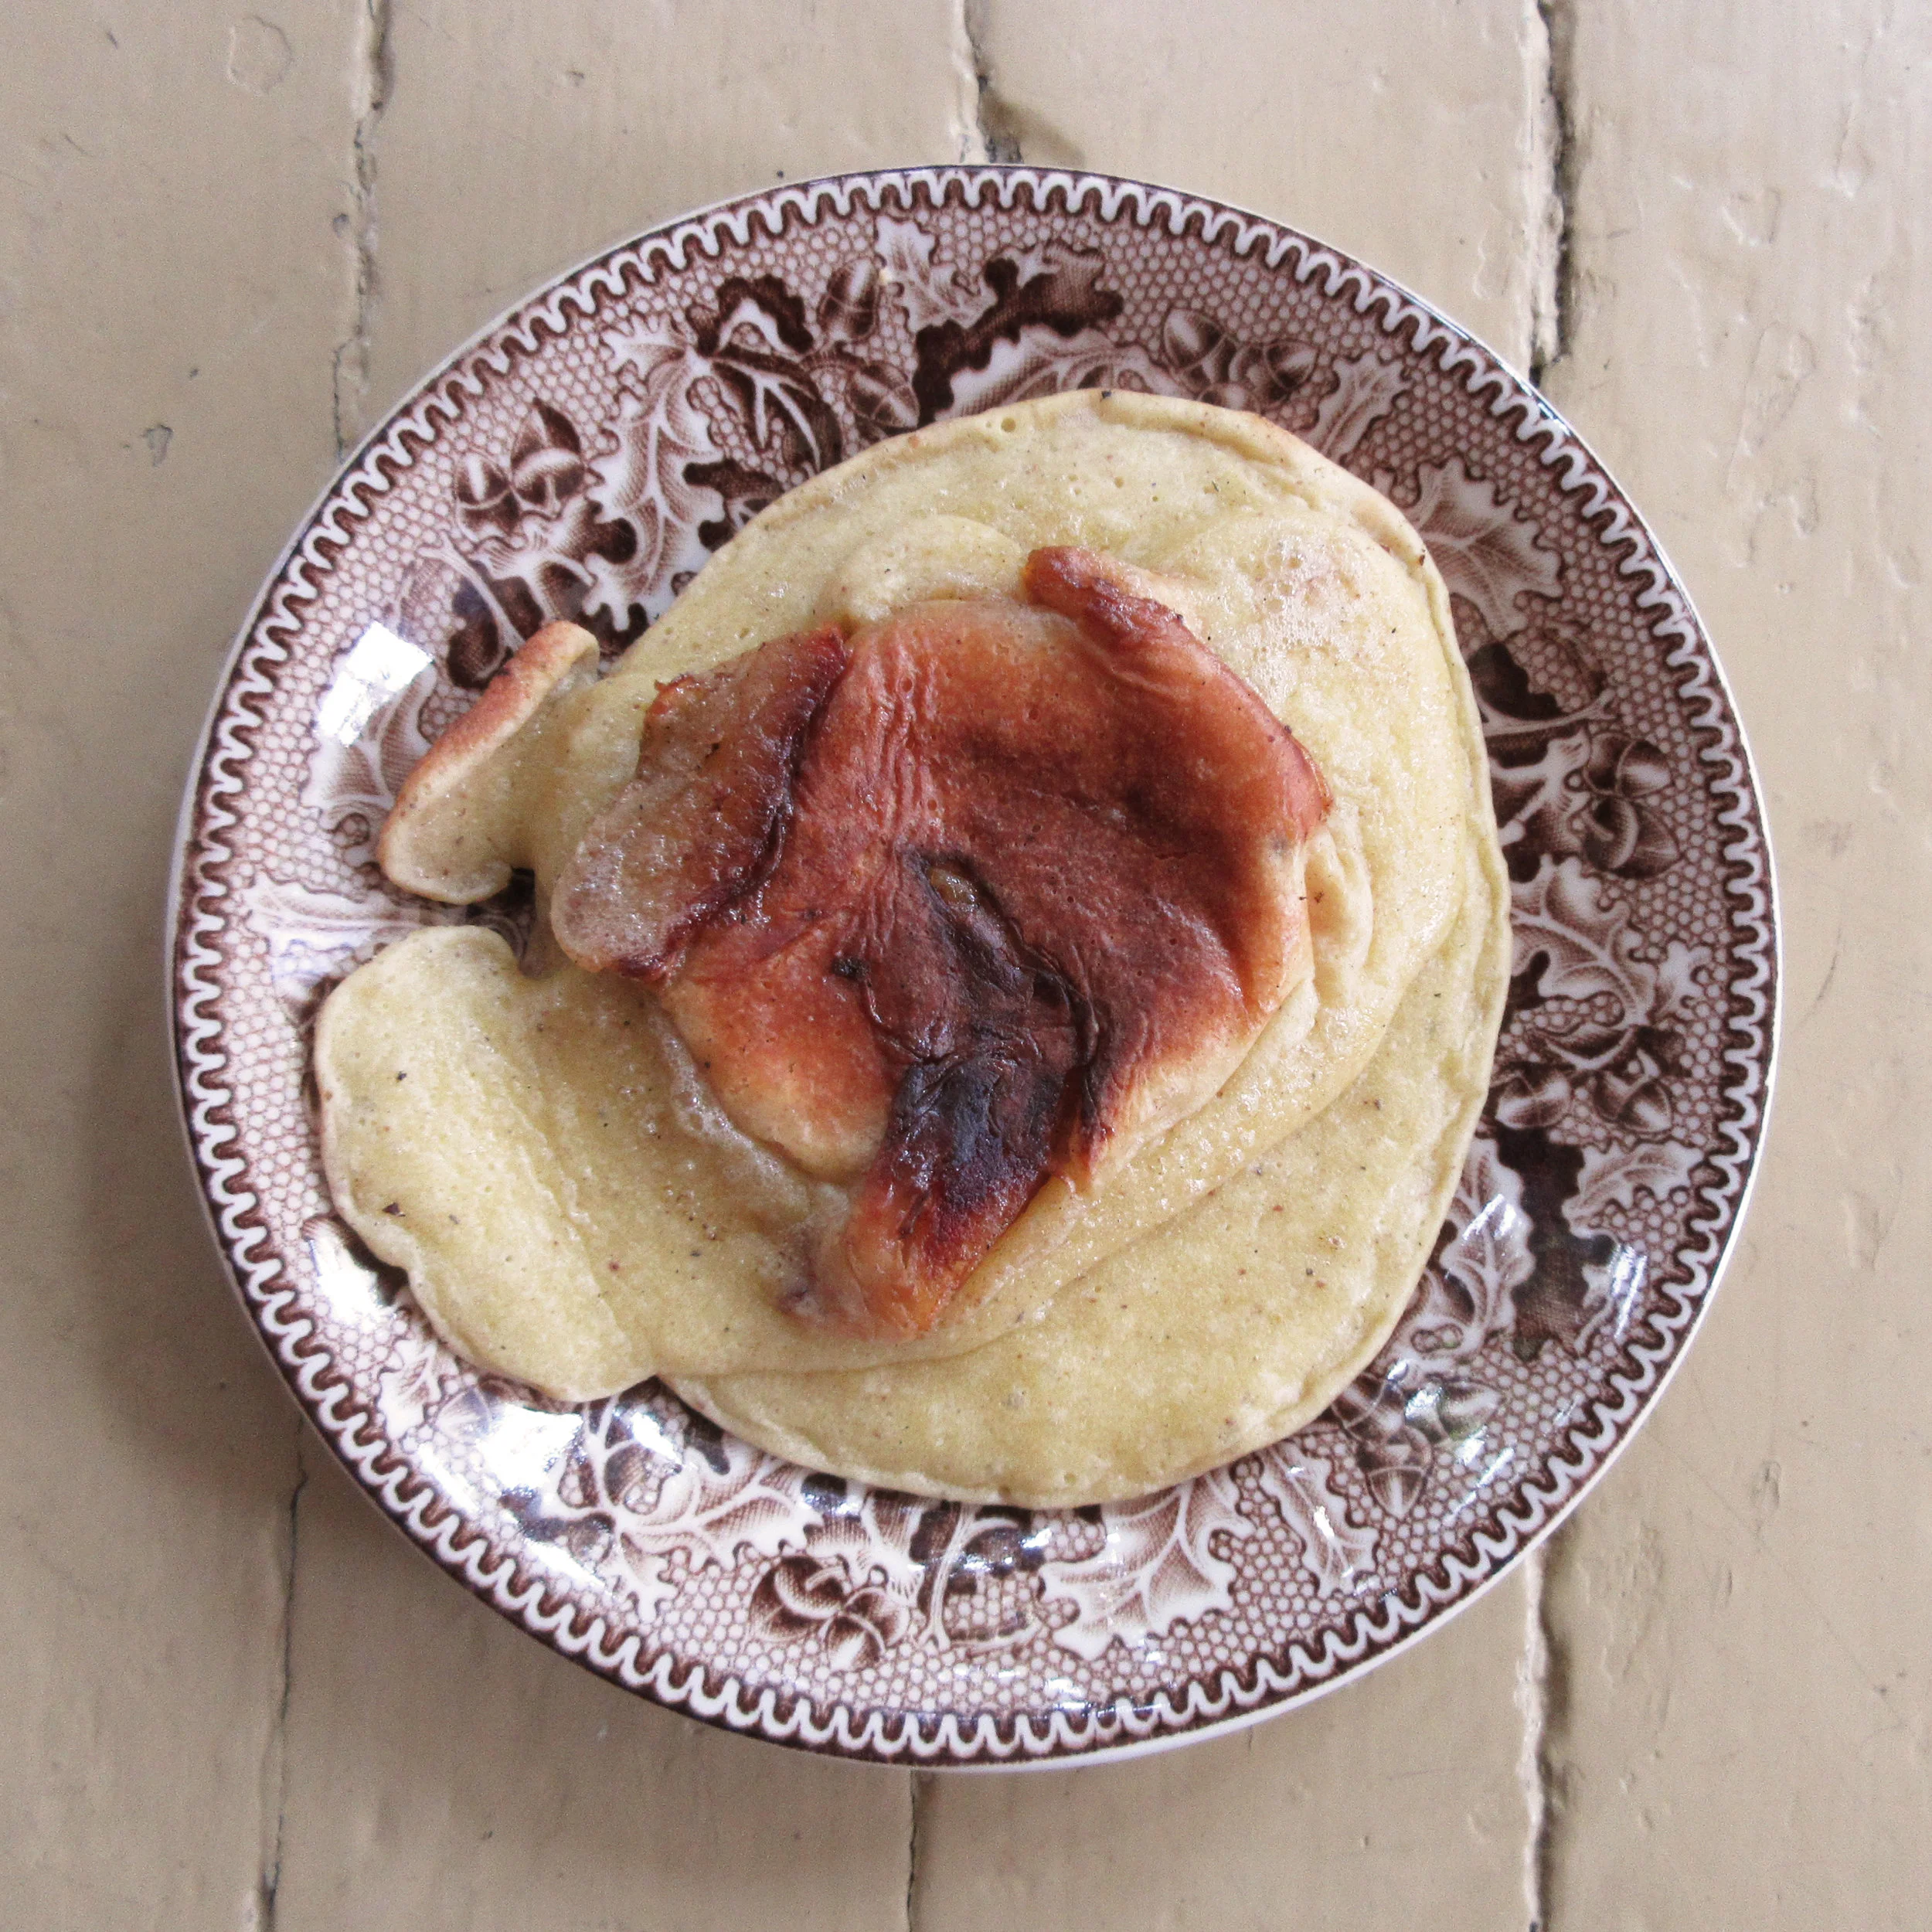
Apple Frazes
Apple Frazes are a tasty apple pancake from the 18th-century classic: The art of cookery made plain and easy by Hannah Glasse. Through making this recipe, I've learned that adding little bit of sherry to your pancake batter is a very good idea!
I had the pleasure of frying my Apple Frazes over an open hearth built in the 1780s at Nelles Manor Museum, where I'll be teaching Open Hearth Cooking Classes. The September Classes have sold out, but we've added a third class on November 4th at 1:00. At this class we'll be making the same Autumn recipes as the classes in September, only at the end of the Fall season rather than the beginning.

You'll find this recipe in:
The art of cookery made plain and easy
By: Hannah Glasse
London, 1747
The Original Recipe:
To make Apple Frazes.
CUT your apples in thick ſlices, and fry them of a fine light brown; take them up, and lay them to drain, keep them as whole as you can, and either pare them or let it alone, then make a batter as follows: take five eggs, leaving out two whites, beat them up with cream and flour, and a little ſack; make it the thickne ſs of a pancake batter, pour in a little melted butter, nutmeg and a little ſugar. Let your butter be hot, and drop in your fritters, and on every one of them lay a ſlice of apples, and then more batter on them. Fry them of a fine light brown; take them up, and ſtrew ſome double-refine ſugar all over them.


My Recipe:
2 cups sliced apples
Butter for frying
3 eggs + 2 egg yolks
1/2 cup cream - 118 mL
1 tbsp melted butter
2 tbsp sherry
1 tsp nutmeg
1/4 cup white sugar - 55g
1 1/4 cup flour - 205 g
White sugar to sprinkle on top
1) Peel, core and thickly slice the apples. Melt butter in a frying pan. You'll want to add enough butter to fry your apples in, but also 1 tbsp extra butter to add to the batter. Remove 1 tbsp butter from the pan, then fry the apples until they are golden on both sides. Take the apples from the pan and keep to the side until needed.
2) While the apples are frying, separate the whites and yolks of two eggs. If you've never separated whites & yolks before, it's easy. I've put a how-to video below. Put both the yolks in a mixing bowl, along with 3 whole eggs. Use the egg whites in another recipe.
3) Add the cream, melted butter and sherry to the eggs and mix well with a fork or whisk. Stir in the sugar, nutmeg and flour.
4) Melt some more butter in your frying pan. Spoon out the batter in small pancakes and place apples on top. Cover the apples with more batter and flip when the frazes are browned on the bottom. Strew the frazes with white sugar before serving.

You can probably tell from my photos that I wasn't cooking in my kitchen on this day. Instead, I had the pleasure of frying my Apple Frazes over an open hearth probably built in the 1780s! This hearth is in the kitchen at Nelles Manor Museum in Grimsby, Ontario, and I was there preparing for the Open Hearth Cooking Classes I'm teaching at Nelles Manor in September...and now in November.
The two classes on September 9th have both sold out, so we've decided to add a third class on November 4th at 1:00! At this class we'll be making the same Autumn recipes as the classes in September, only at the end of the Fall season rather than the beginning.
We won't be making Apple Frazes at these classes, but my main objective for the afternoon when I was a Nelles Manor in August was to test out making the Soda Bread recipe that I have planned for the classes in their dutch oven. To bake something in a dutch oven requires hot ashes, so I took the opportunity to make a recipe over the fire while I was waiting for the wood to transform.
I decided to make a recipe from a cookbook published in the era when the Nelles family home was built, so I turned to an 18th-century classic: The art of cookery made plain and easy by Hannah Glasse. Another consideration was that I have a huge apple tree in my backyard and it was pelting me with apples at the time! I had a look at a 1780s edition of The art of cookery, and this Apple Frazes recipe seemed perfect. Later on, I peeked in the 1747 first edition and found this recipe as well.
If you had a look at the original recipe and are wondering what why there's a letter that looks a bit like an 'f' but in places where an 's' should be, head over to my To Boil Green Peas post, where I've succinctly explained the history & usage of the Long S in the English language.

Using historic recipes as a starting point can be a bit of a soap opera. When I was getting ready to head over to Nelles Manor that morning, as I was assembling all my ingredients and kitchen utensils, I glanced at the recipe and noticed something for the first time that the recipe calls for “a little ſack”. Sack? I certainly wasn't being instructed to put a small bag into the batter. Off to the internet I retreated to find out what sack is with my fingers crossed that I would be able to find and purchase this ingredient in Ontario in the year 2018. I quickly discovered that sack is a fortified wine similar to sherry. Crisis averted!
It also took me two attempts to get the amount of flour correct for the batter. Other than how many eggs to use, the ingredients are listed without specific measurements, except for the very helpful addition of the words 'a little'. We're told to “make it the thickneſs of a pancake batter” and my first guess was veering in the direction of a crêpe. The first layer of batter in the pan was beautiful, but the second layer of batter spooned over the apples had no staying power and slid off the apples & down into the pan. We ate the first attempt anyway and they were still delicious.
I added more flour to the batter for the rest of the Apple Frazes in the measurements you see in the modern recipe above. The next time I make this recipe, I think I'll either add more flour or less cream and see if the frazes are even better if the batter has more coating power. If you try out a thicker batter yourself, I'd love it if you take the time to comment and let us all know how it turned out!
The hot ashes were ready when the last Apple Frazes were frying, so I was rushing to get the Soda Bread in the dutch oven. It slipped my mind during that bit of chaos to strew white sugar on top of the finished frazes, so I can attest that they are also delicious without a sprinking of white sugar.

Read the Cookbook:

Apple Bread
In my backyard is a giant apple tree, so for as long as I call this house my home, you'll find apple recipes on Cloud 9 Cookery this time of year. Apple Bread is surprisingly not sweet. This bread is very flavourful thanks to a longer prefermentation process and the apples add a little je ne sais quoi to the complex flavour of this moist bread. I took both the very large loaves this recipe yielded to a gathering along with some butter. I thought that there would be leftovers and there most definitely were not!

You'll find this recipe in:
Nebraska Pioneer Cookbook
By: Kay Graber
University of Nebraska Press
Lincoln, 1974
This recipe is probably from the 1860s or 1870s
The Original Recipe:
APPLE BREAD
Weigh out one pound of fresh, juicy apples; peel, core and stew them into a pulp, being careful to use a porcelain kettle or a stone jar placed in a kettle of boiling water. Mix the pulp with two pounds of the best flour; put in the same quantity of yeast you would use for common bread, and as much water as will make it a fine, smooth dough. Put it into a pan and place it in a warm place to rise, and let it remain for twelve hours at least. Form it into rather long-shaped loaves, and bake in a quick oven.
My Recipe:


The Apples:
Roughly chop 4 cups (450 g) of peeled & cored apples. Simmer the apples & 1 ½ cups (355 mL) water over medium-low or low heat until mushy. Add a bit more water as it simmers if needed. In the end, you'll want an apple puree, the consistency of a thick apple sauce.
If you don't want to bother with this step, I think you could substitute already-prepared apple sauce. The 4 cups of chopped apples created about 2 cups of apple puree. Apple sauce will probably be runnier than the homemade puree, so you'll need to add less water when combining the ingredients to make the bread dough.


The Dough:
1 tbsp or 1 package active dry yeast
1 tsp white sugar
¼ cup warm water
In a small bowl, combine the active dry yeast, sugar and warm water. Let it sit and bubble for about 10 minutes before adding to the dough.
6 cups (900 g) flour
2 cups apple puree or apple sauce
Yeast solution
2 cups water (use less if you are using apple sauce)
In a large container or mixing bowl, mix the flour and apple puree. After the yeast has been bubbling for 10 minutes, stir it into the flour & apple mixture, then add the water. Cover with the lid or with a tea towel and allow to rise. The historic recipe suggested to let it rise 12 hours, so I prepped the dough before bed and baked it after breakfast. If you have less time, you'll end up with a nice bread after letting the dough rise for a couple of hours.
Reading between the lines:
If you look at the original Apple Bread recipe, you'll notice that there's no mention of kneading the bread dough at all! Often in historic recipes, it was just assumed that the reader had a basic level of cooking & baking skills, so this recipe is an example of needing to read between the lines to get the full picture.
I took the suggestion to allow the dough to rise for at least 12 hours and the advice to add flour until it became "a fine, smooth dough" as clues that this bread recipe uses the sponge method. As well, when you make bread with yeast or sourdough, kneading your bread dough is really a non-negotiable step. If you don't knead, you'll be making a bread-like nonedible brick! So I assumed that the kneading the dough was just implied in the instructions to "form it into rather long-shaped loaves". I also referred to a favourite recipe of mine from The Female Emigrant's Guide (a.k.a. The Canadian Settler's Guide) for Potato Bread because Catharine Parr Traill explains the process in full detail.
A sponge is a prefermentation that produces a very flavourful bread. When you make a sponge, you add water, your yeast (or sourdough) and some of the flour and allow to ferment before adding the remaining flour and kneading the dough.
Have a look at my pictures below. I think my sponge is looking rather * ahem * soupy. It's definitely runnier than I would like. I added 3 cups of water (instead of the 2 cups I'm now suggesting) to the flour because that's about what I'd typically add to this amount of flour to create a sponge, but I didn't take into consideration that the apples would also be adding moisture. I had to add about 4 cups of flour to to the dough until I could begin kneading! The bread was still scrumptious, so it wasn't a crisis.


Adding the Remaining Flour, Kneading & Baking:
Before I begin, I like to pre-pour containers of flour so that I can easily add flour to my sponge without my goopy hands covering everything with slop. If you have enough space in your bowl to add more flour to the sponge, please do. Sprinkle a thin layer of flour on top of your sponge and stir in this a spatula or wooden spoon. Continue doing this until you either run out of room, or it becomes a bit difficult to stir. I didn't have extra space to add flour in my container, so I turned out the sponge directly onto my kneading surface and added the flour there.
Flour your kneading surface well. If you haven't already added flour to your sponge, do so by sprinkling flour on the top and keeping the surface well floured. Mix in the flour by using your hands to lightly fold and turn the dough. Use a dough scraper, knife or spatula to scrape off the dough that sticks to the surface. To remove the dough that will stick to your fingers, add flour to your hands and rub together. Keep adding flour to the sponge until it is begins to look like a dough. What I mean by that is...it will keep its shape and not spread when it sits. It will still be sticky, but it won't continually attach itself to your hands and the surface like slime.
Now you can begin kneading the bread, and you want to stop adding flour at this point. Use your dough scraper, knife or spatula to scrape the dough off the surface if it sticks. If you've never kneaded bread before, check out the videos below – they'll show you how it's done! I usually find that I need to knead for about 10 minutes.
Form your dough into loaves. You can use loaf pans if you'd like – just be sure to butter or oil the pan before putting in the dough. I baked my loaves on cookie sheets lined with parchment paper. I roughly formed them into the shapes I wanted while kneading the last few pushes.
Allow the loaves to rise for about an hour. I didn't have this extra time, so I just preheated my oven and popped my loaves in the oven when it came to temperature. I routinely have to skip this step at work because of the logistics of when I start work and when museum visitors arrive to the kitchen for a snack. The bread will be perfectly good if you don't rise it again, but it will be tastier if you do!
Bake. Preheat your oven to 375 F (190 C). I would normally bake bread at a higher temperature, but I went with this temperature because of the sugar content of the apples. Scoring the top of the loaves right before putting them in the oven allows the bread to continue to rise in the initial baking stages. I baked my Apple Bread for 55 minutes until it was golden. Pick up your bread and tap it on the bottom. If it sounds hollow, your bread is fully baked.

In my backyard is a giant apple tree, so for as long as I call this house my home, you'll find apple recipes on Cloud 9 Cookery this time of year. Apple Bread is surprisingly not sweet. This bread is very flavourful thanks to a longer prefermentation process and the apples add a little je ne sais quoi to the complex flavour of this moist bread. I took both the very large loaves this recipe yielded to a gathering along with some butter. I thought that there would be leftovers and there most definitely were not!
Apple Bread is from the historic recipe compilation called The Nebraska Pioneer Cookbook, which I picked up in the gift shop at Scotts Bluff National Monument in Nebraska about a year ago. I almost didn't buy this cookbook, actually, because the food history nerd in me wasn't satisfied with how the cookbook was referenced. But then I told myself to suck it up, because I didn't know when I'd ever find myself in Nebraska again and the book is an interesting snapshot of culinary history in another part of North America.
Unfortunately, I don't know where this recipe for Apple Bread was originally from. It is found in the chapter "The Sod-House Period" and it's not clearly stated in the chapter when this period occurs, although with some reading between the lines, I think the recipes in the chapter are probably circa the 1860s & 1870s. Kay Graber does note before the recipes in this chapter that "All of the following are taken from authentic Nebraska sources of the sod-house era; most appeared in the Nebraska Farmer or local newspapers, a few are from the cookbooks of homestead wives."
Scotts Bluff National Monument is gorgeous. As it always goes with a roadtrip, I wish we had more time to enjoy the scenery and soak in the atmosphere. When we were getting ready to leave, I started chatting with a woman in the parking lot. She asked me if I was British, which I thought was funny. I don't think I have a strong accent, but I suppose my Ontario accent stood out to her. She was from the area, but had never been to Scotts Bluff until the day before, and she was back because of the intense spiritual experience she had while hiking. I completely understood why she was drawn to return so soon and I wish I could go back, but that will wait for another trip.


Read the Cookbook:
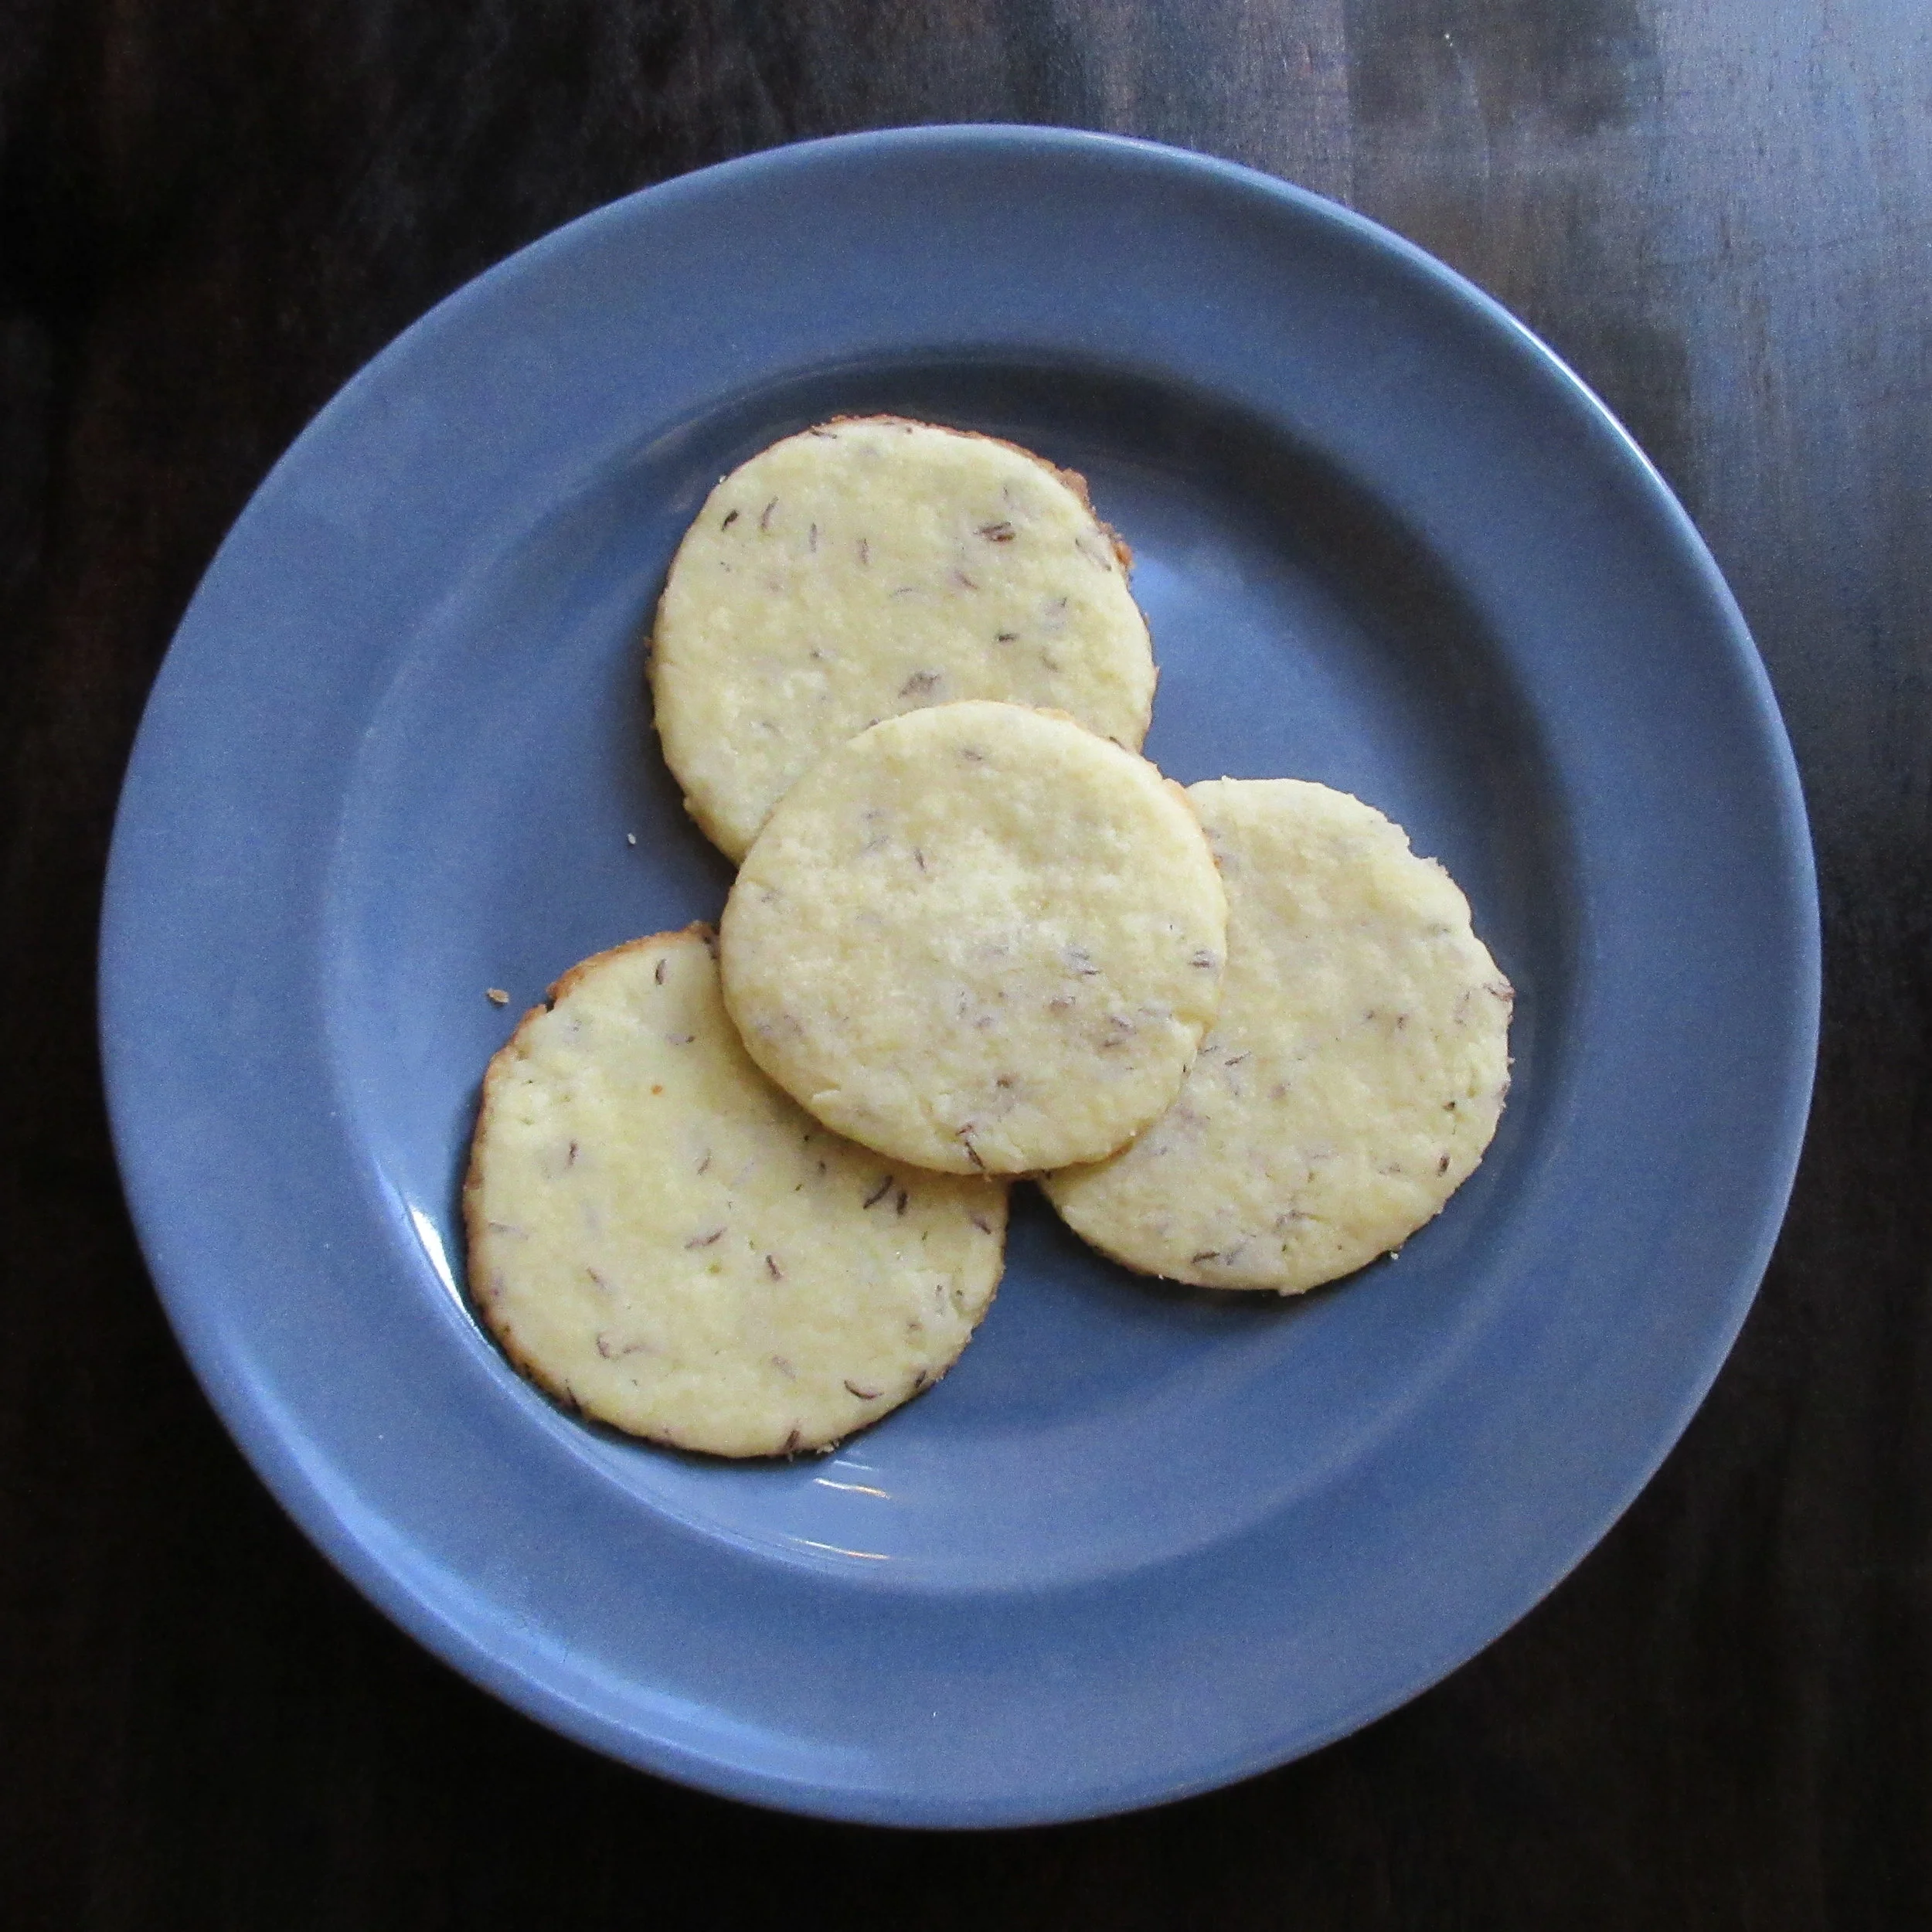
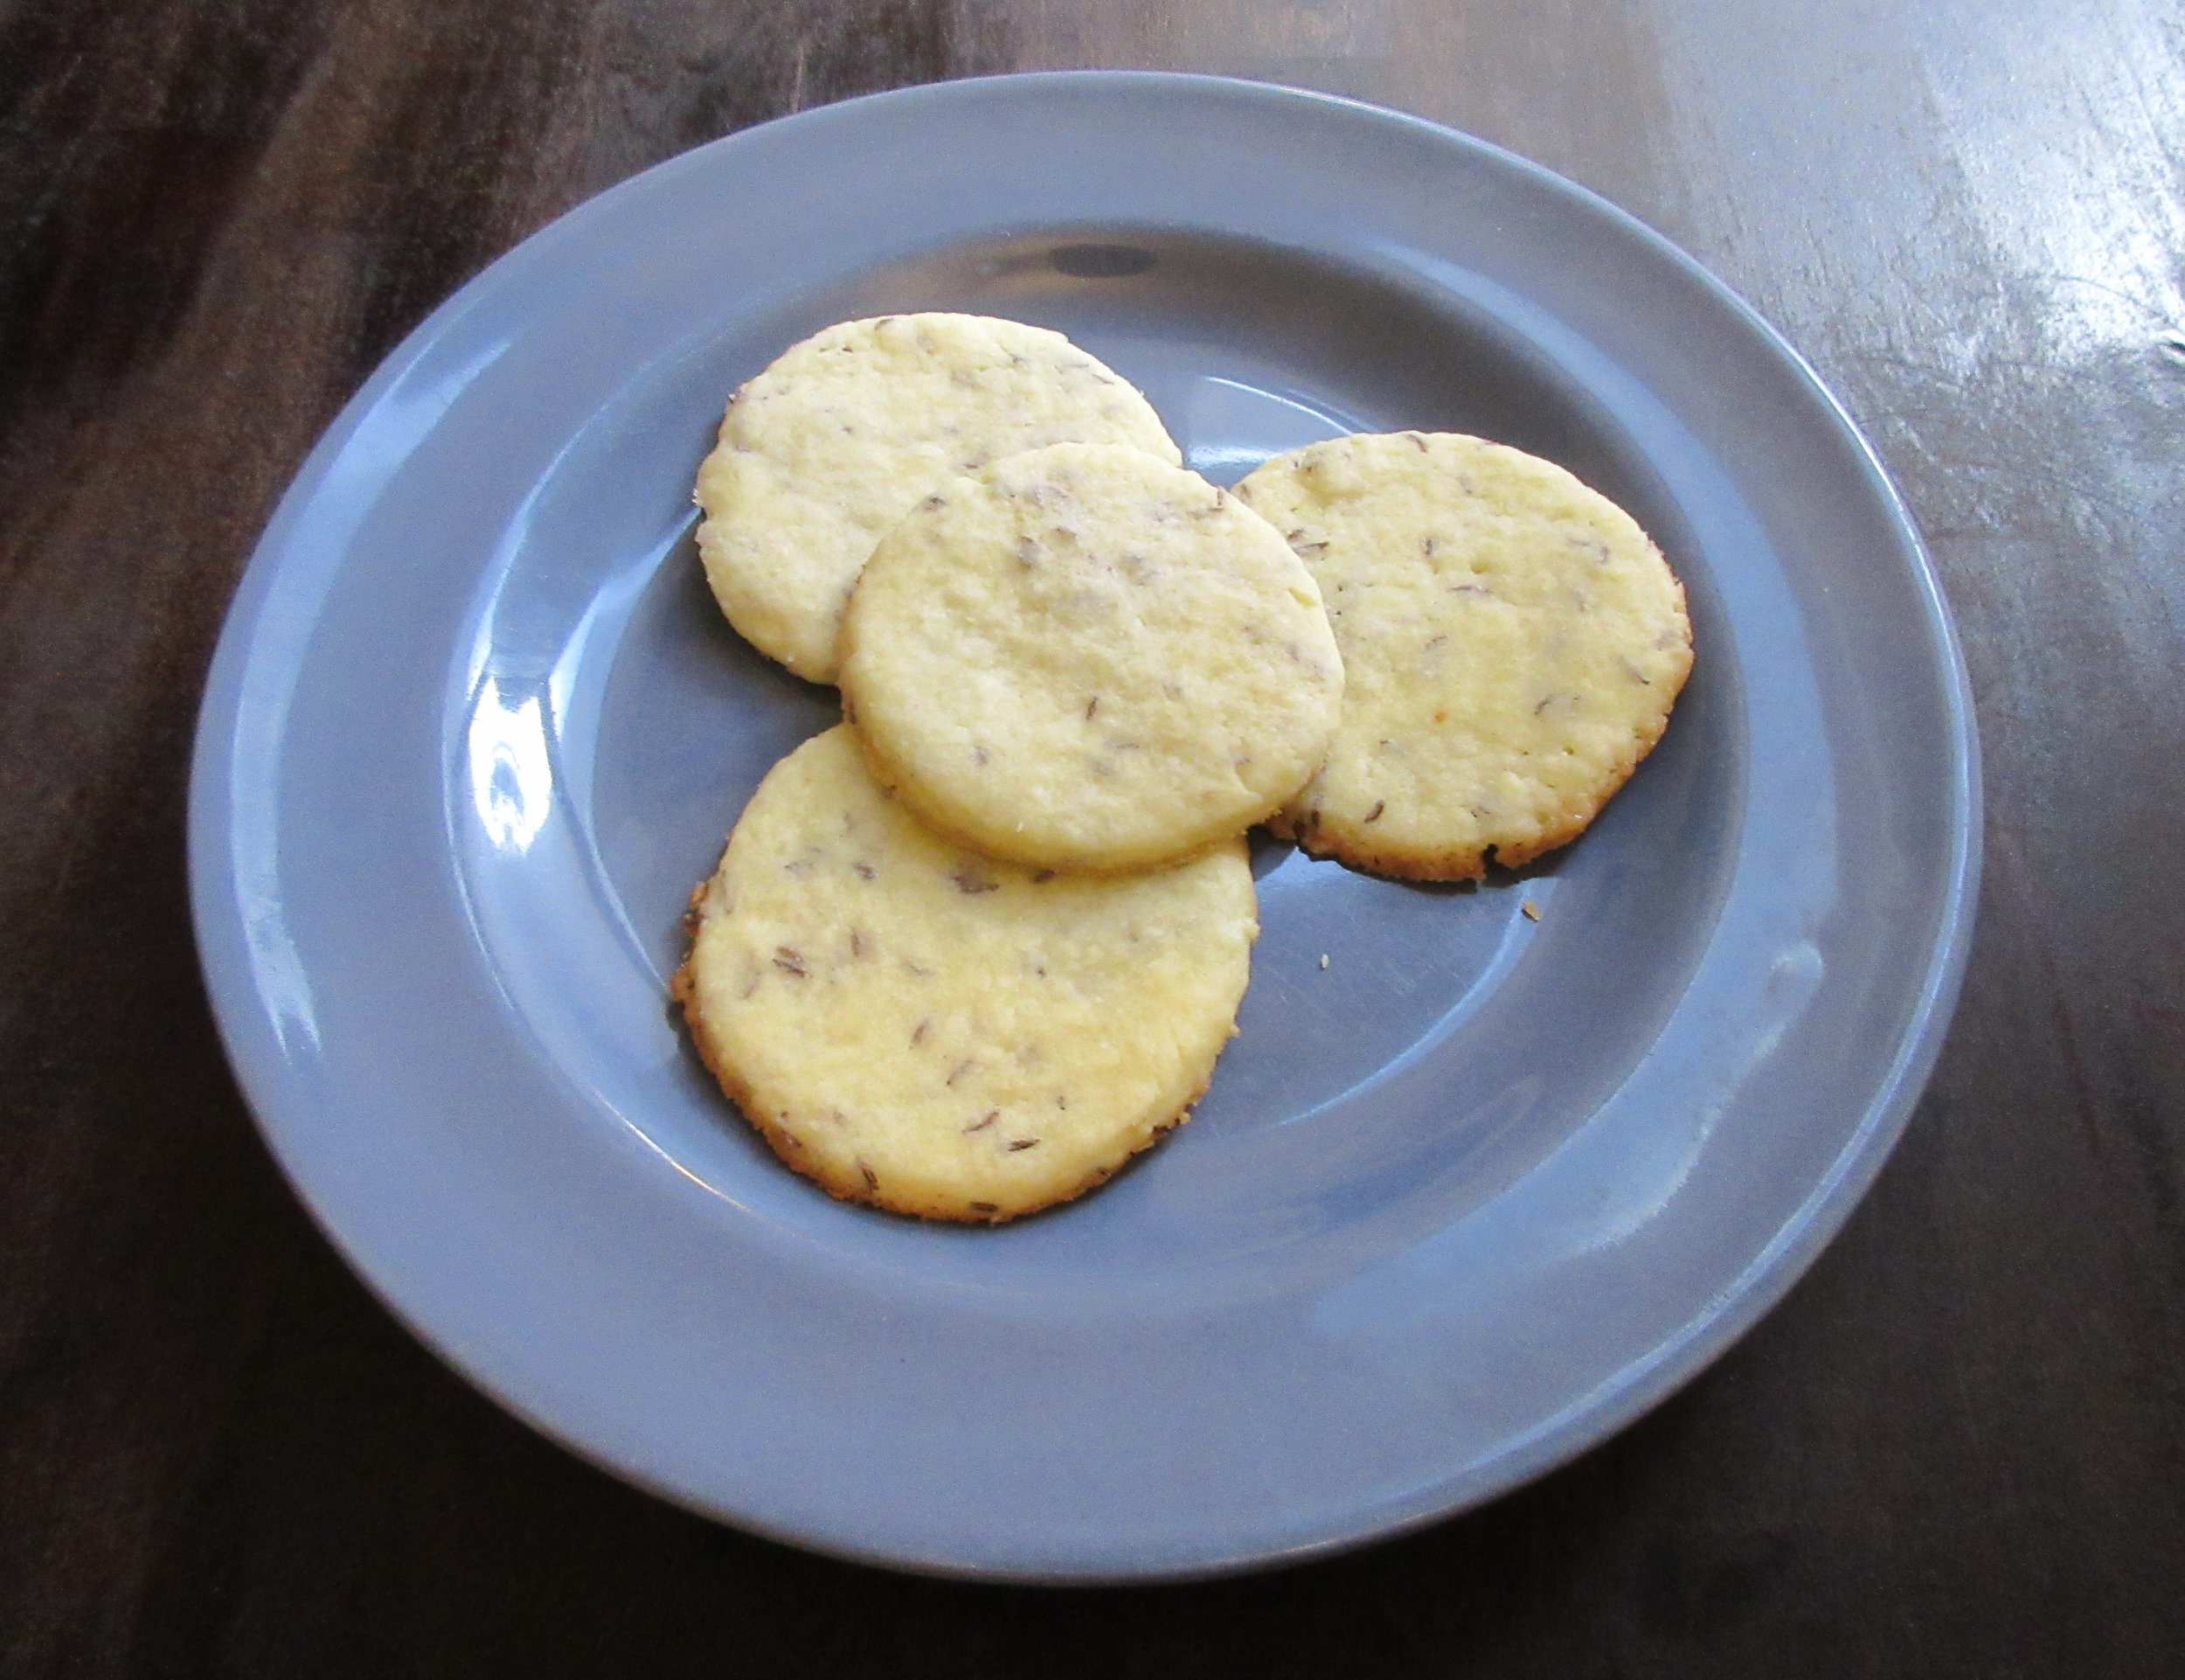
Shrewsbury Cake
Shrewsbury Cake is one of first recipes that I tested out for the Open Hearth Cooking Classes that I'm teaching at Nelles Manor in Grimsby, Ontario in September. They are crisp & buttery, and the flavour of caraway seeds balances out the sweetness of these cookies. Shrewsbury Cake is from the first English-language cookbook that was both compiled & printed in Canada. The Frugal Housewife's Manual was published in Toronto in 1840, but the cookbook author is credited as “A. B. of Grimsby”. I love this connection to the Nelles family, since they likely would have known the mysterious A. B. who wrote the book.
You'll find this recipe in:
The Frugal Housewife's Manual
By “A.B. of Grimsby”
Toronto, 1840
Original Recipe:
10. Shrewsbury Cake.
Mix half a pound of butter well beaten, and the same weight of flour, one egg, six ounces of sifted loaf sugar, and half an ounce of carraway seeds; form these into a paste, roll them thin, and cut them out. Bake on tin, in a moderately heated oven.


My Recipe:
1 cup (½ lb) softened butter
¾ cup white sugar – 170 g
1 ½ cups white flour – 225 g
1 egg
3 tbsp caraway seeds
1) Cream the butter and sugar together, then incorporate the flour, egg and caraway seeds to form a dough. You may be thinking: “There isn't enough flour” or “This is WAY too much caraway”, but there's no need to worry.
2) Since this is a very wet and buttery dough, you'll need to use a lot of flour on the rolling pin & rolling surface when you roll it out. Roll the Shrewsbury Cakes thin, then bake in a 350F/175C oven for about 15 minutes, until they are slightly golden on the bottom.
This recipe makes about 3 dozen 2 inch/5 cm cookies.

These Shrewsbury Cakes are one of first recipes that I tested out for the Open Hearth Cooking Classes that I'm teaching at Nelles Manor in Grimsby, Ontario on September 9th (Grimsby is close to Niagara Falls).
Open hearths are like people – they've all got their own idiosyncrasies - so I thought it would be wise to spend some time getting acquainted with the 230 year-old hearth in the Nelles Manor kitchen before teaching the cooking workshop. Open hearth cookery is much more exciting than using my regular old oven, anyway. Check out these photos of the Shrewsbury Cakes on the griddle!


My aim for this workshop is to prepare some seasonal autumn recipes that will highlight a variety of open hearth cooking techniques, one of those being using a griddle over the fire. I selected this recipe and another from the same cookbook to test out on the griddle, one of which we'd make at the workshop and the other would be destined for my blog.
Shrewsbury Cakes are so buttery that, even though the griddle at Nelles Manor is very well balanced, they tended to slide off the griddle! I actually lost one into the fire, but after that I was able to shepard them back onto the griddle when they slid. In the end, slipperiness was the deciding factor for which recipe we'd be making at the class.
There's a very good reason why I selected these two recipes: they are both from the first English-language cookbook that was both compiled & printed in Canada. The Frugal Housewife's Manual was published in Toronto in 1840, but the cookbook author is credited as “A. B. of Grimsby”. I love this connection to the Nelles family, since they likely would have known this mysterious A. B.. As far as I know, the author's identity is still unknown, but the folks at Nelles Manor seemed intrigued by the puzzle. Perhaps we'll have a short list of possible authors soon.
Read the Cookbook:
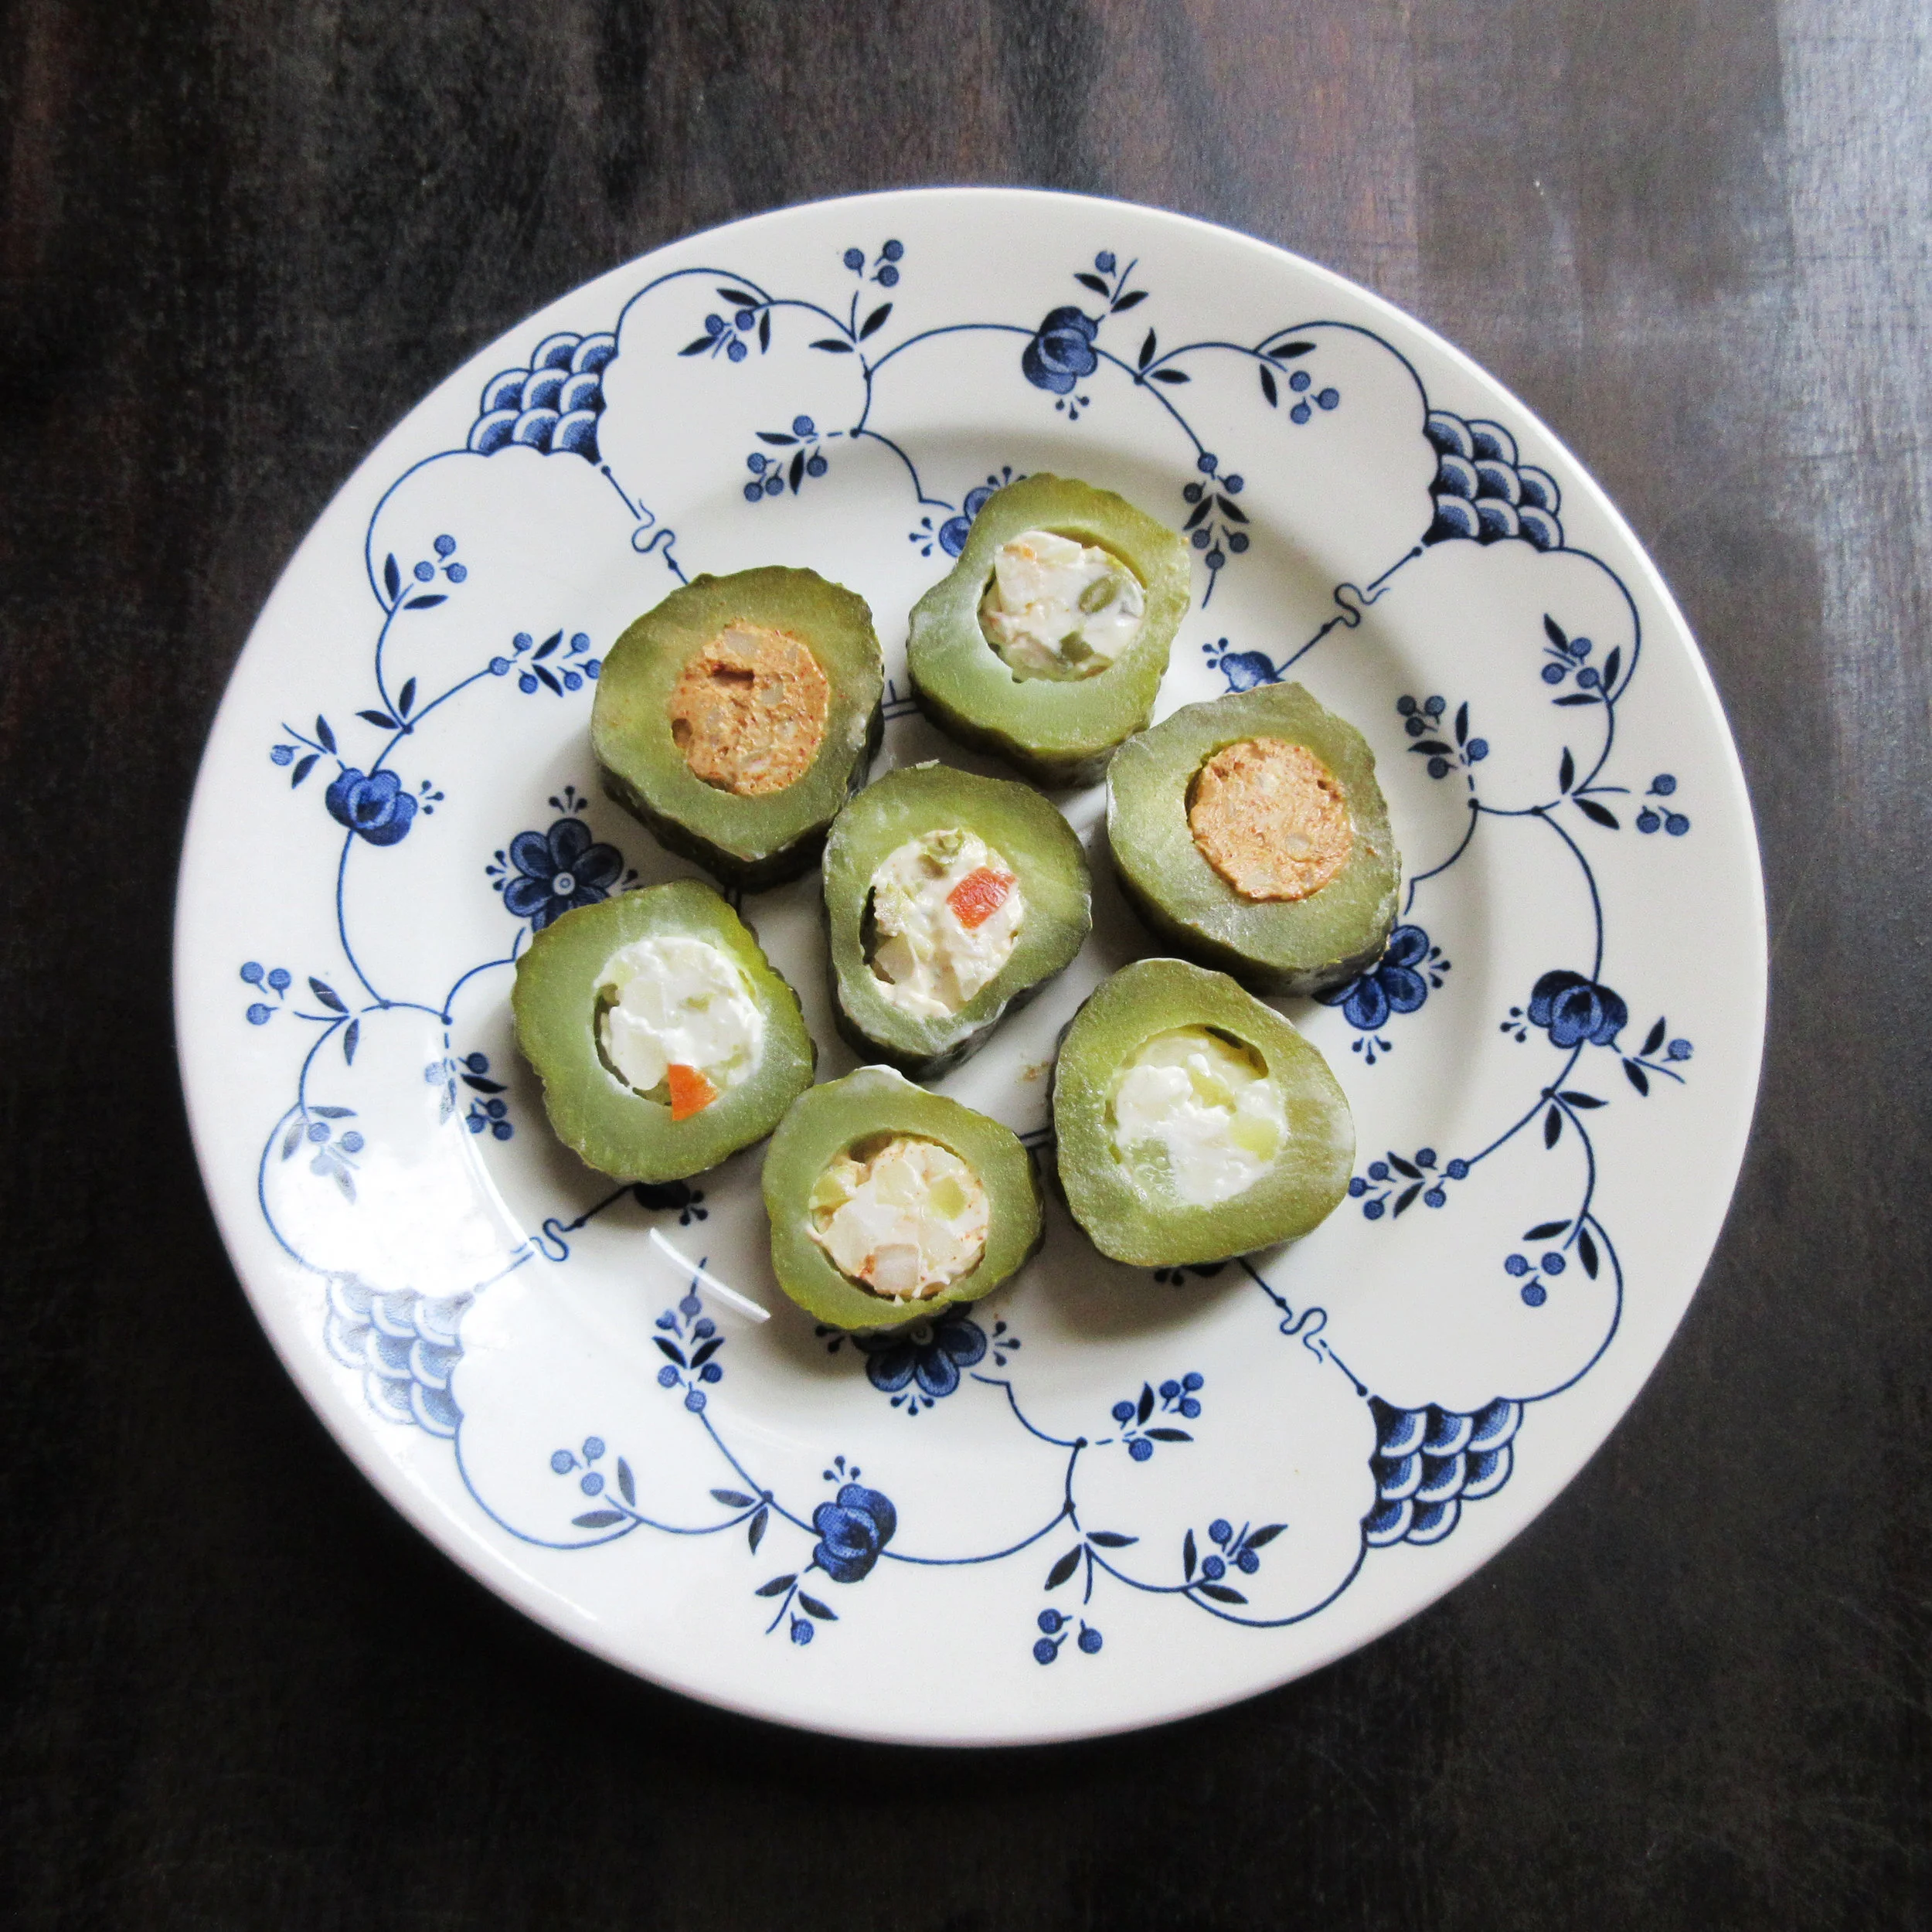
Filled Dills
Filled Dills are just as fun to say as they are to eat! They’re appetizers from The Stay Out of the Kitchen Cookbook, published in 1968. This cookbook contains make ahead recipes and dishes that can be left in the oven so that a hostess can spend time with her dinner guests instead of spending her dinner party in the kitchen. Filled Dills are large dill pickles hollowed out with an apple corer, filled with cream cheese & various flavourings, then finally sliced into thin pieces. They are very tasty and easy to make ahead for your next gathering.

You'll find this recipe in:
The Stay Out of the Kitchen Cookbook
By: Lynn Dallin
New York City, 1968
The Original Recipe:
FILLED DILLS
Perky and palatable...
Bore centers from dill pickles with an apple corer. Stuff cavities with a blend of equal parts of Roquefort and cream cheeses. Chill overnight. Cut into ½-inch slices. Two large pickles make 10-15 slices.
Note: A bit of finely minced celery or water chestnuts may be added for texture. These will keep for several days.
Variations
DEVILED DILLS
Stuff pickles with cream cheese flavored with chili powder to taste.
DILLY DILLS
Stuff pickles with a mixture of cream cheese and minced capers to taste.
SPICY DILLS
Stuff pickles with a mixture of cream cheese and minced chipped beef to taste.
CORNY DILLS
Stuff pickles with a mixture of garlic cream cheese and minced corned beef to taste.
ROSY DILLS
Stuff pickles with a mixture of pimiento cream cheese and minced ripe or stuffed green olives to taste.
DILLS PUEBLO
Stuff pickles with a mixture of cream cheese and deviled ham.
DILLS CON FUEGO
Stuff pickles with a mixture of cream cheese and mashed green chili peppers to taste.
DILLS ANTONIO
Stuff pickles with a mixture of chive cream cheese and finely minced salami to taste.
DILLS RAMON
Stuff pickles with a mixture of cream cheese and anchovy paste to taste.
PAT'S DILLS
Stuff pickles with a mixture of cream cheese and crisp bacon bits to taste.


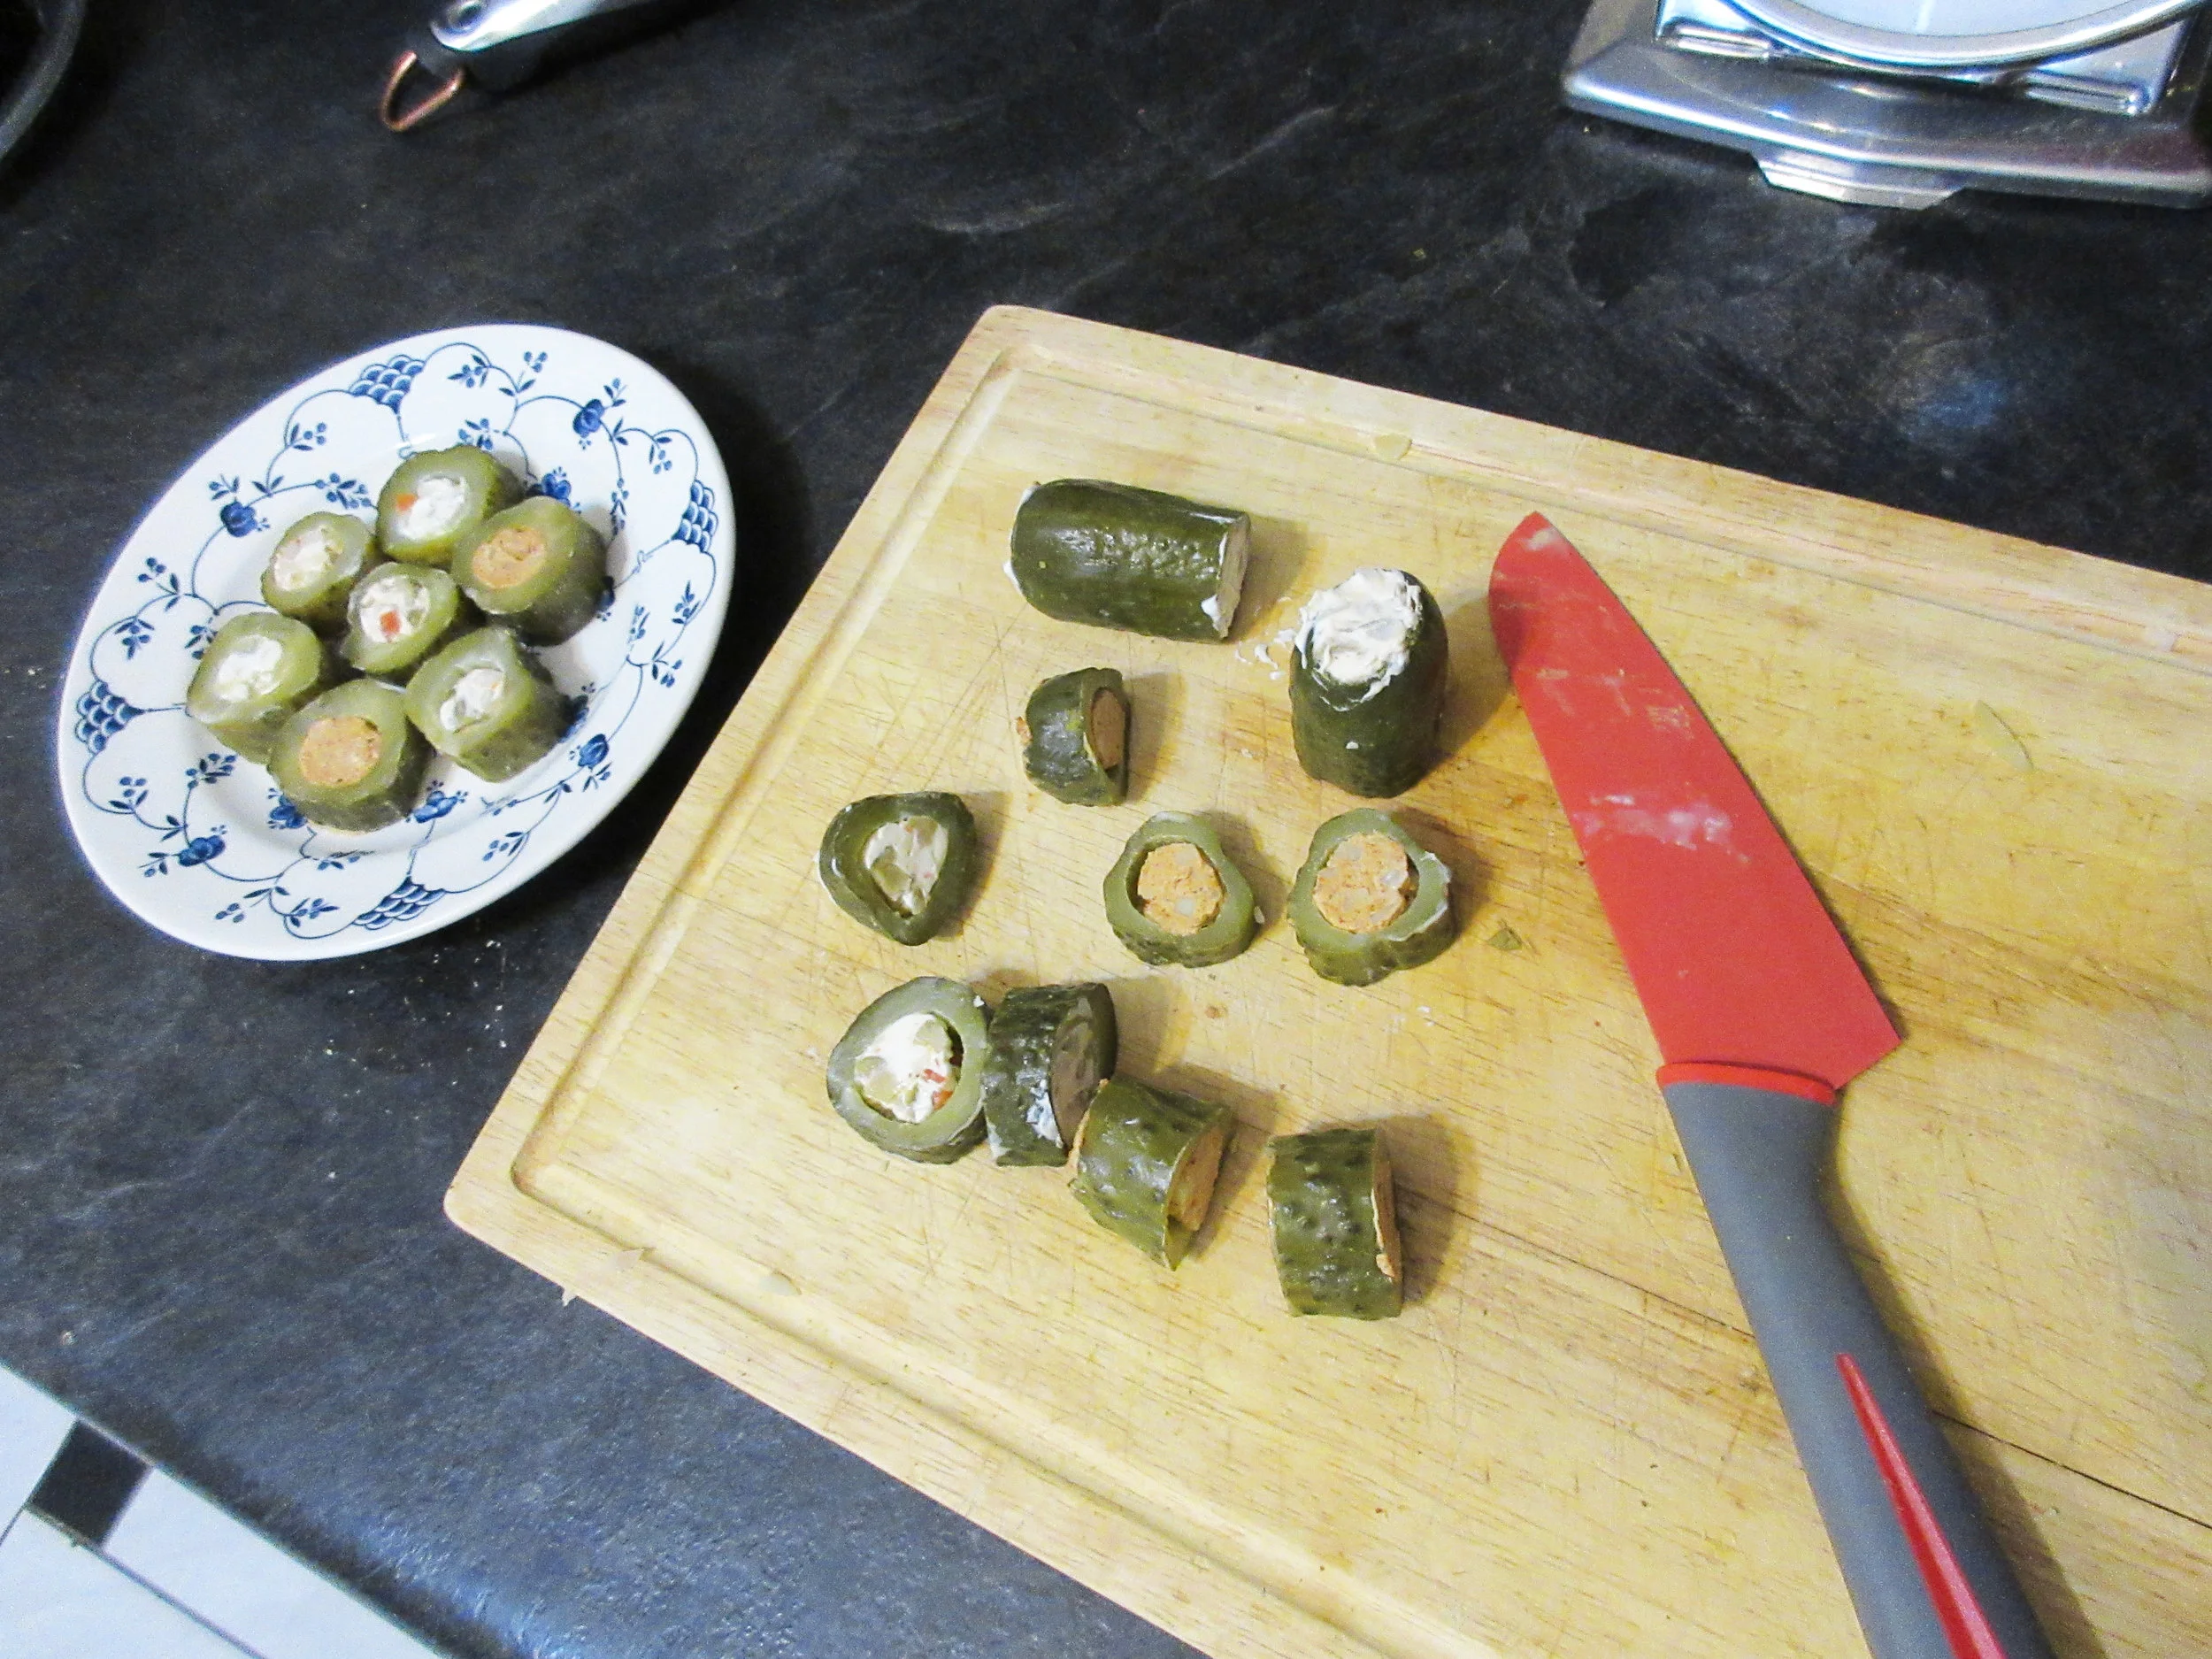
What happened when I made it?
The biggest hurdle I had to overcome was to find dill pickles that were large enough to be hollowed out by my apple corer. I stopped making Filled Dills when I did simply because all the pickles that remained were too small.
This recipe suggested trying adding either chopped water chestnuts or chopped celery to the cheese for added texture. I thought water chestnuts would provide a nice crunch, but would have a mellow flavour that wouldn't interfere with the flavour of the other ingredients, so that's what I went with.
The variations I tried out were Deviled Dills (cream cheese and chili powder) and Rosy Dills (cream cheese, pimentos and green olives). I had so many dill pickle cores that I also put some chopped dill pickles in the cream cheese. What don't we call this variation Extra Dills? Then, at the end I had a little bit left of all three variations, so I made some All Dressed Dills* where I mixed all three flavourings together and this was my favourite Filled Dill flavouring.
You will end up with a lot of dill pickle cores when you make this recipe! I made a batch of potato salad with the chopped dill pickle cores, but I guess you could also just eat them.
I took the Filled Dills to a potluck and there was some confusion over what they were. They do look an awful lot like sushi, which wasn't much of a concern in 1968! I'd made a little sign next time. I heard positive reviews from the people who tried them, though.
* In Canada, we have a potato chip flavour called All Dressed, which is all the flavourings thrown in together. One chip in the bag might taste more strongly of Salt & Vinegar, and the next chip might taste more like BBQ flavouring. You never know what you're going to get!
Read the Cookbook:
French Beans as a Salad
This tasty green bean salad is found in John Smith's The Principles and Practices of Vegetarian Cookery, published in 1860 in London. The Salad Sauce that accompanies the green bean salad is made of hard boiled egg yolks, oil, vinegar, mustard and herbs, and would taste amazing on salads of all varieties. Steve said that he didn't hate green beans when eating this salad, which is a glowing review of the Salad Sauce!

You'll find this recipe in:
The Principles and Practices of Vegetarian Cookery
By: John Smith
London, 1860
The Original Recipes:
French Beans as a Salad.
255. Cook them in water as above, drain them and let them cool. Season them, some hours before using them, with pepper, salt and vinegar; then cover them well. At the time of serving, drain off the water which they will have yielded, and add salad sauce.
French Beans (Haricorts verts).
254. Remove the fibres and wash the beans; put them in boiling water with a little salt; when cooked put them in cold water to preserve their colour...The better to preserve their colour, put a double linen cloth on a sieve, and on this cloth a good spoonful of wood ashes. Pass the water, in which the beans are to be cooked, over the ashes and through the sieve. This method may also be adopted when cooking artichokes. (There's more to this recipe, but this is the info we need for our purposes)
Salad Sauce.
505. Eggs two; water or cream one table-spoonful; oil or dissolved butter two table-spoonfuls; salt or powdered lump sugar one tea-spoonful; mustard one tea-spoonful; vinegar three table-spoonfuls; to these may be added a tea-spoonful of tarragon vinegar; or basil vinegar, etc; or a table-spoonful of chopped leaves. Boil the eggs twelve minutes, then put them in cold water for a few minutes; rub the yolks, which must be cold and hard, through a sieve with a wooden spoon, or pound them in a mortar, then mix them with the water or cream; add the oil, sugar, salt and mustard; and, when these are very well mixed, add very gradually the vinegars, and rub the whole until blended. Garnish the salad with the whites of eggs cut in pieces.


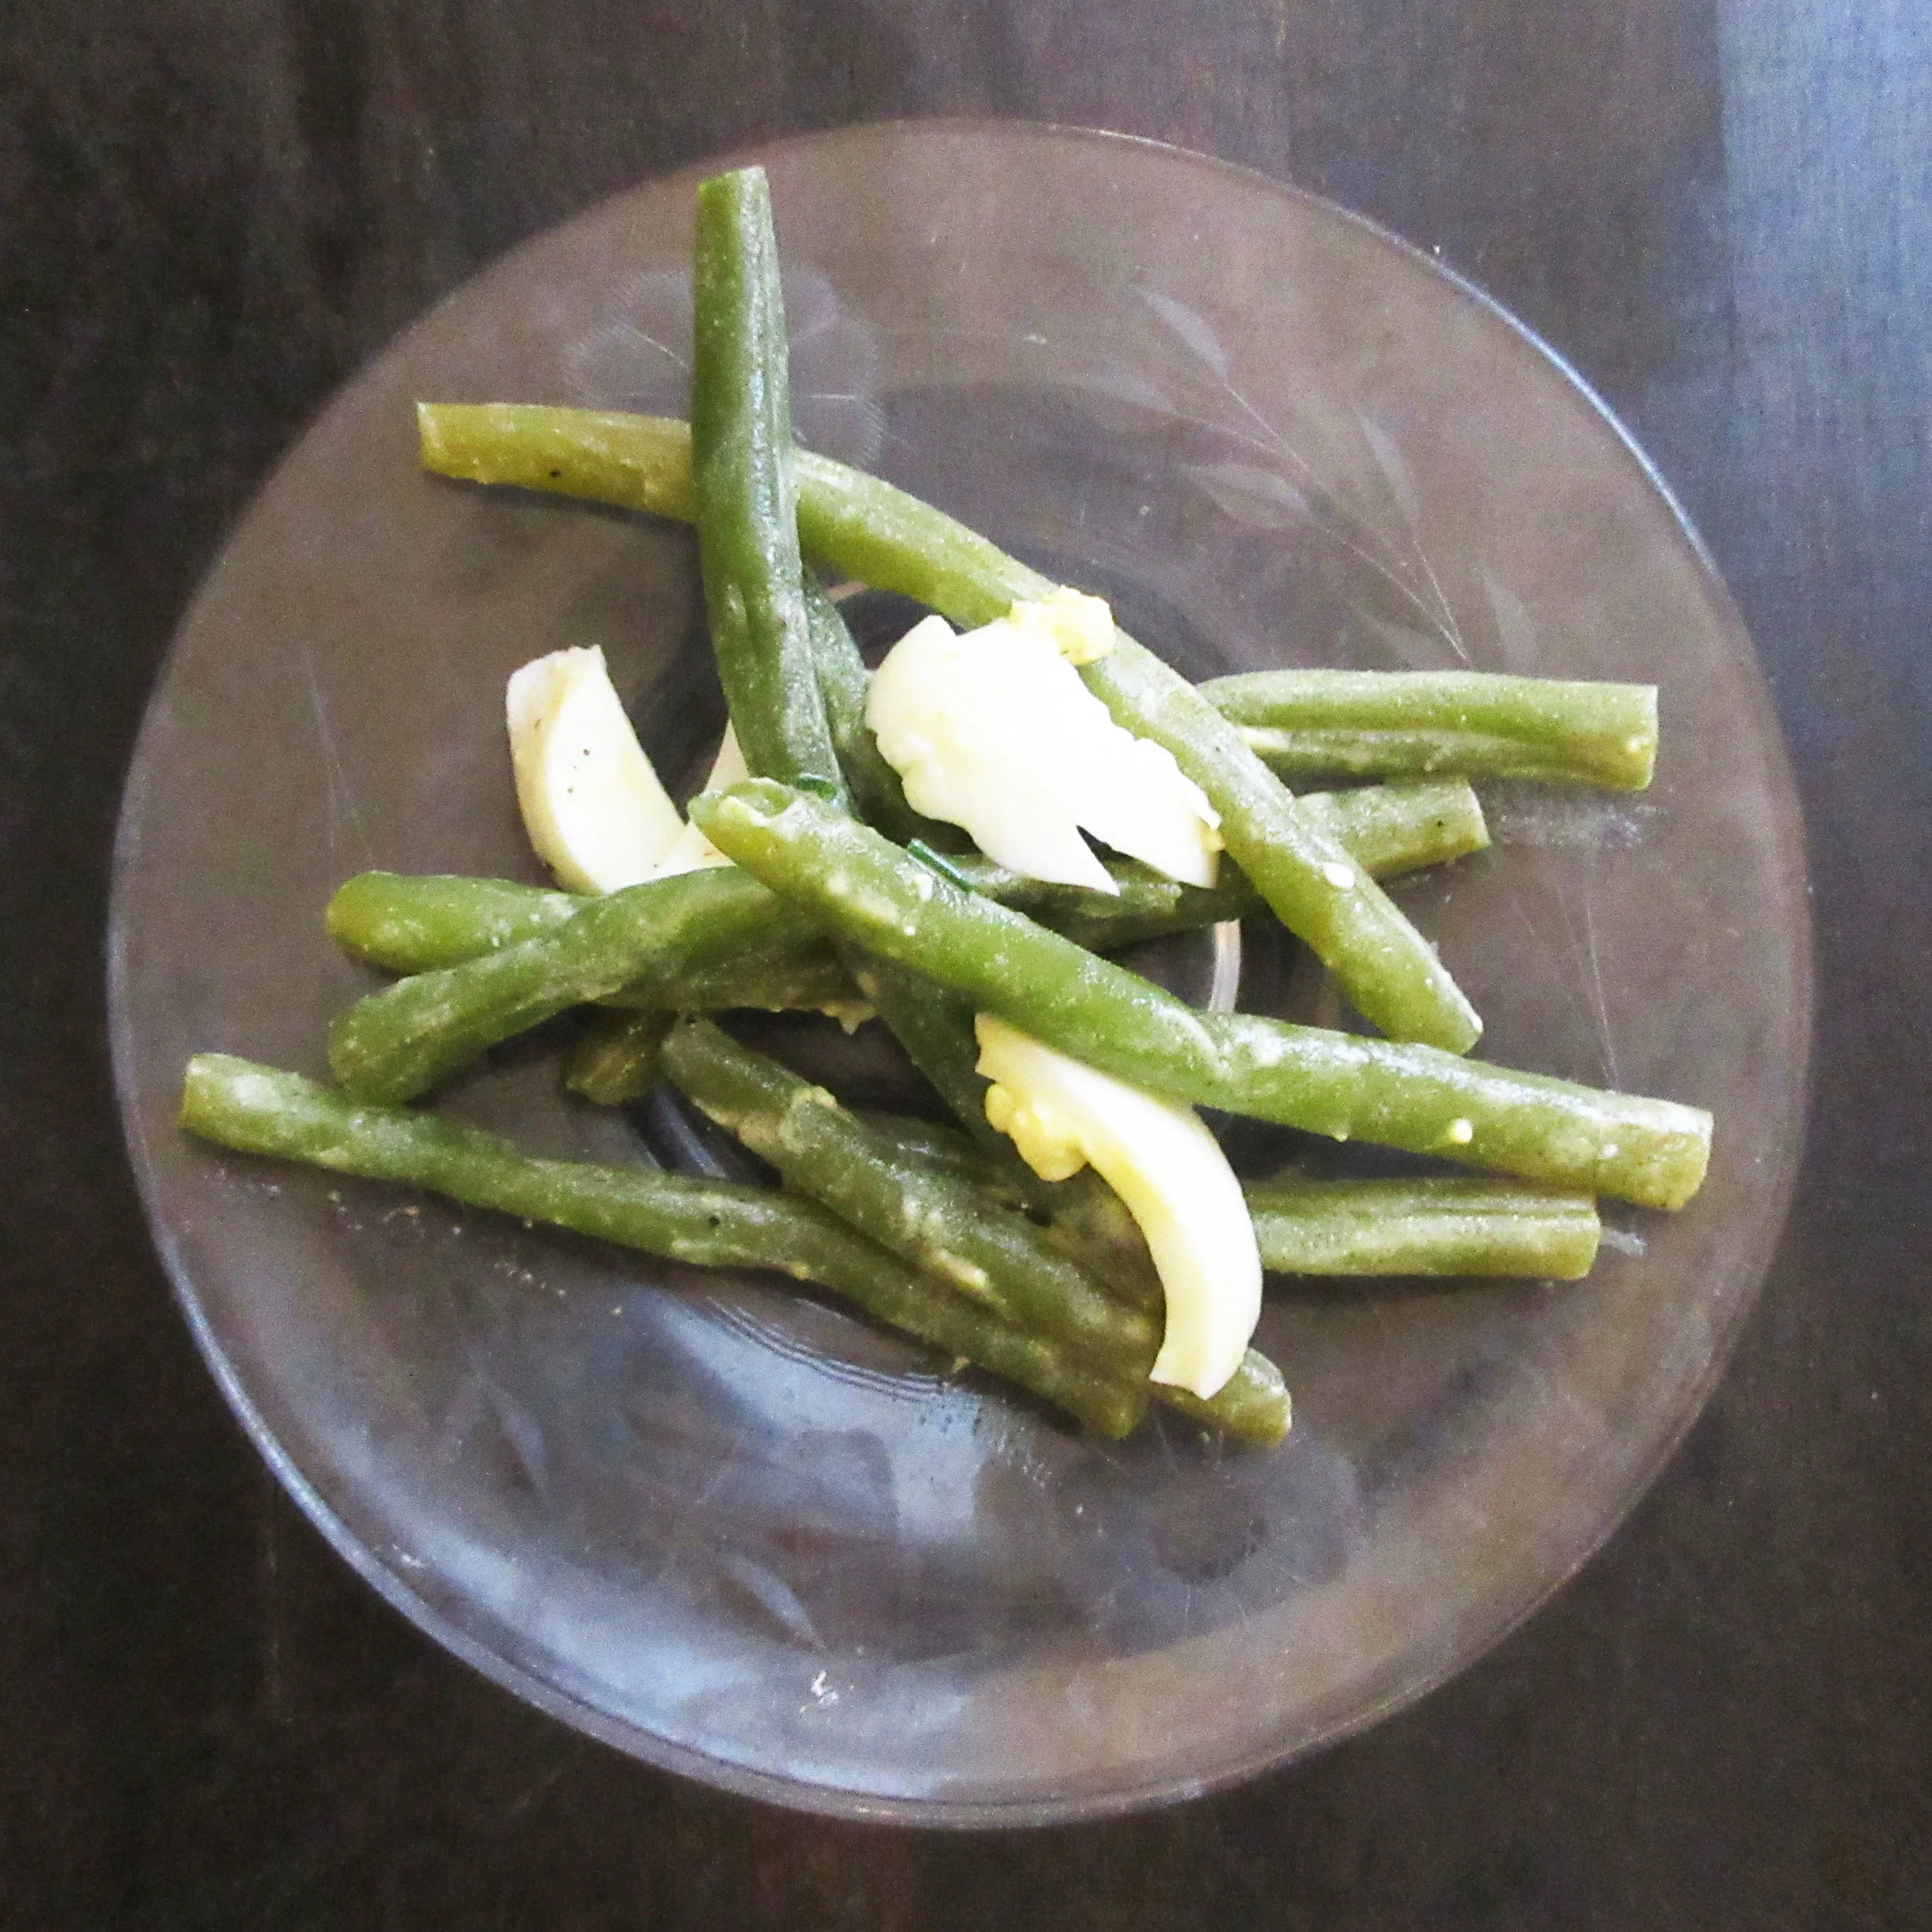
My Recipes:
French Beans as a Salad
Green Beans
Salt
Pepper
Vinegar (I used apple cider vinegar)
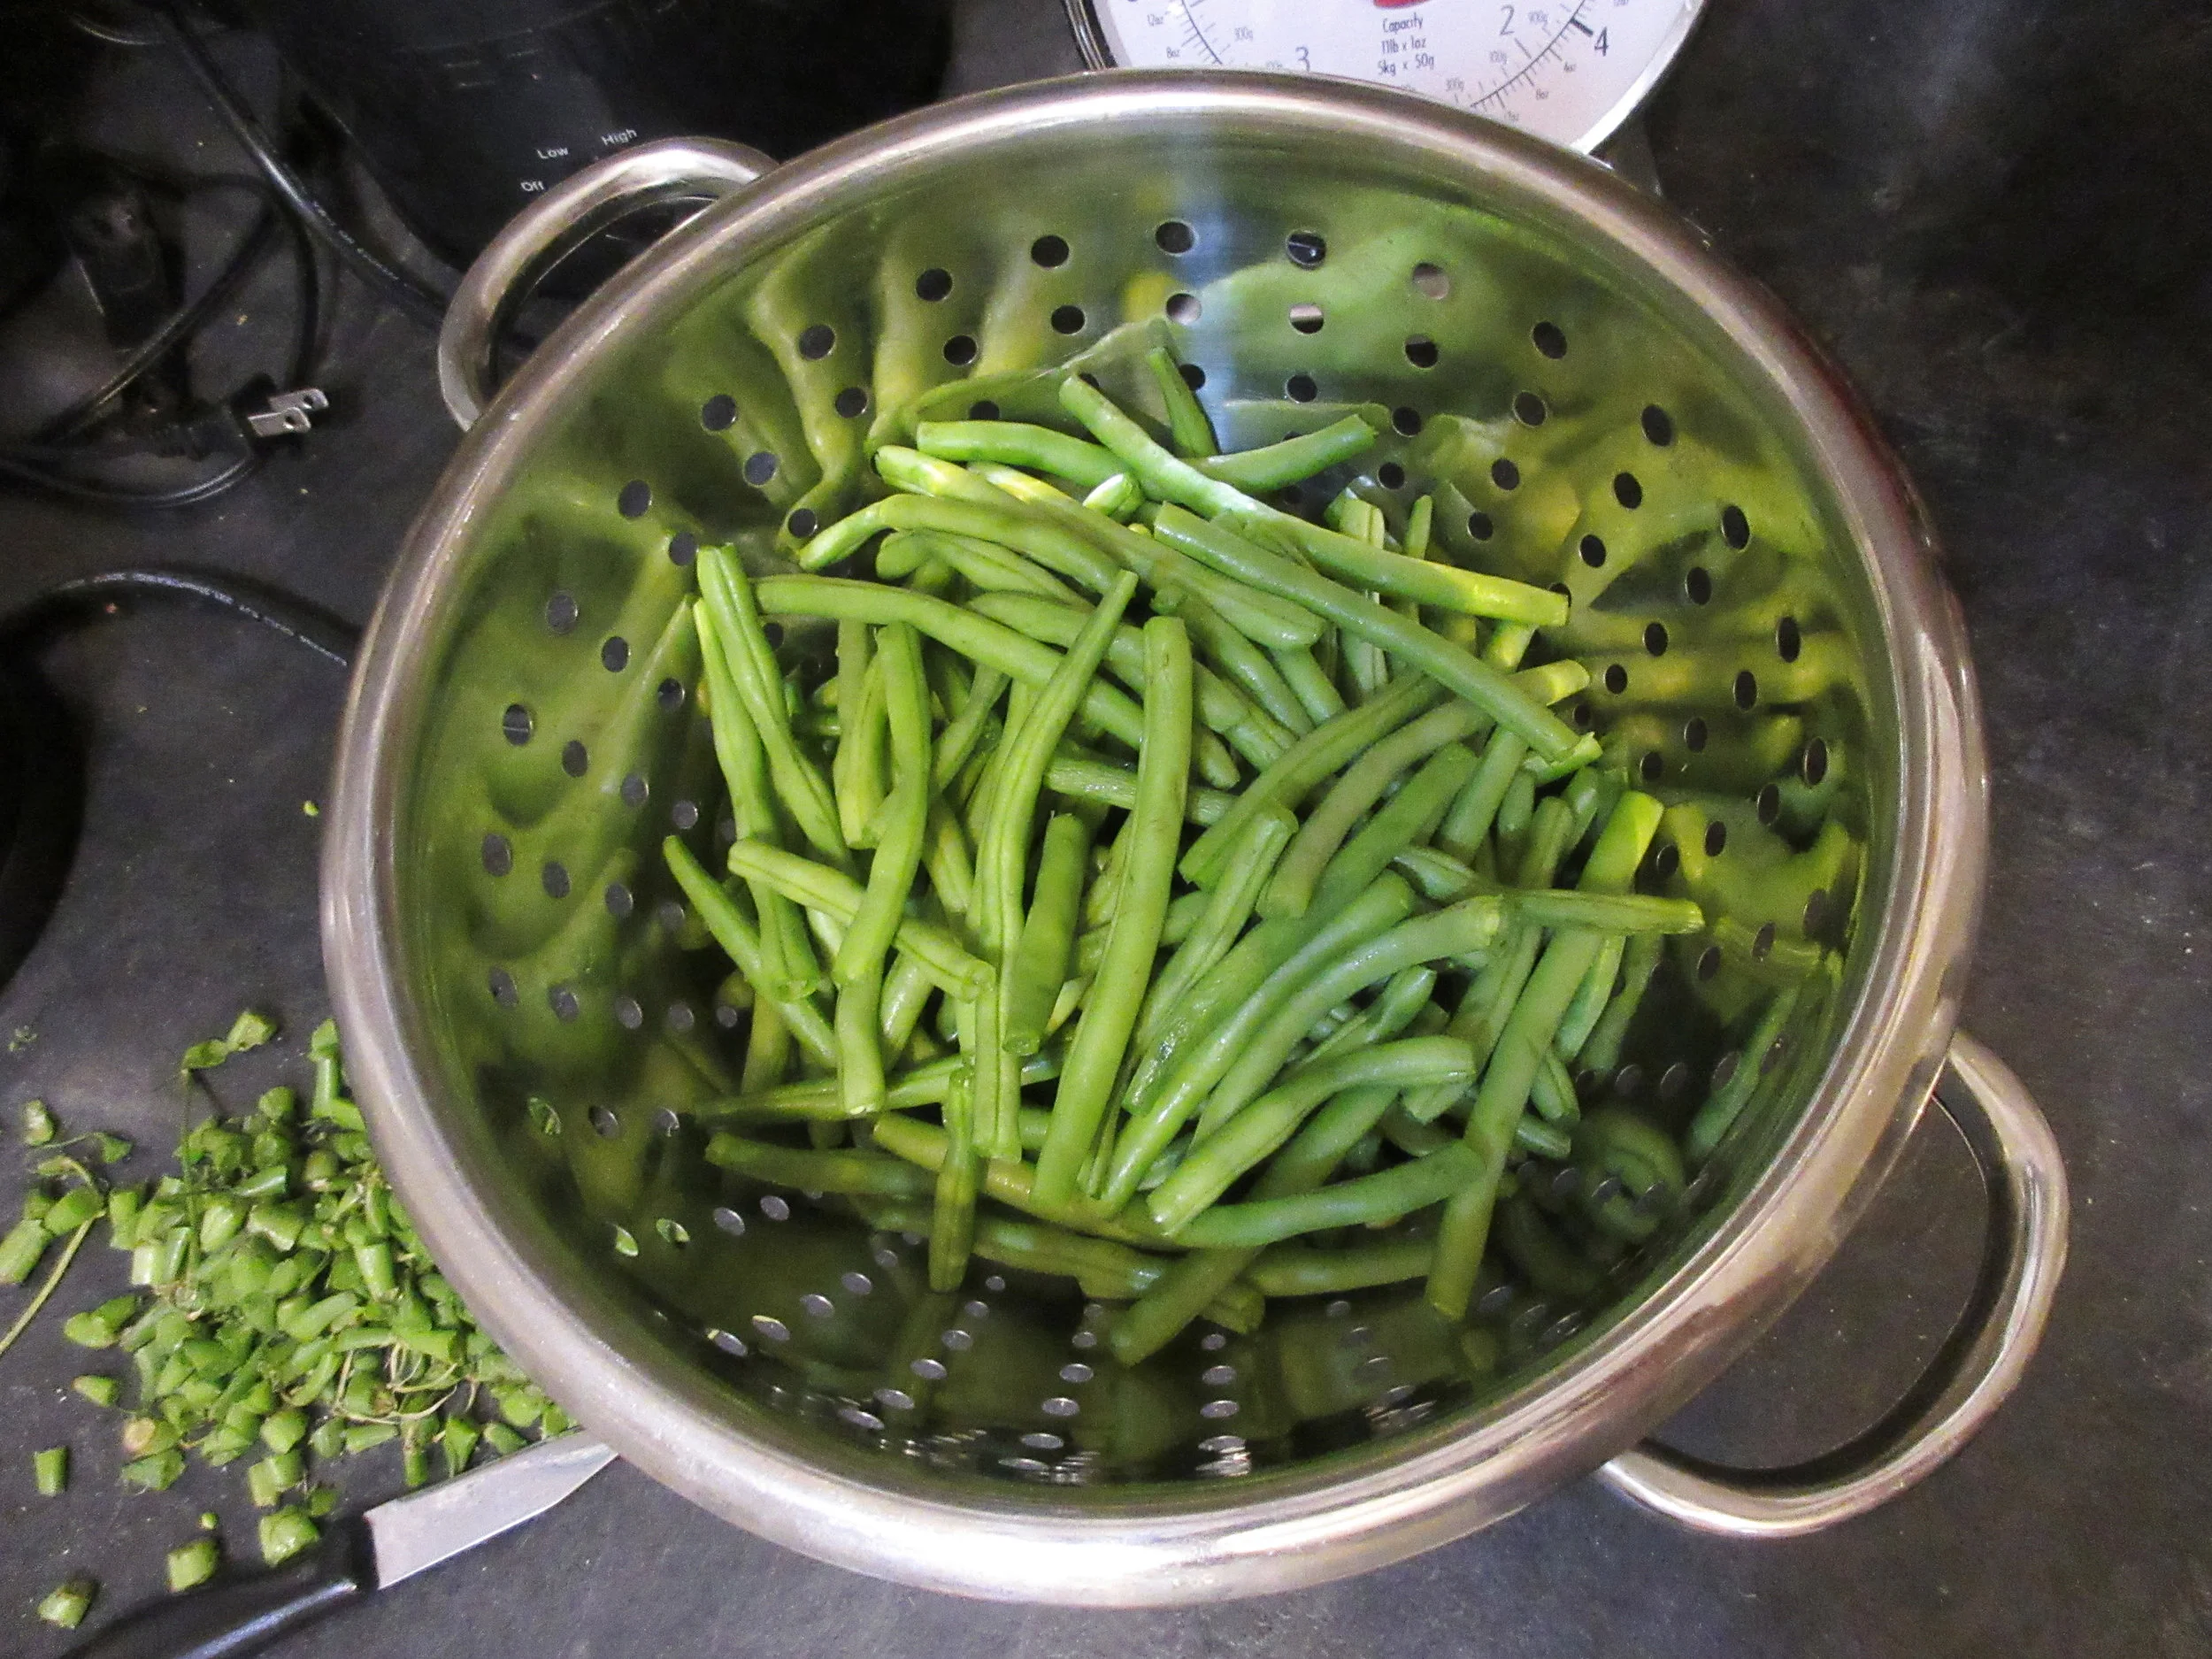
1) Wash the green beans, then trim the tops & tails. Bring a pot of salted water to a boil and add the green beans. Once cooked, drain and submerge the beans into cold water.
2) Drain the green beans again after they've cooled and put them into a bowl or container. Add some salt, pepper and a little vinegar. Stir, then store in the refrigerator. Strain off any liquid, add the Salad Sauce and stir. Garnish with the sliced egg whites.
Salad Sauce
2 hard boiled eggs
1 tbsp water or cream
2 tbsp oil or melted butter
½ tsp salt
½ tsp sugar
1 tsp mustard powder
3 tbsp vinegar (I used apple cider)
1 tsp herbal vinegar or 1 tbsp chopped fresh herbs (I added chives)
1) Slice the hard boiled eggs in half, separate the yolks and cut the egg whites into pieces. Put the yolks into a bowl and mush with the back of a spoon.
2) Add all the other ingredients to the bowl and mix well with a fork. Add the Salad Sauce to your salad, then garnish with egg white.

In my regular life, I am weirdly enough not a follower of recipes. For this reason, The Principles and Practices of Vegetarian Cookery is one of my favourite historic cookbooks because John Smith wrote his recipes in the same spirit of how I normally cook. He offers a lot of options, substitutions and variations, so you're able to easily use the same recipe when you're craving some variety or you've got different ingredients in the house.
Not having wood ash handy at home, and also since I didn't plan ahead to bring a small container of ashes home from work, I unfortunately couldn't try Smith's suggestion of passing the cooking water through a sieve filled with ashes before bringing it to a boil. This method is supposed to keep the beans' bright green colour. If you end up trying it, please let me know how it turned out! I'm especially curious how the ashes affect the taste of the beans.
If any of you are marveling over the fact that this recipe comes from a vegetarian cookbook published in 1860, The Principles and Practices of Vegetarian Cookery is not the only vegetarian cookbook to be published in this time period. Vegetarianism wasn't a part of mainstream culinary culture, but it was an important aspect of the health movement that was gaining a lot of momentum at this time. I think a blog post just looking at early vegetarian cookbooks is a must, so keep an eye out for it.
Until then, I'll share my favourite article about mid-19th century vegetarians from Slate: The Exquisite Wistfulness of 19th-Century Vegetarian Personal Ads. These lonely Vegetarians were searching for a spouse who shared their commitments to Vegetarianism, Hydrotherapy, Temperance, Phrenology or Dress Reform. I feel for these people, considering how small a segment of the general population would have shared their viewpoints. I also would love to know if any of these advertisements produced a love match and a long & happy marriage, wouldn't you?
Read the Cookbook:

Queen's Drops
Queen's Drops are a basic sugar & spice cookie with a hint of dried currants. The recipe is found in The Cook Not Mad from 1831, which has the distinction of being the first English-language cookbook to be published in Canada! They are delicious with both white or brown sugar, but I prefer the extra flavour that comes with using brown. The dried currants provide little intense sweet flavour pops, and our recipe suggests using "any agreeable spice", so feel free to customize and add your favourite baking spices.

You'll find this recipe in:
The Cook Not Mad
Kingston, Ontario
1831
Original Recipe:
No. 162. Queen's Drops
One pound of sifted sugar, one pound flour, one of butter, quarter of a pound of currants, any agreeable spice, put drops on a tin about as large as a dollar, sift on sugar, to be baked quickly.


My Recipe:
2 cups softened butter (1 lb) - 450 g
2 cups sugar (I used brown) – 450 g
2 ¾ cups flour – 450 g
¾ cup dried currants – 225 g
white sugar to sift on top
Spices:
I've used 2 tsp cinnamon & 1 tsp nutmeg in the past and loved it!
This time, I tried this very delicious spice combo:
1 ½ tsp cinnamon
1 tsp ginger
1 tsp nutmeg
a few shakes of allspice
1) Preheat your oven to 350F/175C. Cream the sugar and softened butter together, then add in the currants & spice, and once mixed, stir in the flour.
2) Form the dough into balls and place onto cookie sheets. The cookies will spread a fair bit while they're being baked, so be sure to give them space. For kicks, I followed the historic recipe's direction to make these balls "about as large as a dollar". Our Canadian $1 coin, the "Loonie", is about 2.5 cm/1" in diameter, so that's what I aimed for. I ended up with nicely sized cookies!
3) Before you pop your cookie sheet into the oven, sprinkle some white sugar on top of each cookie. Bake for 15-20 minutes, until the cookies are golden on the bottom and will move easily when shifted with a lifter. This recipe makes about 5 – 6 dozen cookies.

The "LOONIE: if my childhood memory is accurate, the name came from a) the obvious fact that the bird depicted is a Loon, but also b) that many people thought replacing the dollar bill with a coin was ludicrous!
Queen's Drops is my favourite historic cookie, so of course I've picked Queen's Drops as the inaugural cookie recipe on my blog! I've brought the recipe with me as I moved from historic house museum to historic house museum. The first time I made this recipe in my new historic kitchen, word spread to the Curator's office. Our Curator would never try the food, but would venture into the kitchen sometimes to critique how we were displaying the dishes. This day, when he came to kitchen, he said: "I hear you're making Queen's Drops" and after he ate one, gave the cookie a glowing review of being "Not bad".
Queen's Drops are found in The Cook Not Mad (possibly the best cookbook title ever), and the author of this cookbook remains anonymous to this day. It was first published in 1830 in Watertown, NY, and was reprinted the following year as well by the same publisher. The Cook Not Mad was also published across the border in 1831 in Kingston, Upper Canada (Ontario), giving it the distinction of being the first English-language cookbook to be published in Canada! The content in the Canadian version of The Cook Not Mad is identical to the original, with only the word "American" changed to "Canadian".
Queen's Drops are a basic sugar & spice cookie with a hint of dried currants. They are delicious with both white or brown sugar, but I prefer the extra flavour that comes with using brown. The dried currants provide little intense sweet flavour pops, and our recipe suggests using "any agreeable spice", so feel free to customize and add your favourite baking spices.
If you're wondering why Queen's Drops feature dried currants instead of chocolate chips, that's because our Queen's Drops recipe was published in the 1830s, and Chocolate Chip Cookies didn't come into being until the 1930s! In the 1830s, if you told someone that you were serving "Chocolate", they would probably automatically know that you were serving a hot chocolate beverage. The origin story of the Chocolate Chip Cookie is an interesting one, so I'm sure I'll do a post about it someday.

Read the Cookbook:
1931 Canadian The Cook Not Mad:
A more readable scan of the 1831 American The Cook Not Mad:
