
Mint Cup
Today's the first day of a scorching hot Canada Day long weekend in Ontario, and it's the perfect day to post about my experiences making Mint Cup, a mocktail recipe from a 1940s edition of The Joy of Cooking. To start off, you take about 5 minutes to make a mint syrup with fresh mint leaves, sugar and water. Once it's strained & cooled, you add lemon juice, ginger ale and a bit of green food colouring. It's a very refreshing beverage that tastes like a Whisky Sour. I'd recommend giving it a try!

You'll find this recipe in:
The Joy of Cooking
By: Irma S. Rombauer
Toronto, 1945
(I think my copy is a Canadian reprint of the 1943 American edition)
The Original Recipe:
MINT CUP
About 2 quarts
Remove the tips and the leaves from:
4 sprigs of mint
Add to them:
2 cups sugar
2 cups water
Boil these ingredients for 5 minutes.
Strain the sirup. Add:
2 cups lemon juice
1⁄4 teaspoon salt
A little green food coloring
Chill these ingredients well. Immediately before serving add:
1 quart chilled ginger ale


My Two Cents:
"4 sprigs of mint" seemed like an arbitrary measurement, so I just went with using all the mint that I had in my fridge, which amounted to about 3/4 of a cup. It made a very minty sweet syrup, so I think this is a good approximate amount of mint to use for this recipe.
I found that adding 2 cups of lemon juice almost eradicated the minty taste, though. Next time, I'll probably choose to add the mint syrup, lemon juice & ginger ale to taste.
Steve thinks Mint Cup tastes like a Whisky Sour, so if you enjoy the flavour of that beverage, give this mocktail recipe a try with the full amount of lemon juice!
I added 5 drops of green food colouring to the mint syrup & lemon juice concoction
I was serving Mint Cup by glass, not by punch bowl, so I kept the ginger ale separate so it didn't go flat. With the full amount of lemon juice, the ratio of mint syrup & lemon juice to ginger ale is about 50/50.

Irma S. Rombauer, the author of The Joy of Cooking, was a homemaker who lived in St. Louis, Missouri. In 1930, her husband Edgar committed suicide and the cookbook was conceived in the following year out of grief and the need to make a living. Rombauer funded the printing of 3000 copies of The Joy of Cooking in 1931 and she sold copies out of her apartment for the following few years. A.C. Clayton, the company who printed the first edition, mostly printed labels and had never printed a book before The Joy of Cooking.
Rombauer continued to do revisions and searched for a publisher for the second edition, which was published in 1936 by the Bobbs-Merrill Company, which was moderately successful. It wasn't until the 1943 edition was published that The Joy of Cooking met with the blockbuster success that we associate with the book today.
My copy of The Joy of Cooking is a 1945 Canadian reprinting of the 1943 edition, and this edition was edited to reflect the realities of wartime rationing. It includes suggestions for butter substitutes and chapters filled with sugarless & sugar-saving baking and meatless & meat-stretching recipes.
In her introduction, Irma S. Rombauer writes "When the revision of this book was begun a year ago we had no intimation that international obligations would lead our land of plenty to ration cards. It now goes to print with a number of emergency chapters added, written to meet the difficulties that beset the present-day cook."

If you'd like to read more about Joy of Cooking, this cookbook has an excellent website: http://www.thejoykitchen.com/
I've also read a couple of interesting articles about Joy of Cooking in the last little while. The article on Bon Appetit weaves a story about The Obsessive Sport of Shopping for a Vintage Joy of Cooking. Apparently, the 1962 edition is sought after because it features pictorial instructions for how to skin a squirrel. I'll be keeping my eye out for it from now on! (edited later to add: I've been told that the squirrel skinning illustrations are also in the 1975 edition)
The Strange, Uplifting Tale of "Joy of Cooking" Versus the Food Scientist from The New Yorker:
A 2009 study called "The Joy of Eating Too Much" claimed that the recipes' caloric content increased with new editions, implying the cookbook's popularity had a part in the obesity epidemic. This article tells the tale of how this study has been debunked.
Read the Cookbook:

Asparagus Soup
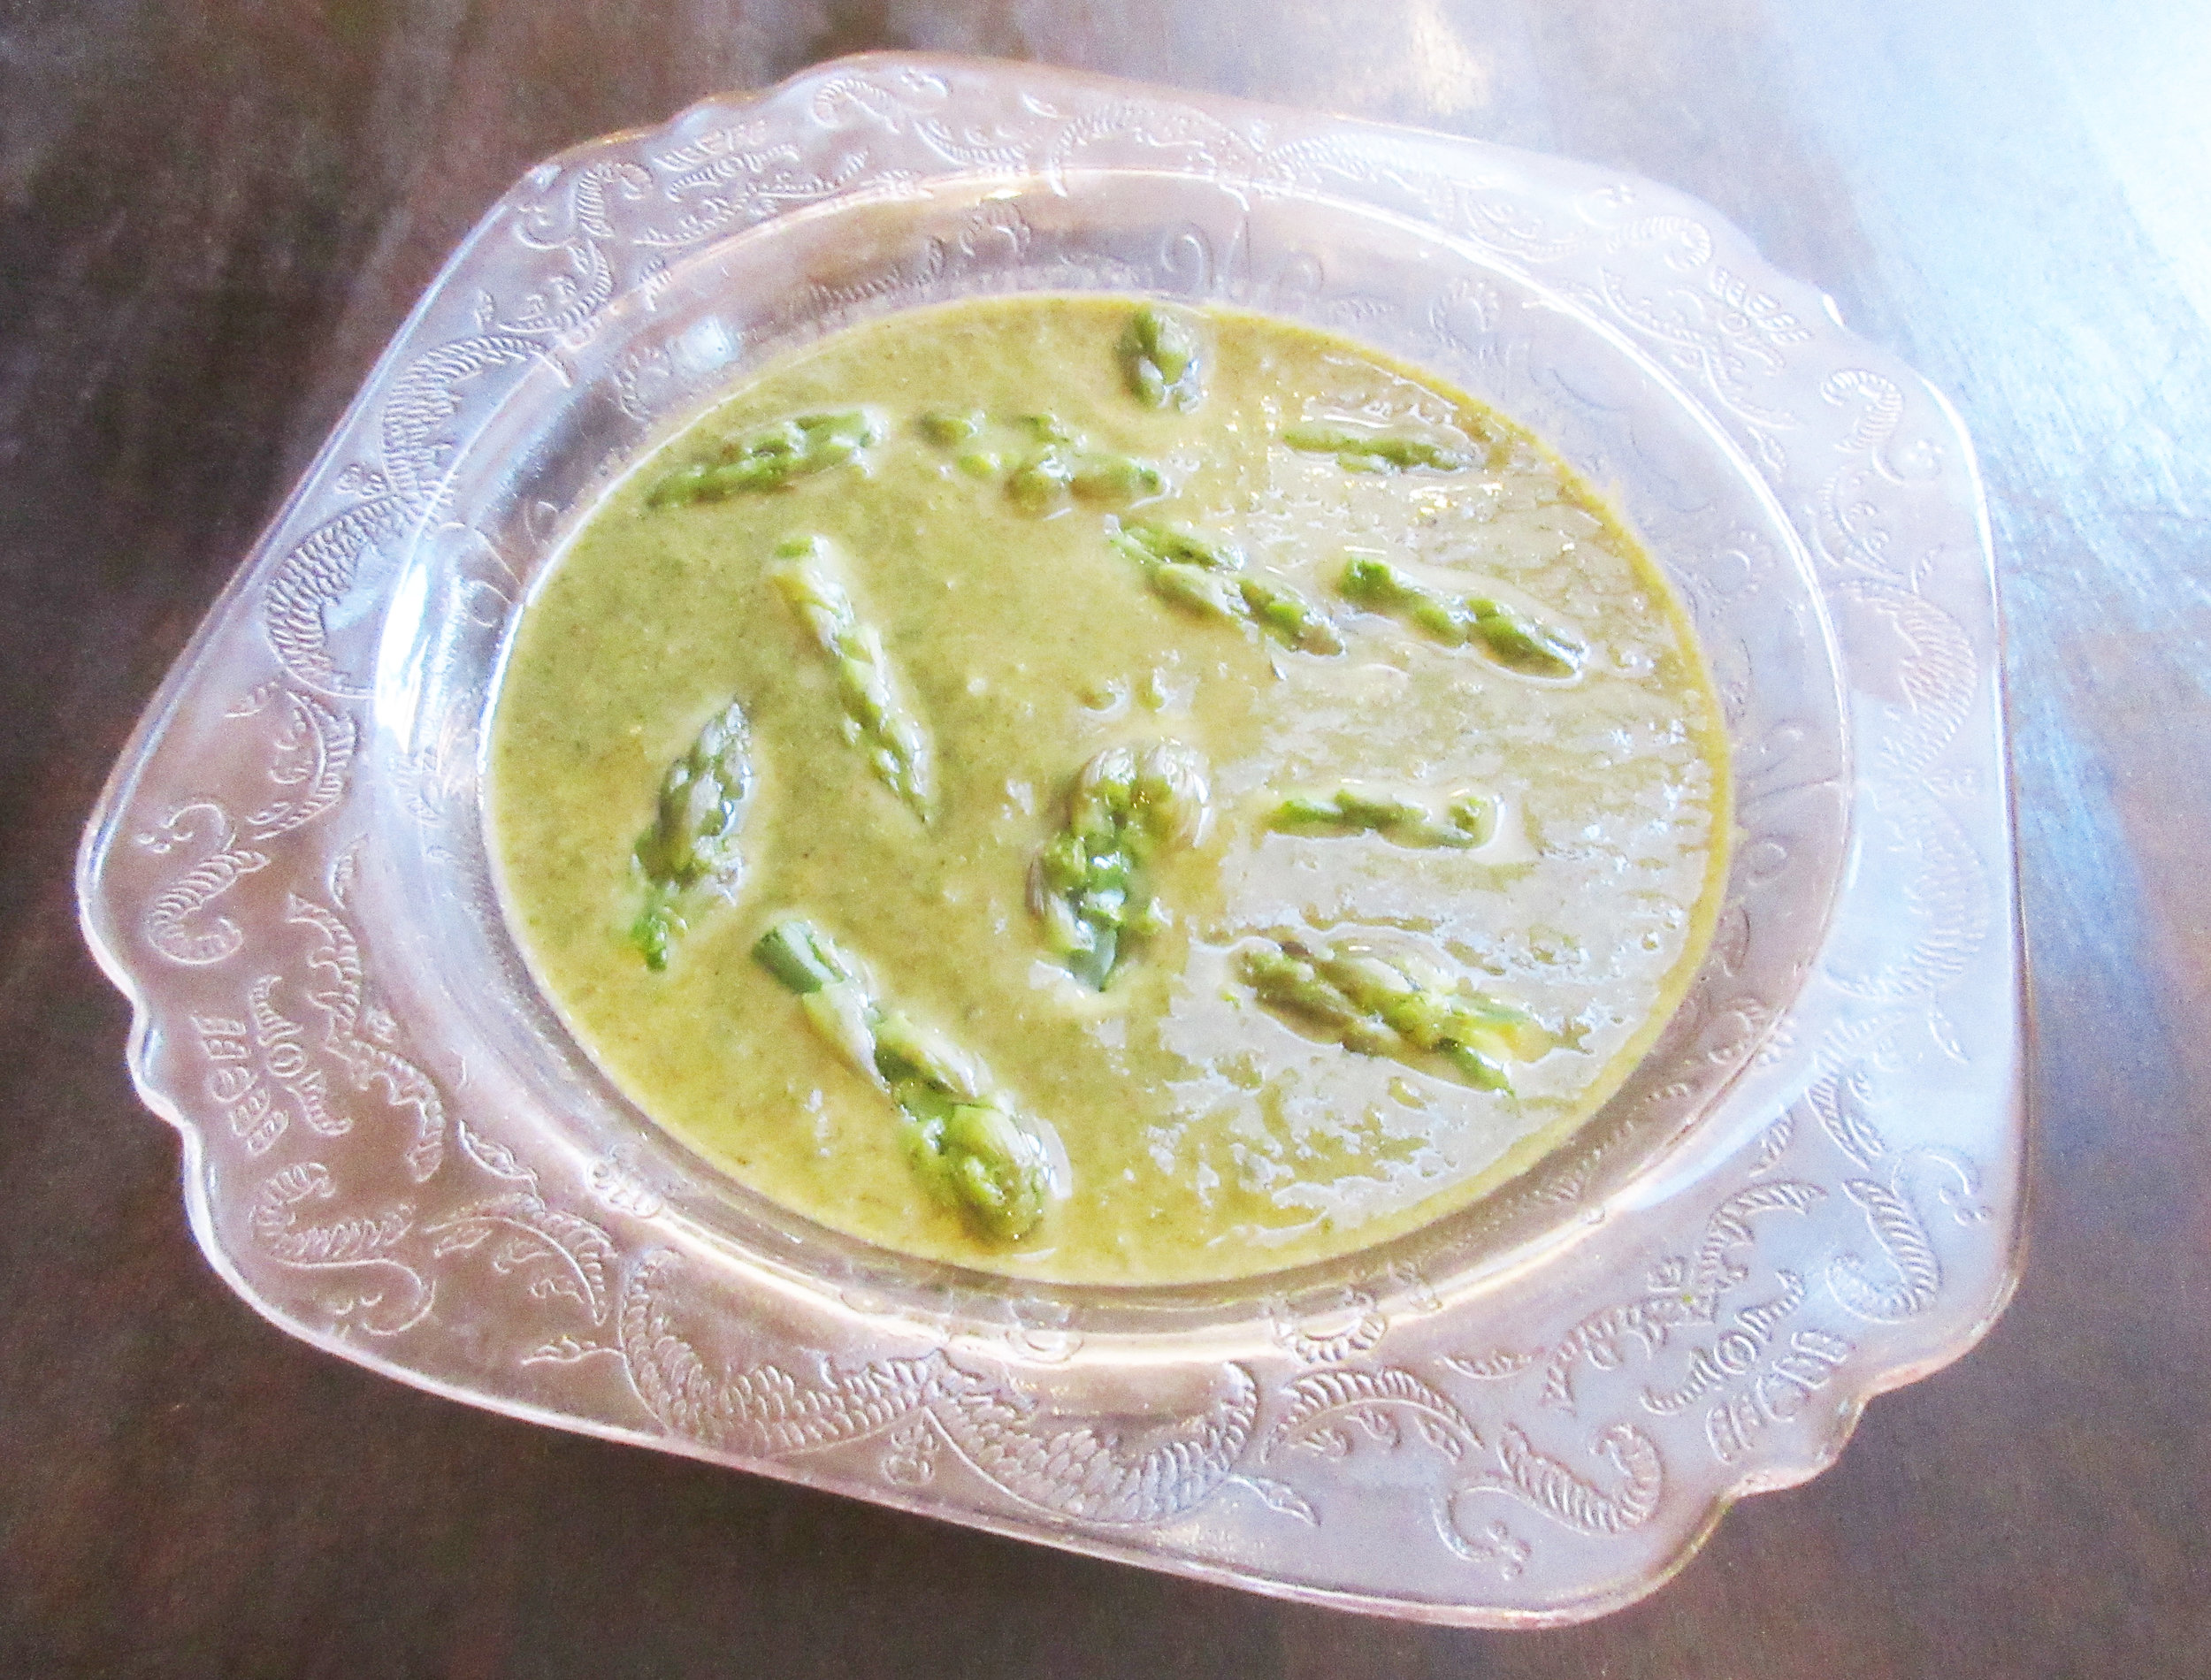
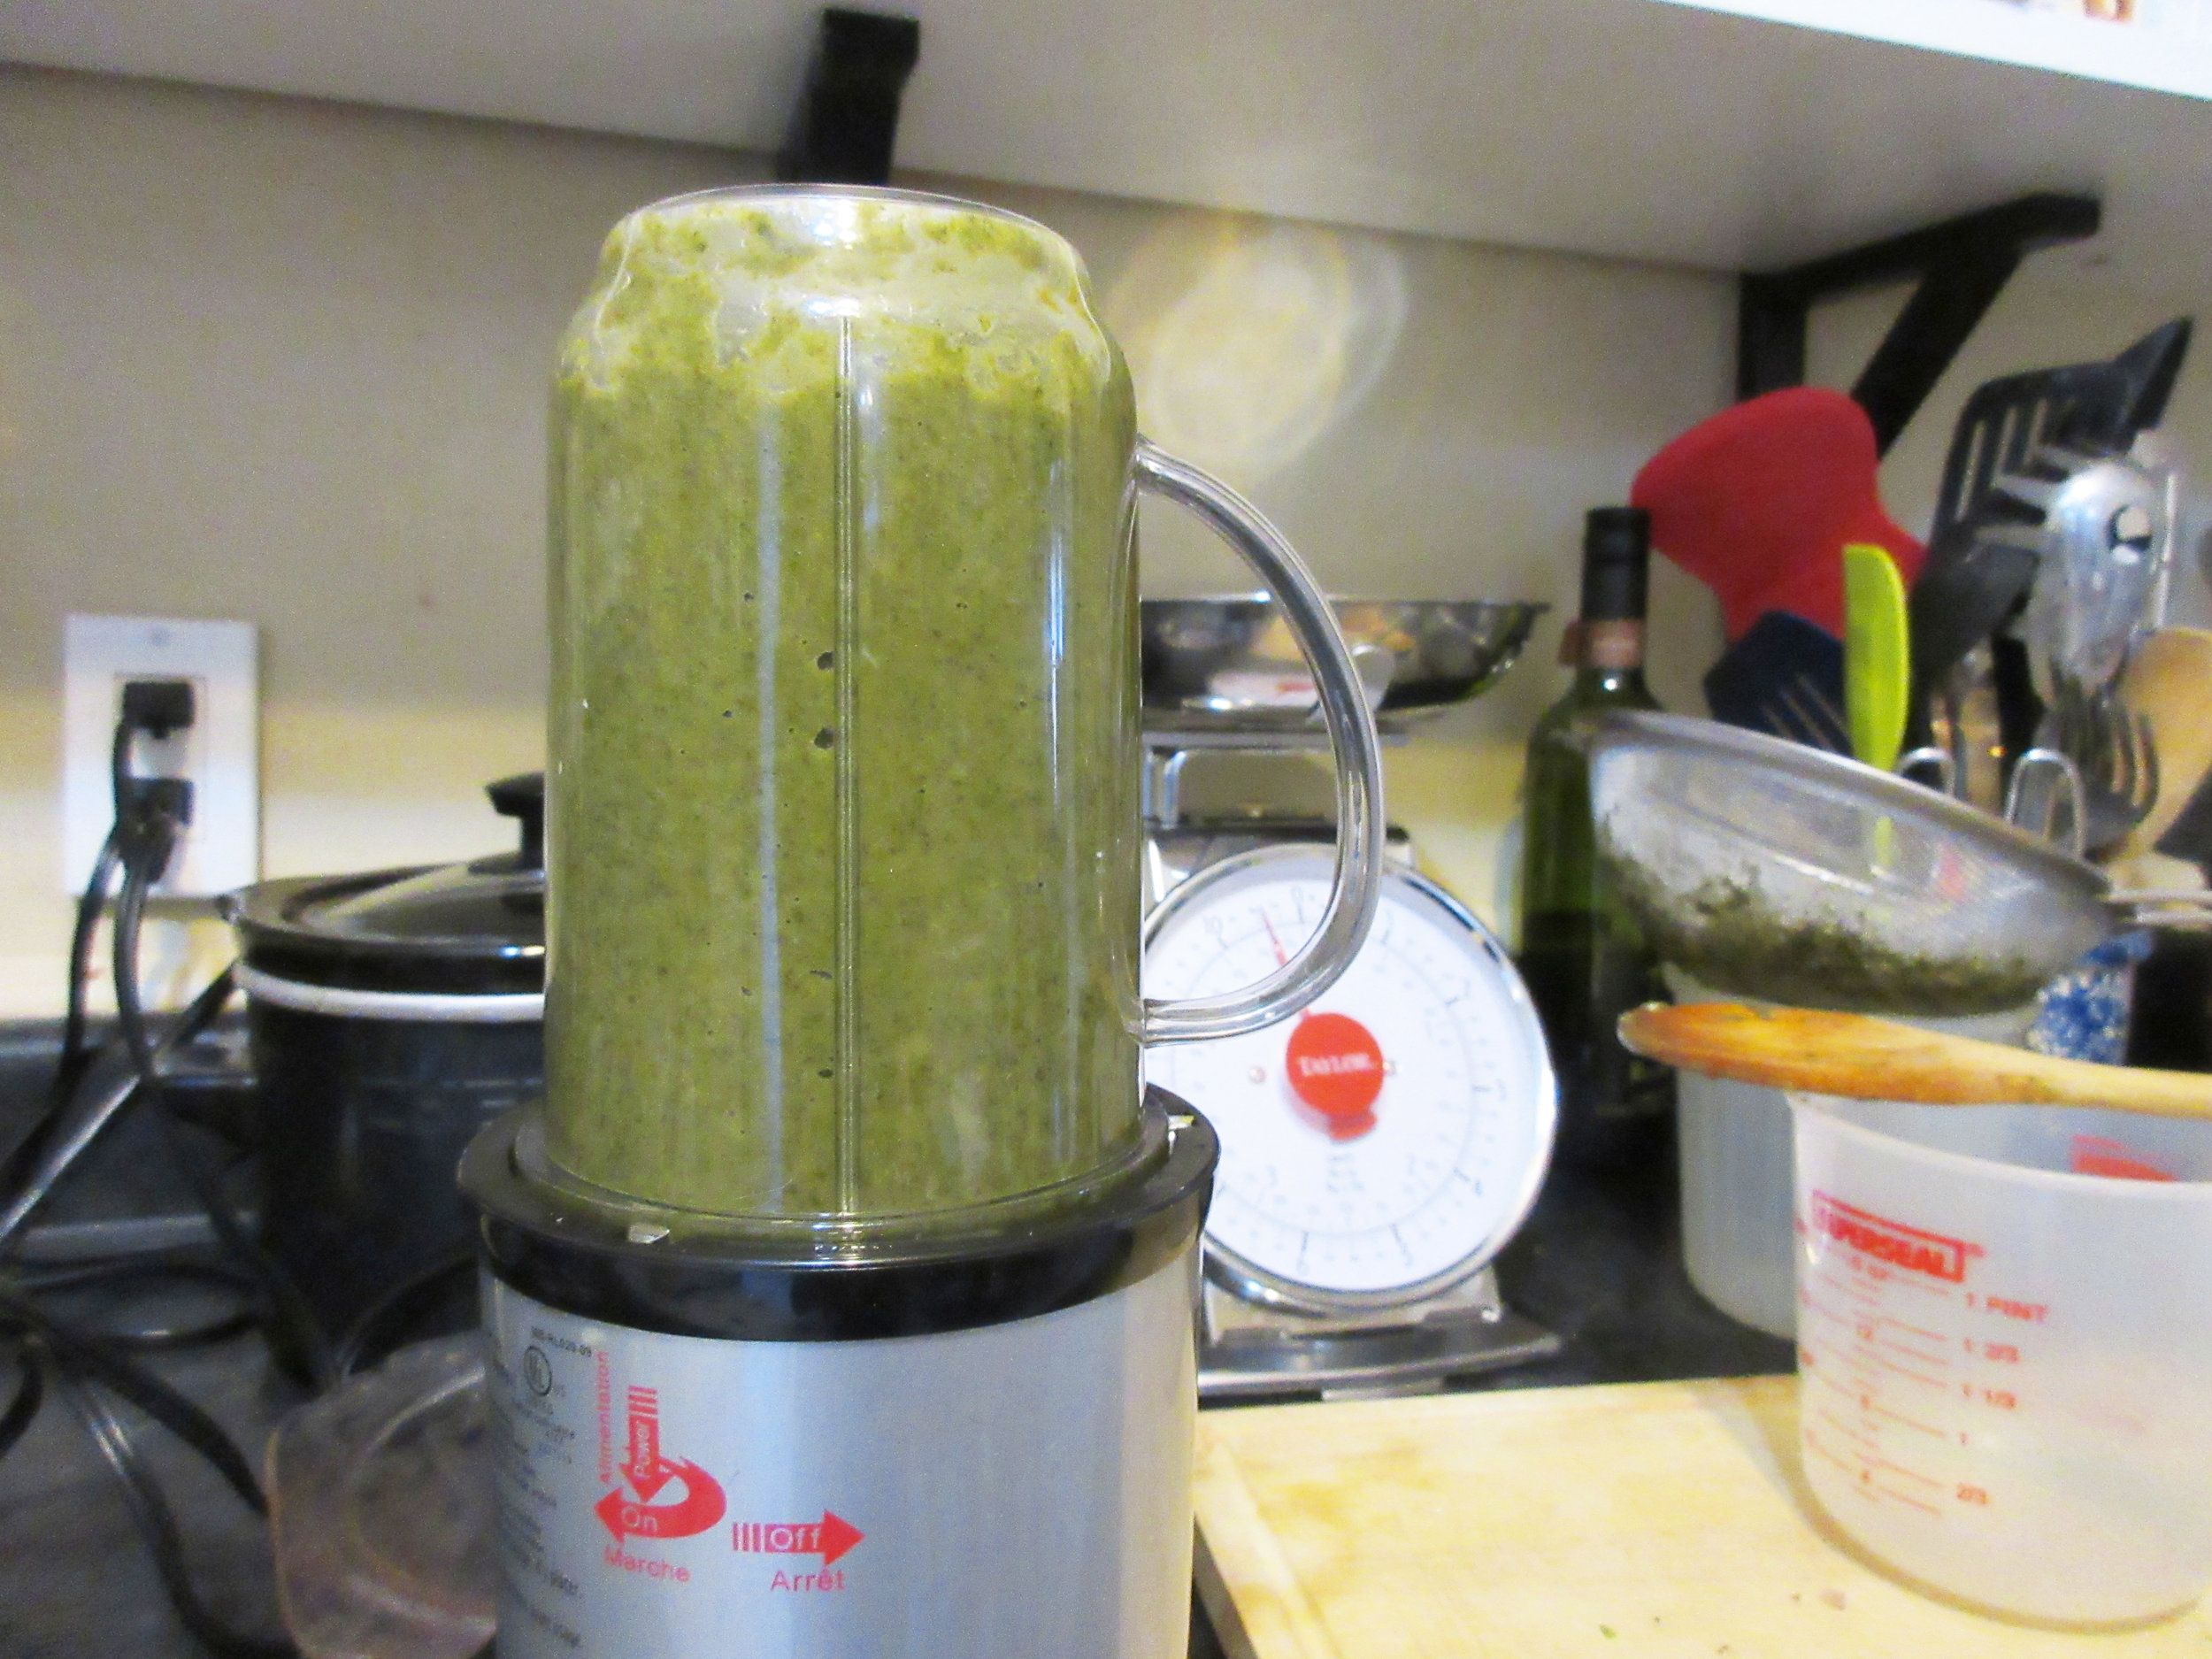
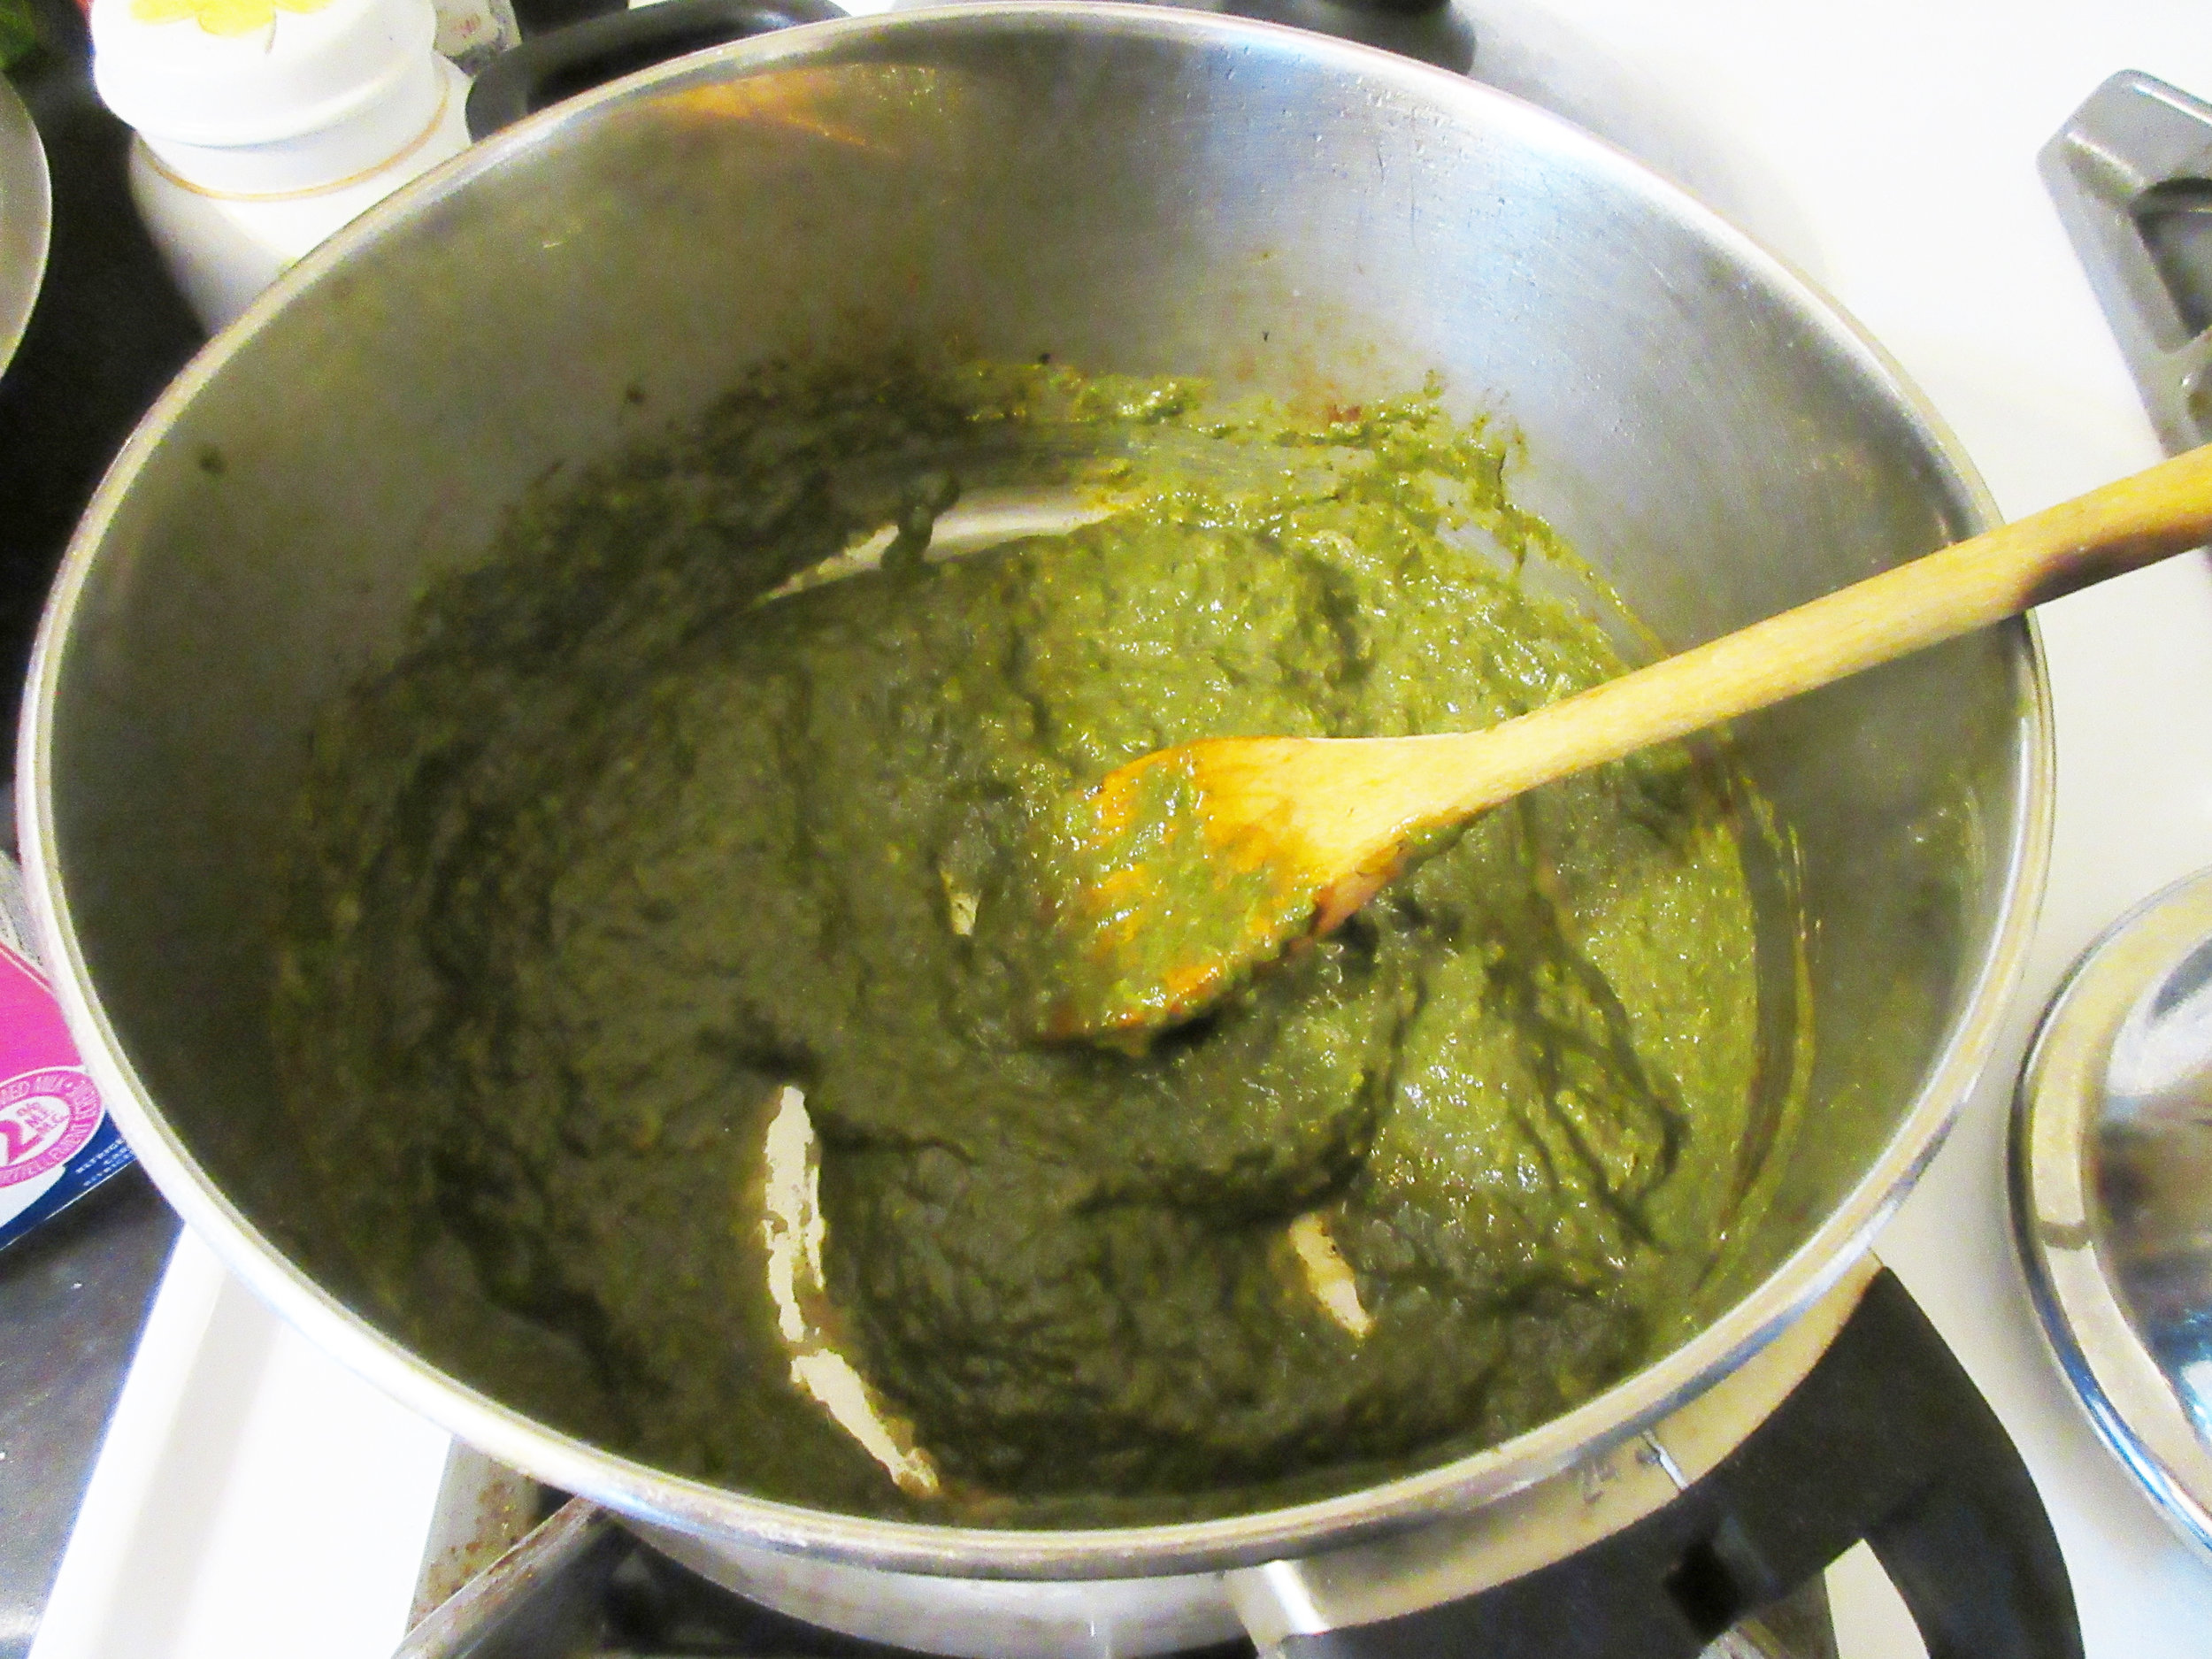
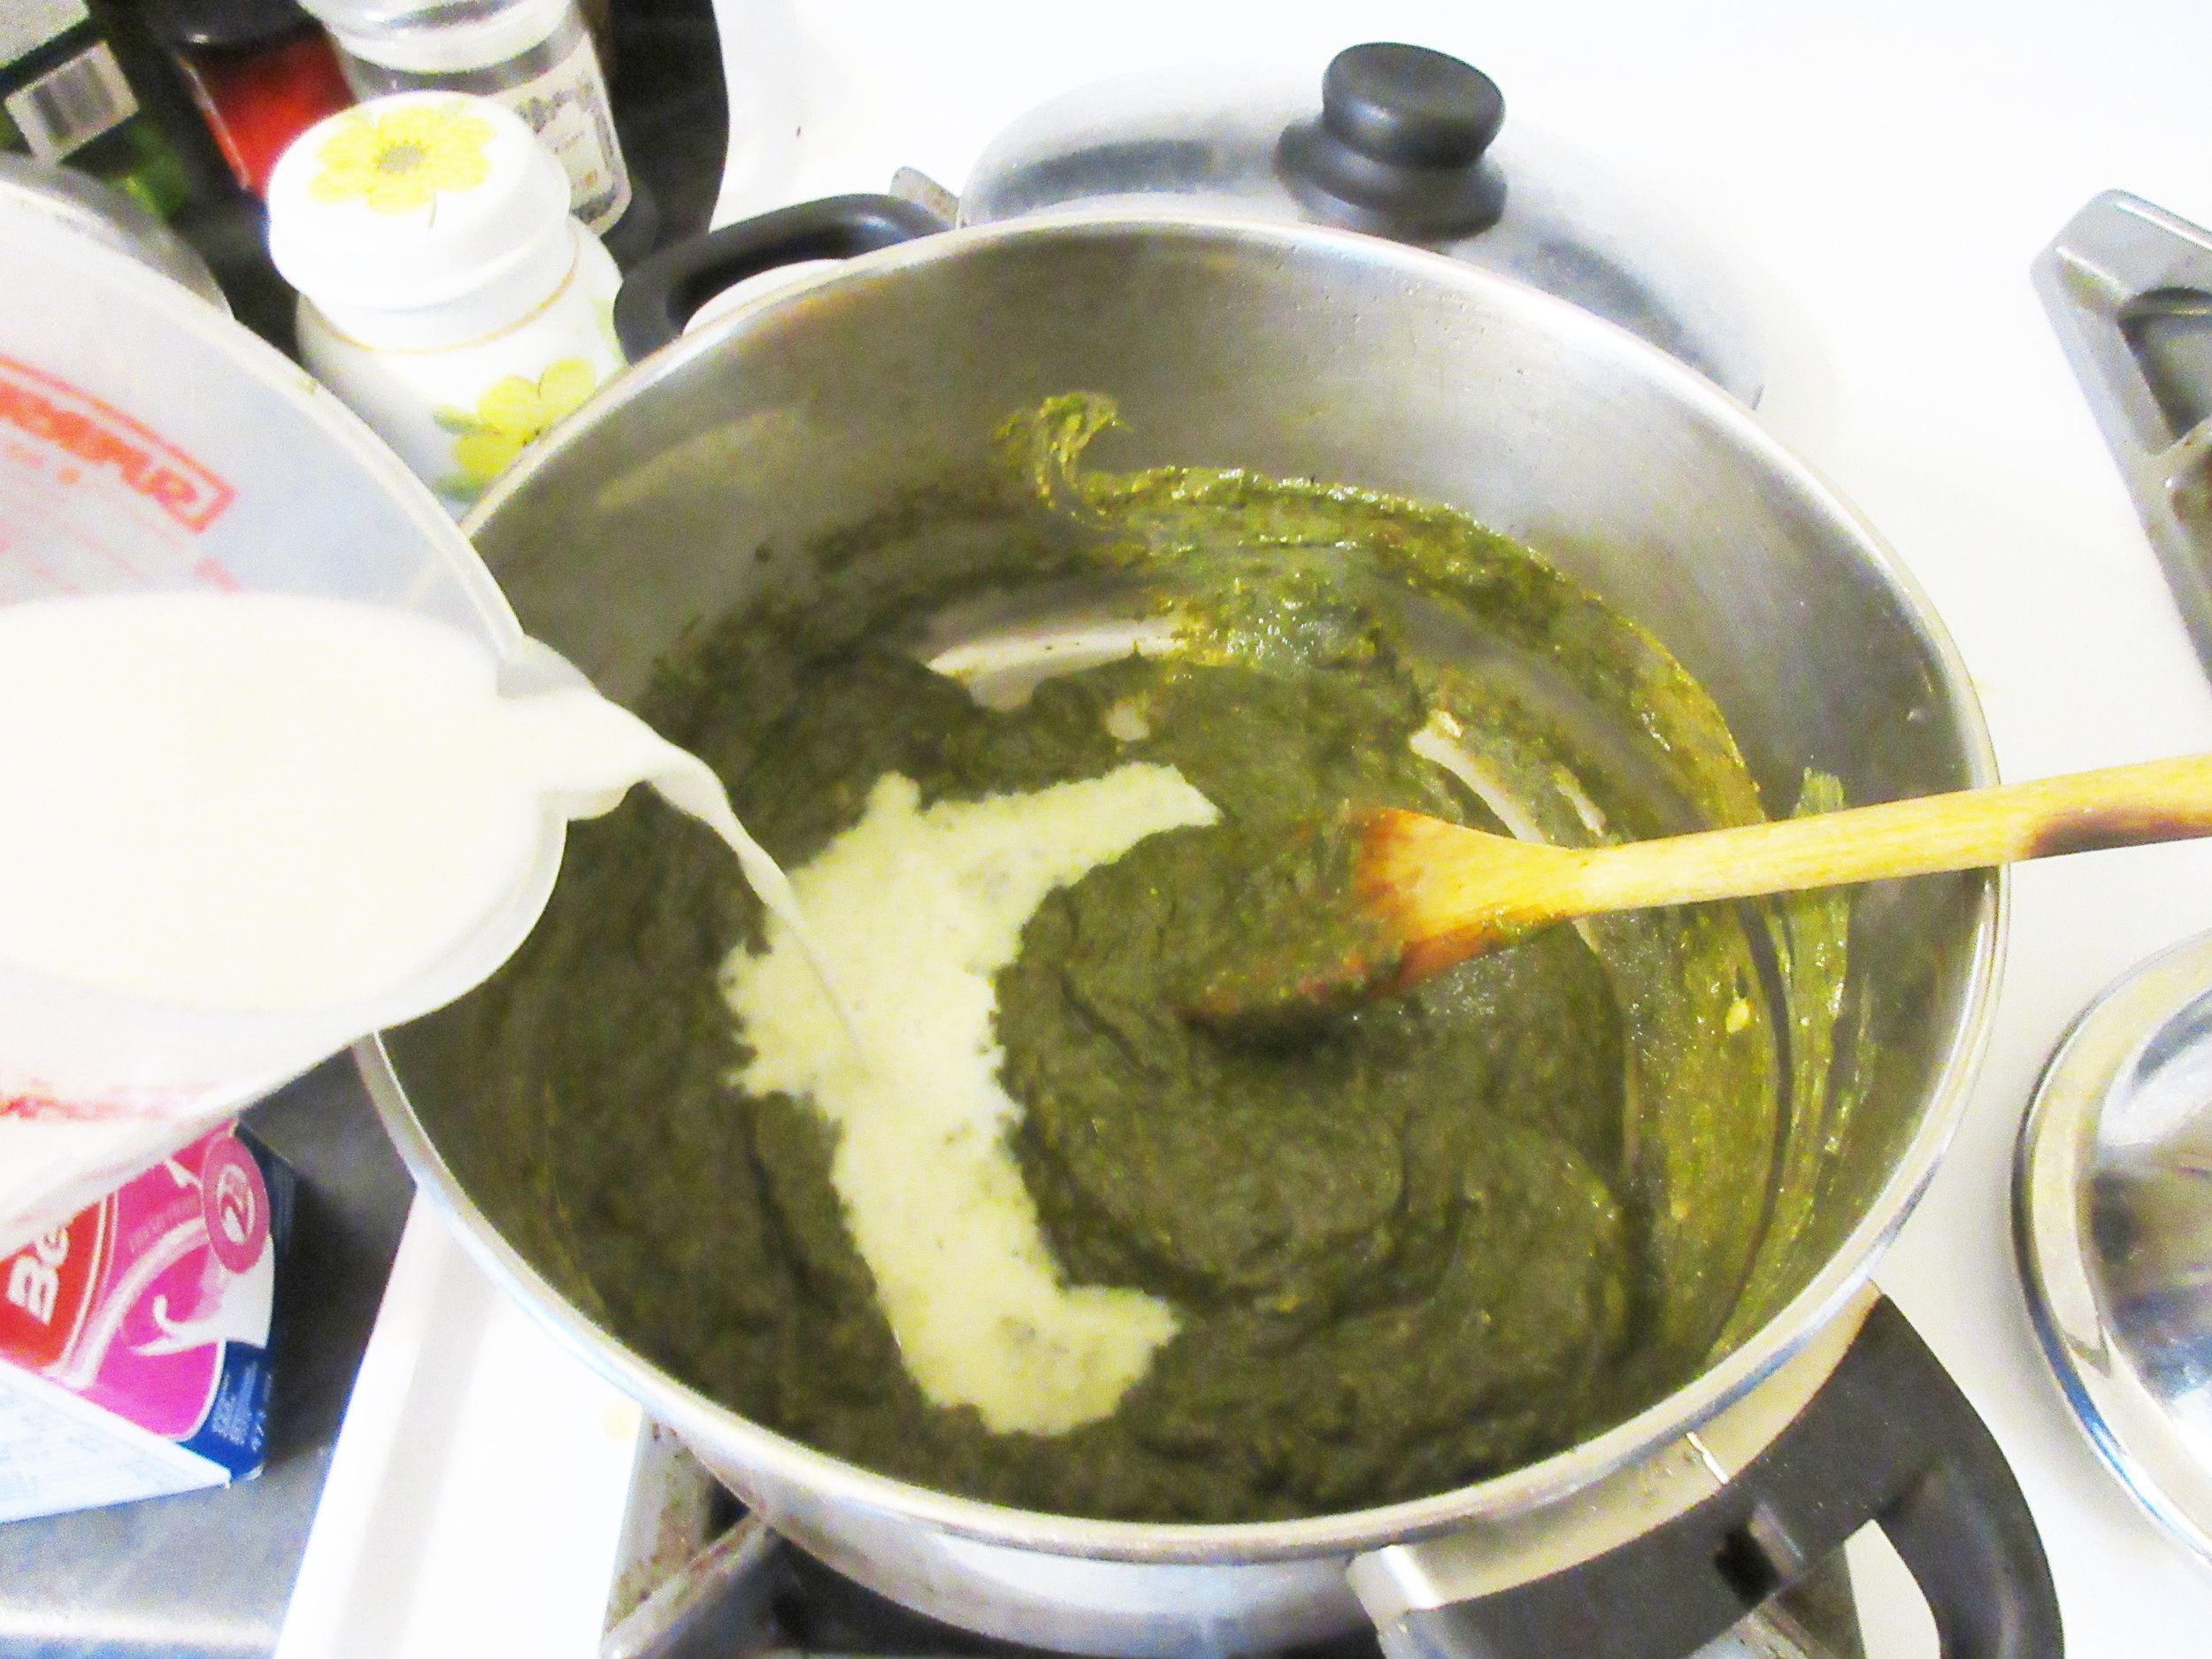
This Asparagus Soup recipe comes to us from a 1920s copy of Mrs. Beeton's Cookery Book that I picked up at an antiques market. Our soup recipe contains asparagus, of course, and also a lot of spinach. The spinach in this soup provides the vibrant green colour, but most of the flavour comes from the asparagus. The puréed creamy soup is offset nicely with the tender asparagus tips, that provide a nice variety in the texture and a flavour pop to boost.
You'll find this recipe in:
Mrs. Beeton's Cookery Book
London, 1920s (?)
The Original Recipe:
ASPARAGUS SOUP.
INGREDIENTS. - 1 ½ pints of white second stock or water, ½ a pint of milk, 25 heads of asparagus, ½ lb. of spinach, ½ oz. of butter or good fat, ½ oz. of flour, 1 tablespoonful of cream or milk, salt and pepper.
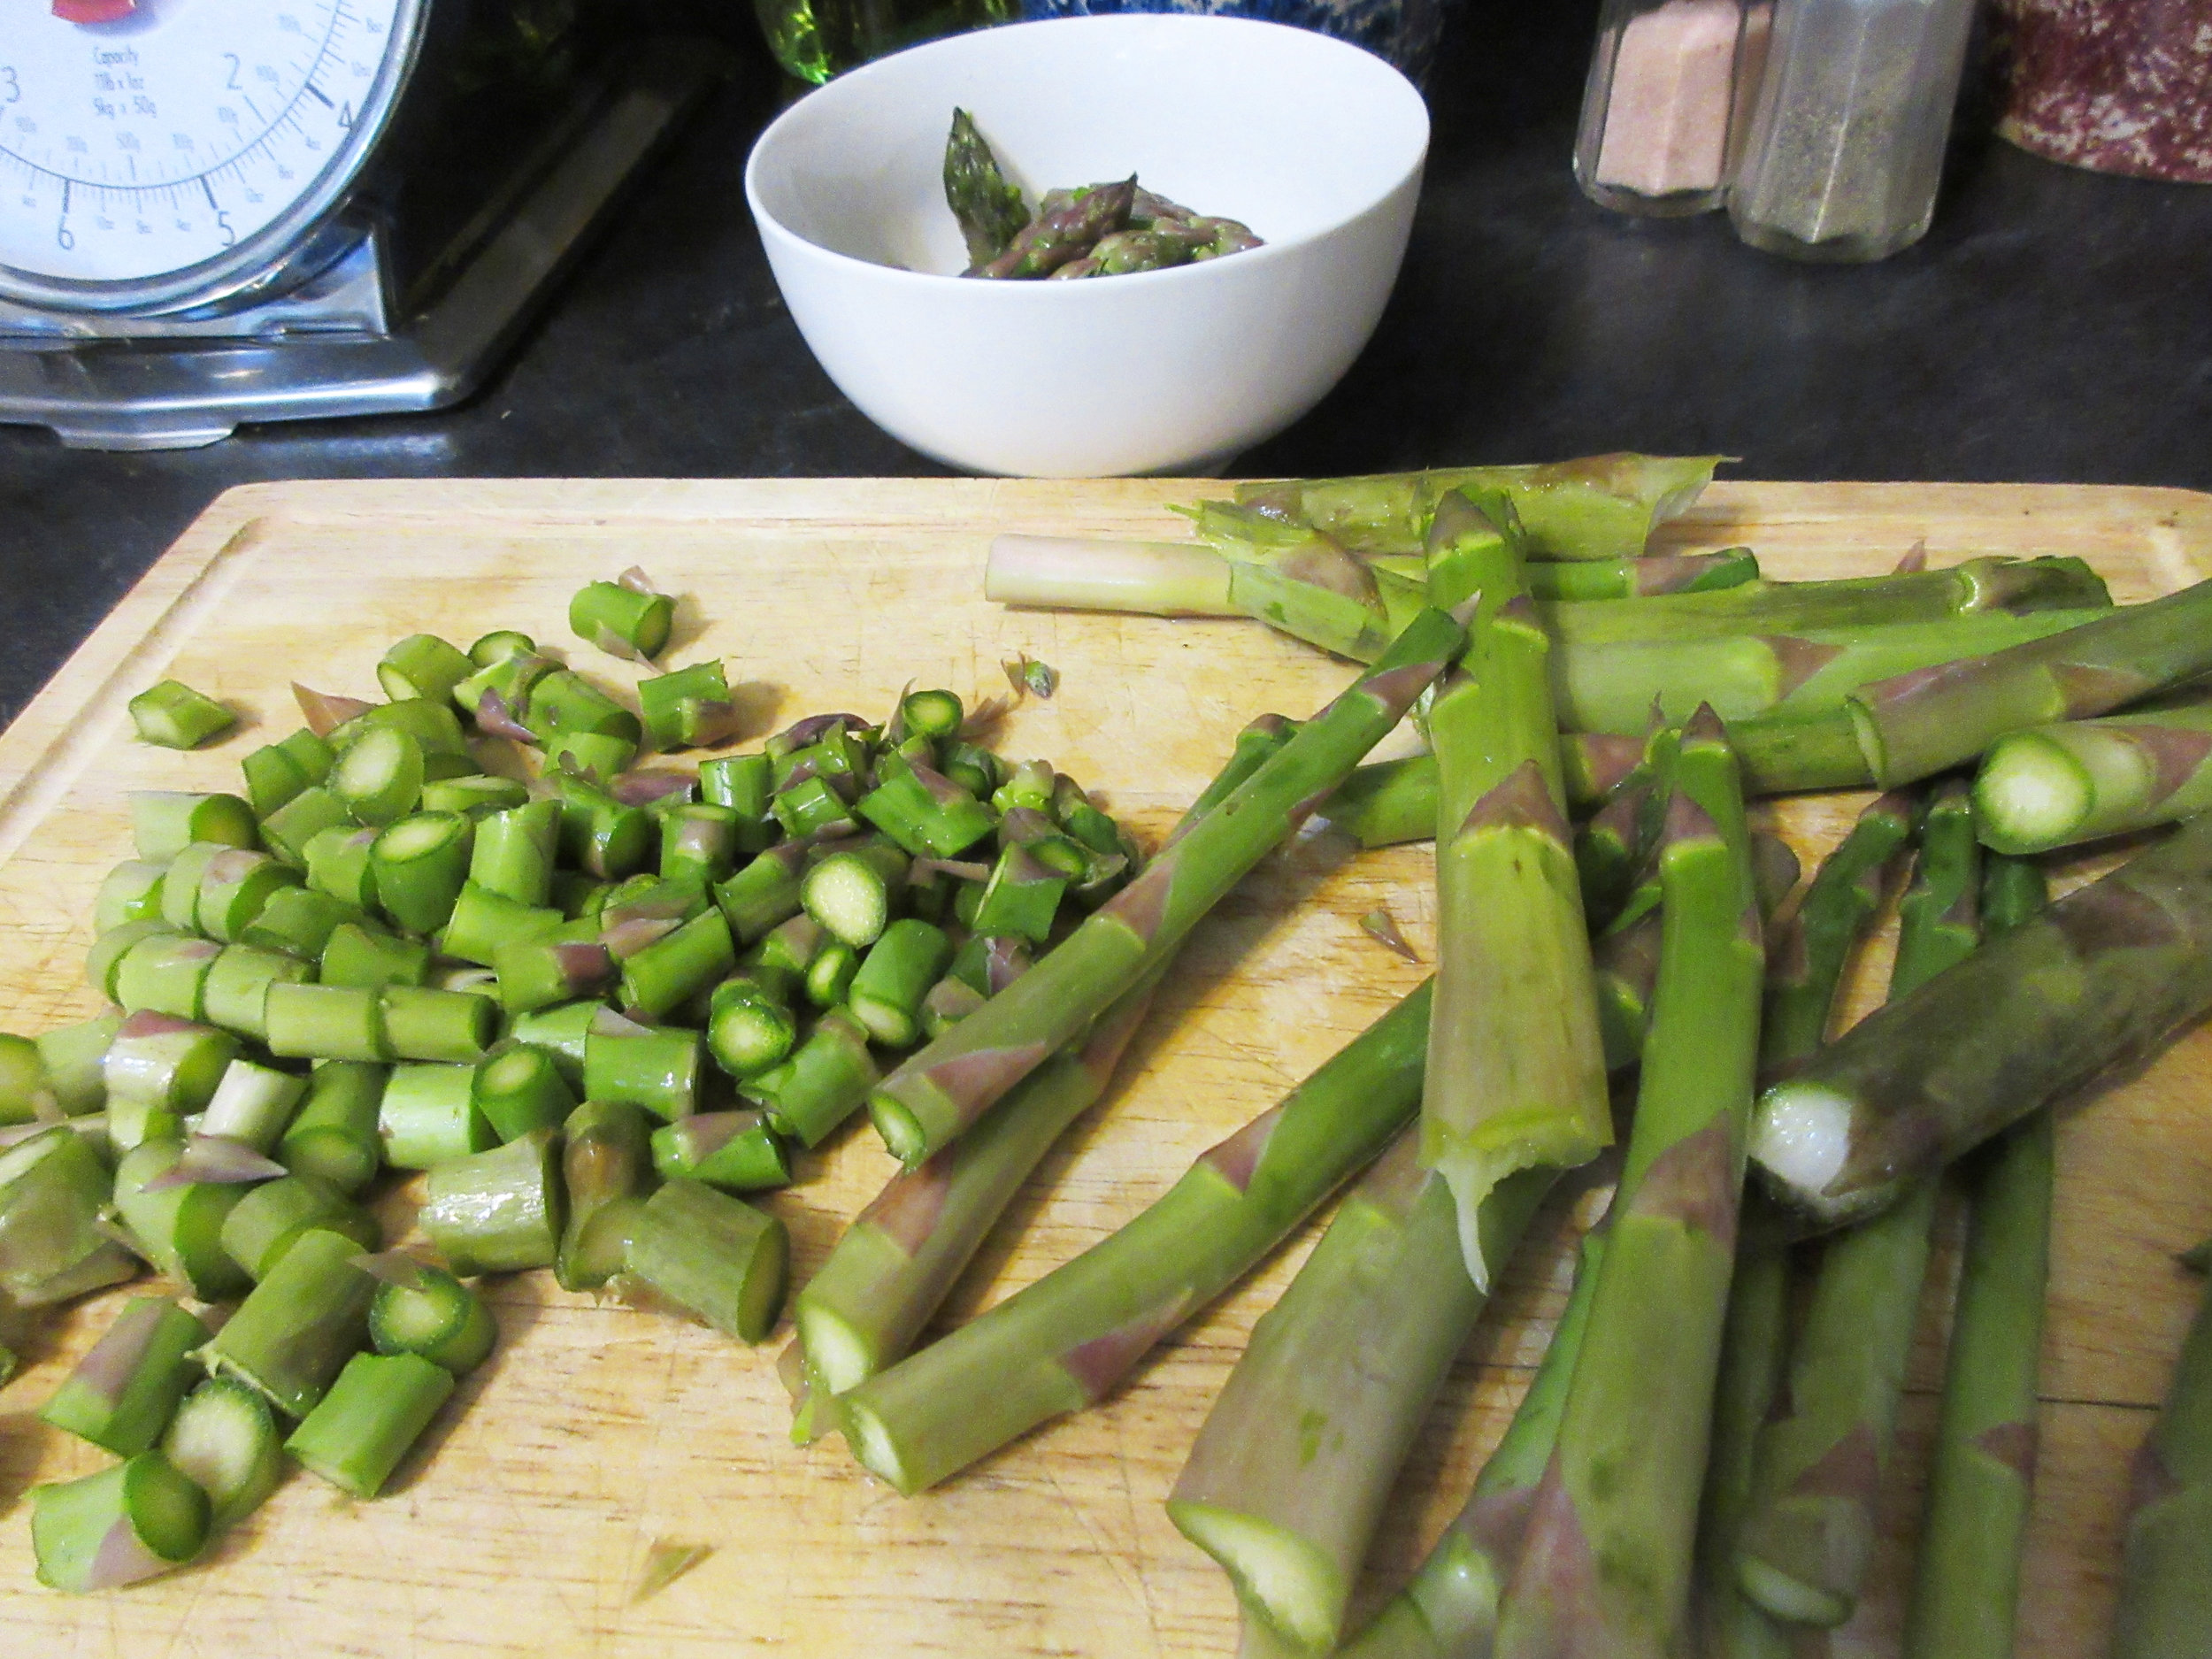
METHOD. - Cut off the points of the asparagus and put them aside, trim the stalks and cut them into small pieces; wash and pick the spinach. Put the stock or water into a stewpan; and when it boils add the asparagus and spinach, and cook until tender (about 40 minutes); then rub through a fine sieve. Have ready a small saucepan of boiling water, put in a little salt and the asparagus points, and cook for about 10 or 15 minutes. Melt the butter or fat in the stewpan, sprinkle in the flour, add the milk and stir until it boils, then put in the stock and purée of asparagus and spinach, salt and pepper to taste, and simmer gently for about 10 minutes. Place the asparagus points into the tureen, add the cream or milk and necessary seasoning to the soup, and serve as quickly as possible.
TIME.- From 1 to 1 ½ hours.
SEASONABLE from March to July.
SUFFICIENT for 4 or 5 persons.

My Recipe:
25 asparagus stalks
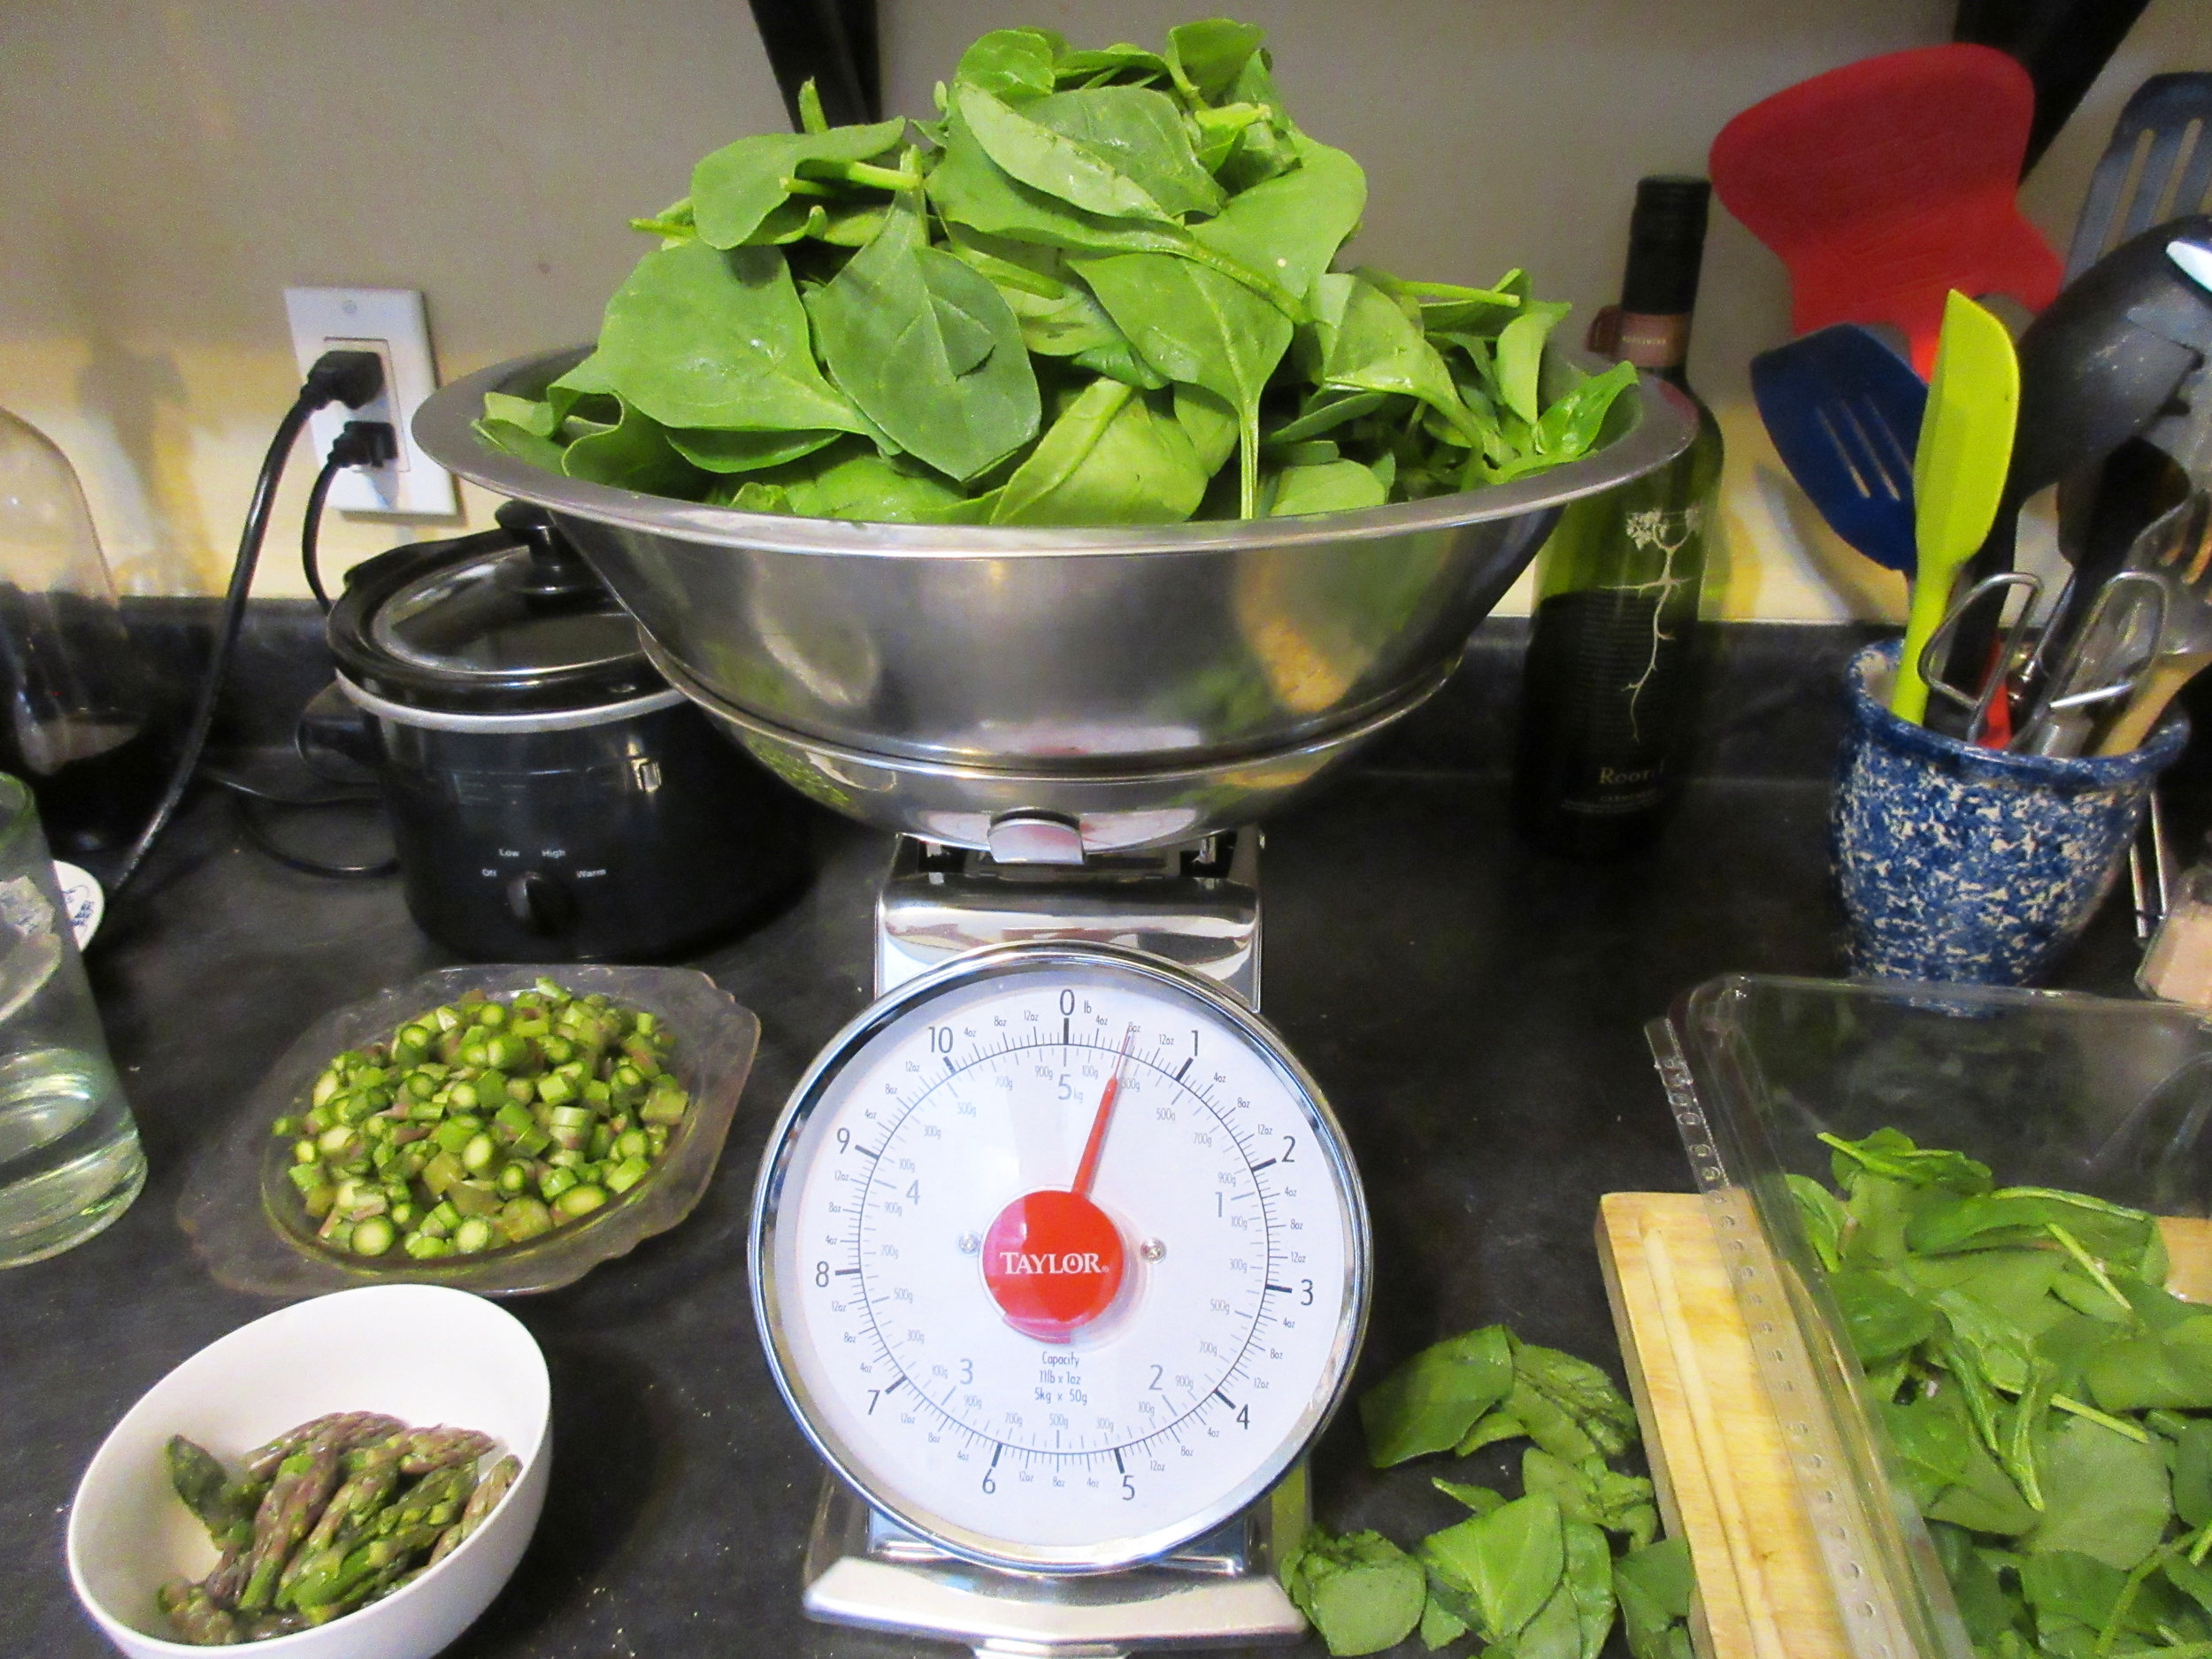
10 cups loosely packed spinach (225 g)
3 ½ cups (825 mL) vegetable stock, chicken stock or water
1 tbsp butter or oil
1 ½ tbsp flour
1 tbsp cream or milk
3 ½ cups (825 mL) milk
salt and pepper to taste (I tried ½ tsp salt and a few shakes of pepper)
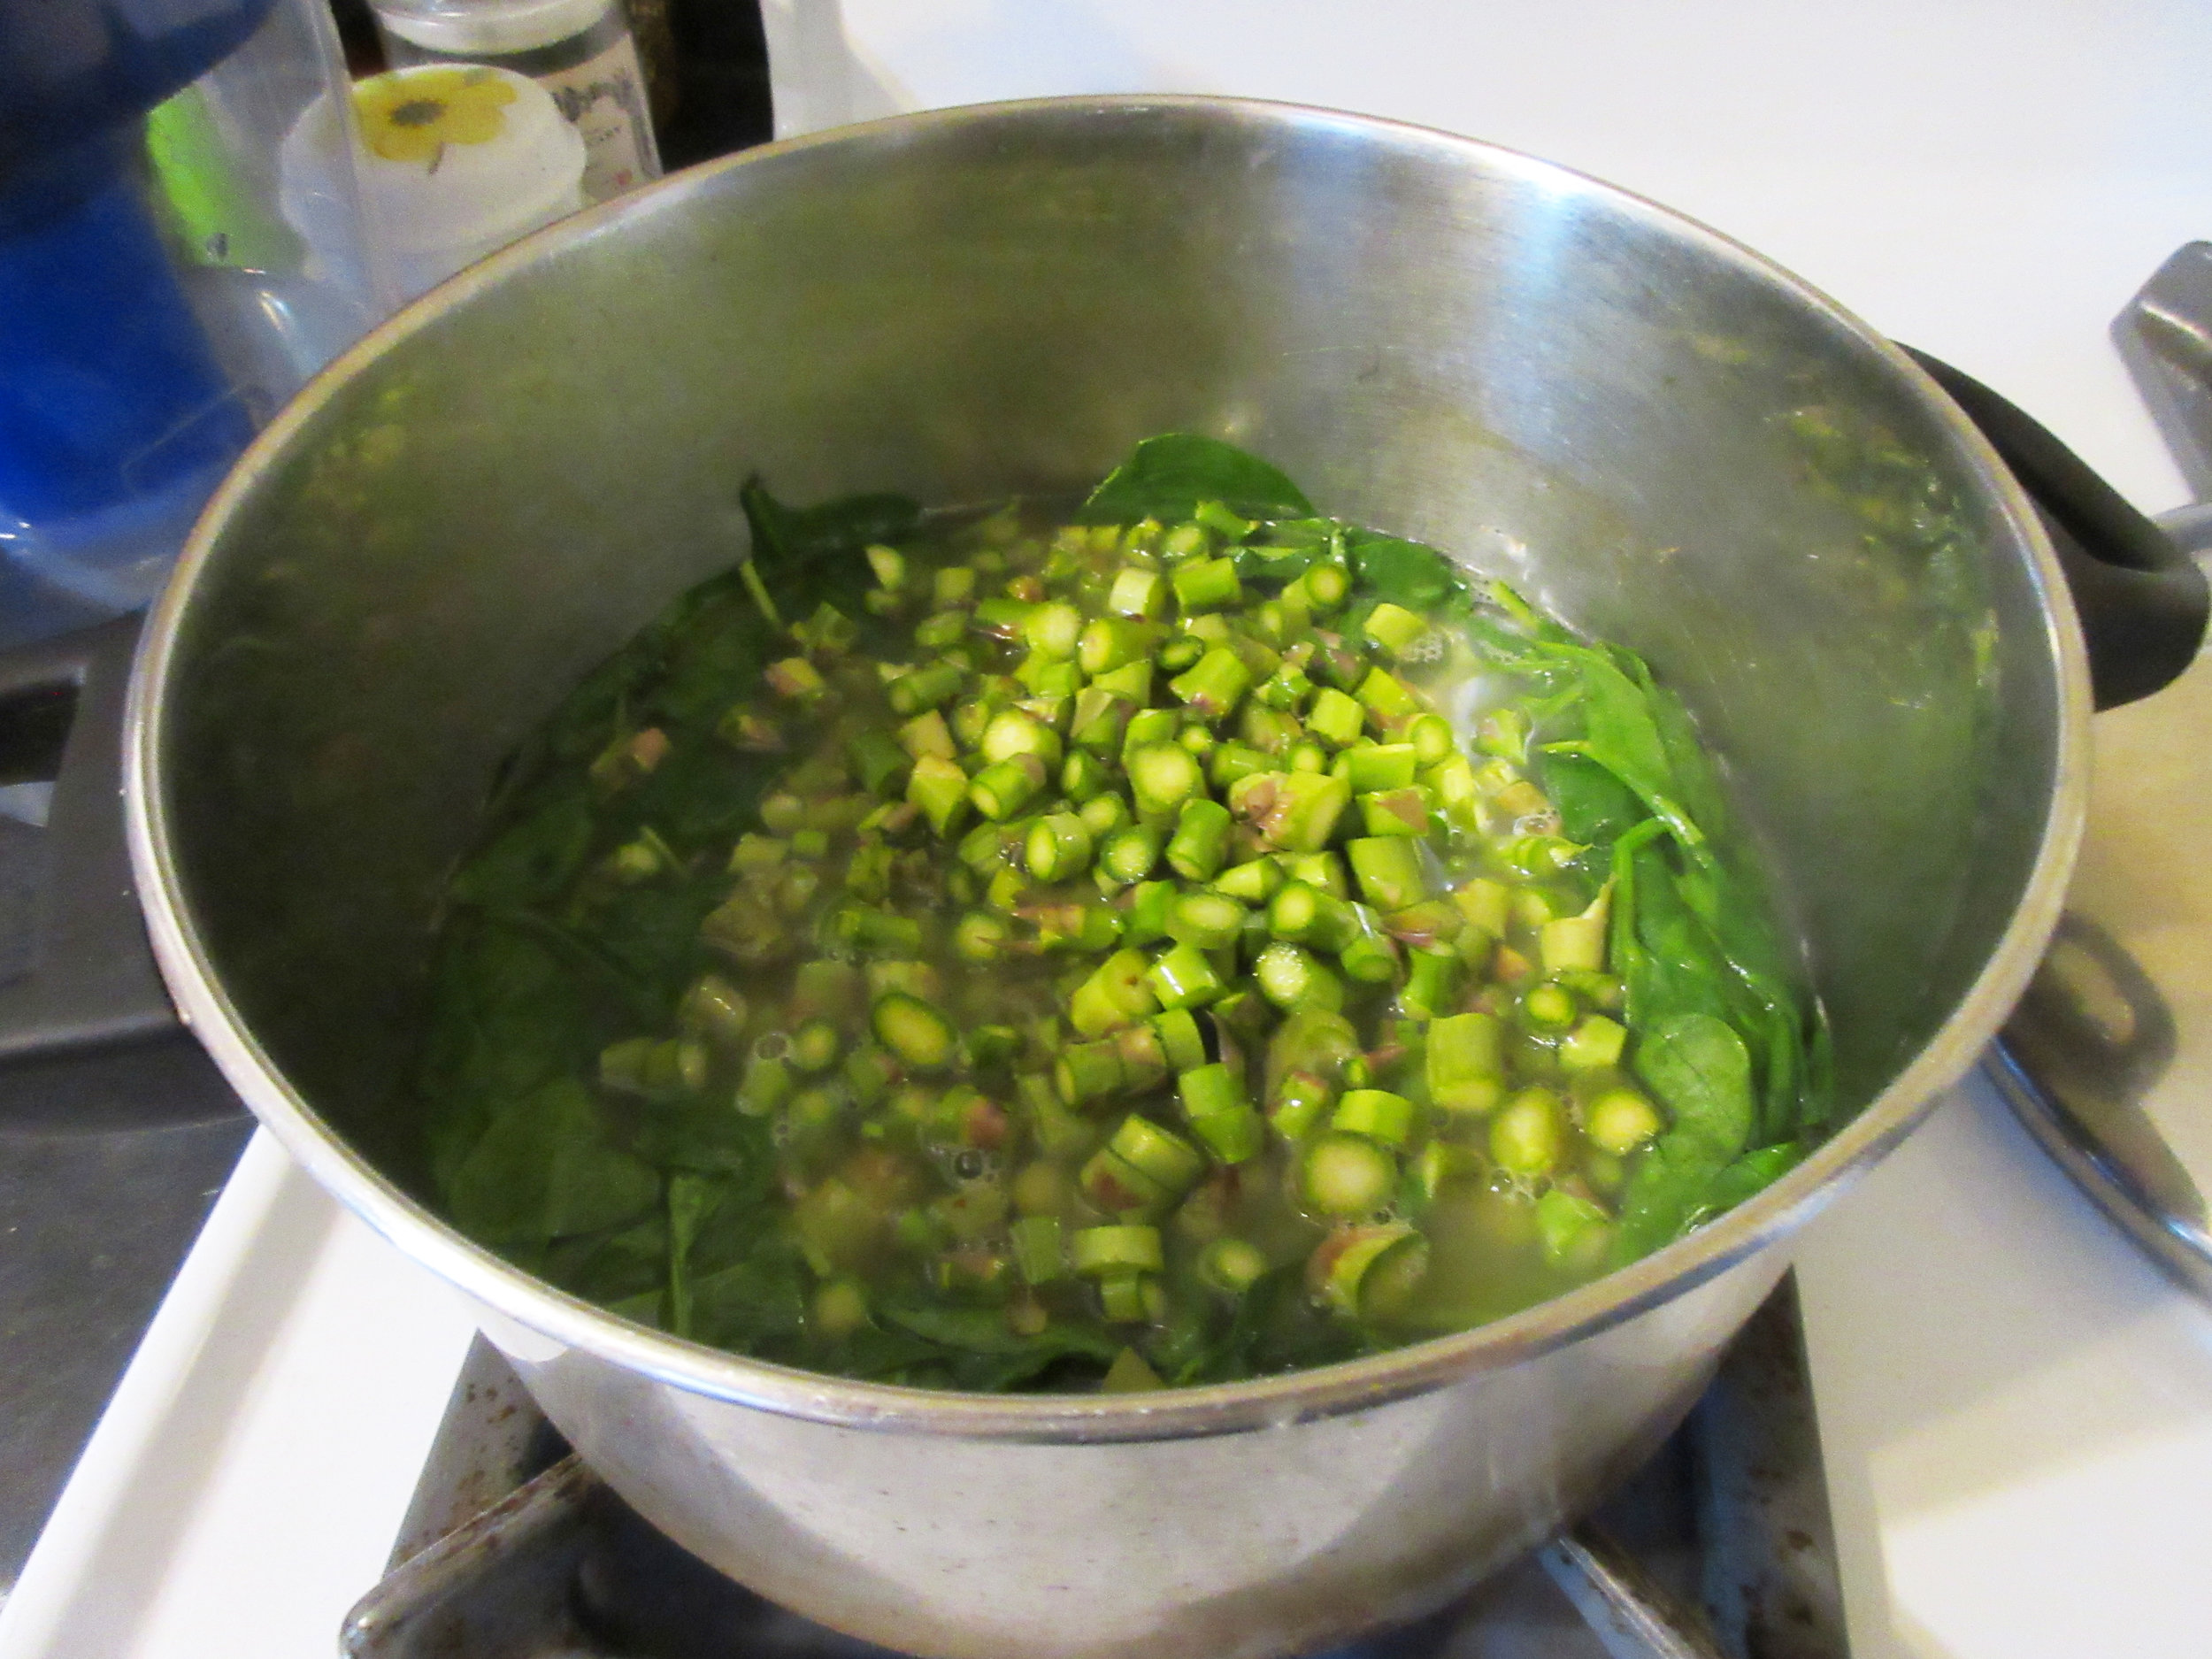
1) Wash the spinach and asparagus. Cut off the asparagus tips and set them aside, then snap off the tough bottoms of the stalks. Chop the remaining asparagus into small pieces. Bring the stock or water to a boil in a large pot, then add the asparagus slices and spinach. Reduce heat and simmer until tender in a covered pot.
2) In the meantime, boil or steam the asparagus tips in a small pot. Drain and set aside when tender.
3) Once the spinach and asparagus slices are cooked, transfer these vegetables and the remaining stock or water from the pot to a blender and purée.
4) Melt the butter in the large pot over low heat, mix in the flour, then stir in 1 tbsp of milk or cream. Slowly add the spinach and asparagus purée, stirring well to avoid flour lumps. Once all the purée has been added to the pot, gradually stir in the milk, then season to taste with salt and pepper.
5) Bring the soup back up to temperature, then serve. If you're serving the soup directly into bowls, you can divvy up the asparagus tips between the bowls, or you can just add the tips to the soup.
My notes: I've made contemporary soup recipes where I pushed cooked vegetables through a sieve, so I followed the historic recipe fairly closely. I boiled the stock, asparagus and spinach for the advised 40 minutes, then tried pushing it through my "fine sieve" with a spatula and wooden spoon. It didn't work very well at all! Most of my vegetables stayed on the inside of the sieve and only a green liquid passed through. Maybe my fine sieve is finer than sieves of the 1920s? I thought it was a huge waste of nutrients and flavour to only use the green liquid, so I opted for blenderizing the vegetables and stock instead.
The spinach in this soup provides the vibrant green colour, but most of the flavour comes from the asparagus. Having the tender asparagus tips floating in the puréed soup provides a nice variety in the texture and a flavour pop to boost. The original recipe states that it makes enough soup for 4 or 5 people, but I'd say that it makes enough soup for you and a couple of friends to enjoy a soup course before your meal.
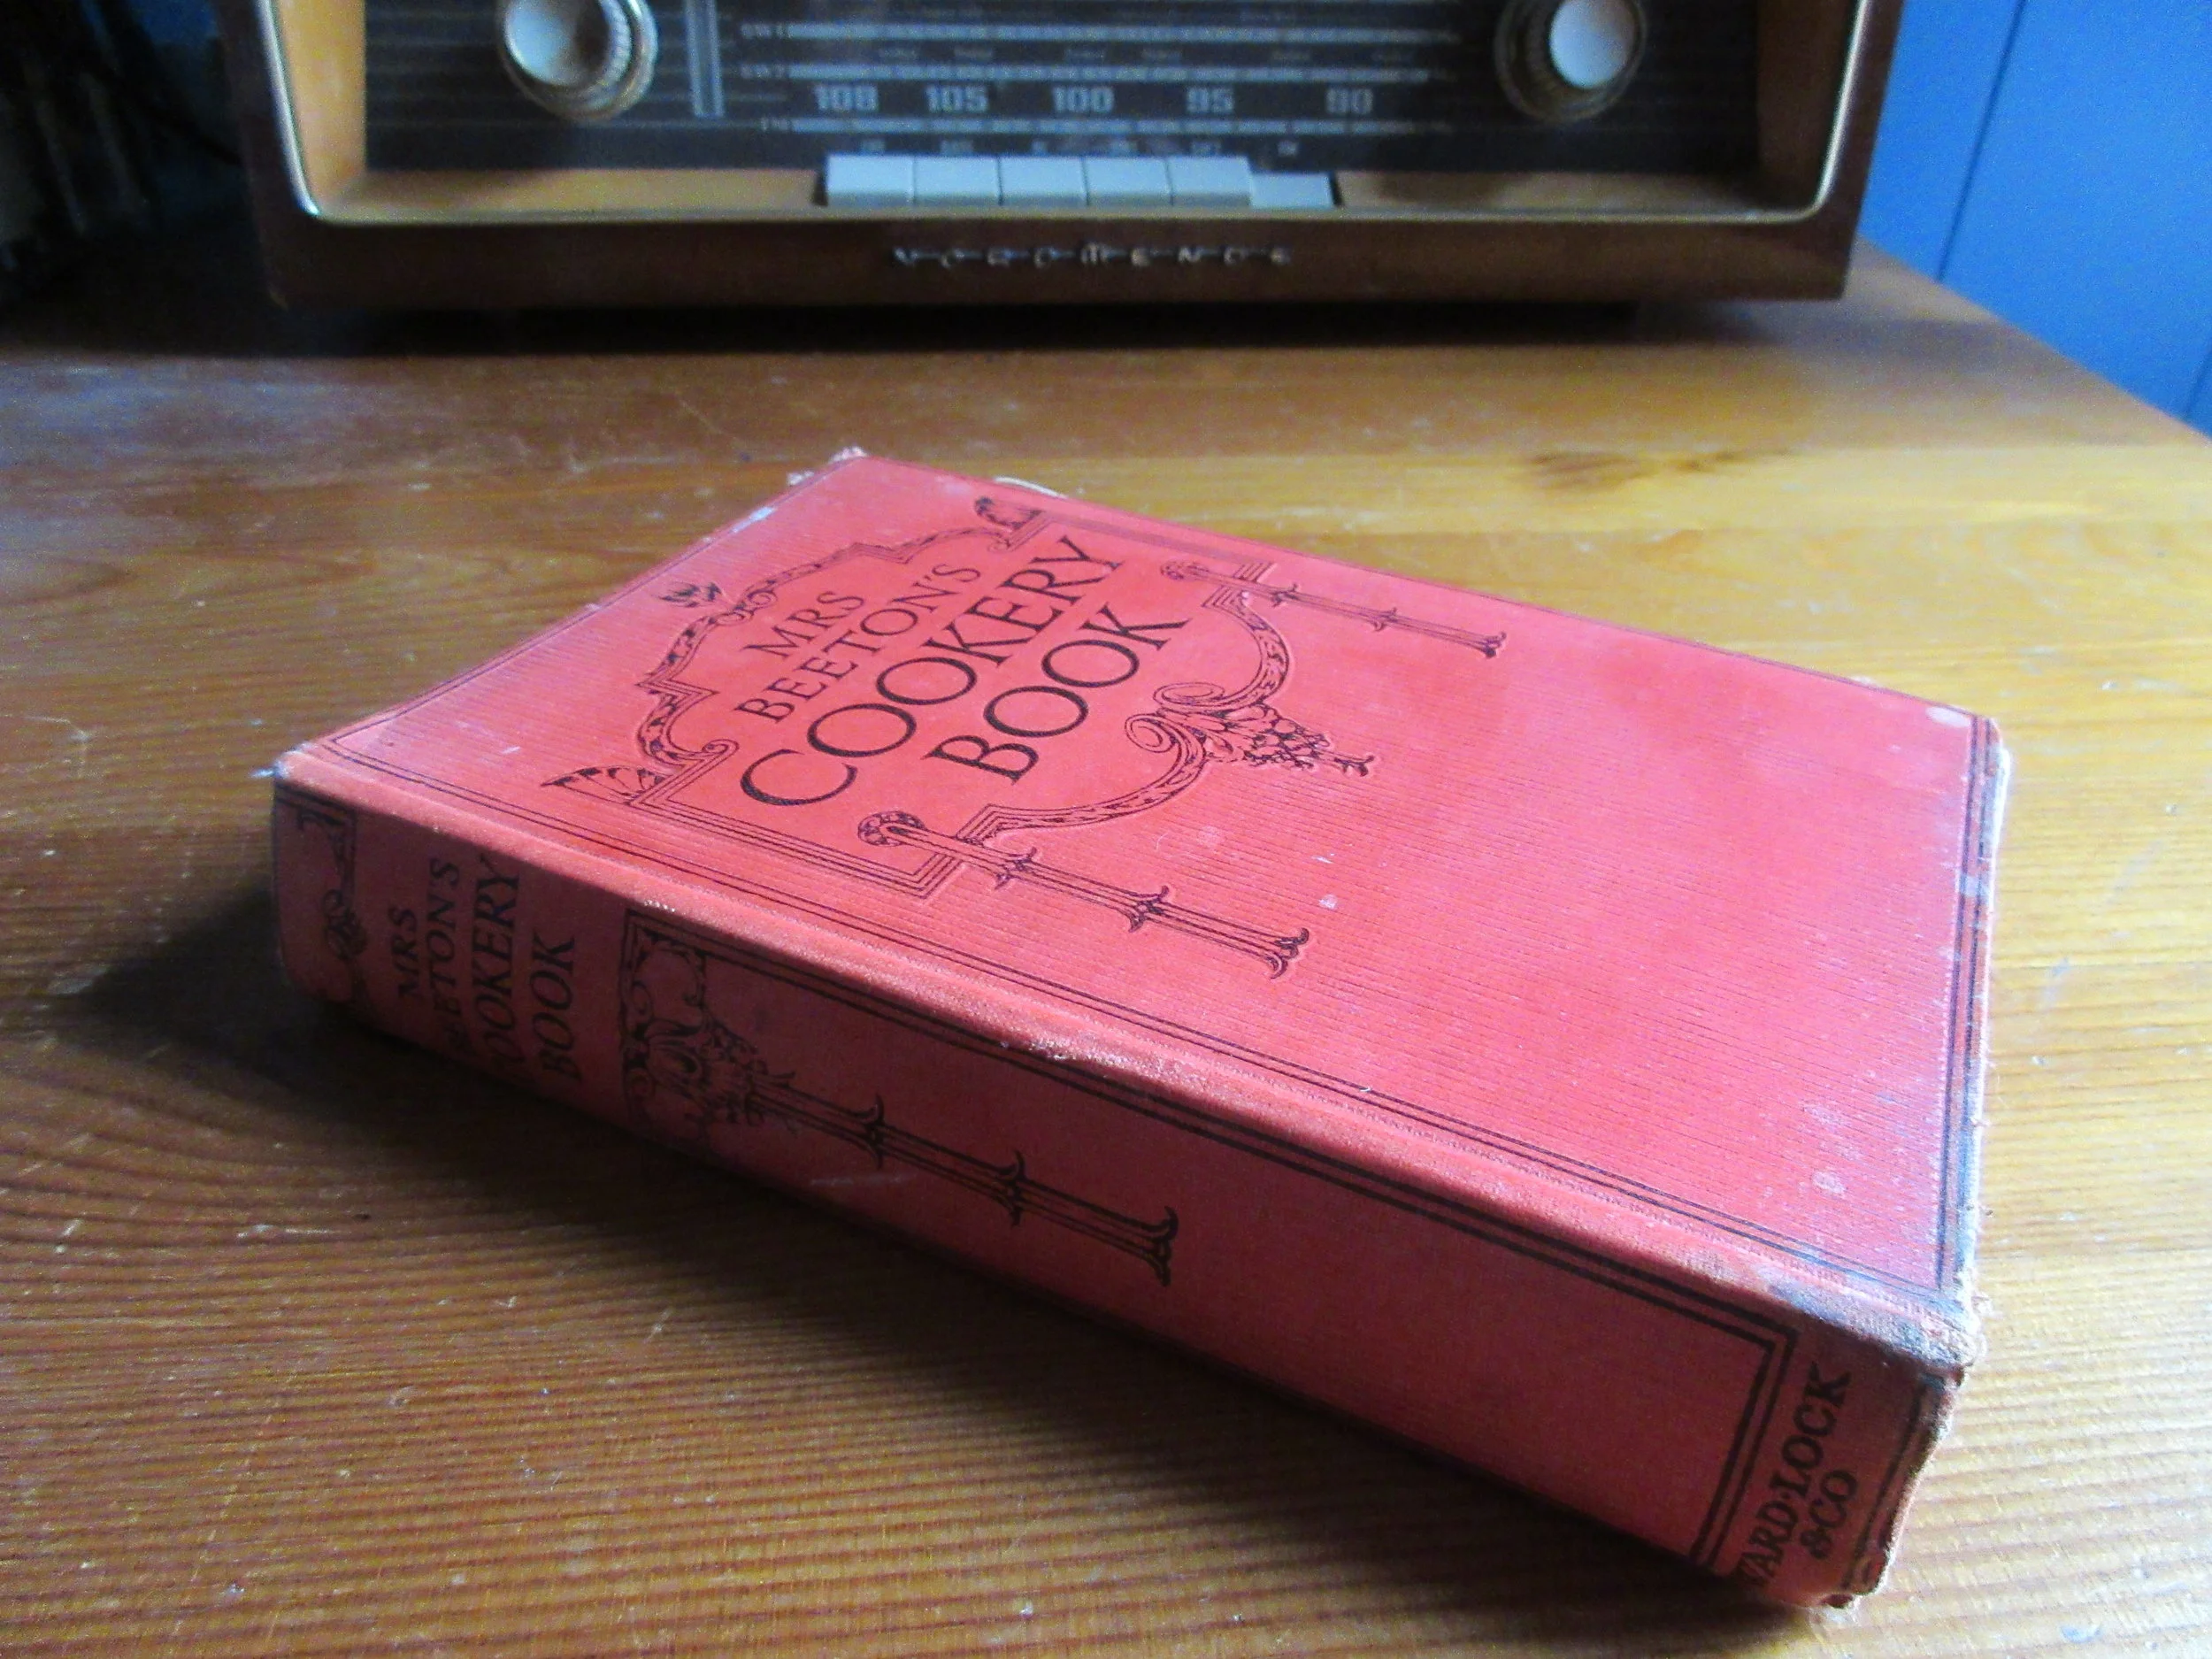
The strange thing about this edition of Mrs. Beeton's Cookery Book is there's no publication date printed inside! The internet mostly agrees that my copy is from the 1920s, generally either 1923 or 1925. Asparagus Soup is on page 69.
Read the Cookbook:
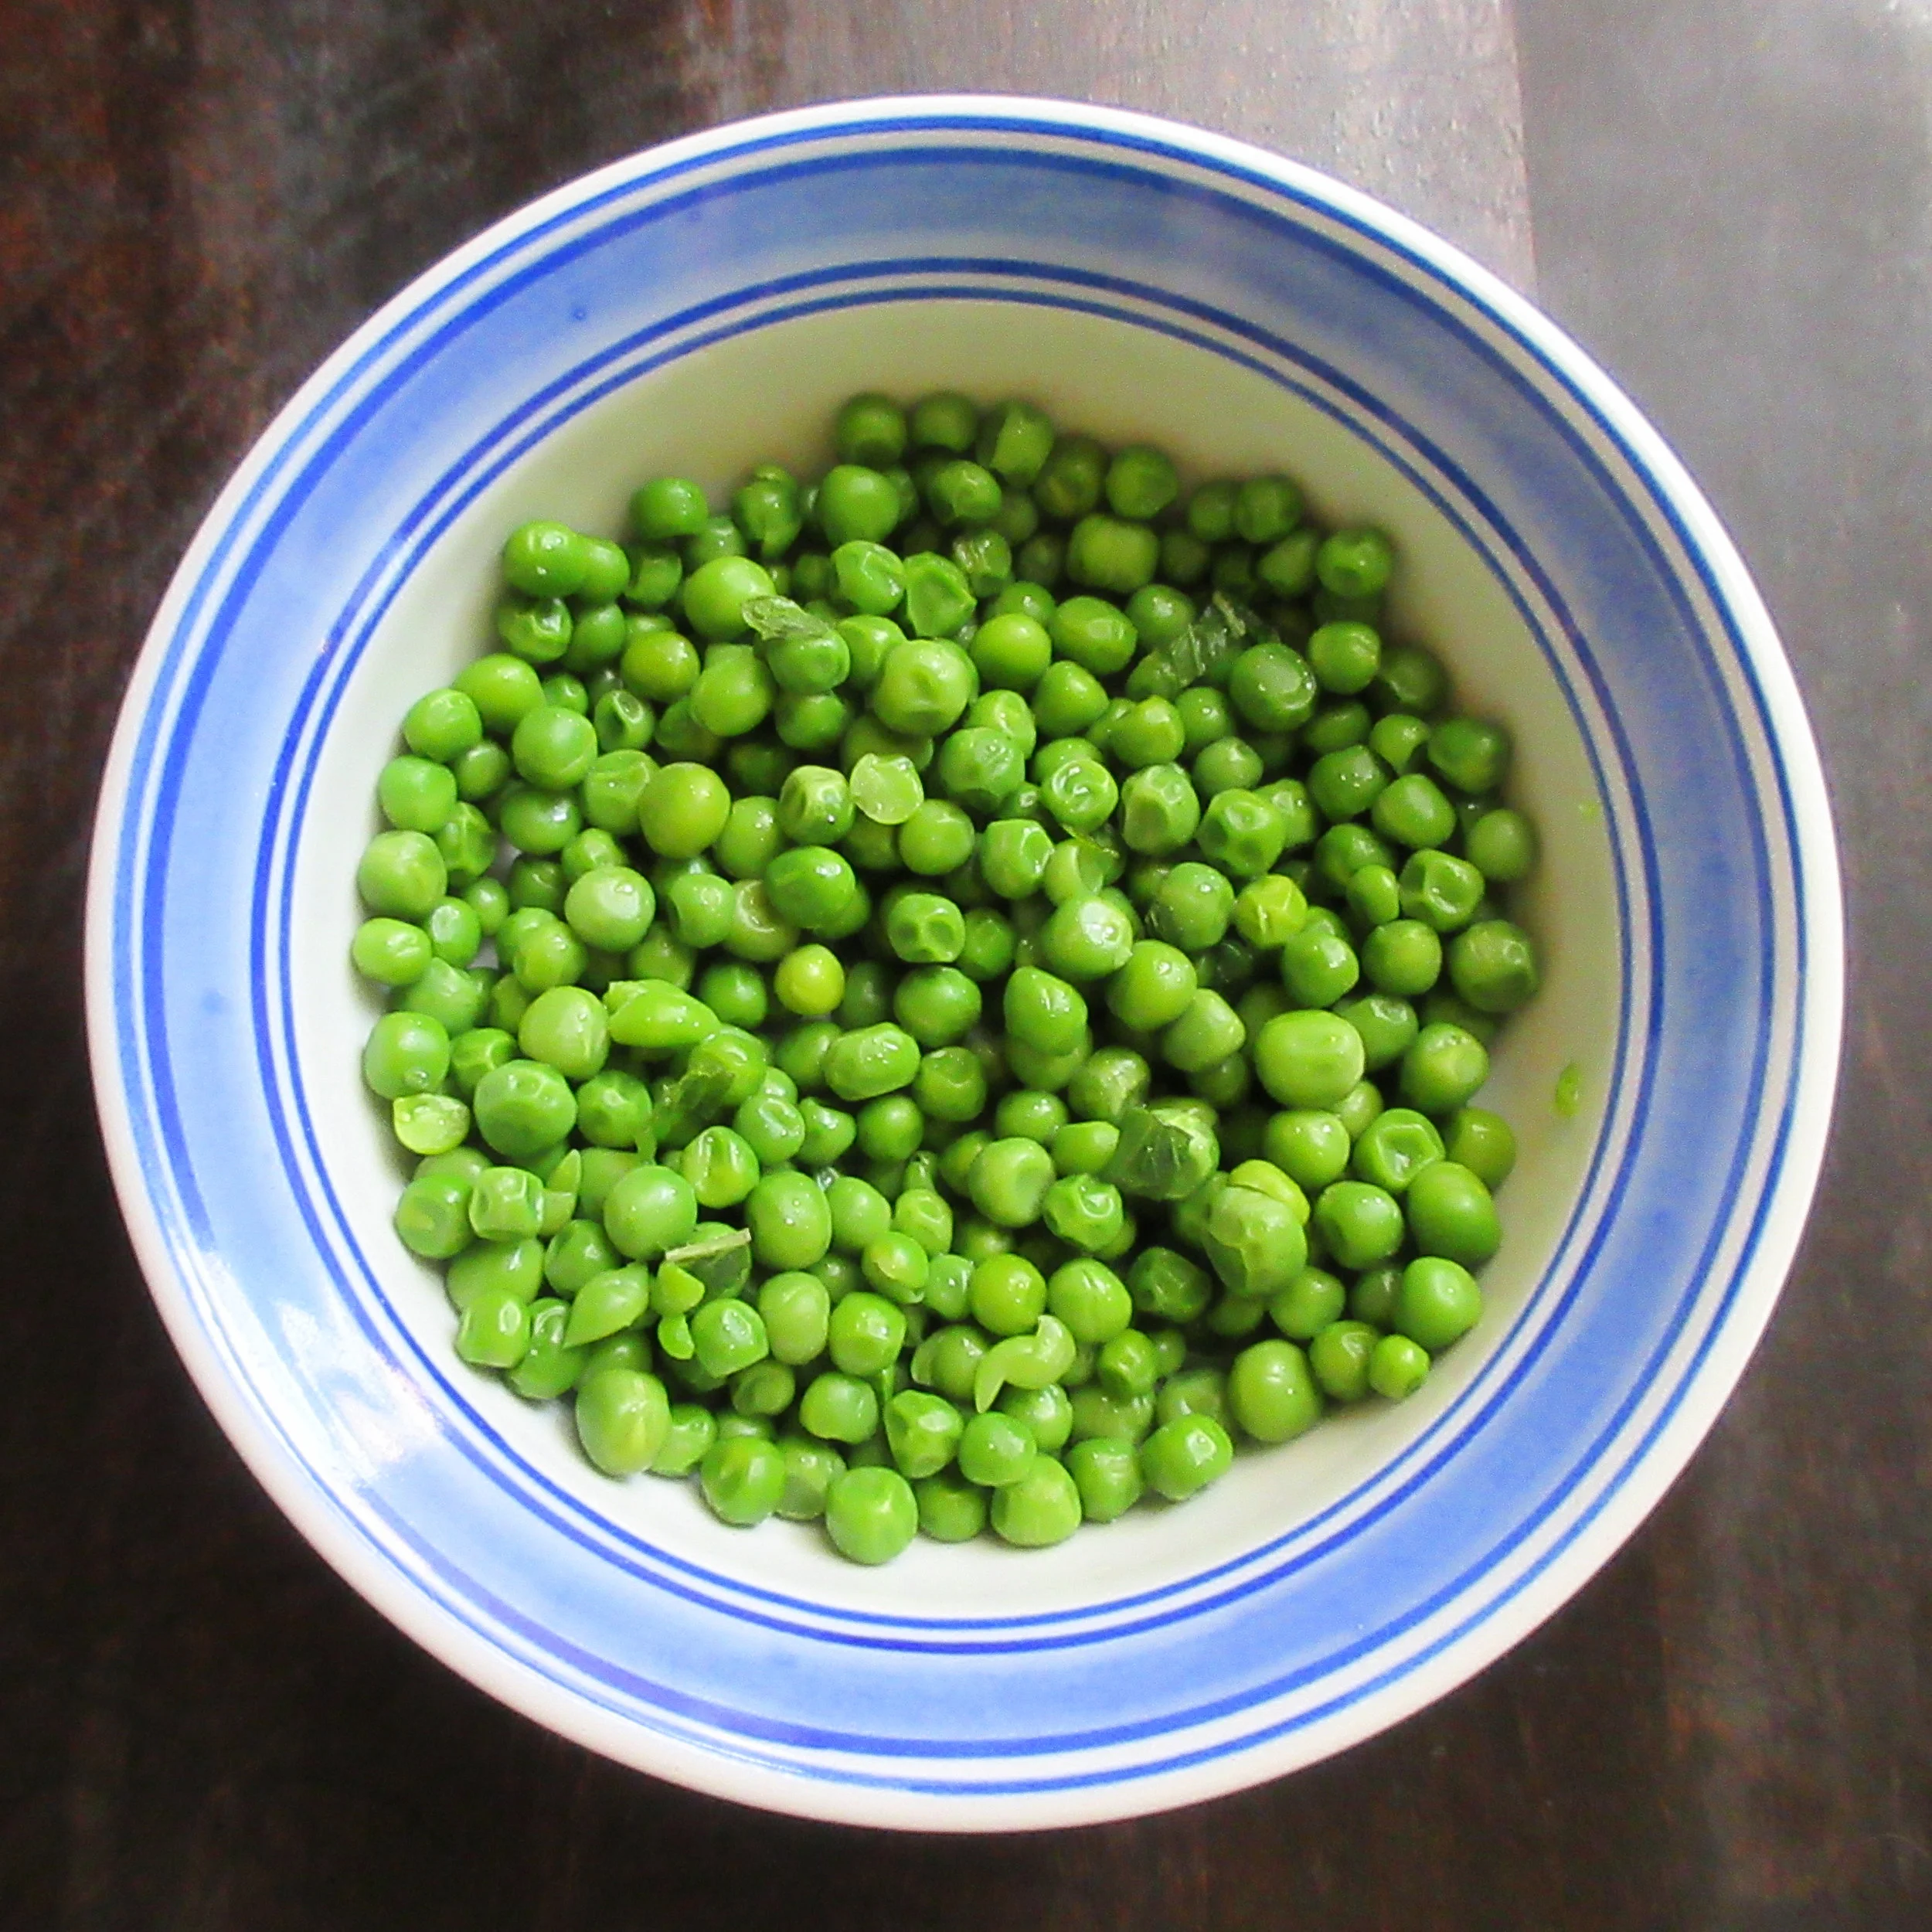
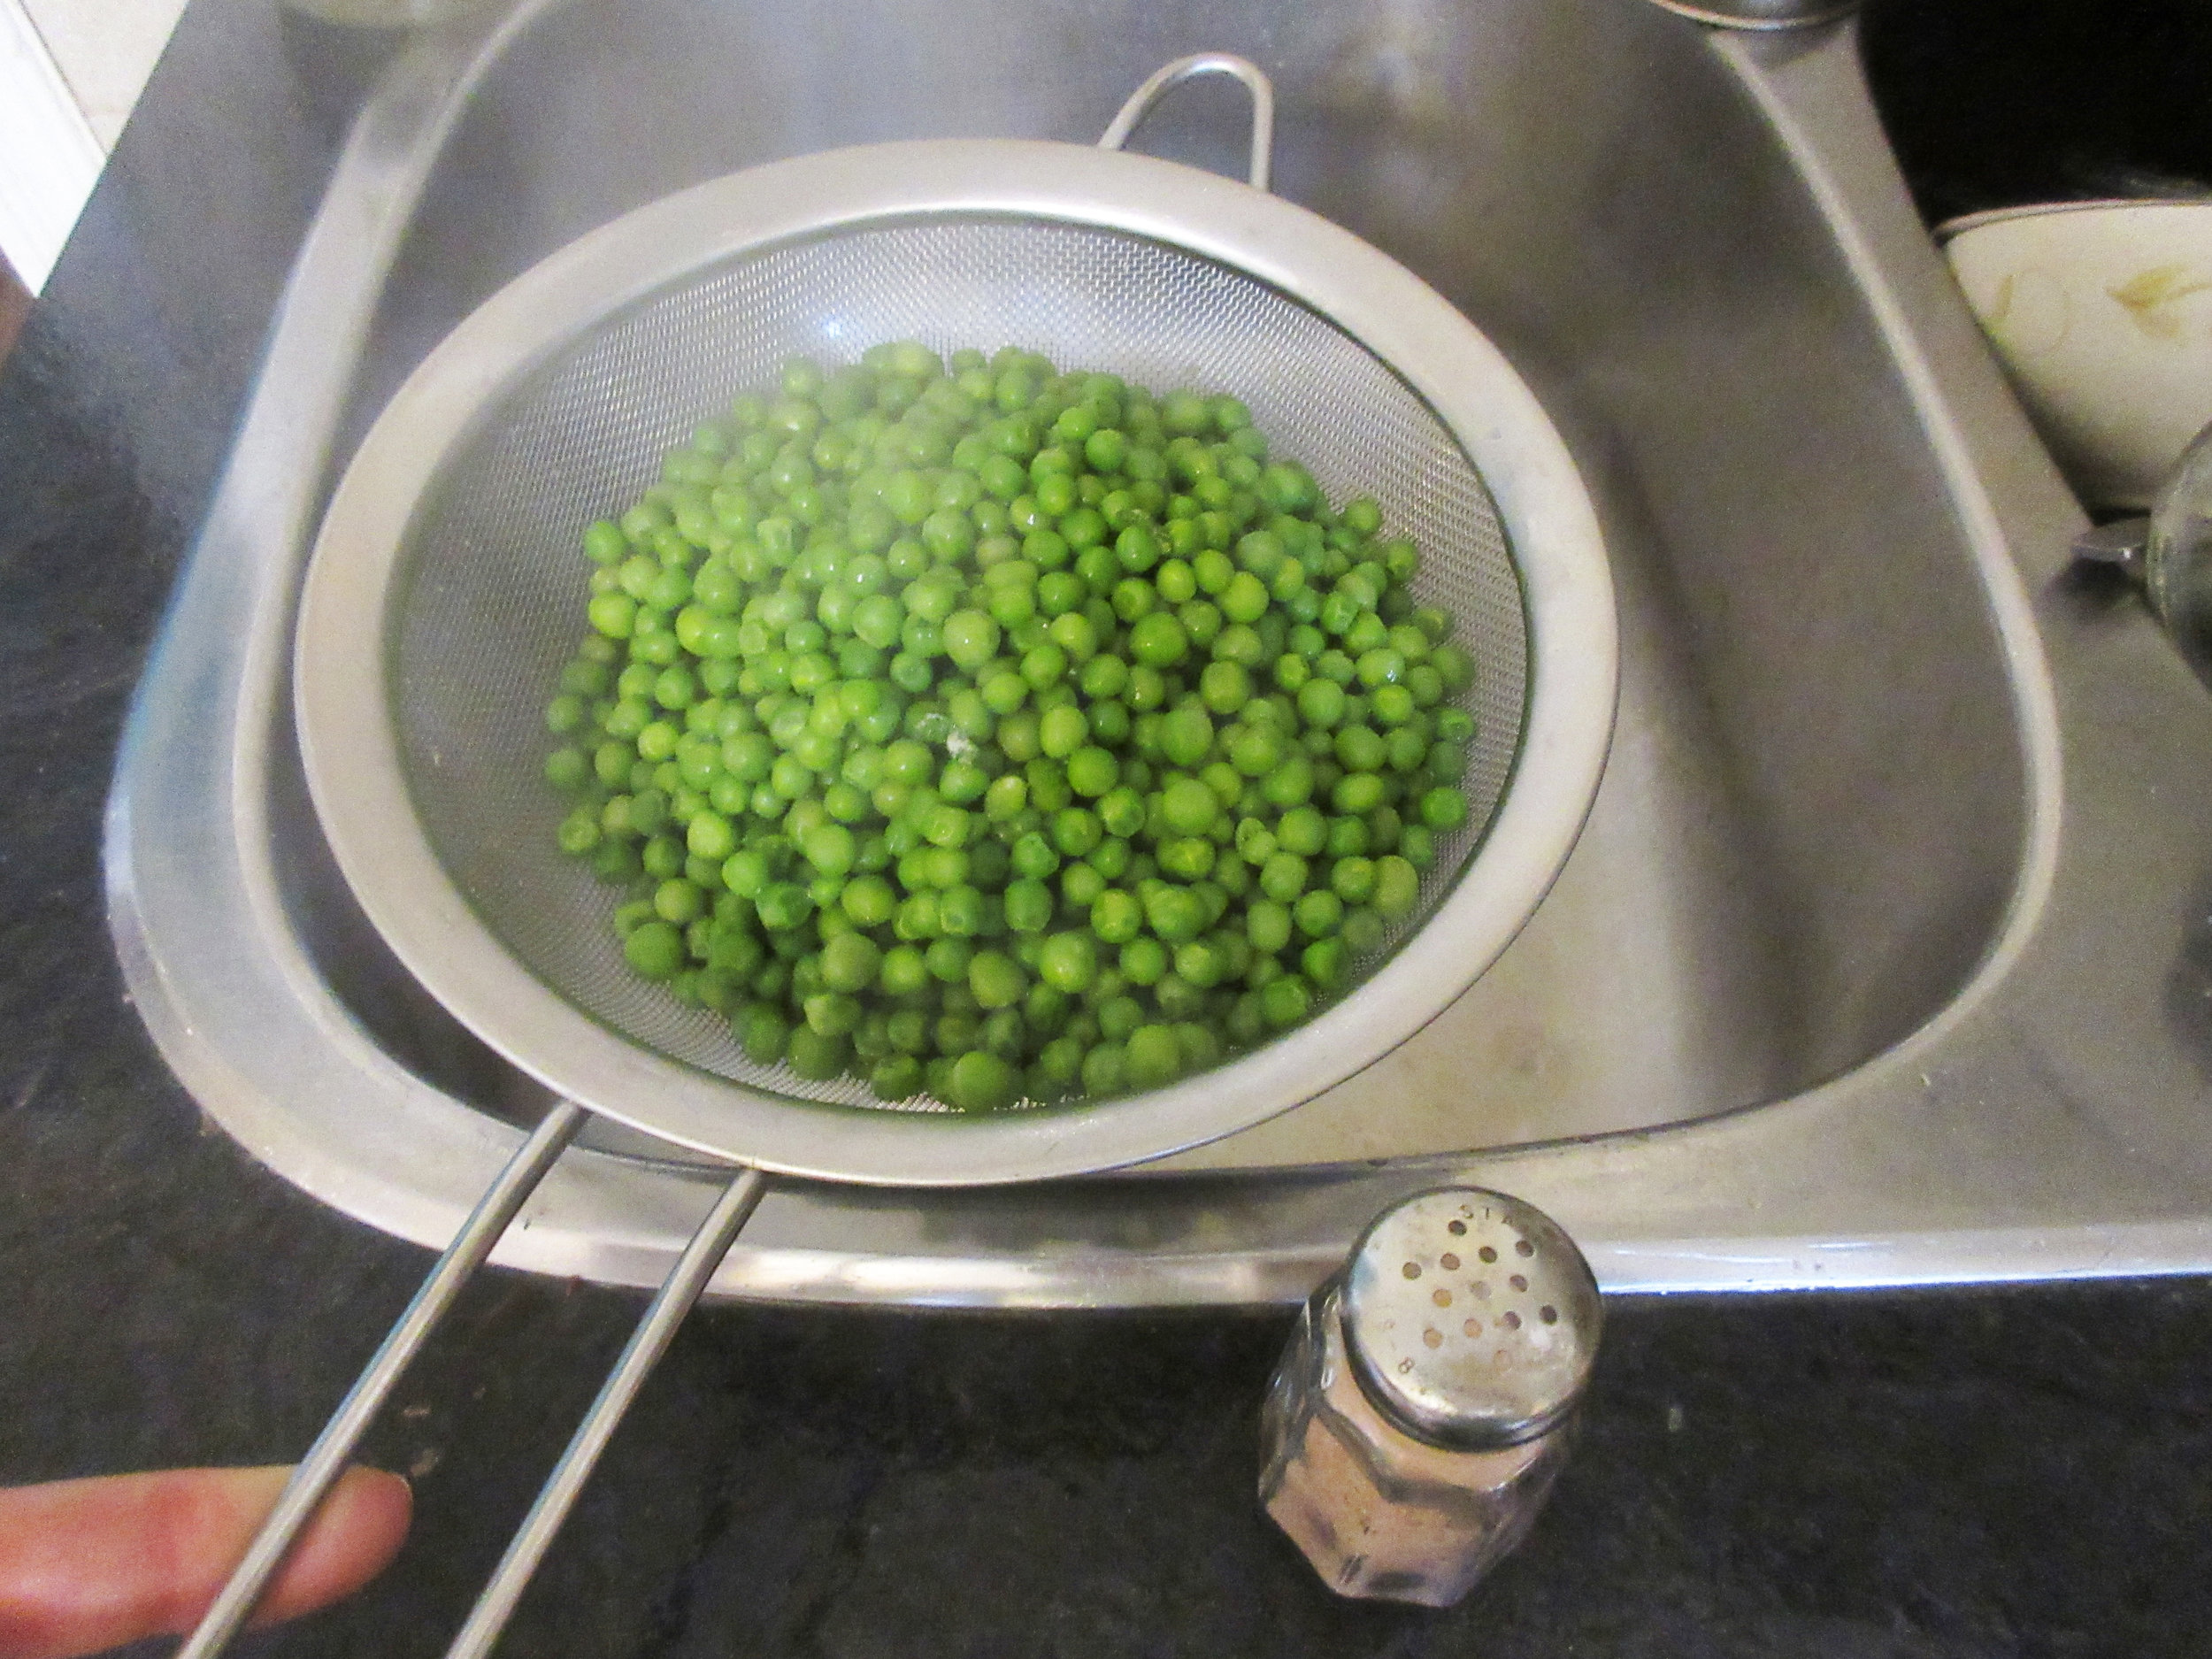
To boil green Peas
I agree, the name of this recipe doesn't sound very exciting. To boil green Peas? Really, what you end up with is green peas, with a touch of fresh mint, butter and salt. It's a simple, yet flavourful recipe that you'll find in American Cookery from 1796. Our authoress is Amelia Simmons (who has the tagline "An American Orphan" added to her name on the title page) and American Cookery is the first cookbook that was both written and published in the United States.

You'll find this recipe in:
American Cookery
By: Amelia Simmons
Hartford, Connecticut
1796
The Original Recipe:
To boil green Peas.
When your peas are ſhelled and the water boils which ſhould not be much more than will cover them, put them in with a few leaves of mint, as ſoon as they boil put in a piece of butter as big as a walnut, and ſtir them about, when they are done enough, ſtrain them off, and ſprinkle in a little ſalt, ſhake them till the water drains off, ſend them hot to the table with melted butter in a cup or boat.
My Recipe:
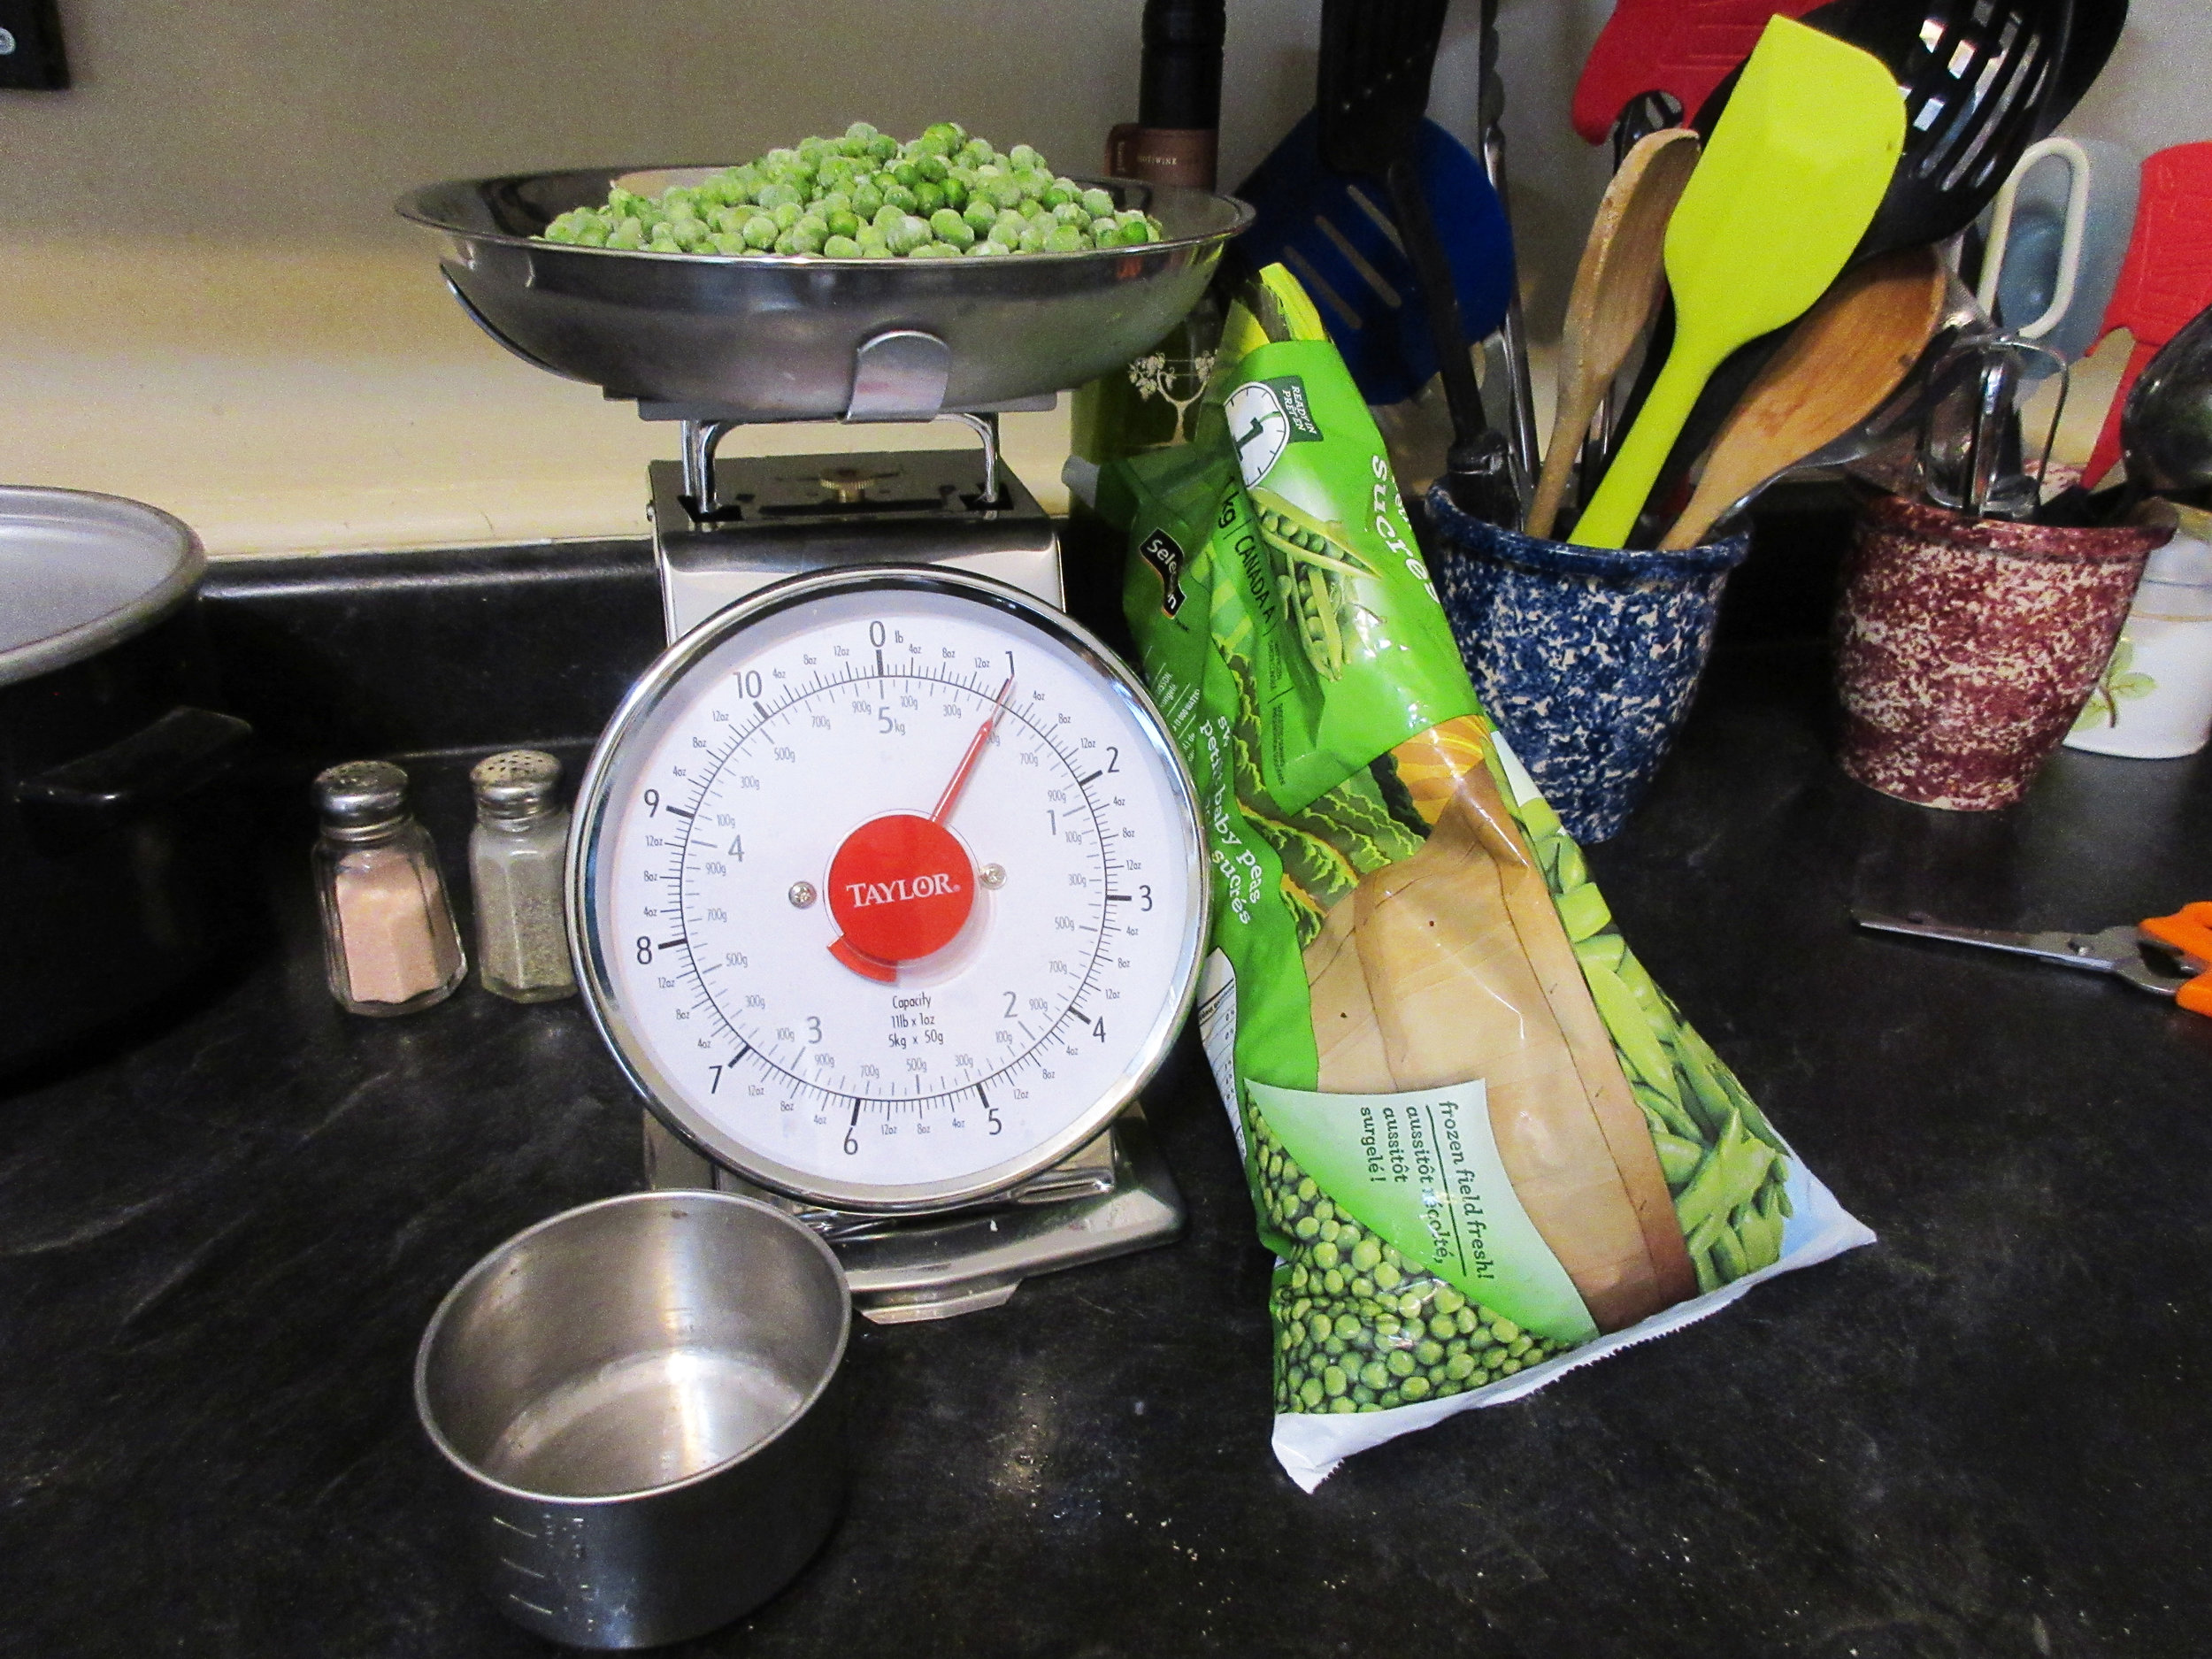
3 cups frozen green peas – 450 g
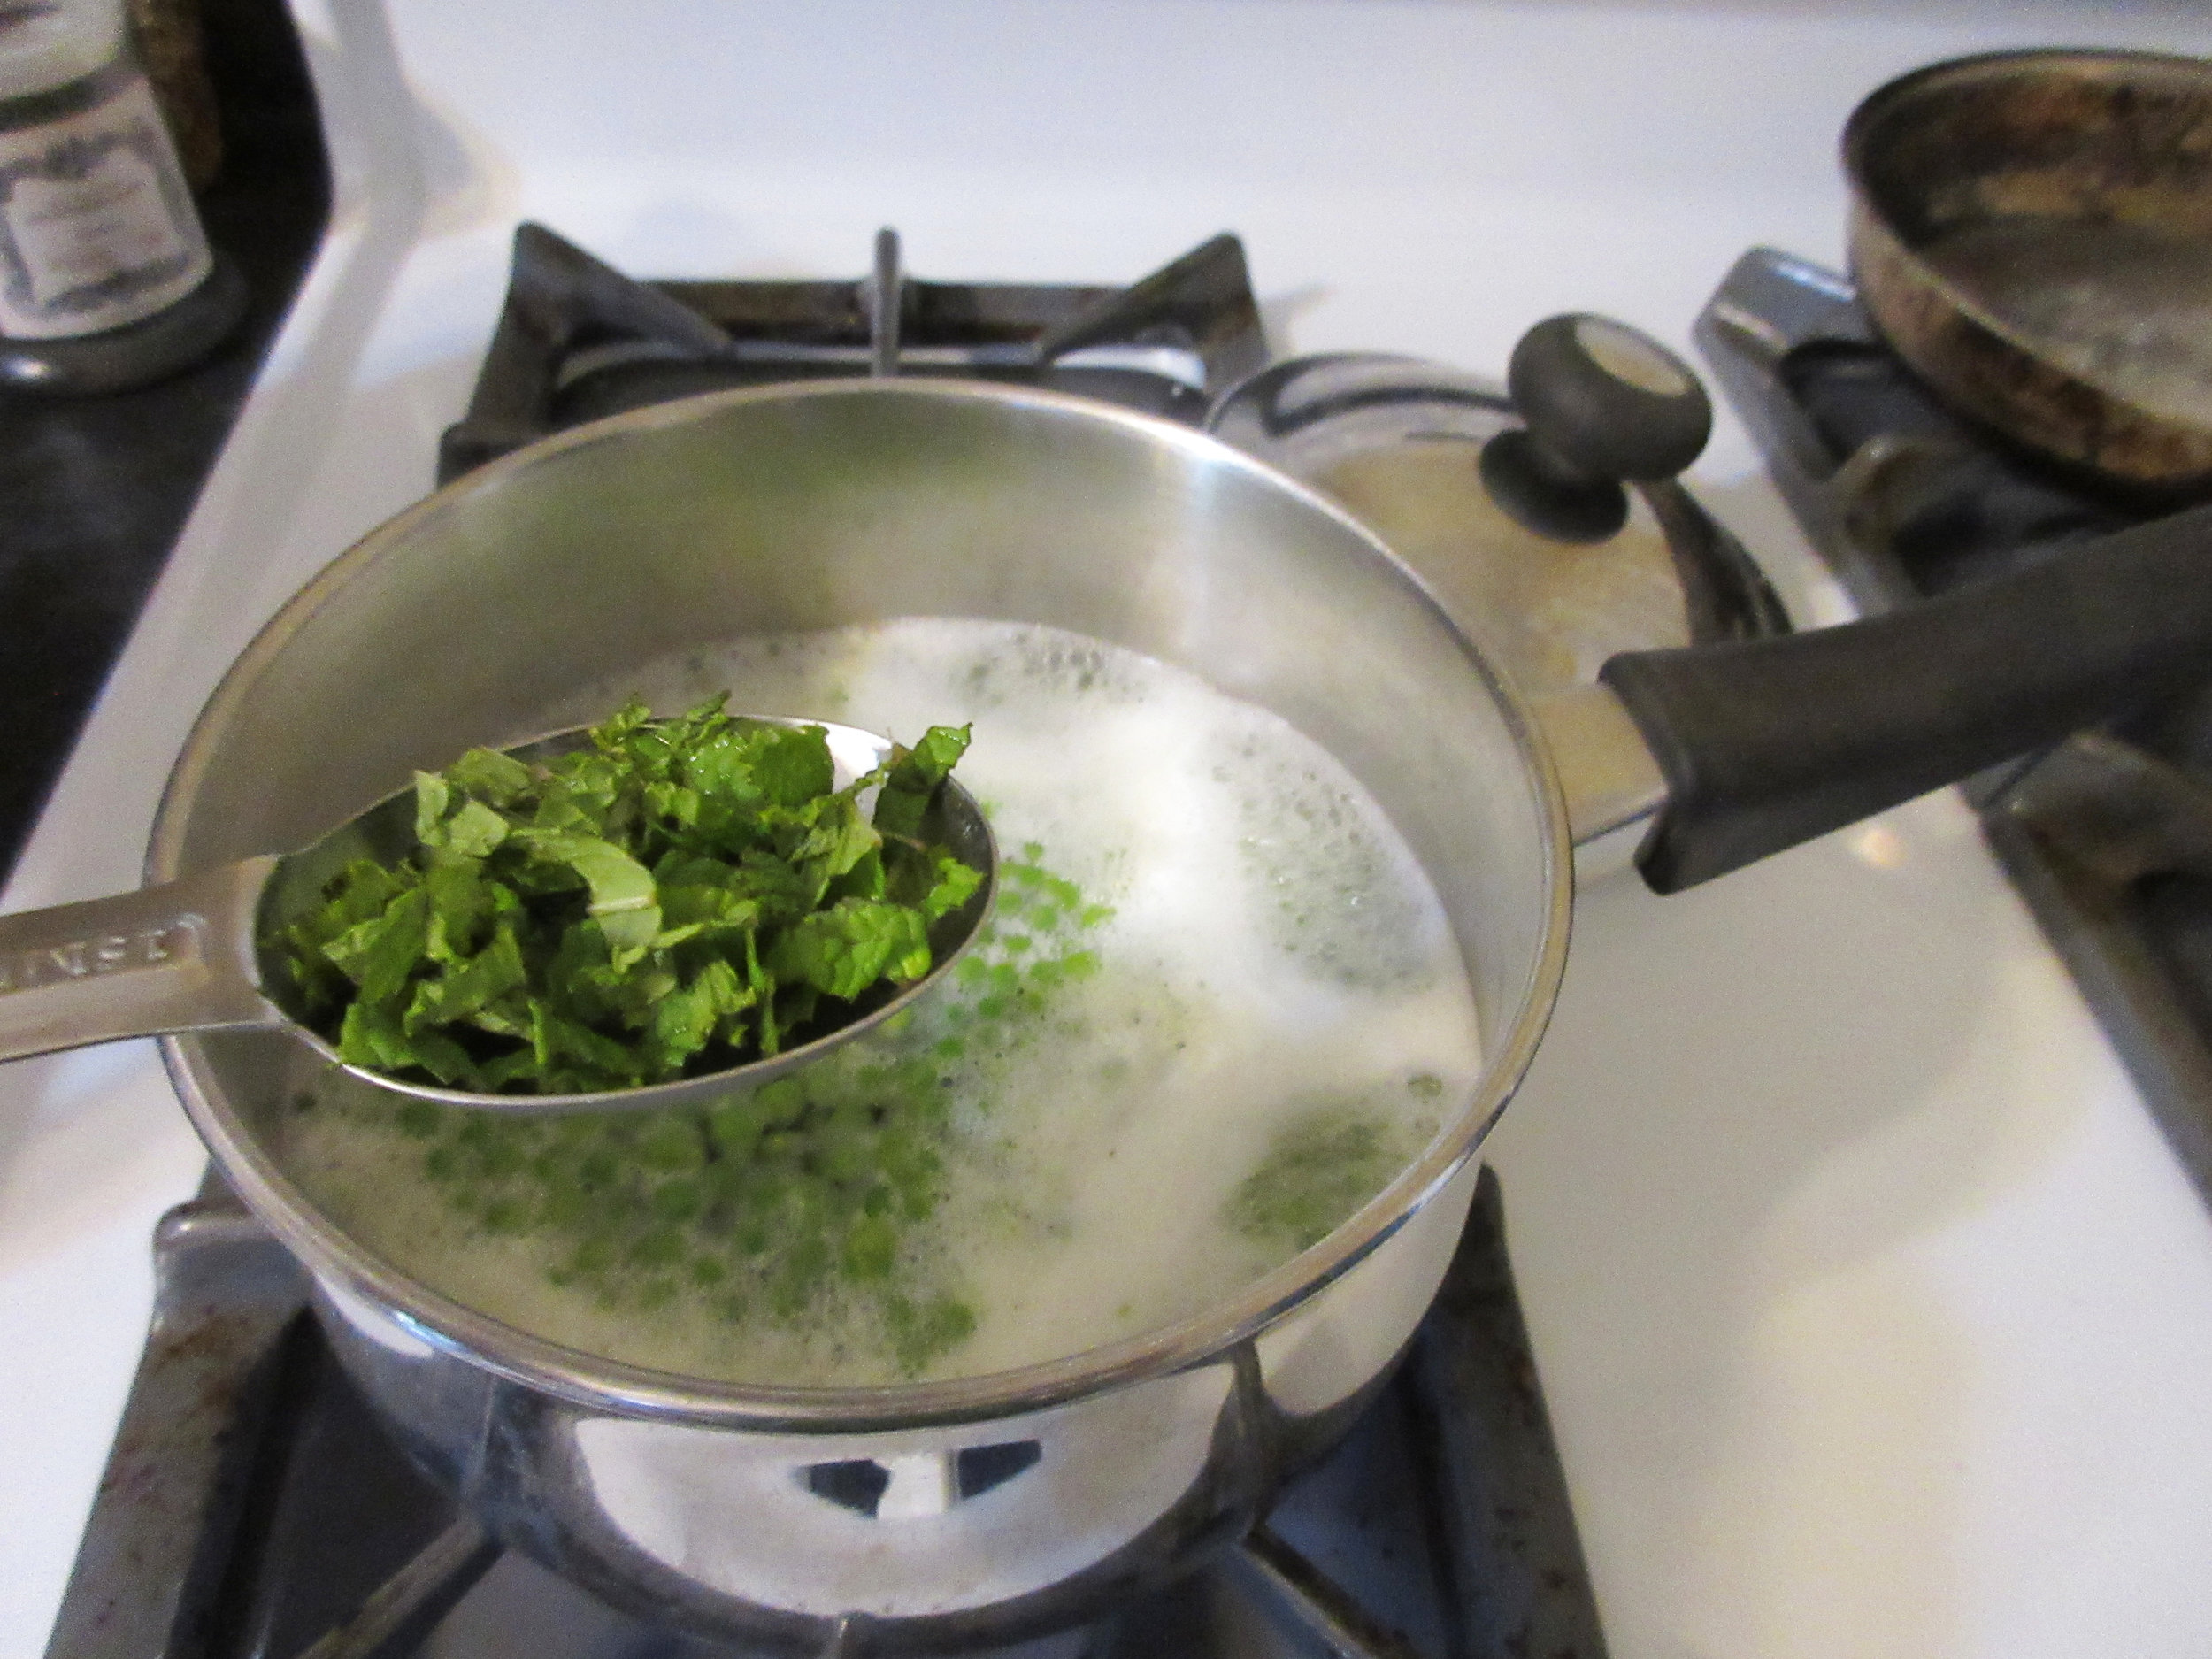
Chopped fresh mint (I used 1 tbsp, but would try more next time)
Butter
Salt
Boil the peas and mint in enough water to cover them, and continue simmering until cooked. Drain and transfer to a dish. Add butter and salt to taste.
The mint: Since this recipe doesn't specify how many peas to use, using "a few leaves of mint" isn't altogether clear either. I picked 3 cups of peas because it seemed like a family-sized amount to serve for a meal, which is probably what Amelia Simmons had in mind. A few leaves amounted to1 tbsp of chopped mint, so that's what I put in the pot. With 1 tablespoon of mint in this amount of peas, I tasted a subtle minty flavour every one or two bites. Next time, I'd try at least 2 tablespoons.
The recipe also doesn't give the instructions to chop the mint, but often recipes of this era leave information out because the author assumes that you already know. Simmons is quite clear about all the other steps in this recipe, though. I debated whether to put the mint in the boiling water whole or not, because perhaps she intended the mint to only flavour the peas & butter. In the end I thought it would be tastier with small pieces of mint nestled in with the peas, so I chopped it.
The butter: If you read the original recipe, Simmons instructs putting "butter as big as a walnut" into the boiling water with the peas while they are cooking, then straining the buttery water from the peas. This seemed like a huge waste to me, and I thought that I might as well just put most of that butter straight into the garbage.
But in the interest of historical accuracy, I listened to the recipe. As I was straining the peas, I realized that all of that oily water was going down the drain. Not good for my plumbing at all! Keeping her pipes unclogged is probably something that Amelia Simmons didn't have to worry about in 1796, so I suggest straining your peas first, then adding the butter.

I agree, the name of this recipe doesn't sound very exciting. To boil green Peas? Really, what you end up with is green peas, with a touch of fresh mint, butter and salt. It's a simple, yet flavourful recipe that you'll find in American Cookery from 1796. Our authoress is Amelia Simmons (who has the tagline "An American Orphan" added to her name on the title page) and American Cookery is the first cookbook that was both written and published in the United States.
As you read the original recipe above, you may have thought, "What is that strange letter that looks a bit like an 'f' at the beginning of some of those words?" If you did have that thought, meet the Long S or Descending S.

The American Bill of Rights uses the Long S, shown here in the word "Congress"
The roots of the Long S stretch back to Roman Cursive, a script that was used in the first to the third century AD. Up until the eleventh or twelfth century, the Long S was used as an uppercase S, but there was a shift around that time that lasted until the late eighteenth and early nineteenth century – right around the time when American Cookery was published.
The Long S was used when the letter s appeared at the beginning or middle of a word. The letter s that we know today (the Short S or Round S) was used at the end of a word, before an apostrophe and before or after the letter f. If a word has a double S, like in the example 'Congress' above, the first S is a Long S and the second one is a Short S.
Confusing, right? You do get used it with practice, and eventually you'll stop pronouncing ſalt as falt instead of salt. Now I can read documents with the Long S and only occasionally mispronounce words in my head while I'm reading!
The change to our familiar usage of the letter S probably came about due to printers wanting to simplify the typesetting process. Why have two letters that sound exactly the same when you can get the job done with one? For that reason, printed materials changed to only using the Short S around the turn of the nineteenth century. Handwriting is another matter. Humans are creatures of habit, so examples of handwriting using the Long S can be seen well into the 1800s.
P.S. If you're interested in reading very detailed rules for using the Long S (in multiple languages!), you'll want to read what BabelStone has to say on this topic.
Read the Cookbook:

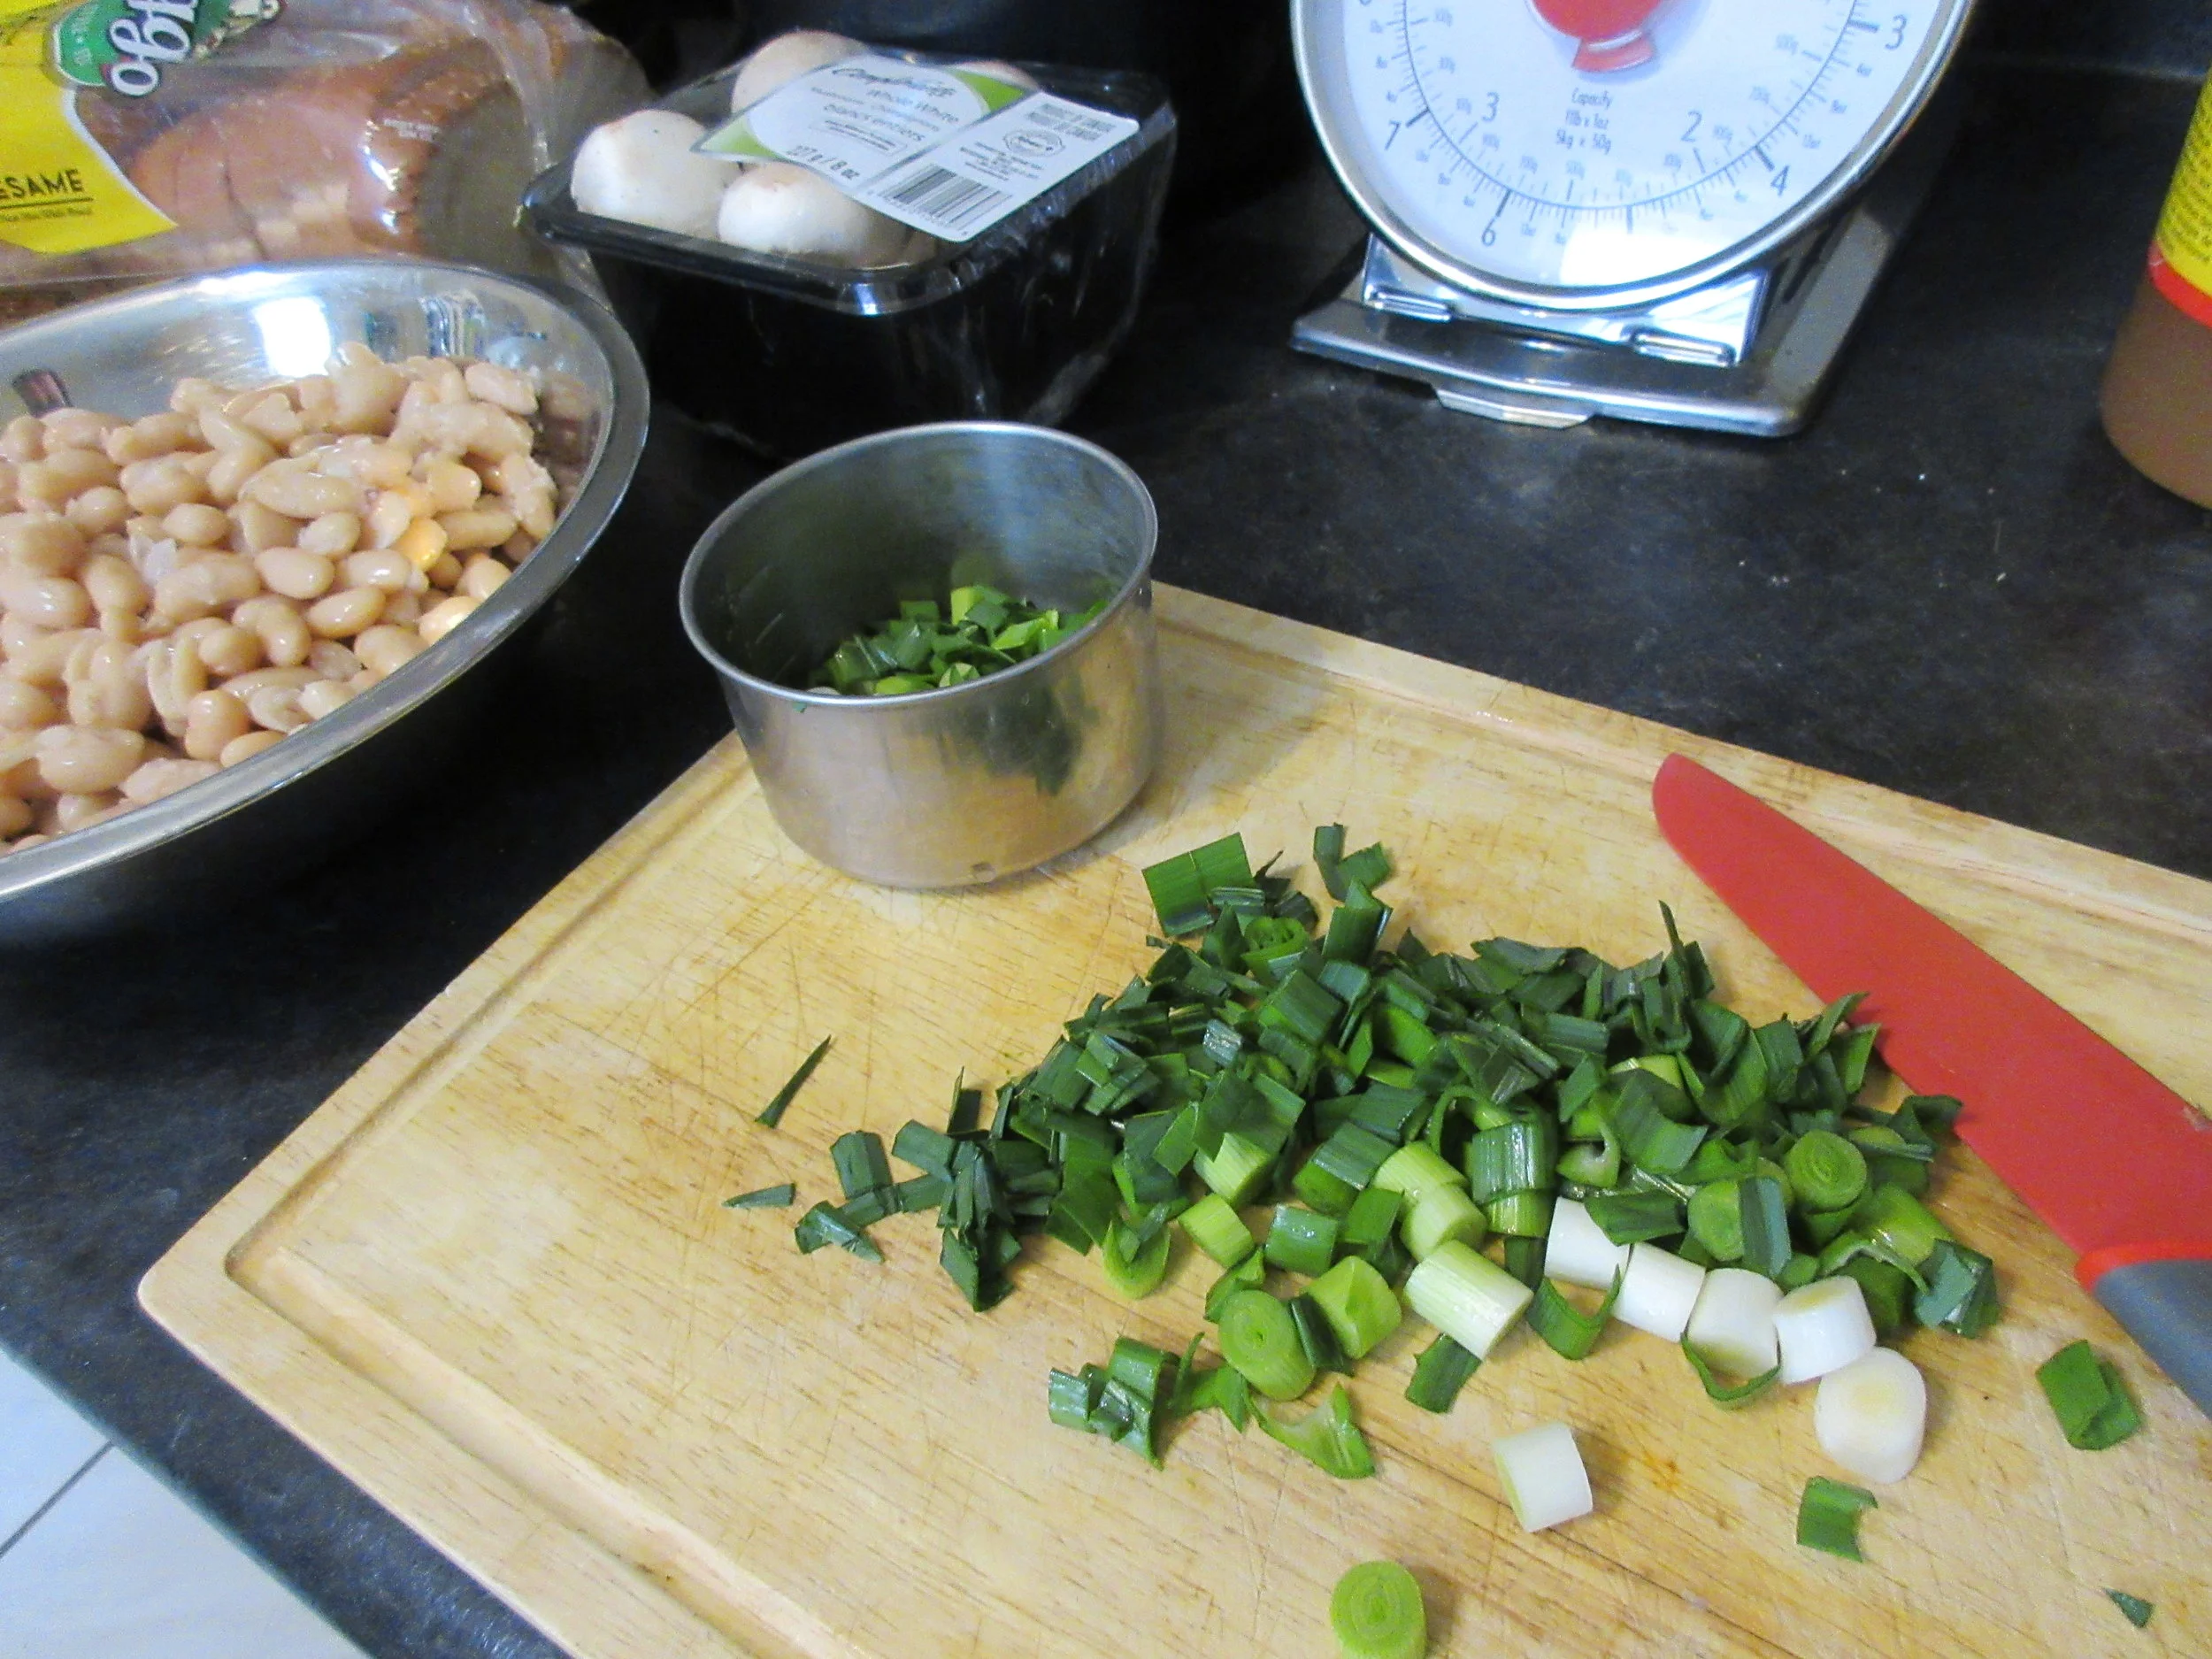
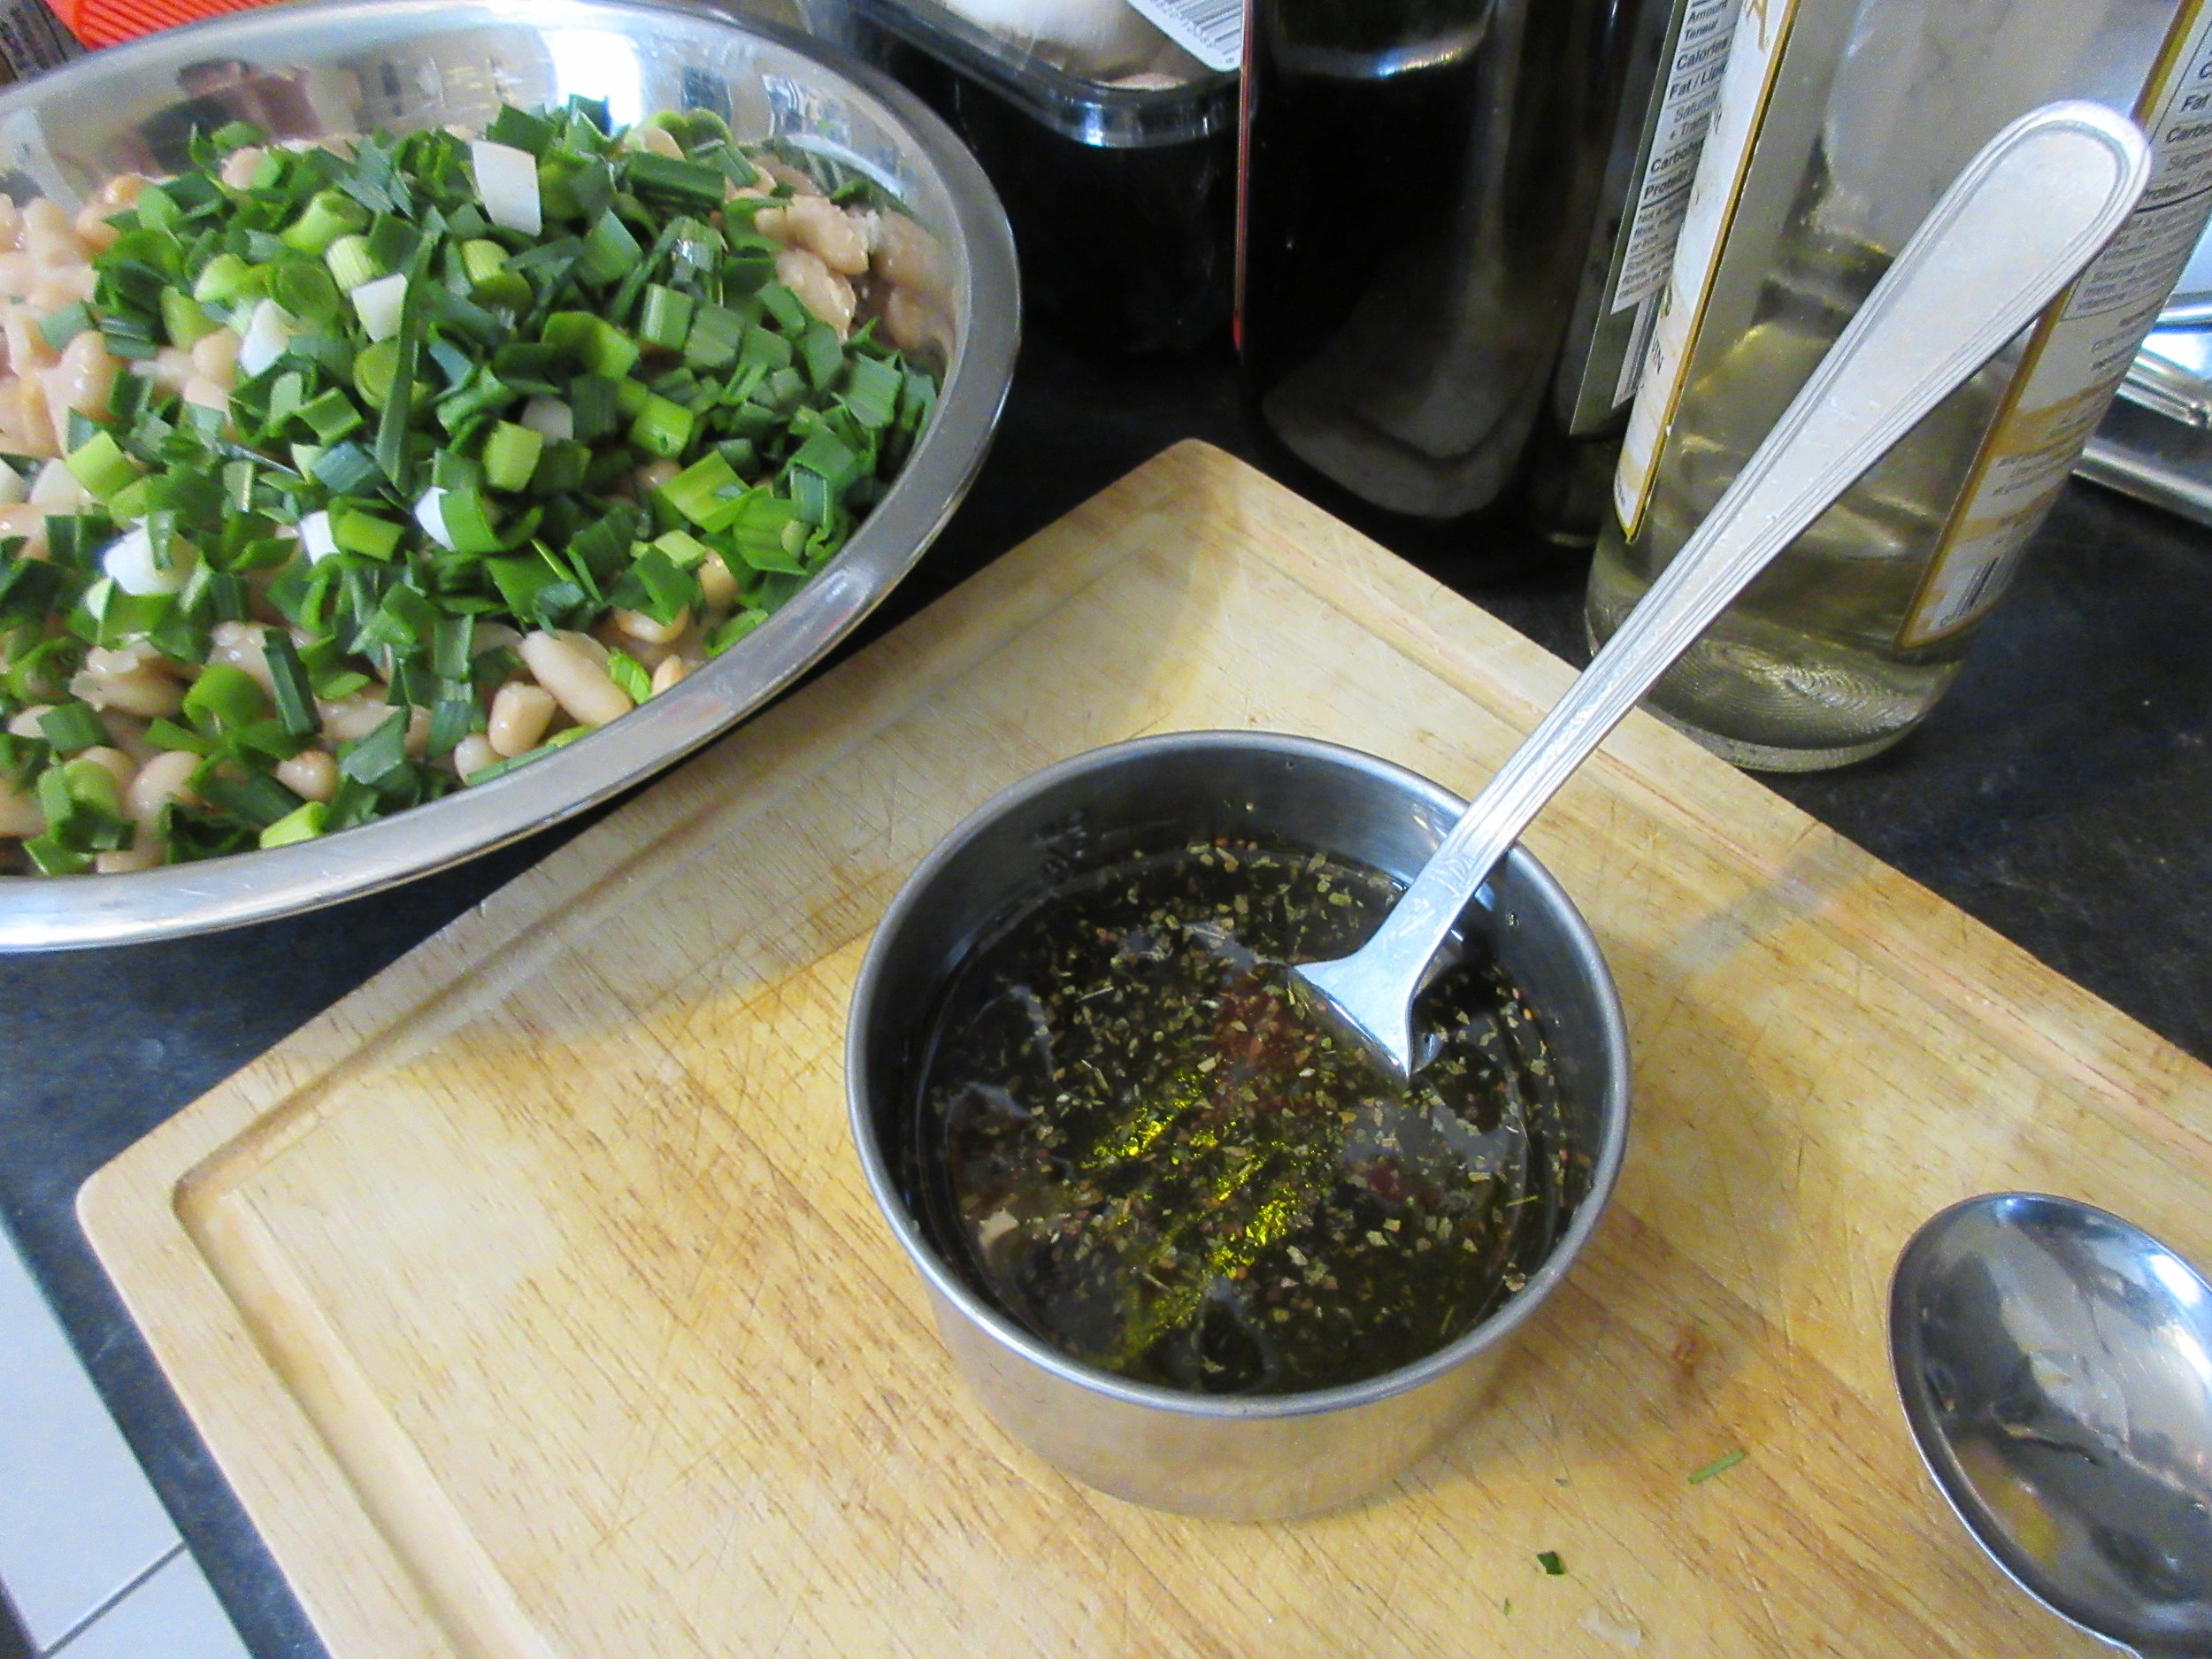
Italian White Bean Salad
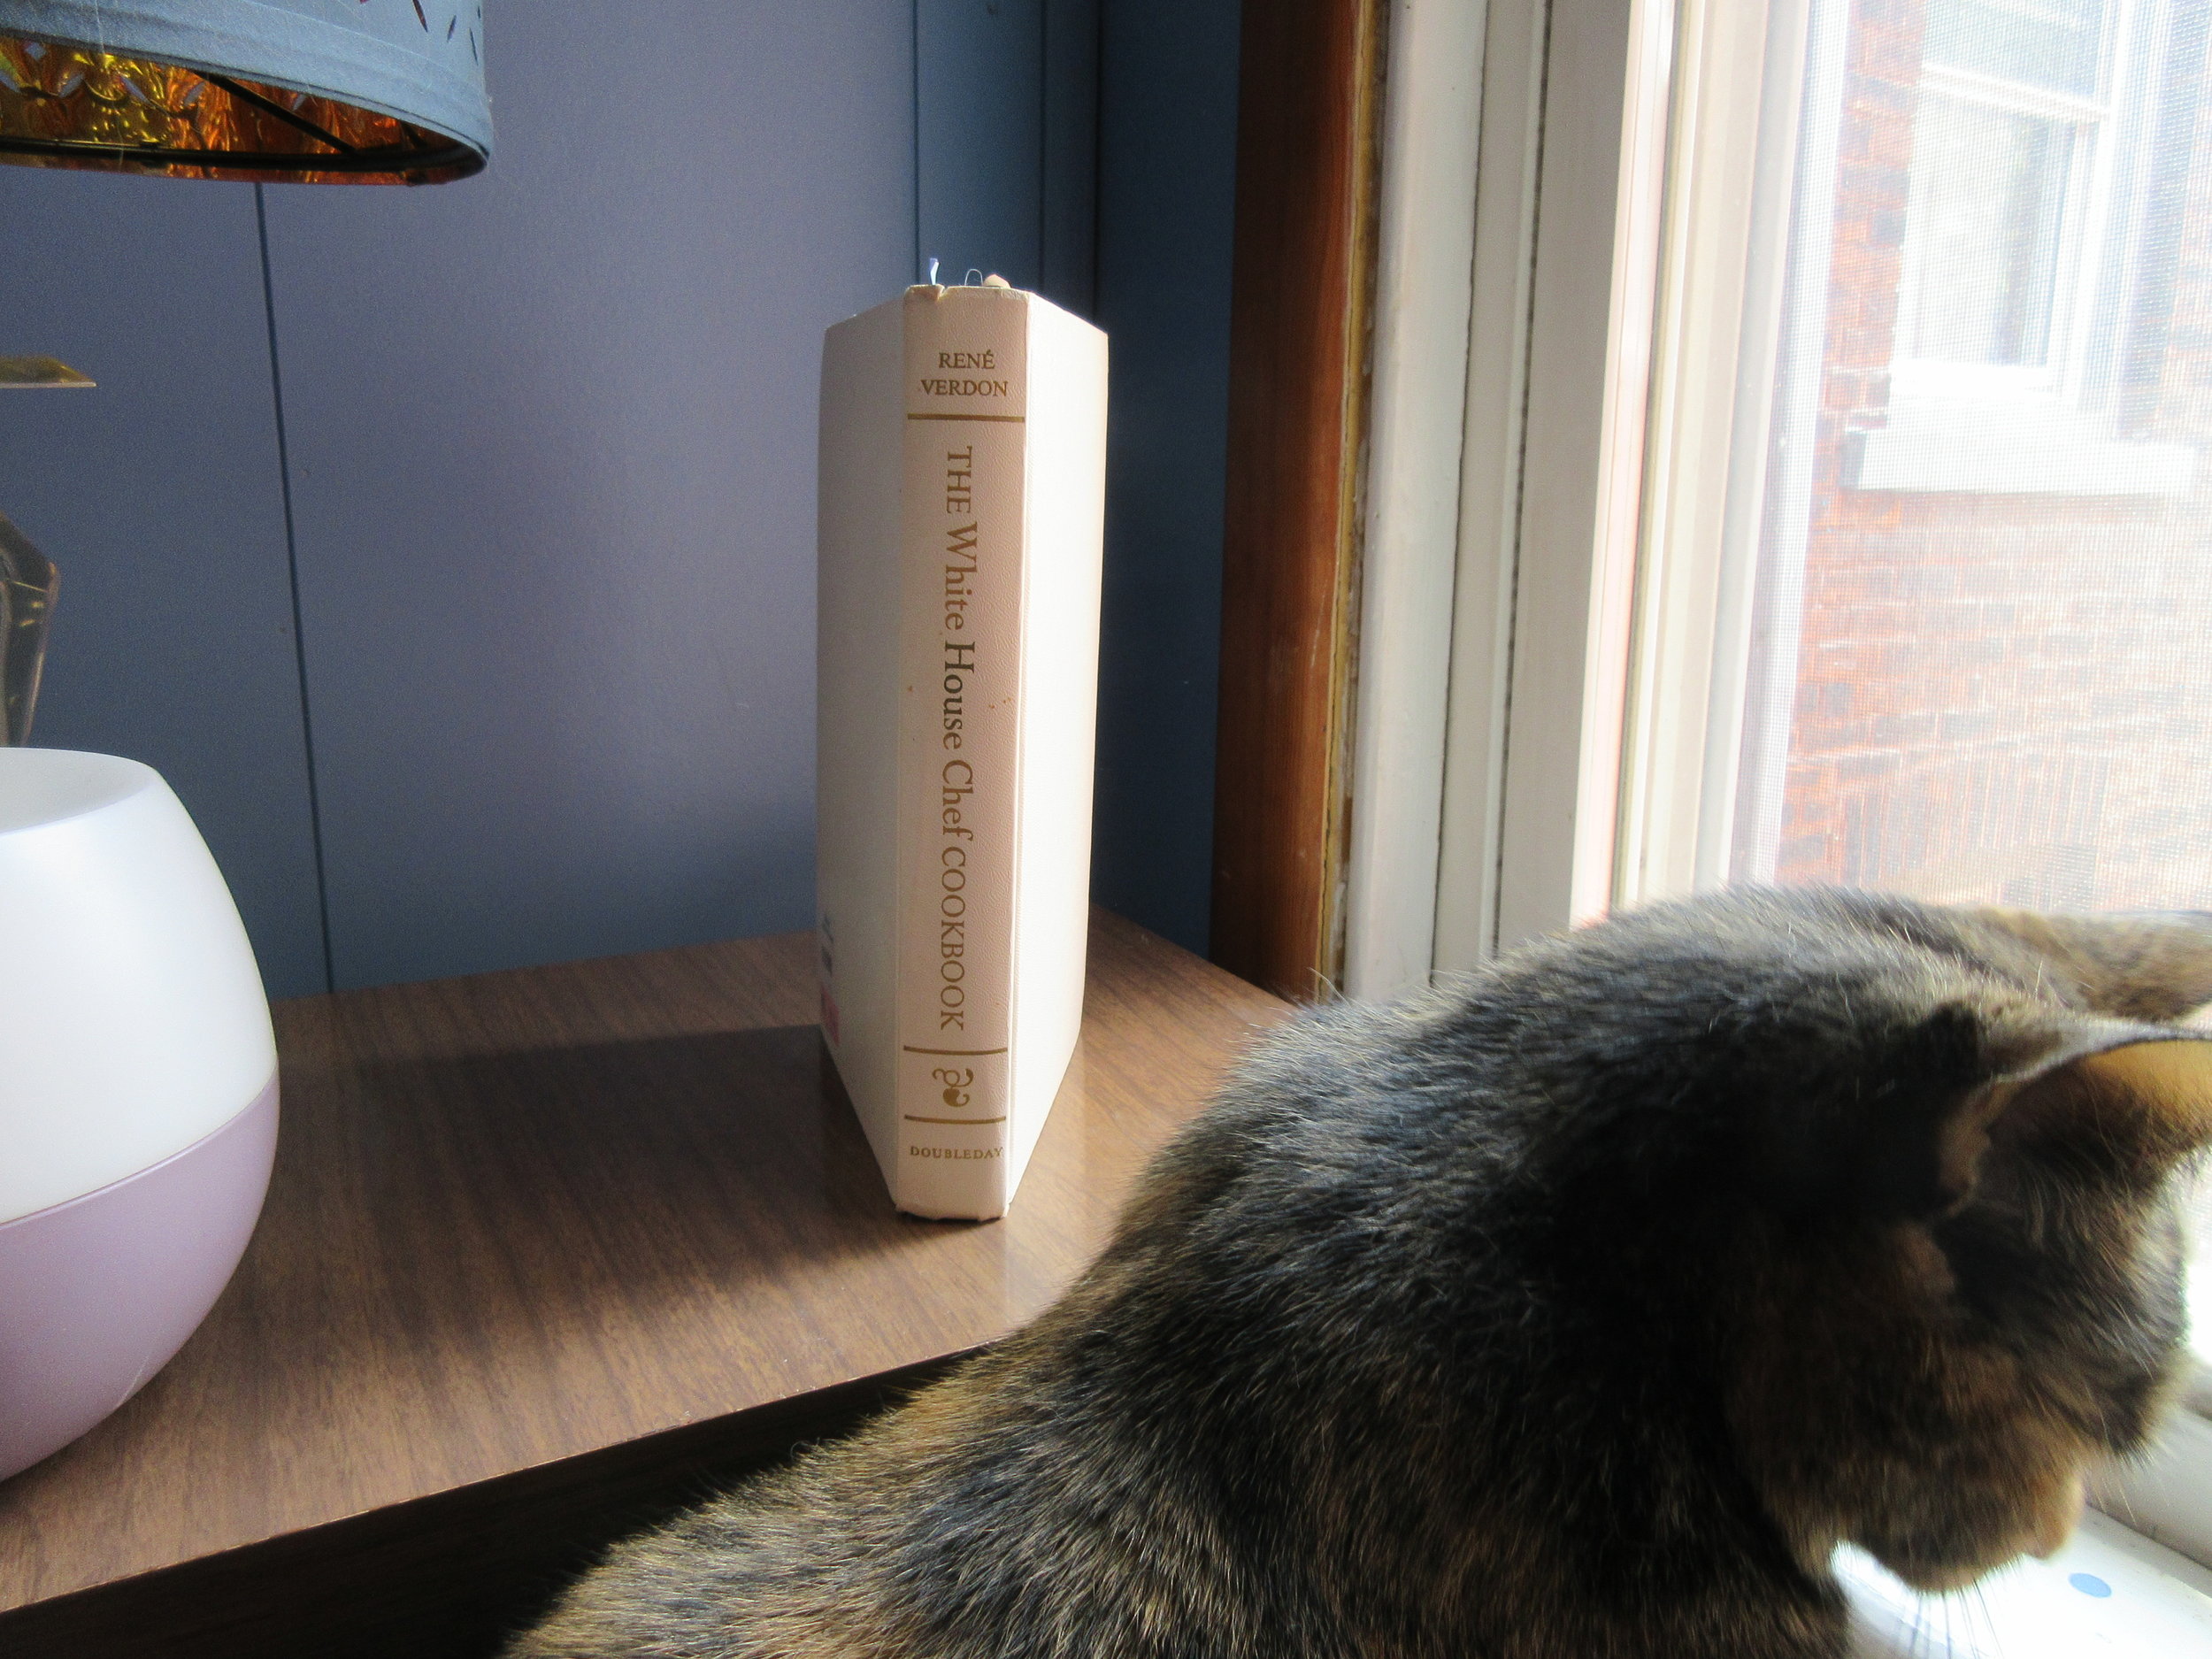
I made Italian White Bean Salad along with Mushroom Rolls to take along to a potluck picnic. Both of these recipes are found in The White House Chef Cookbook, written by René Verdon in 1967 after spending 4 years as the White House Executive Chef. Verdon was appointed the first Executive Chef of the White House in 1961, a position created by the Kennedys. My version of this salad features green garlic instead of the red onion listed in the recipe (a shopping list oversight on my part), and I really like the green garlic's blend of onion and garlic flavours.

You'll find this recipe in:
The White House Chef Cookbook
By: René Verdon
New York, 1967
The Original Recipe:
ITALIAN WHITE BEAN SALAD (6 servings)
2 cans cannellini (white beans)
2⁄3 cup chopped red onion
½ cup olive oil
1 teaspoon salt
1 teaspoon basil
2 tablespoons wine vinegar
Combine all ingredients and toss well. Refrigerate for several hours before serving.

My Experience:
If you're paying attention to the ingredients listed in this recipe and what my Italian White Bean Salad looks like, you're probably wondering: What is all the green stuff? Where is the red onion? I had every intention of making this salad by the book, but I didn't read the ingredients close enough, so I didn't notice the "red" in front of the "onion" in the ingredient list until I was about it make it. I had an occasion to get to, so I just had a look at what I already had in the house. I had regular old white onions, and some green garlic from my farmshare that I didn't have plans for. I opted for the green garlic, and I really like its blend of onion and garlic flavours in this salad.
In keeping with the white theme for this salad, I used white wine vinegar. Since Chef Verdon lists only 1 tsp of basil, I guessed that he was referring to dried basil, but this recipe would be even tastier if you've got fresh basil on hand. Cannellini beans are also known as white kidney beans, and the cans I bought were 540 mL/19 fl oz. Although very delicious, this salad recipe is doused in vinaigrette! It's too oily for my taste. It's very likely that can sizes were different than today in 1967, so if the cans of cannellini beans in your local grocery store are the same size as the ones I used, I'd scale down the vinaigrette.
I made Italian White Bean Salad along with Mushroom Rolls to take along to a potluck picnic. Both of these recipes are found in The White House Chef Cookbook by René Verdon, written in 1967 after his four-year stint as White House Executive Chef. Verdon was the first Executive Chef of the White House, a position created by the Kennedys in 1961.
This cookbook is filled with scrumptious recipes and a biographical Introduction outlining his early life and how his career at the White House unfolded. The introduction to each section features anecdotes about the Kennedys and life at the White House, and also helpful tips like the proper order in which to dress a salad, or how to keep the colour vibrant in various cooked vegetables.
Verdon stayed on as Executive Chef with the Johnsons, but he found that the tides had turned. A Food Administrator was hired to cut costs and the culinary tastes of the new First Family were not harmonious with what Verdon wanted to put on the menus. He resigned in 1965, and went on to author three cookbooks & open Le Trianon, a French restaurant in San Francisco.
It was, I believe, the superb aroma of freshly baked bread from the ovens of my father's bakery that first gave me the idea that preparing food might also be for me a life's work...There was no opposition at home. Indeed, my parents were very pleased, and encouraged me in every way. Father only had one word of advice to me about jobs: "If you don't like it, quit." He had the conviction that a man must like his work in order to be productive and creative. I remember his words years later when I came time for me to think about leaving the White House.
Particularly, I recall the heartwarming personal notes, in French, handwritten by Mrs. Kennedy to express her appreciation for some dish I had prepared. President Kennedy was also extremely generous with his appreciative comments. I shared the grief of America when he was so suddenly taken away from us. I had known him as a man full of life and laughter, of wisdom and charm. I had seen him as a kind and loving husband and father. His death struck all of us on the staff as a deep and personal loss.

If you'd like to learn some more about René Verdon and his life, The New York Times featured him following his death in 2011 at the age of 86
Mental Floss outlines the history of White House Executive Chefs and the Cooks who prepared food for American Presidents beginning with the Washingtons
Read the Cookbook:

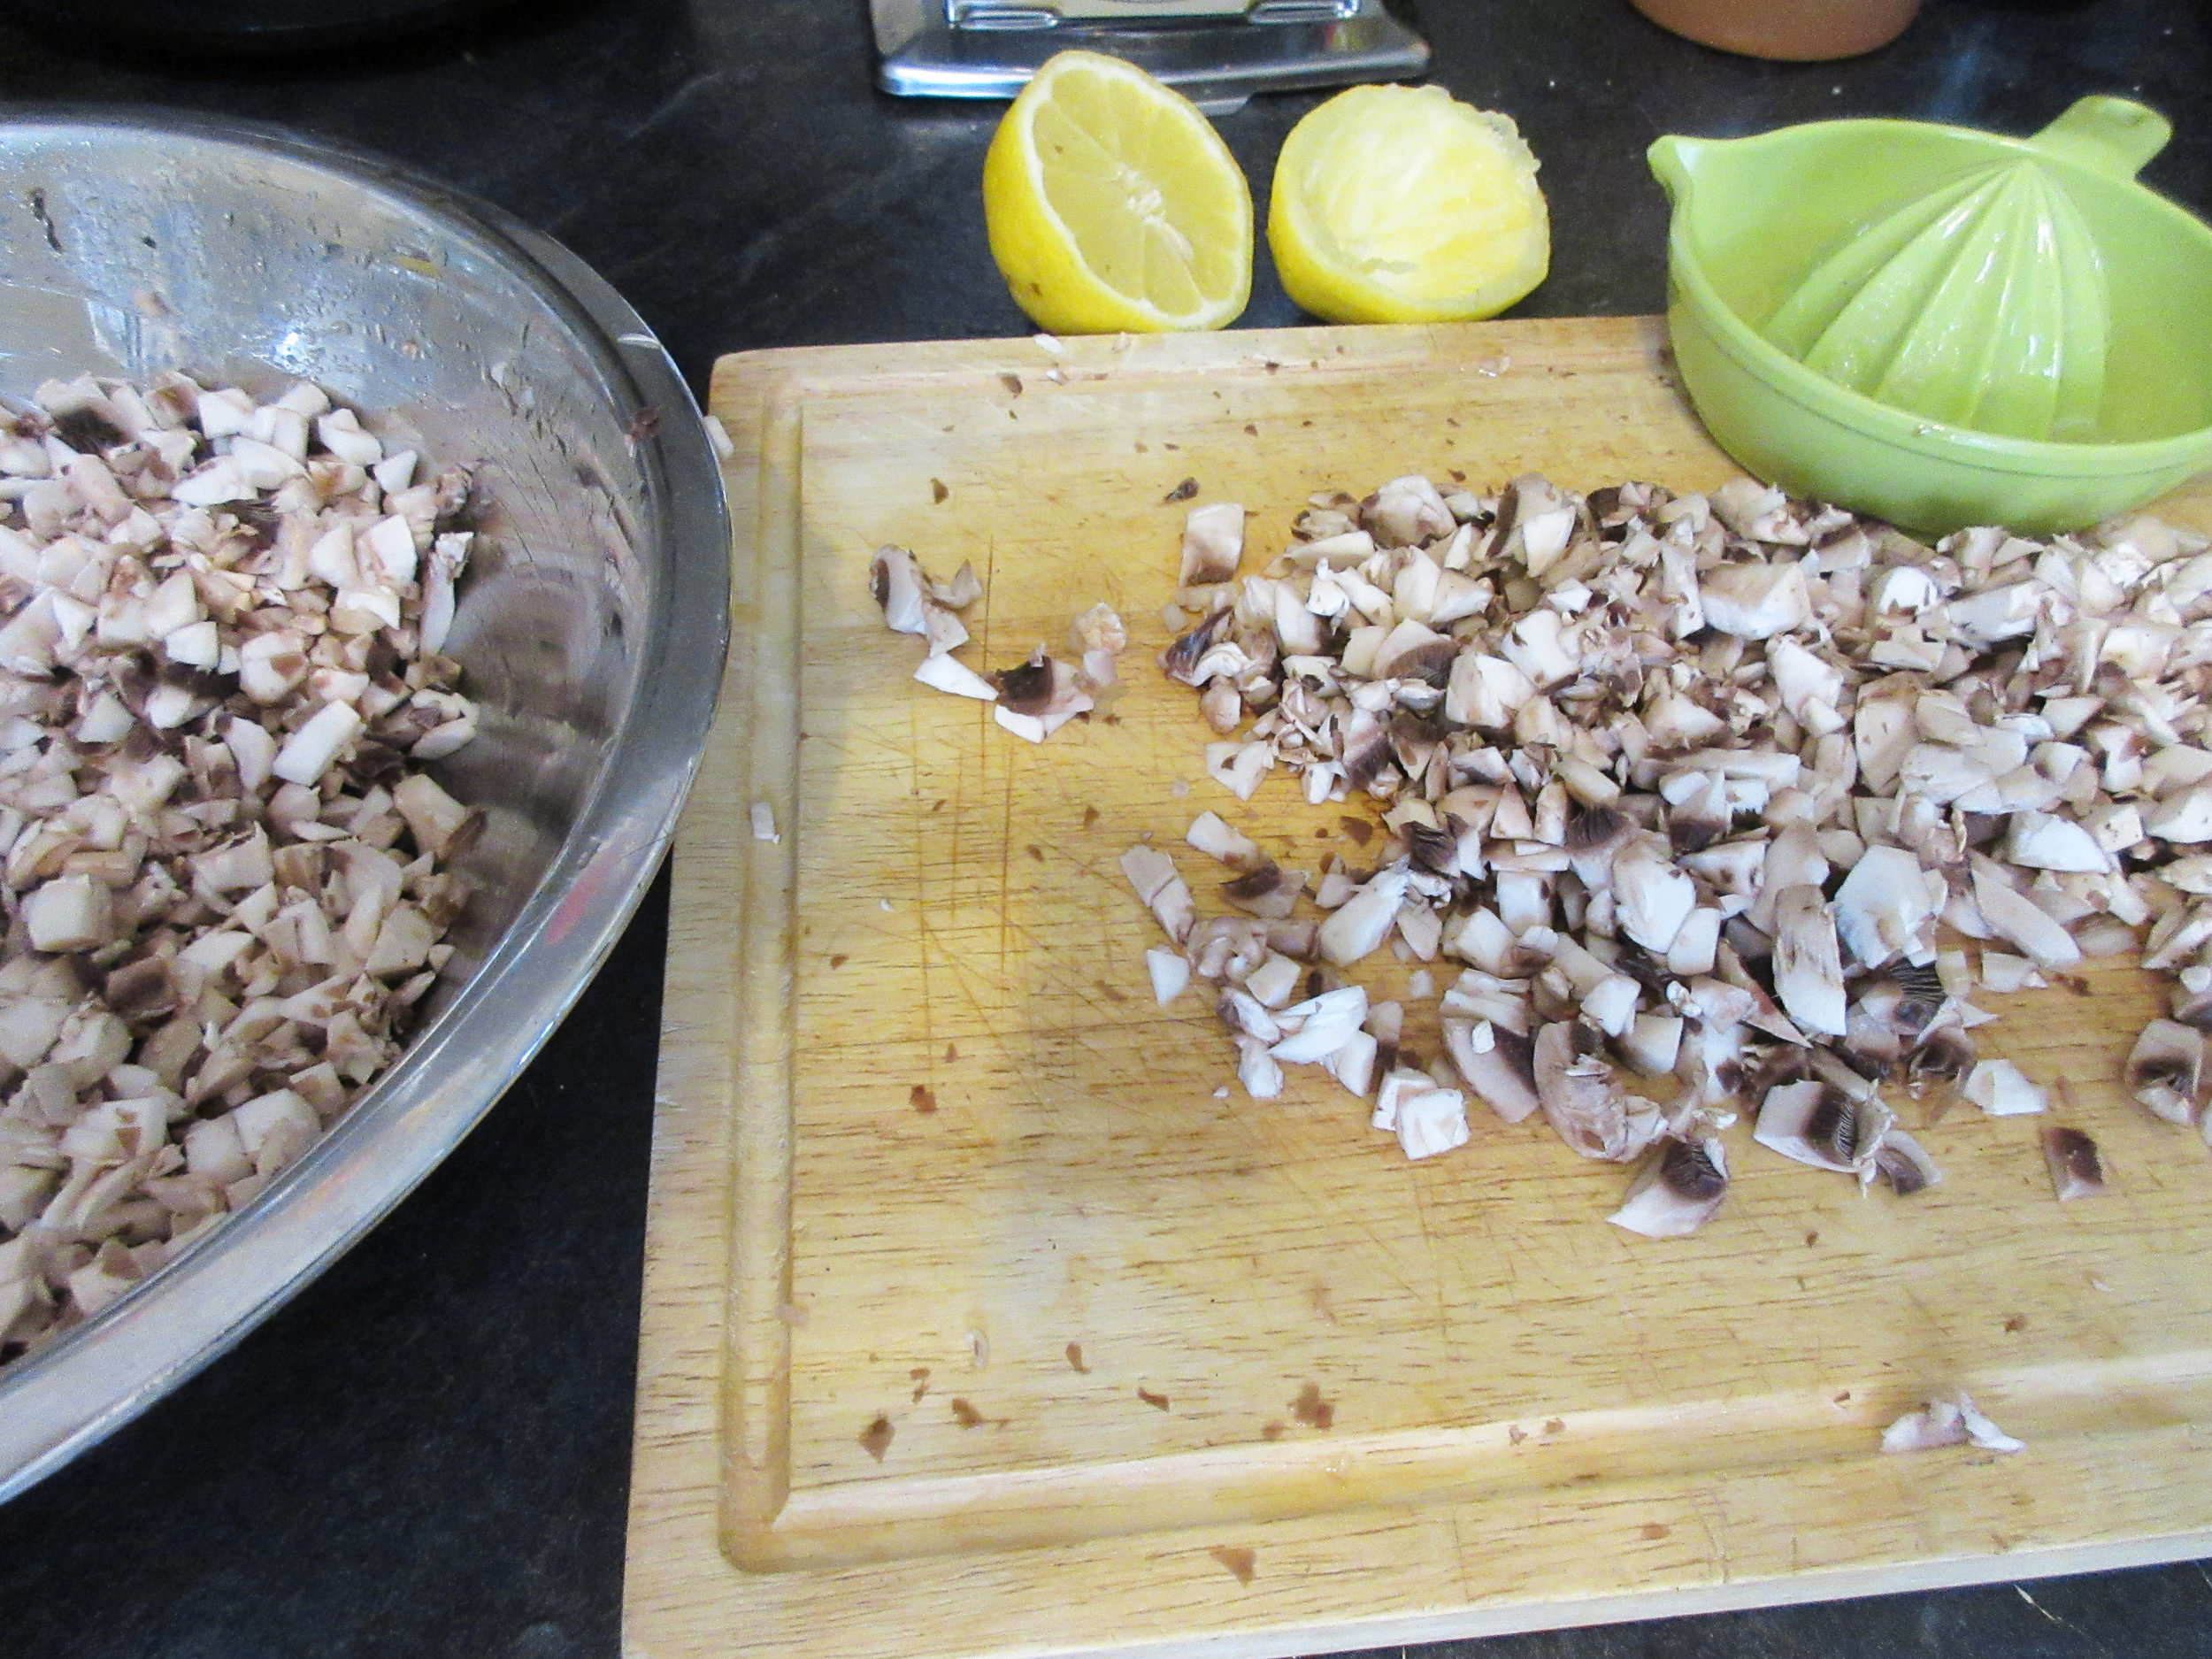
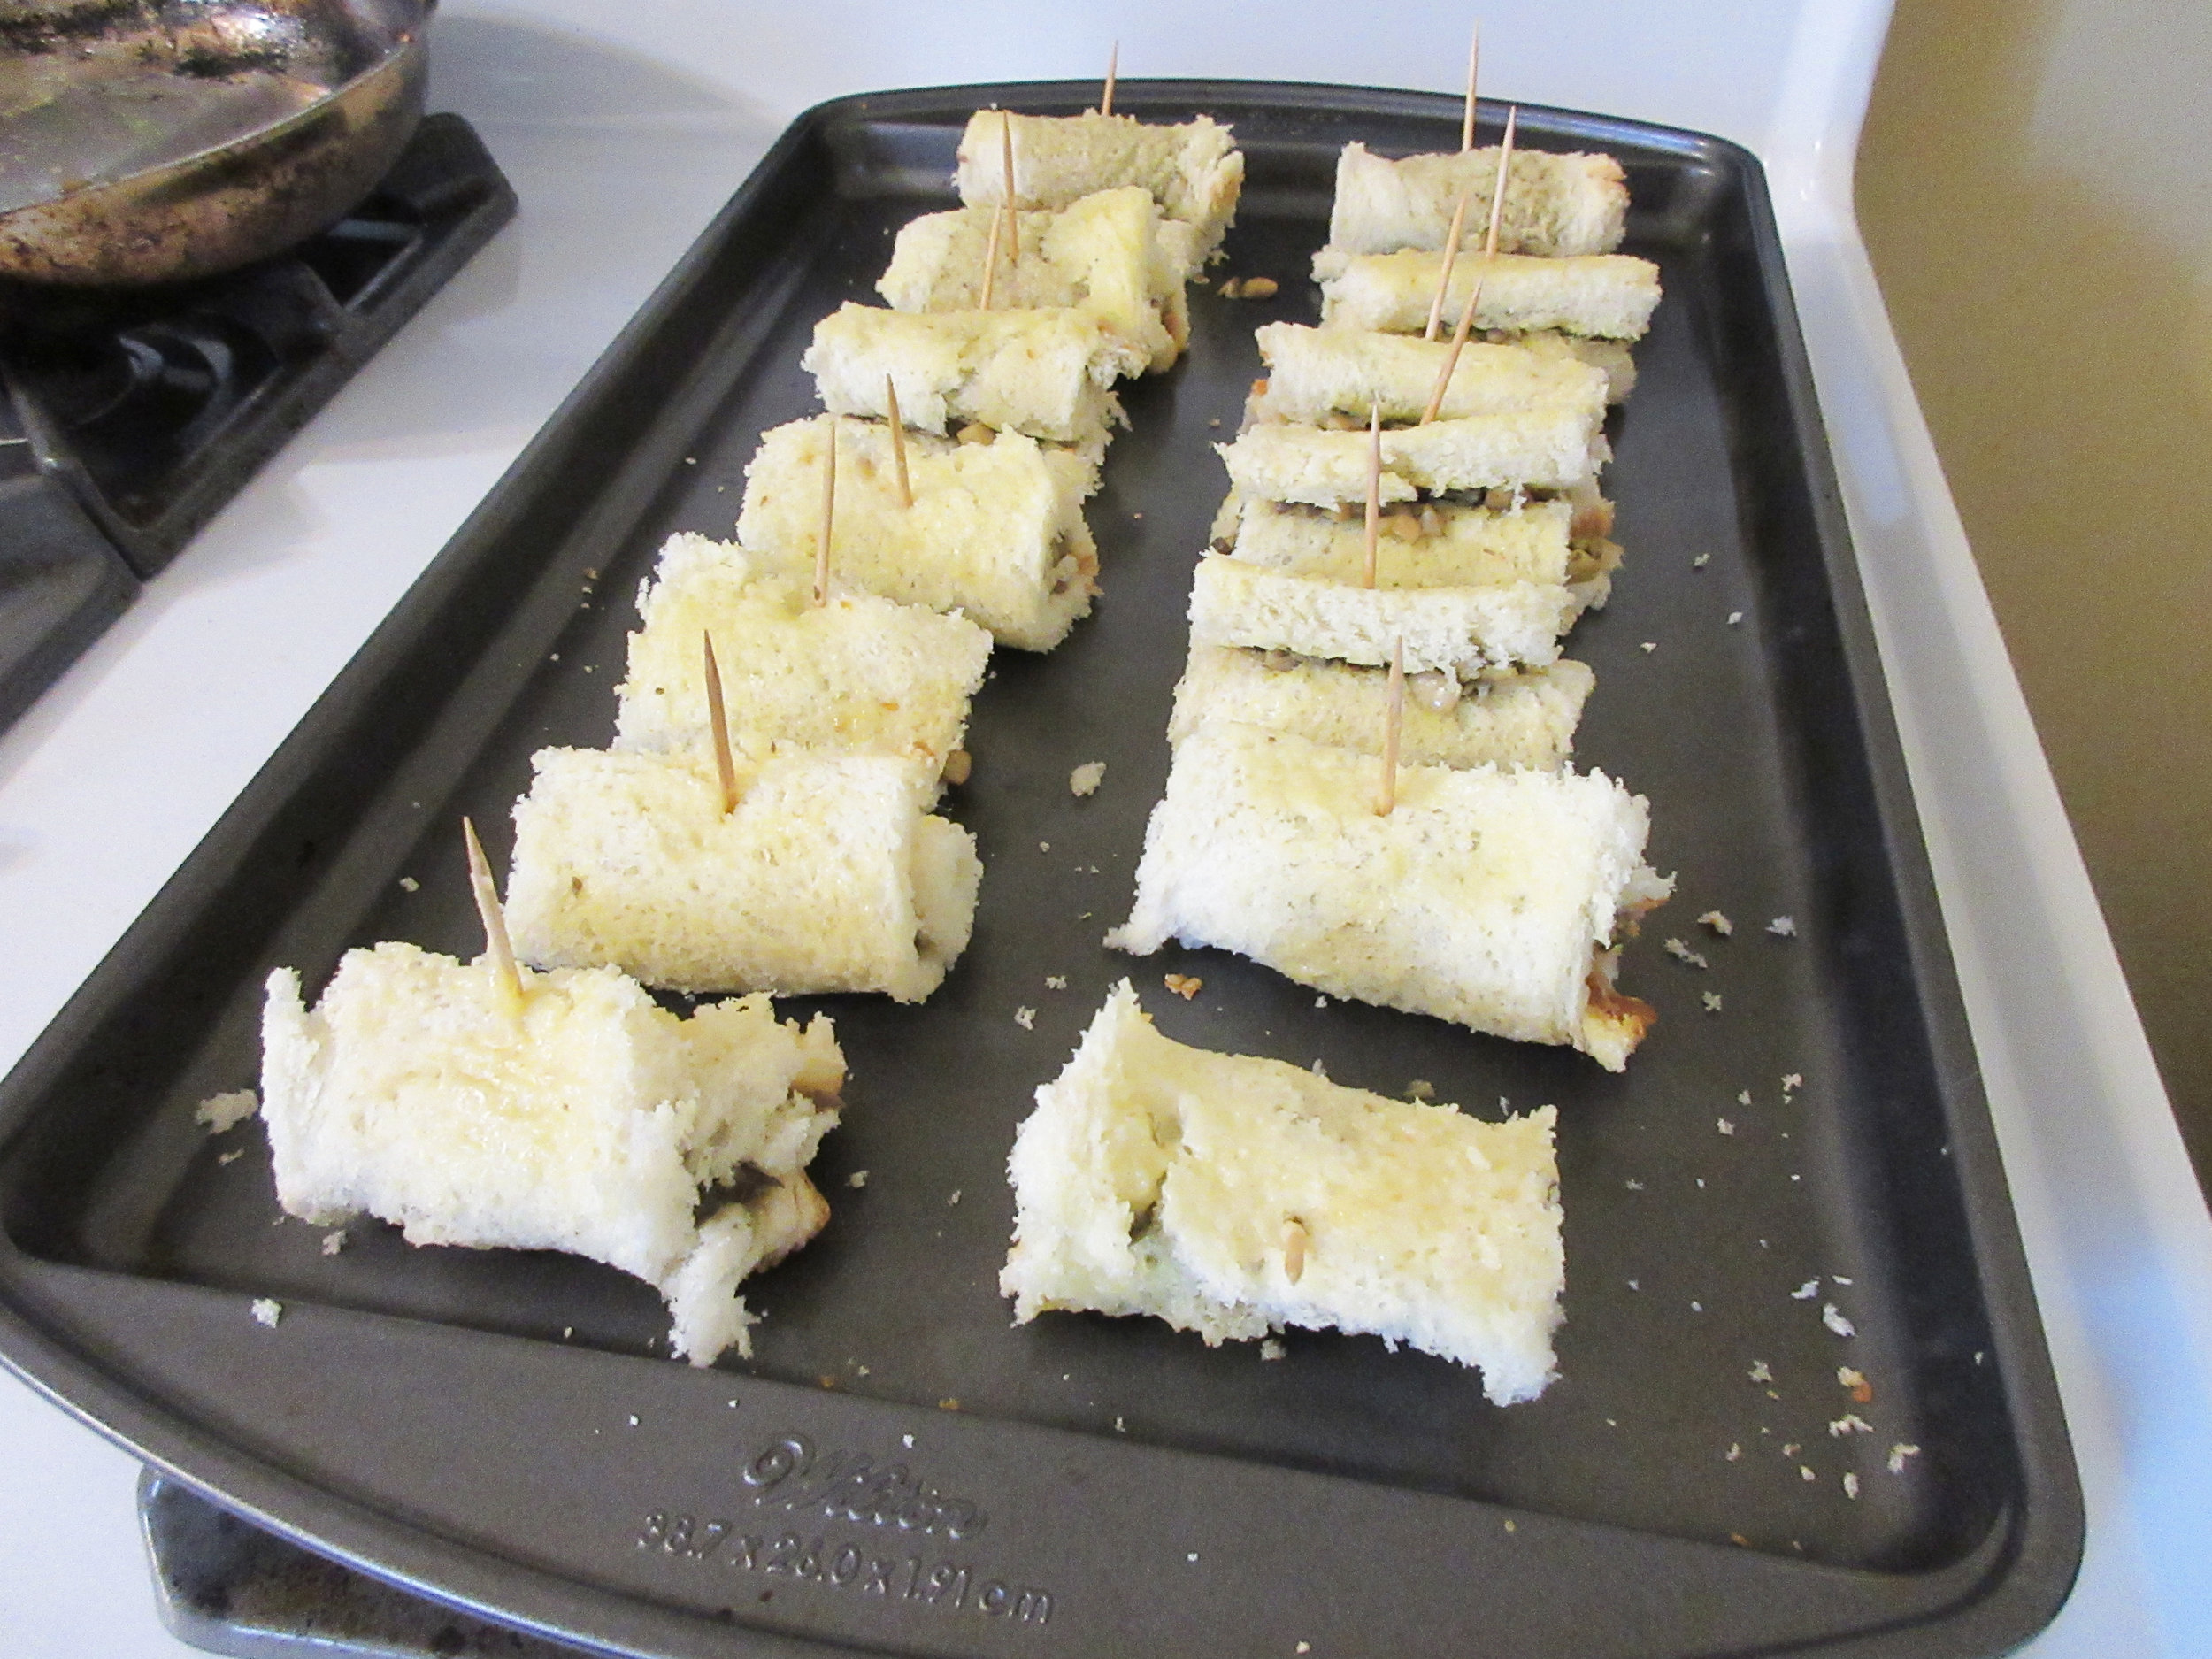
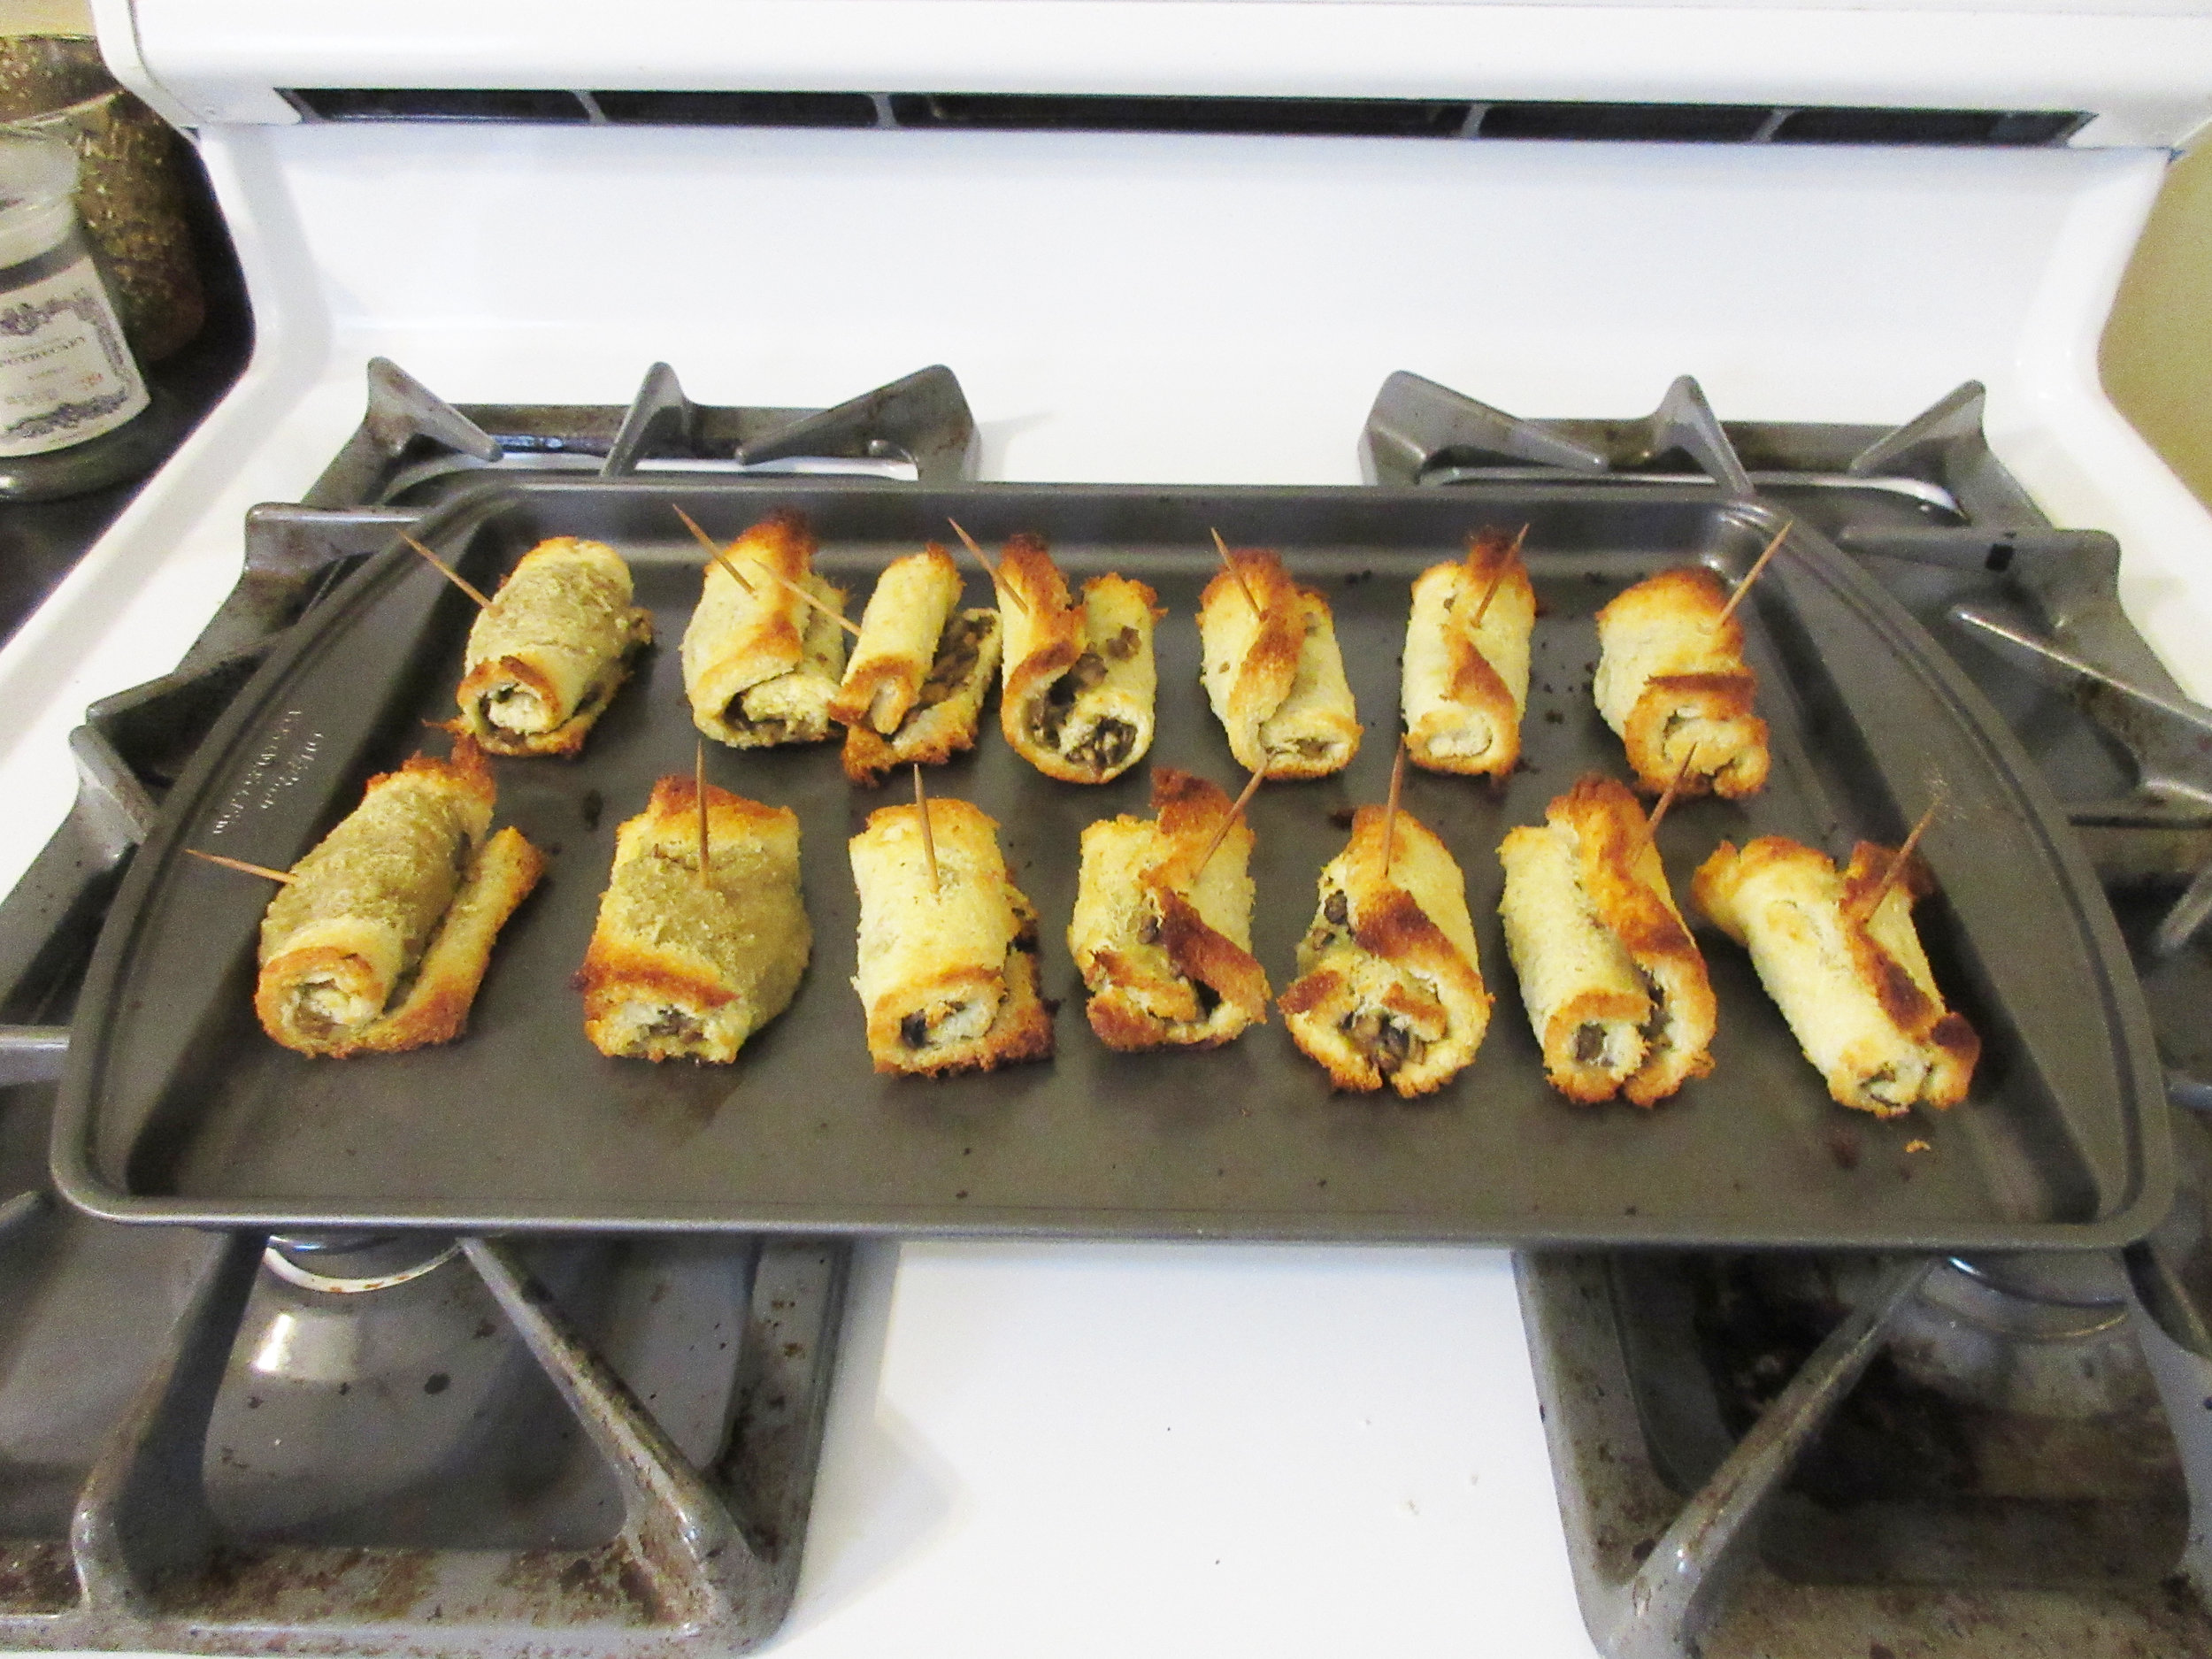
Mushroom Rolls
Mushroom Rolls would be perfect for your next afternoon tea, or as an appetizer at your next celebration. Or anytime. They would probably be perfect to eat at any point in time. I'm a huge fan of mushrooms and butter, and this recipe uses both ingredients liberally. Add lemon juice, curry powder, salt & pepper, a dash of cayenne pepper...and additional butter...to the mushrooms, then package it up in crispy bread. Yum.

You'll find this recipe in:
The White House Chef Cookbook
By: René Verdon
New York, 1967
The Original Recipe:
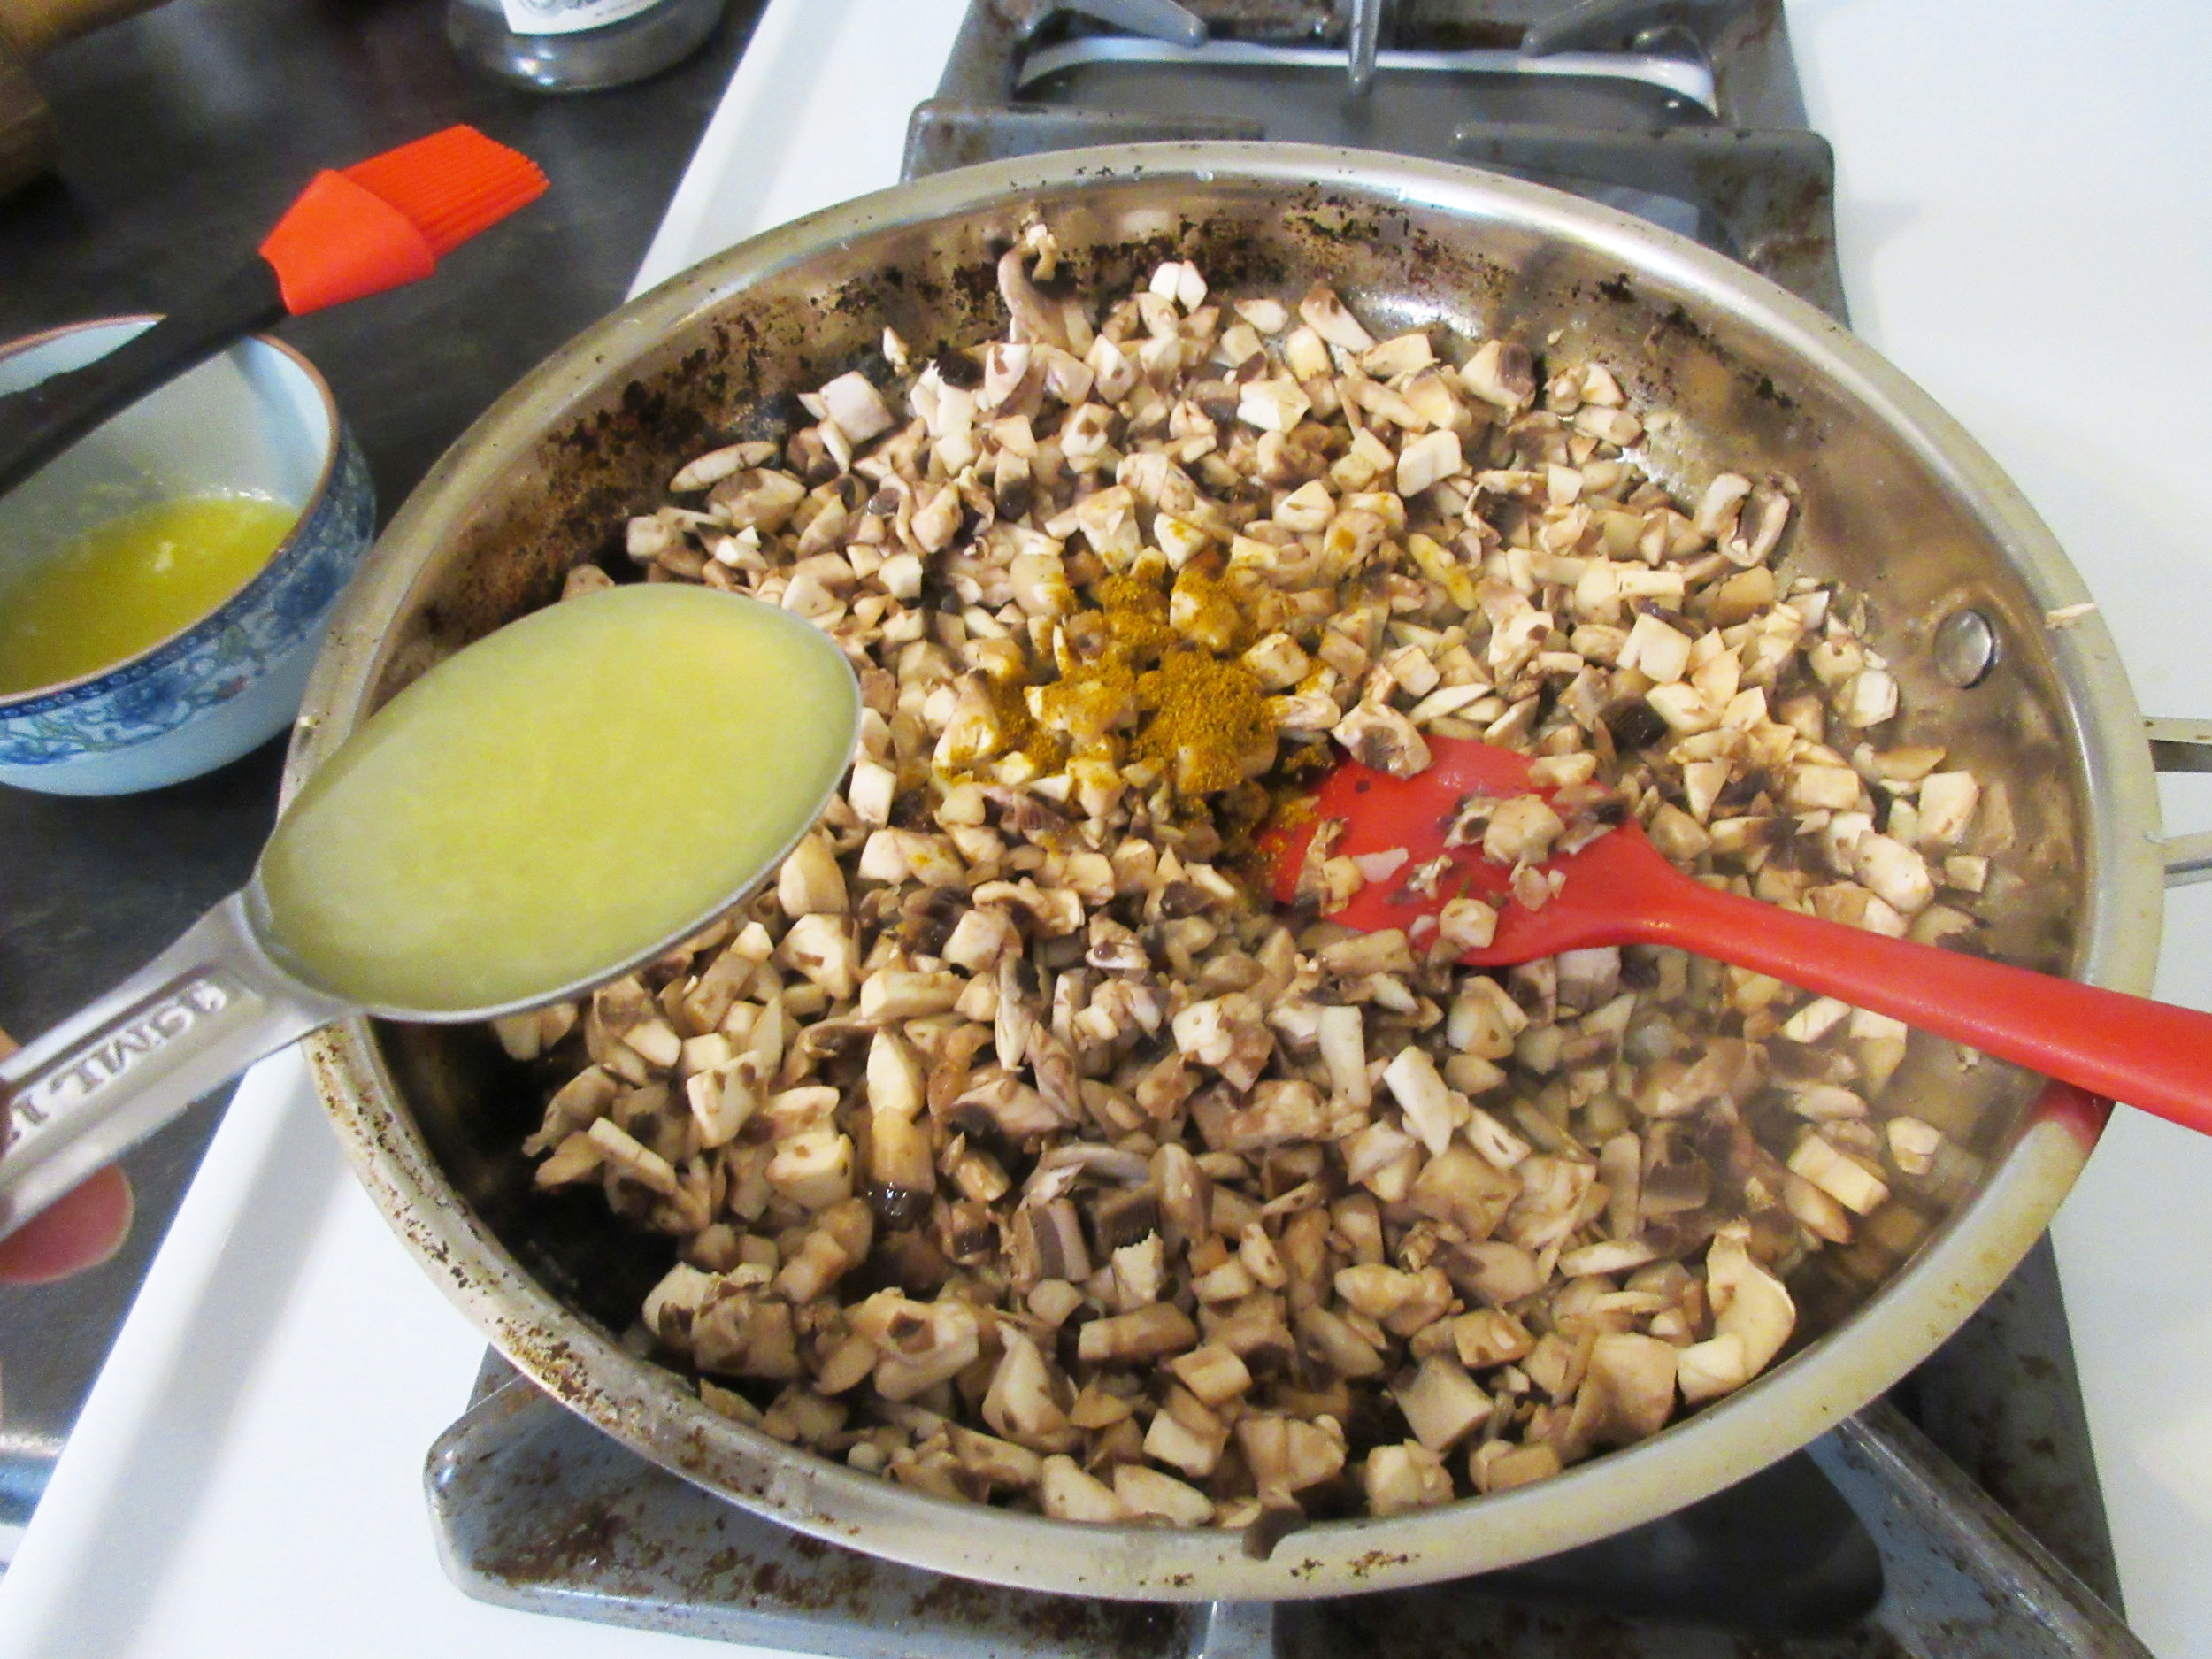
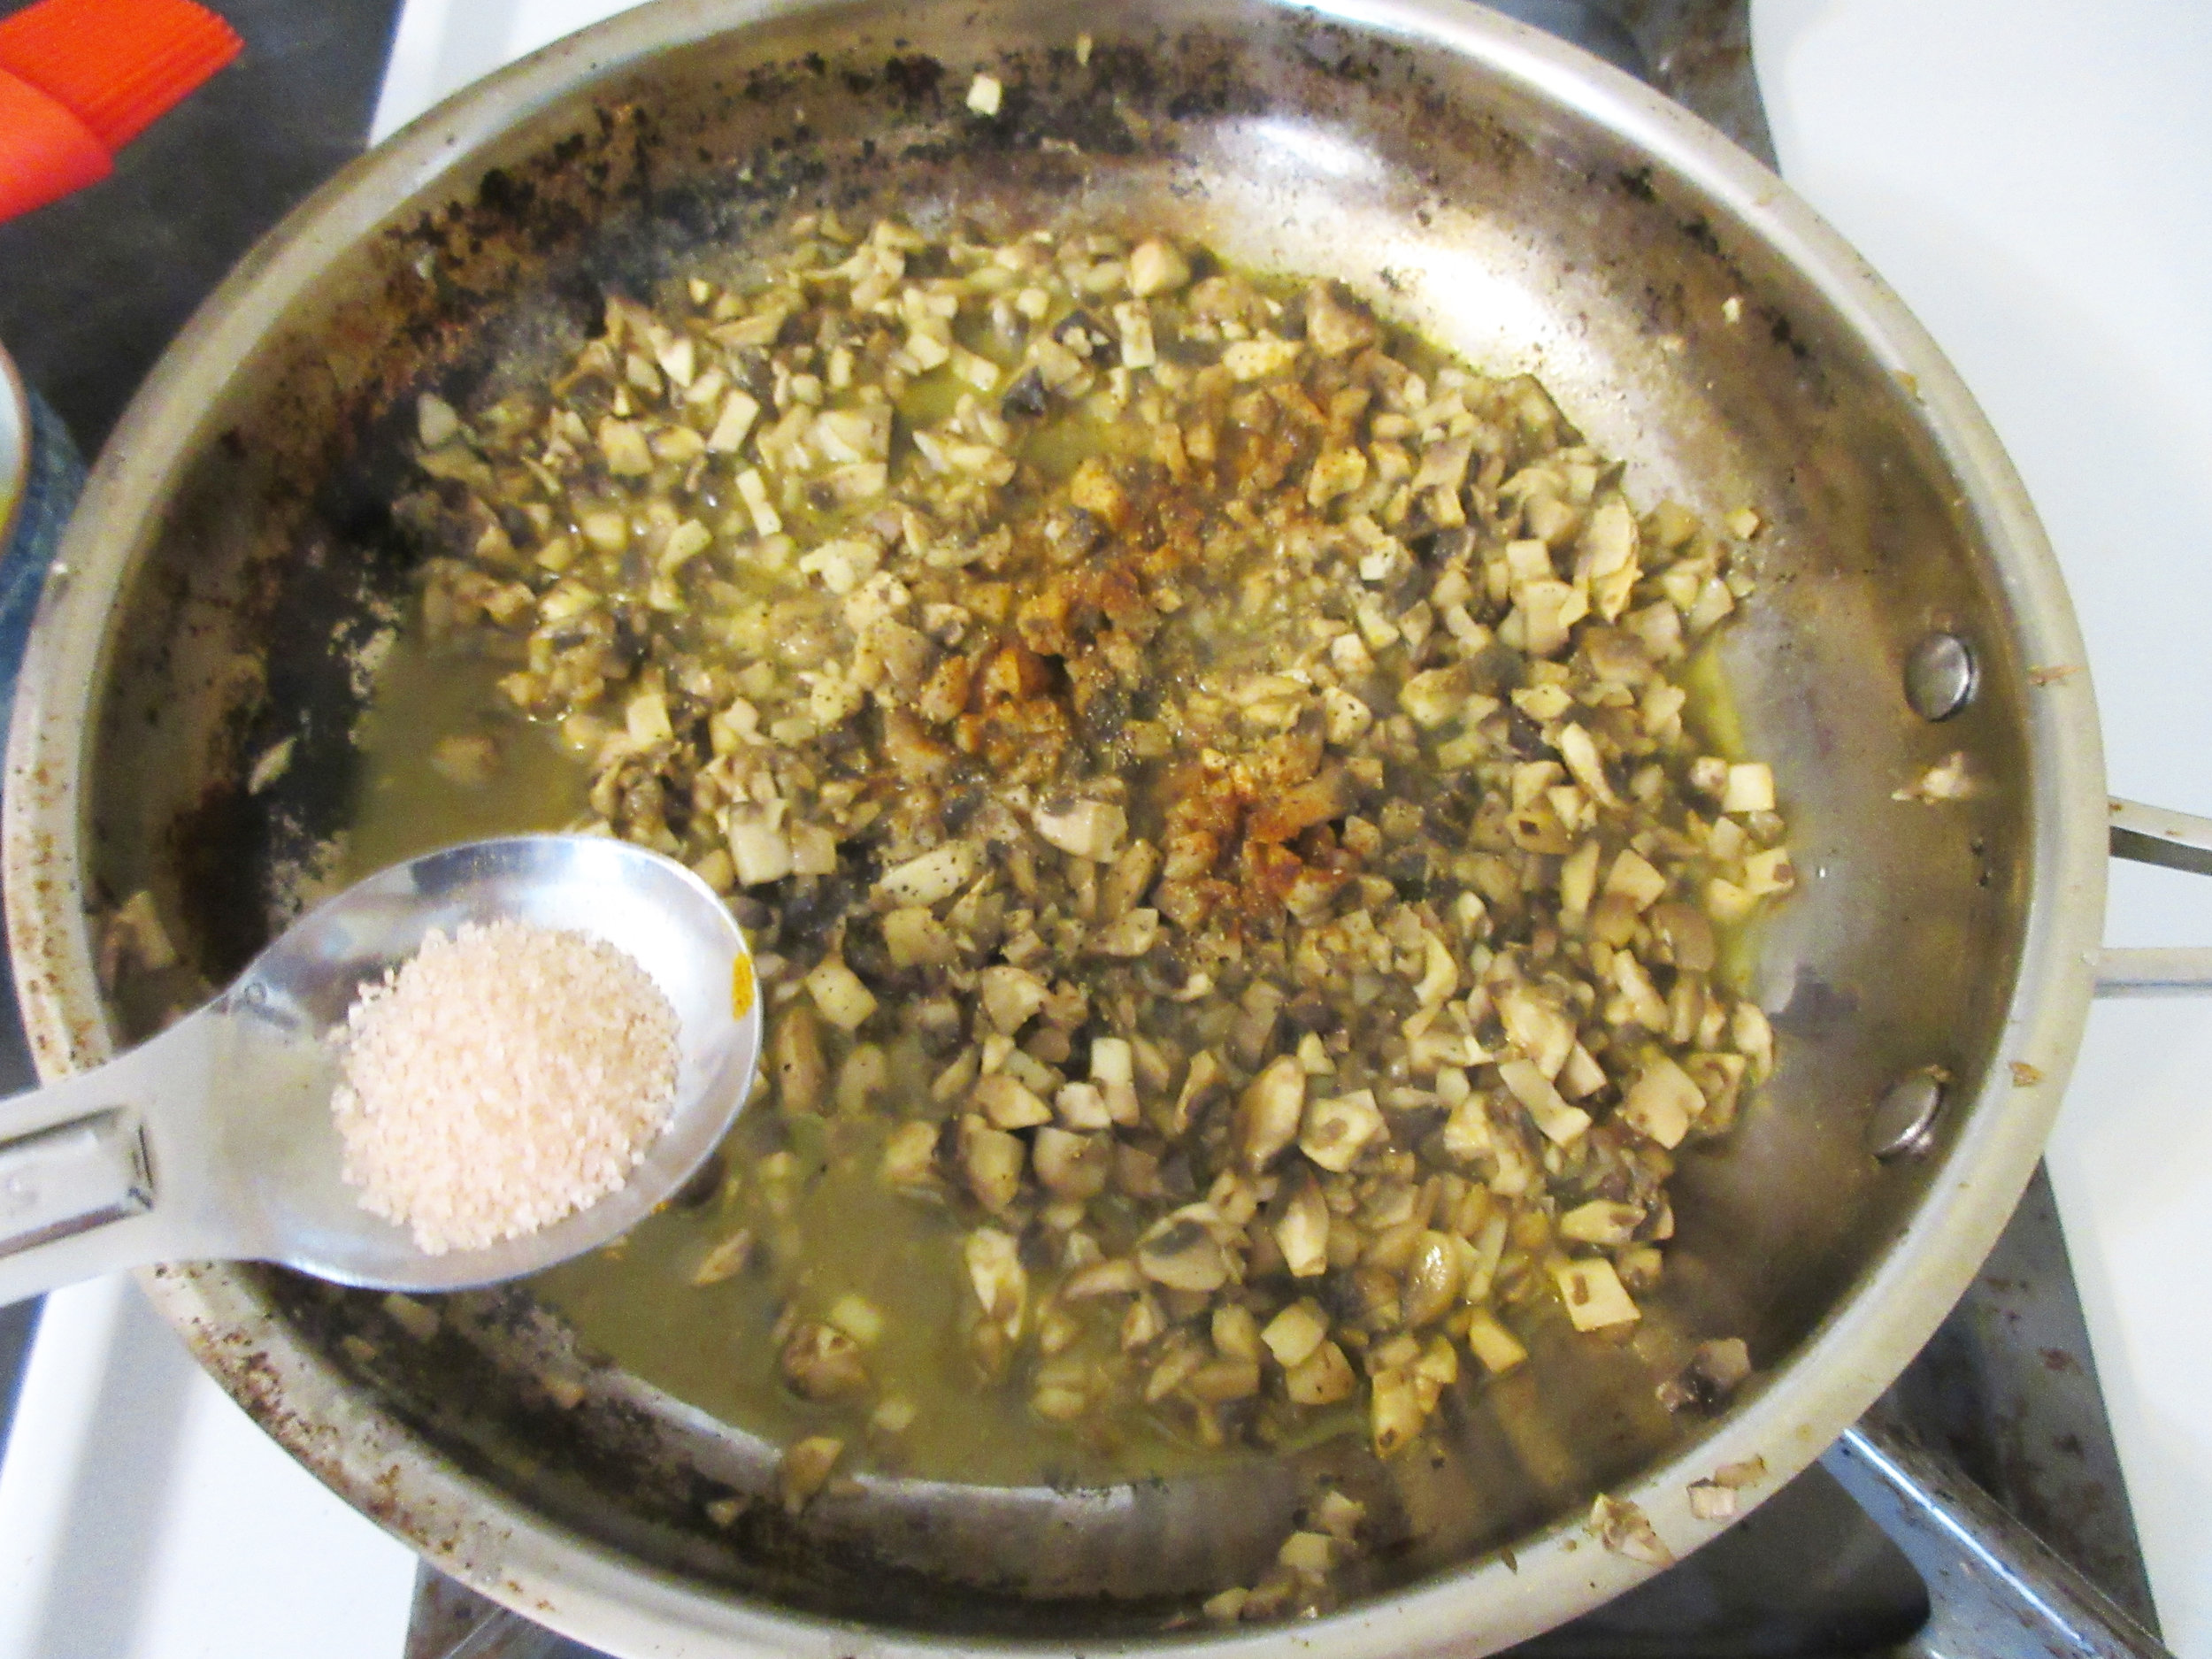
MUSHROOM ROLLS (12 to 14 rolls)
12 to 14 slices white bread
softened butter
½ pound fresh mushrooms, finely chopped
2 tablespoons melted butter
½ teaspoon curry powder
1 tablespoon lemon juice
½ teaspoon salt
dash of freshly ground black pepper
dash of cayenne pepper
additional melted butter
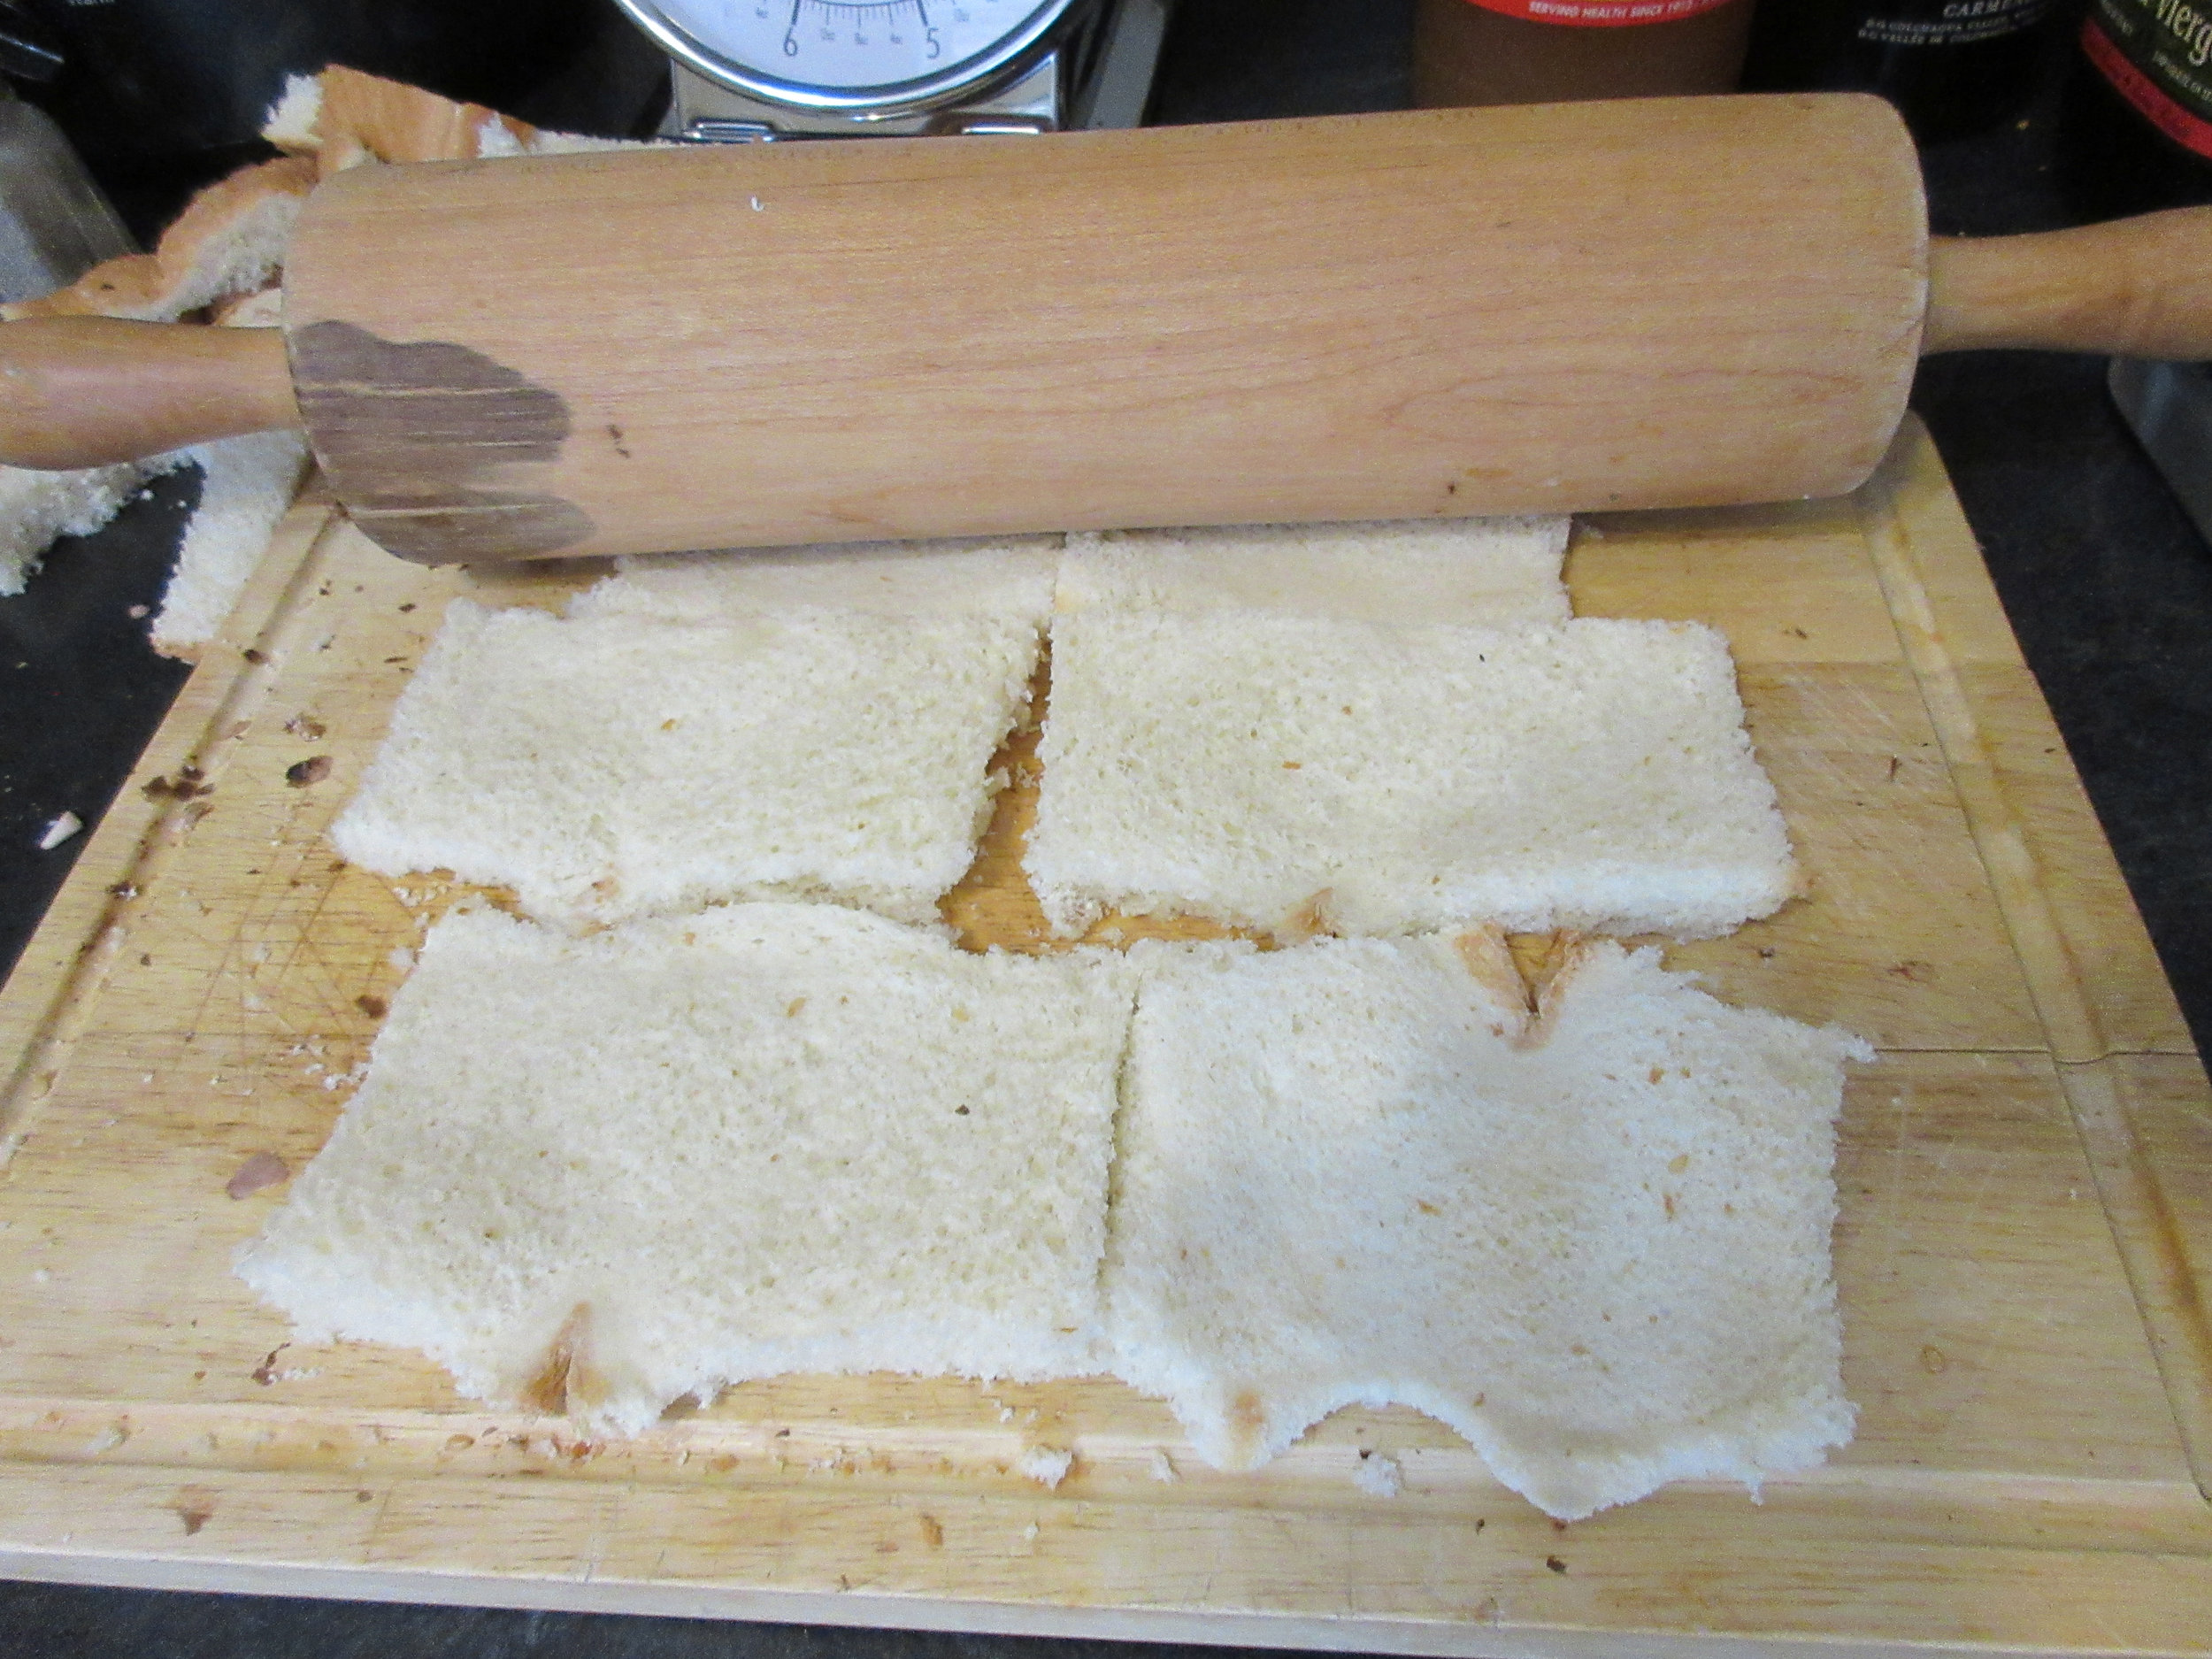
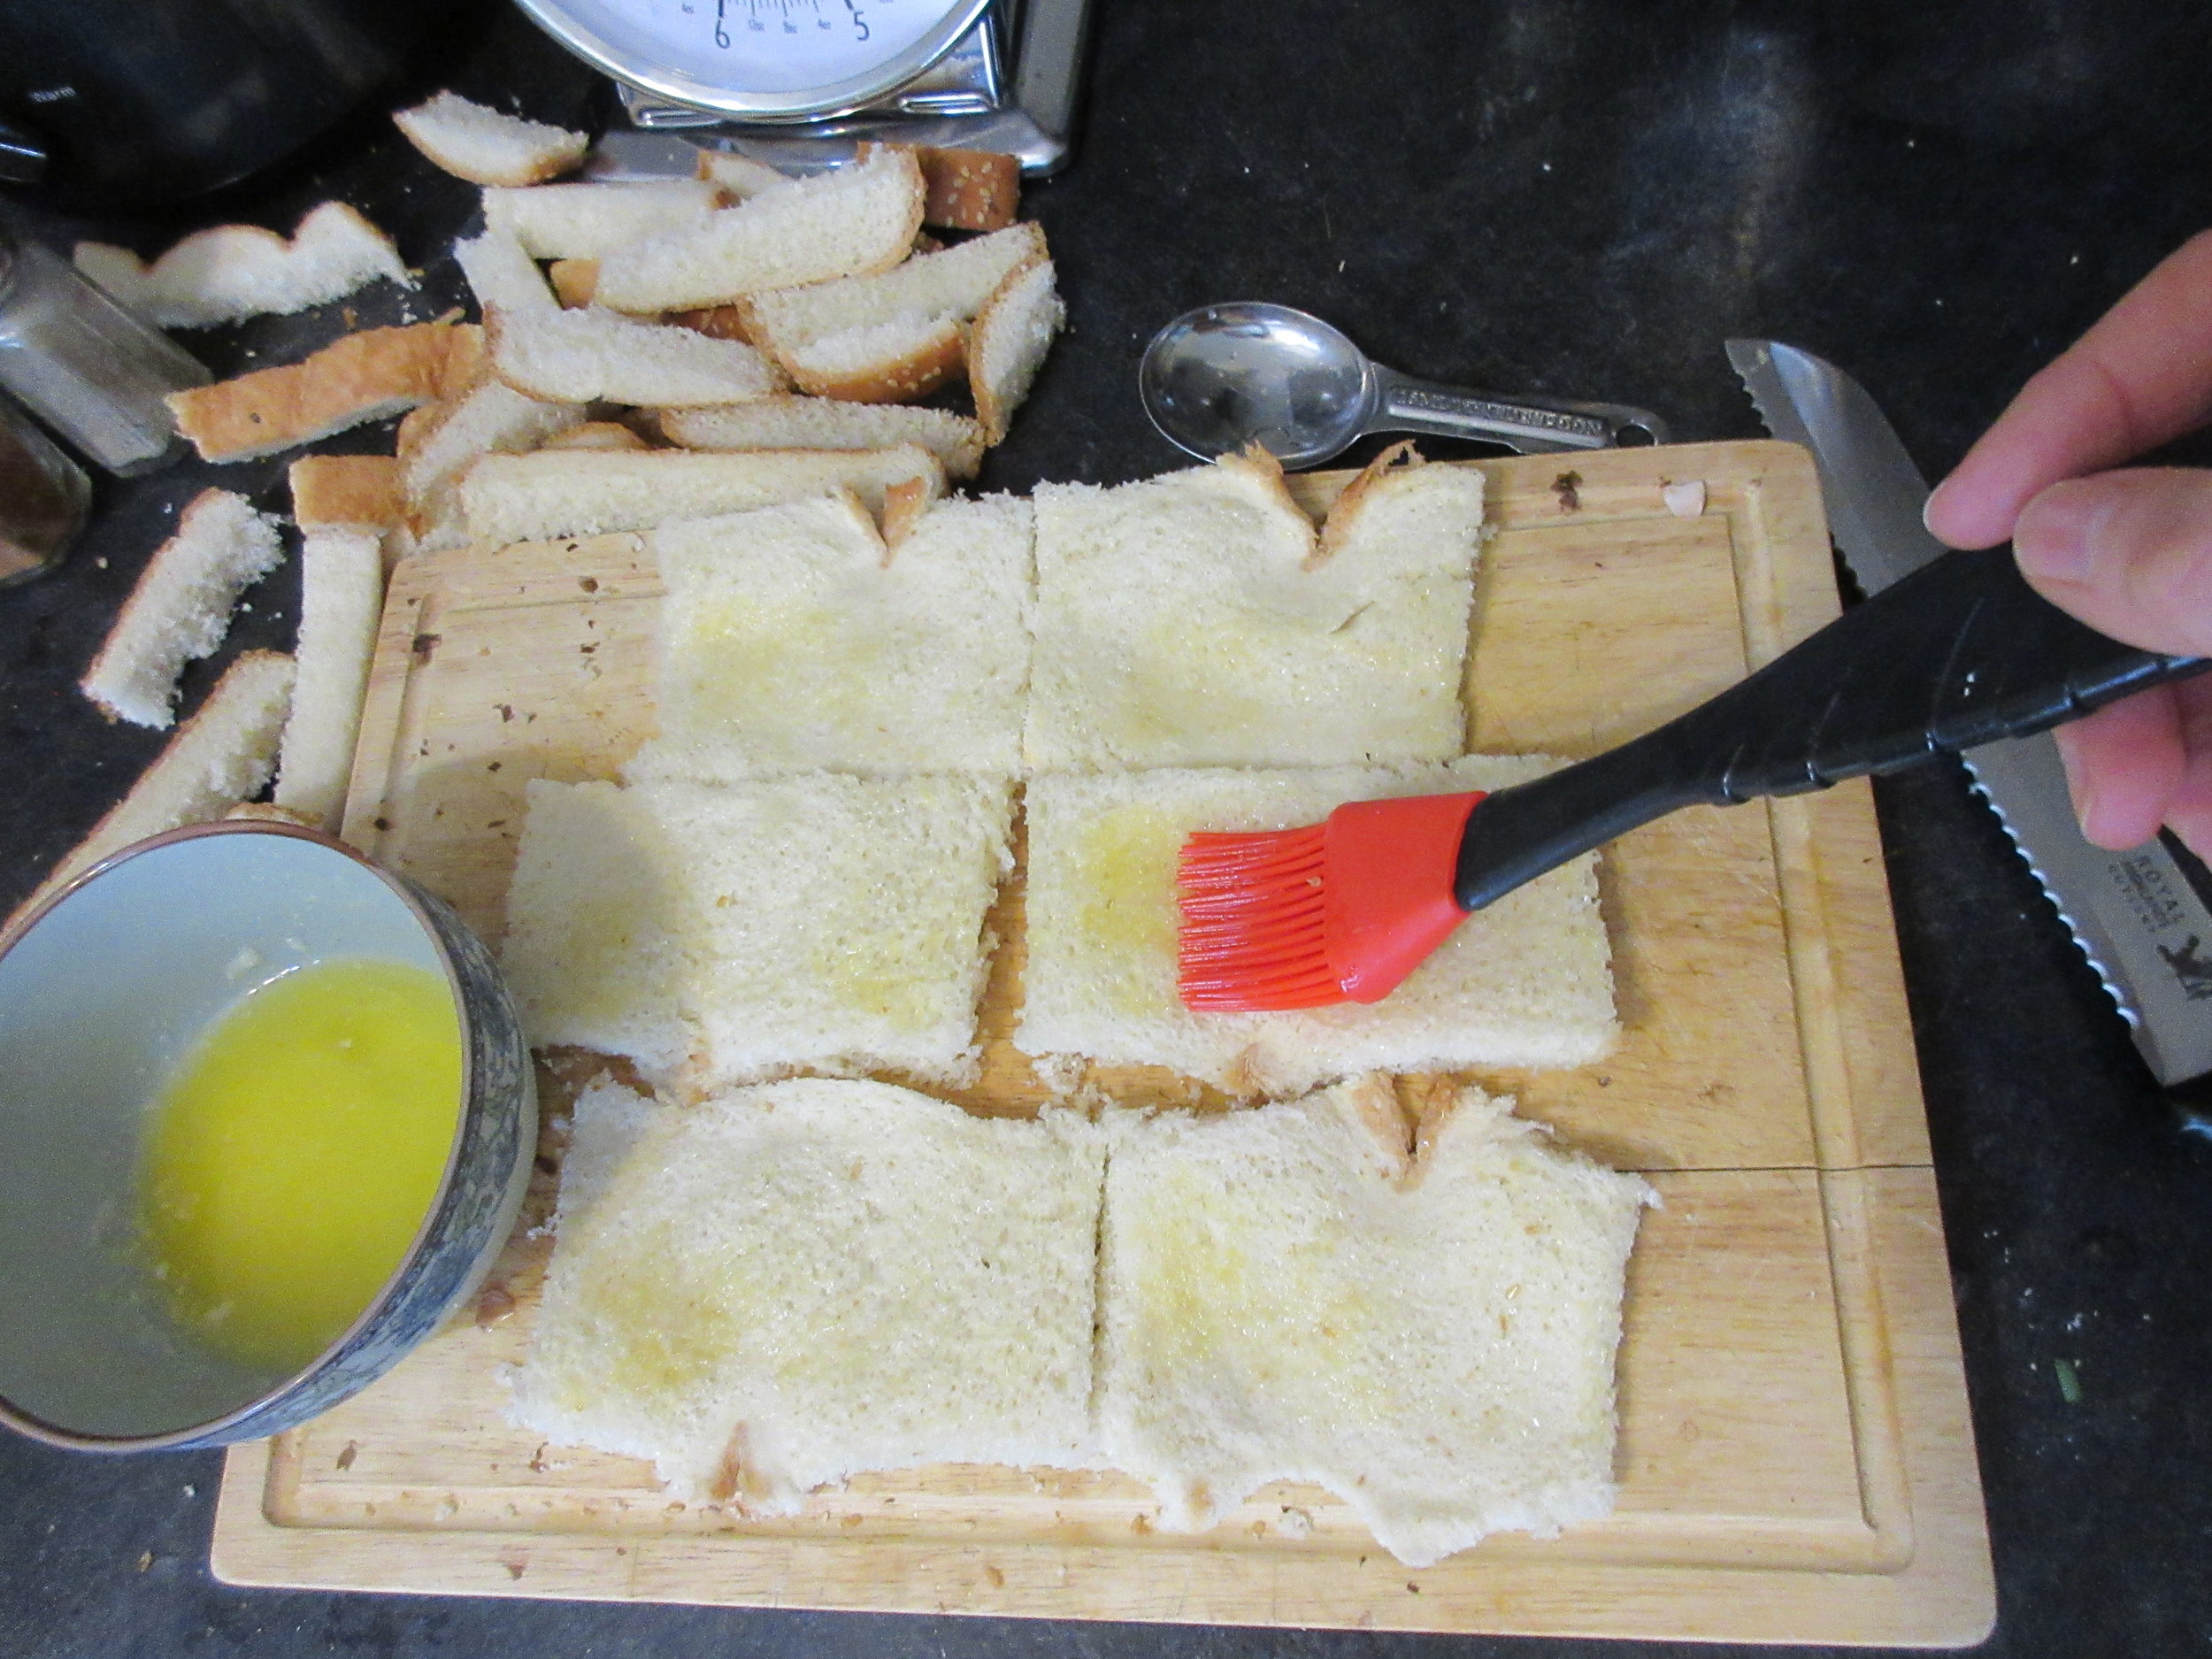
1. Remove the crusts from the bread slices and roll the slices to ⅛-inch thickness with a rolling pin. Spread the surface of each slice thinly with softened butter and set them aside.
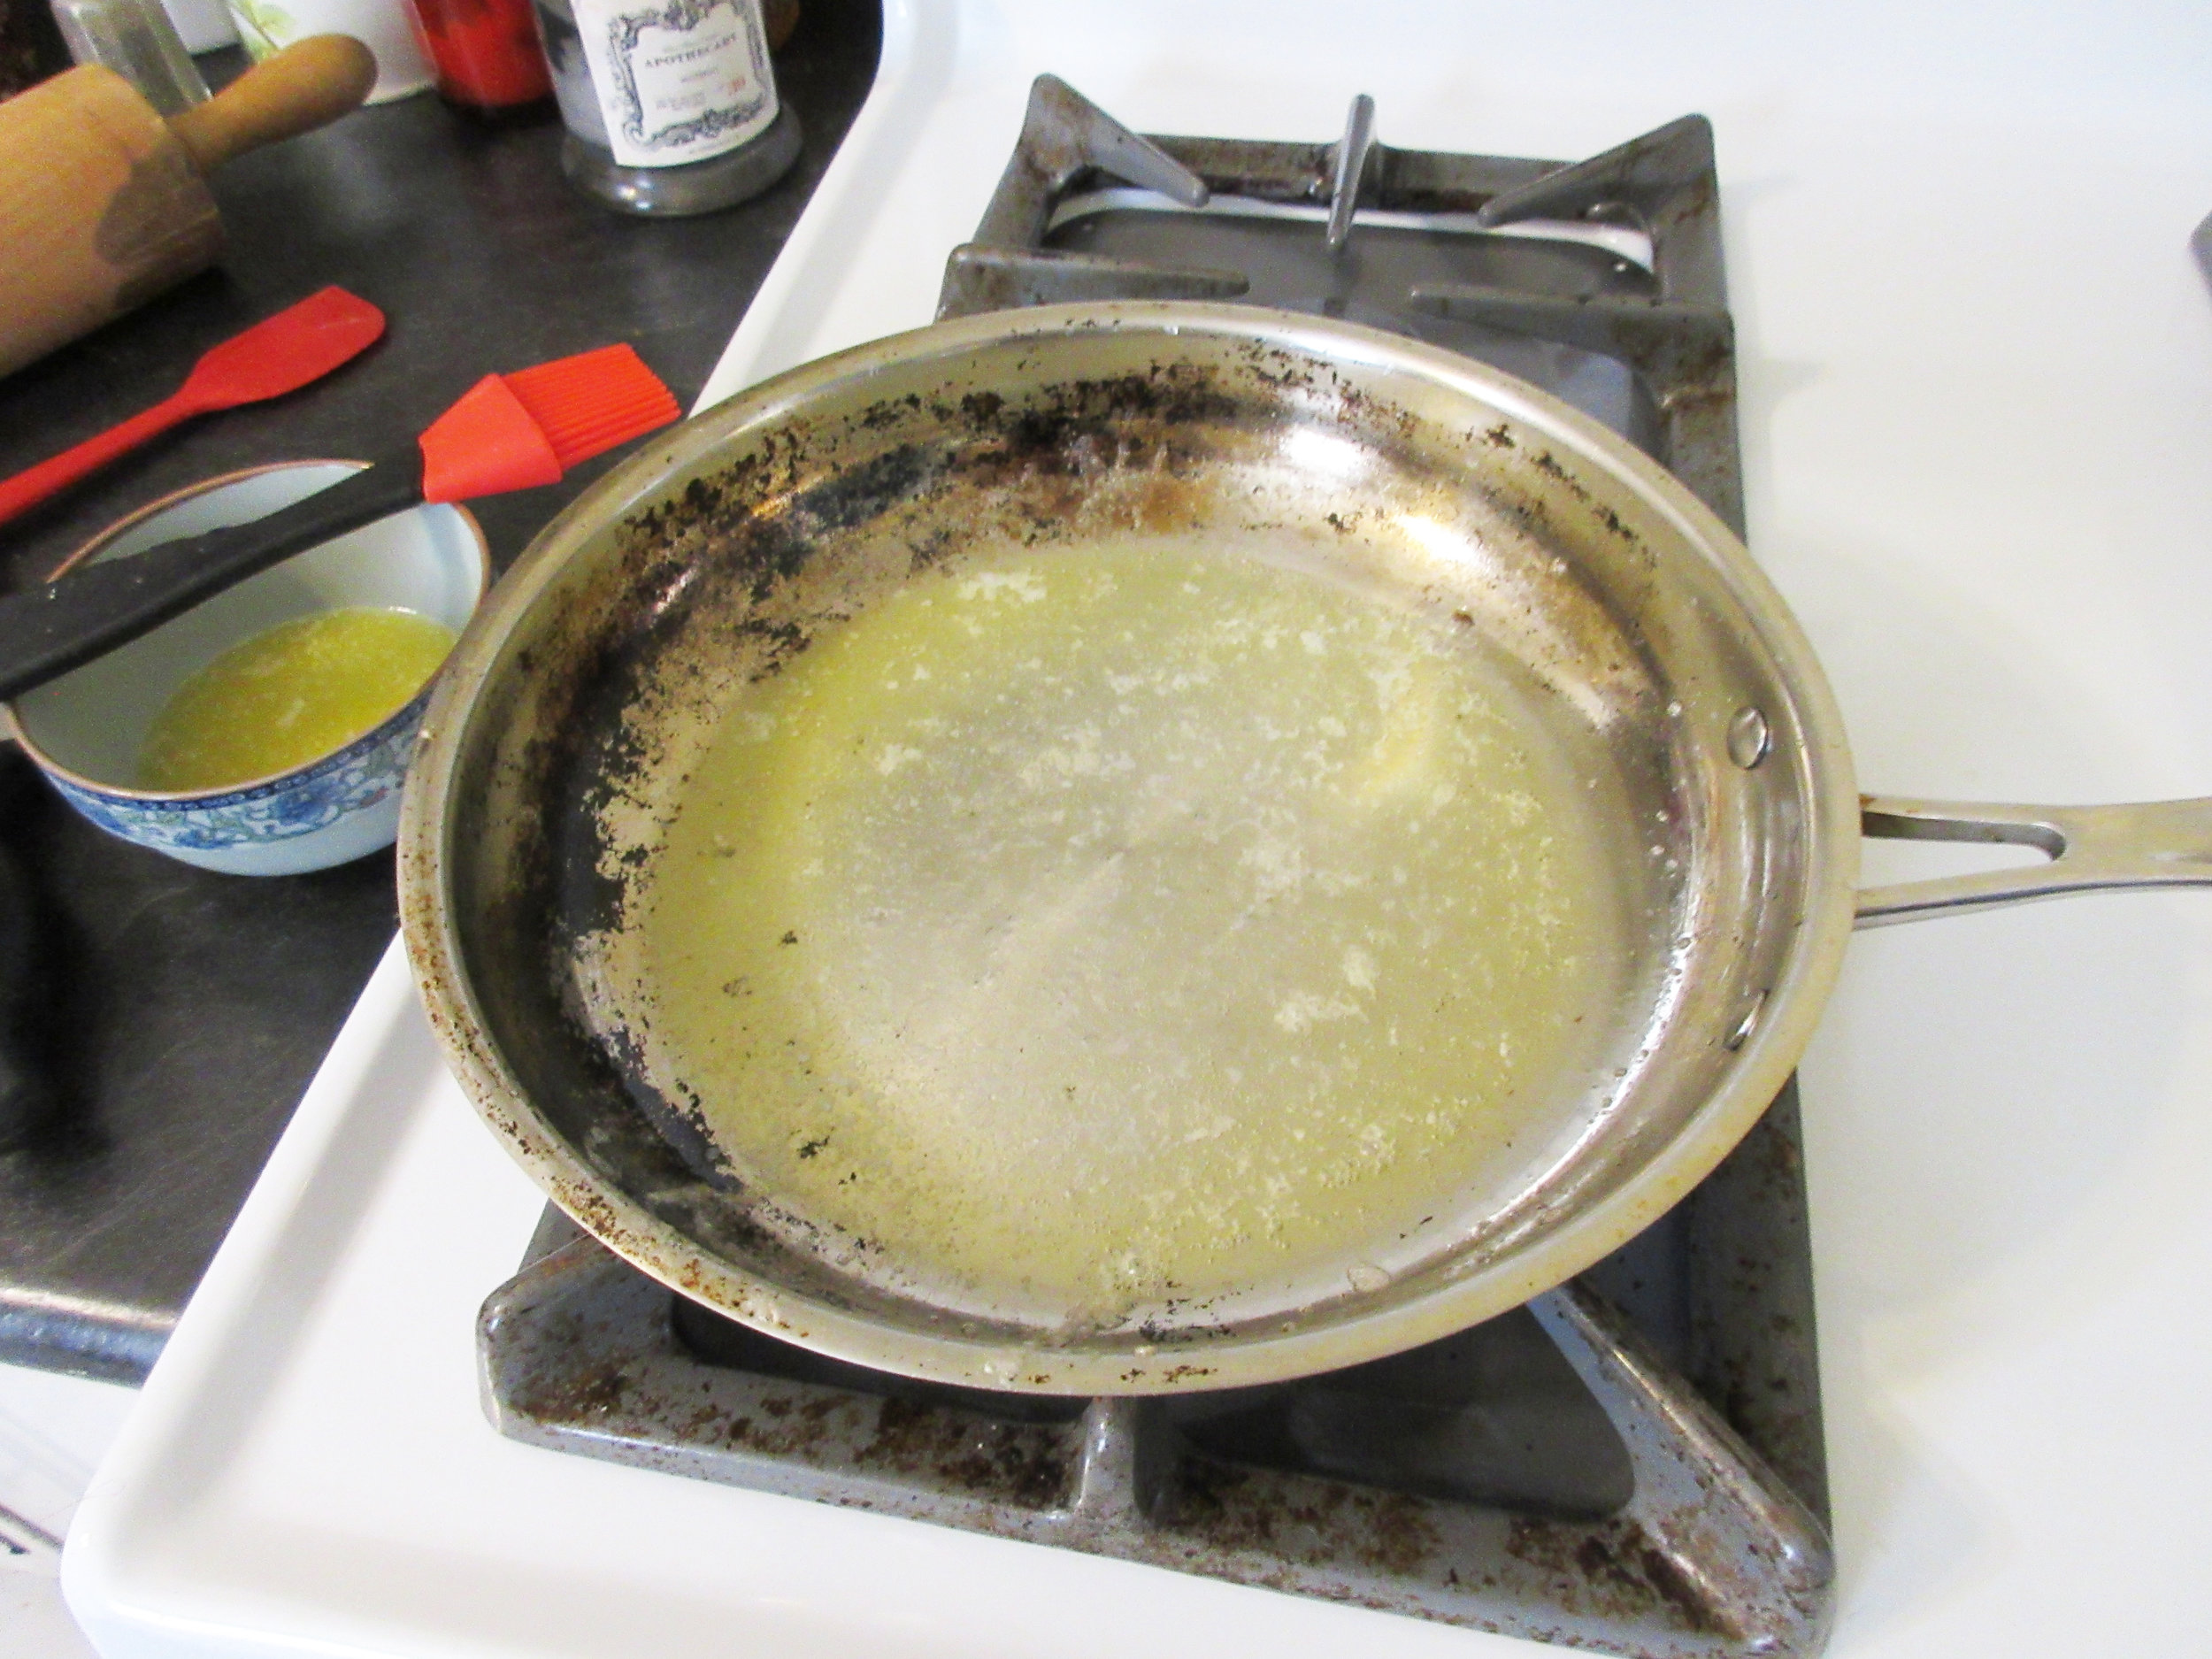
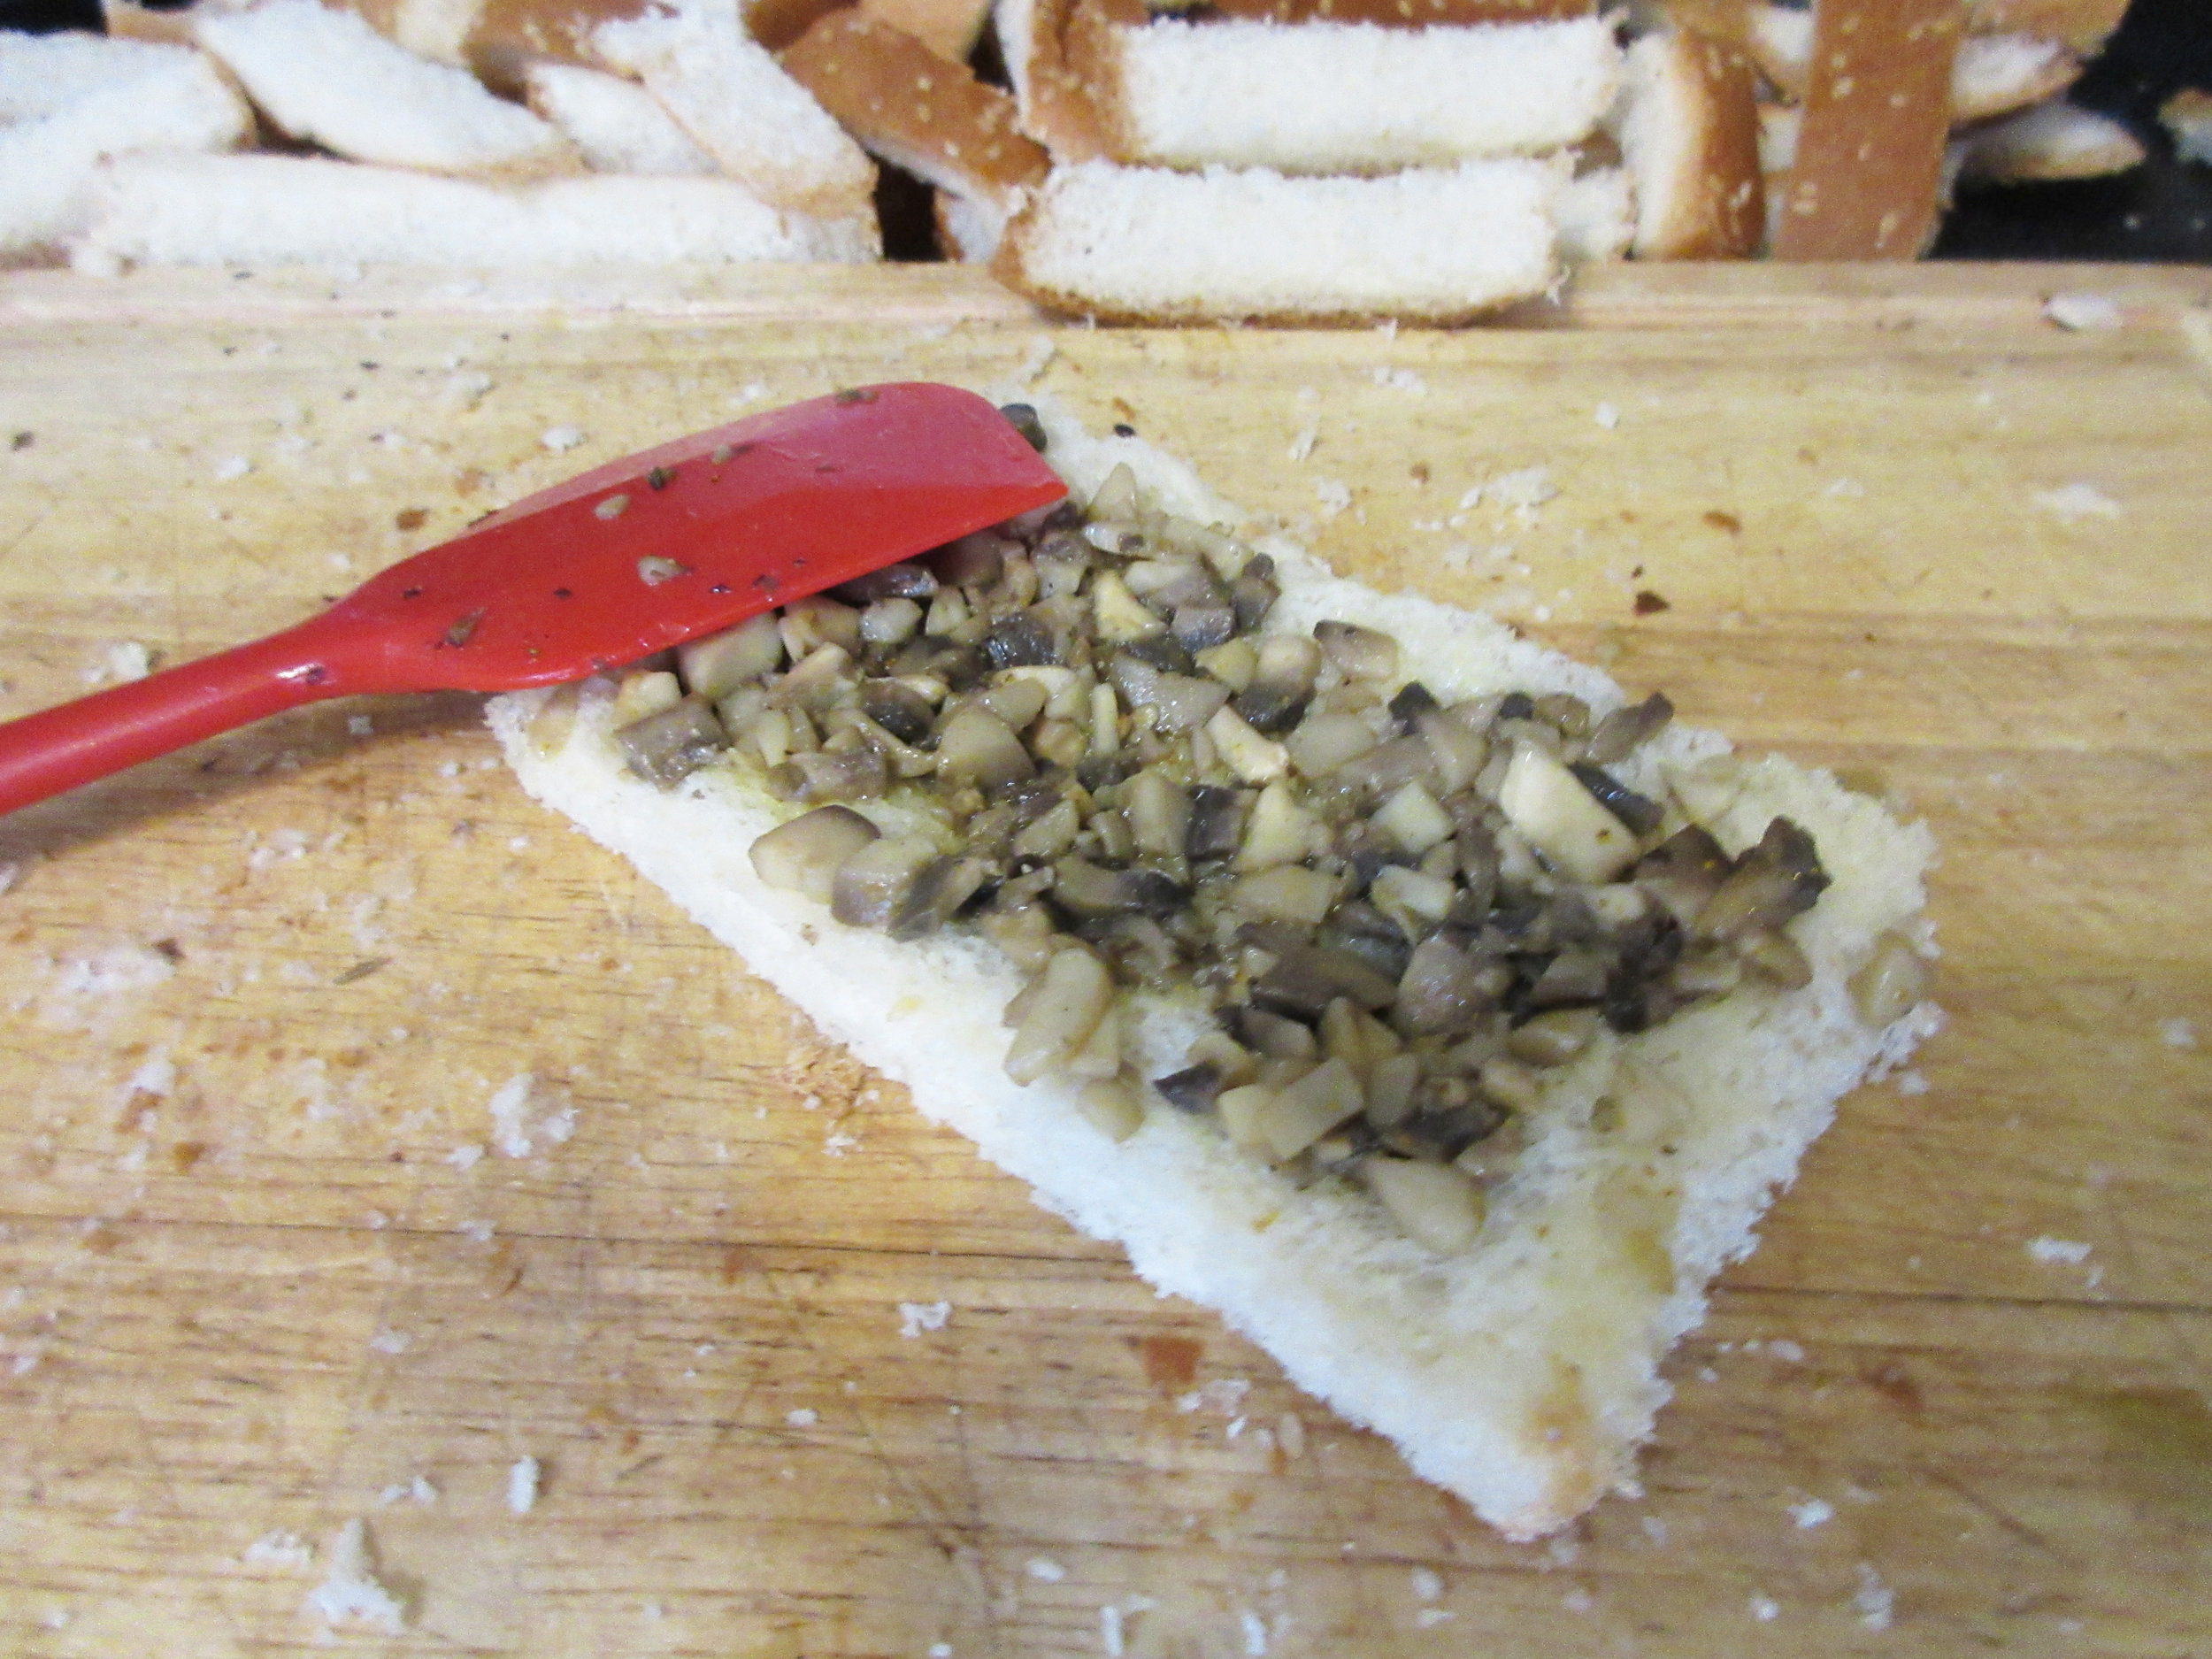
2. Sauté the mushrooms until tender in 2 tablespoons melted butter with the curry powder and lemon juice. Add the salt, pepper and cayenne.
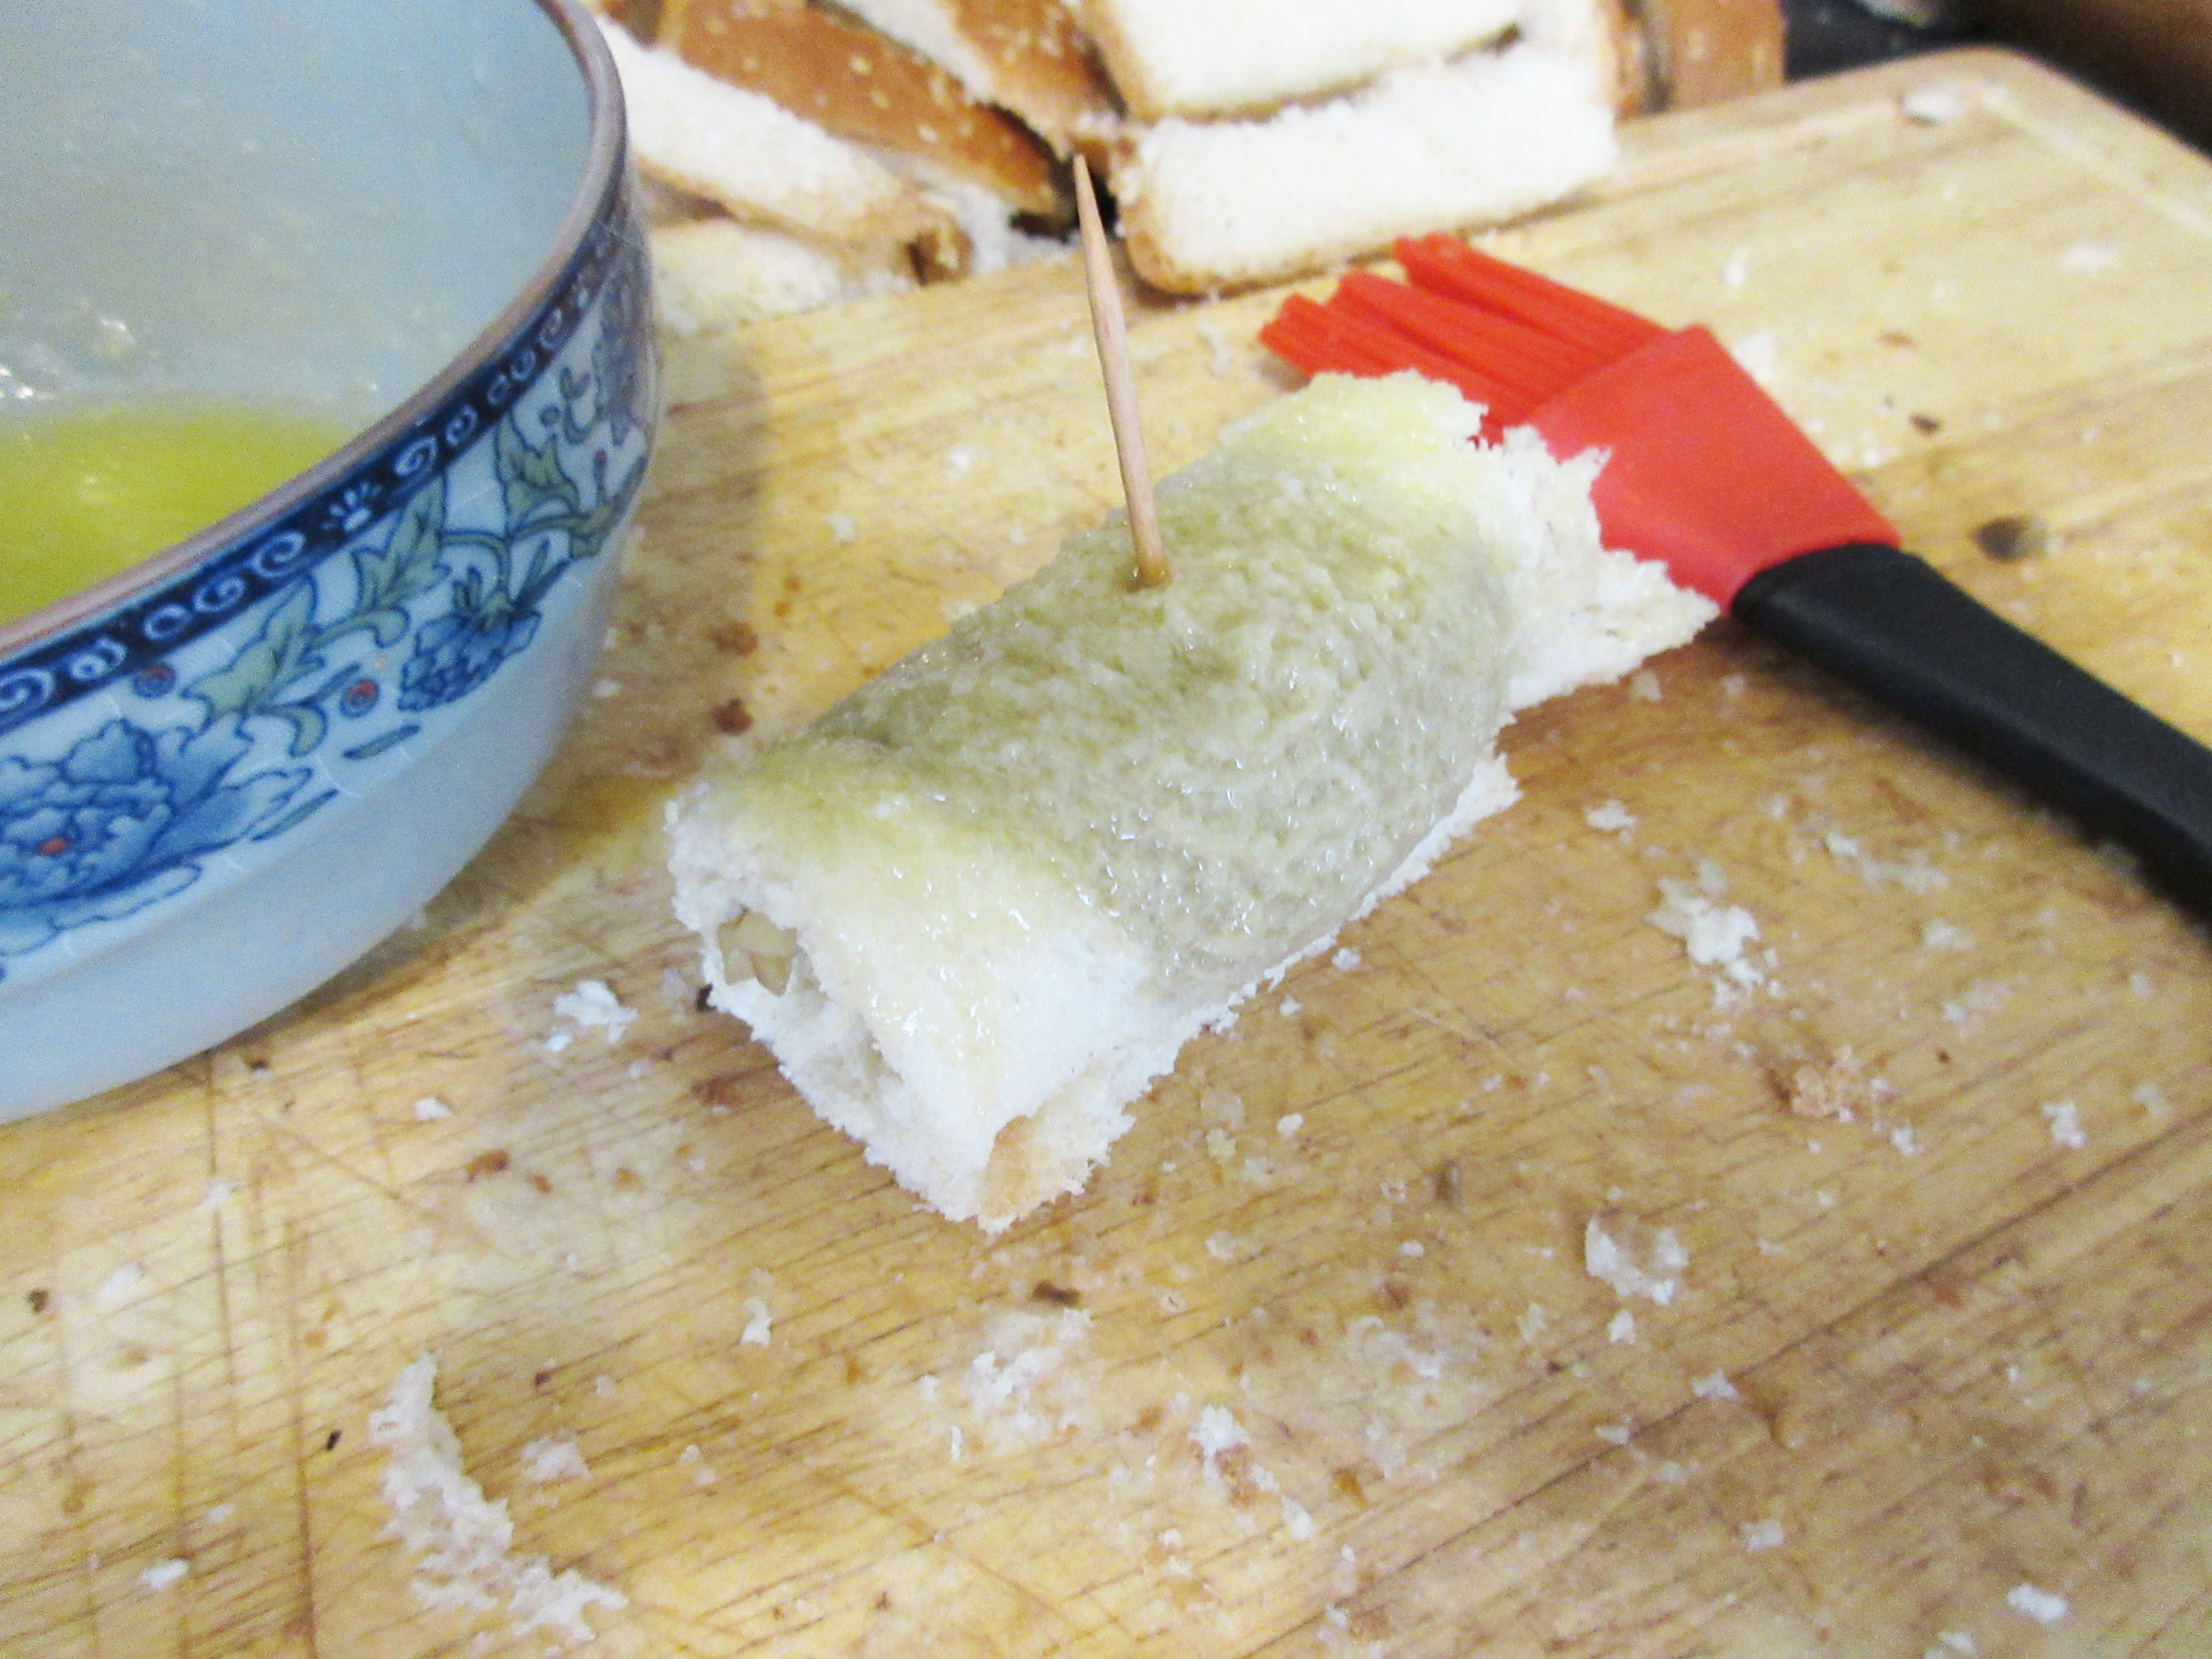
3. Spread about 1 tablespoon of this mixture over each slice of buttered bread. Roll like a jelly roll and fasten the ends with food picks. Place on baking sheets. Brush lightly with melted butter and bake in preheated oven (425˚F.) until lightly brown, about 15 minutes.
My Experience:
This recipe uses a 227g/8oz package of mushrooms.
I melted the butter for sauteeing and brushing at the same time in the frying pan.
My loaf of bread was rather small, so I prepared 16 slices. I only had enough filling for 14 small slices of bread, probably because I was too generous with the mushroom filling in the beginning. Stick to the suggested 1 tbsp of mushroom filling per slice.
The bread didn't remain flat for long. It almost instantly poofed back up and refilled with air! I re-rolled the bread slices several times as I made the recipe.
I brushed the bread with melted butter both times the recipe suggests adding butter to the bread. Now that I read the recipe again, I notice that Chef Verdon meant that you should spread softened butter on the bread with a knife before adding the mushroom filling. No matter, the most important thing is that a lot of butter ended up in the rolls!
I added some of the mushroom juice to the bread when I was making the first few rolls. These rolls were by far the most flavourful of the batch, but they were still mushy when they came out of the oven.
I placed some of the rolls the the rolling edge down on the cookie sheet, and some of them with the edges up. There wasn't a difference between how well they stayed together after they were baked (none of them unrolled). The rolls with the edge facing down did have a tidier look and the rolls with the edge facing up had a little jaunty swoop on the top.
The recipe doesn't specify if you should serve it warm or cold, so I tried the Mushroom Rolls at both temperatures. They taste better warm, but are still good cold.
I put all the cut-off crusts in the freezer. I'll use them up the next time I make a turkey stuffing, bread crumbs or bread pudding.

I remember one morning in 1981. I had just turned 6 years old. I am the youngest of four children, with my sisters & brother eight, eleven and twelve years older than me. Needless to say, those days I was generally awake well before anyone else, and was constantly being told that I was up too early and had to go back to bed . Or at least, that's my memory of my early childhood mornings!
But this particular morning, I woke up to find that nobody was sleeping in their beds. I came downstairs to find everyone in the living room in their pyjamas, wrapped in blankets, with breakfast in front on them on TV trays. They were watching television together.
I remember being very confused by their strange behaviour. The first thing I remember about what was on the TV was a lady in a giant white princess dress. Everyone tried to explain to me that it was a wedding that was happening in England, and it was happening so early in the morning because England was very far away and time was different there. They also tried to explain to me who was getting married – Prince Charles and Diana Spencer. That morning, I probably learned for the first time about the existence of England, time zones & the British Monarchy.
I think I remember the ceremony, people riding in carriages, waving to the crowds, and also everyone gathered on the balcony together. I'm not sure. These memories could also have been gained later on from all the times that I saw clips of that day being replayed. What I certainly remember is the feeling of togetherness with my family and knowing that I was taking part in a special event. I loved the excitement of a break in our usual daily routine and the very exciting fact that we were eating our breakfast on TV trays in the living room, which was normally quite against the rules!
Fast forward about 37 years to this morning. I was awoken by my cat Rhonda at 6:30, who was sitting on my chest, purring loudly and licking my face. I didn't plan to wake up early this morning to watch the wedding of Prince Harry & Meghan Markle, but I did, thanks to my furry alarm clock.
I watched the ceremony stretched out on the couch in my living room, while drinking coffee & snuggling with my cats. Having breakfast in the living room is the rule in my household, because I make the rules these days. Steve was still sleeping upstairs, but thanks to facebook and instagram, I knew that I wasn't alone taking part in this collective event.
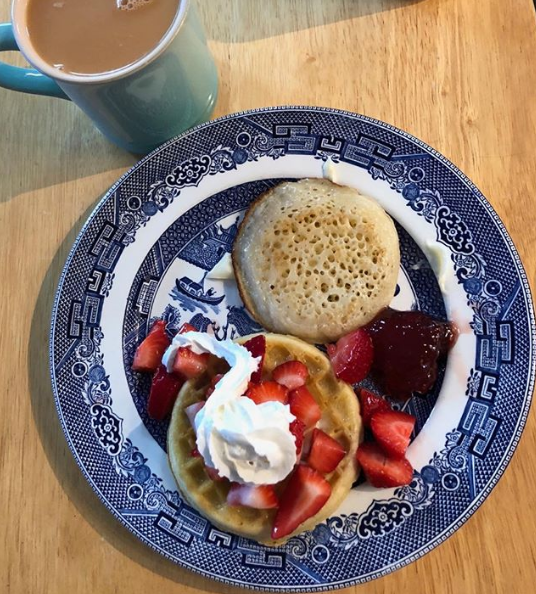
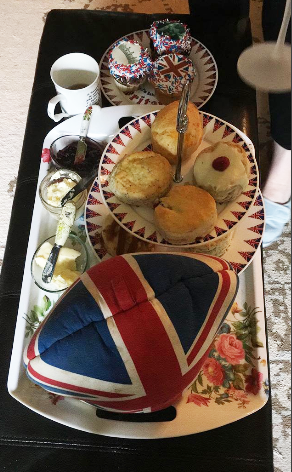
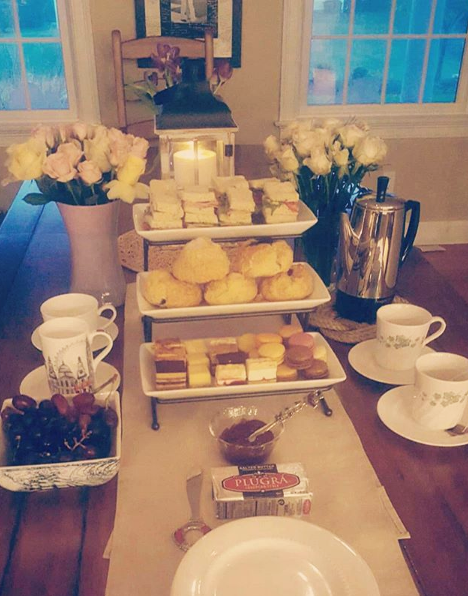
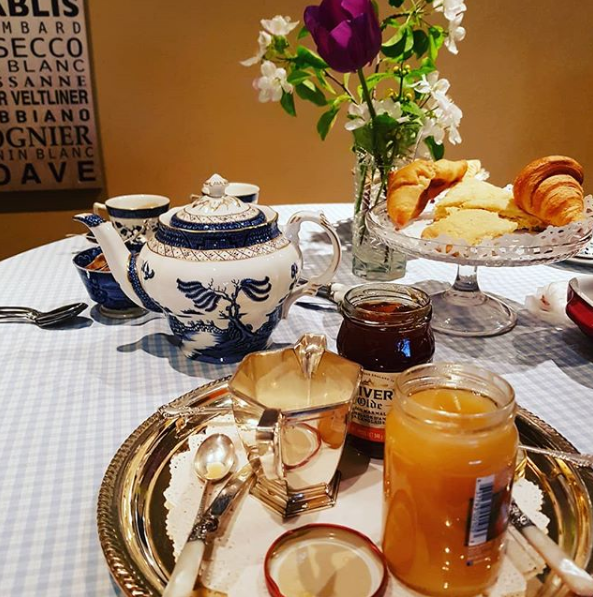
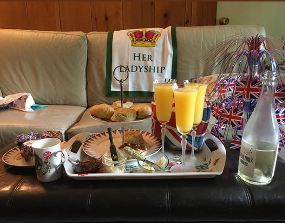
I was tickled to see my friends' pictures of the food they prepared to celebrate the occasion. Have a look above at some delectable food photos courtesy of my friends' Instagram accounts. In these pictures, I see ideas held by Canadians & Americans about British food. There are also memories waiting to be made along with the food on the plates, just like were memories nestled among my juice and cereal bowl on that TV table 37 years ago.
I didn't know that I'd be taking in the royal festivities this morning, so I didn't prepare any food especially for it. I did, however, make these Mushroom Rolls a few days ago and they've been waiting in the queue since then to be added to my blog. When I saw everyone's Royal Wedding smorgasbords this morning, I knew I was going to have Mushroom Rolls on my blog by the end of the day. They'd be perfect for your next British Tea, or as an appetizer at your next celebration.

Read the Cookbook:
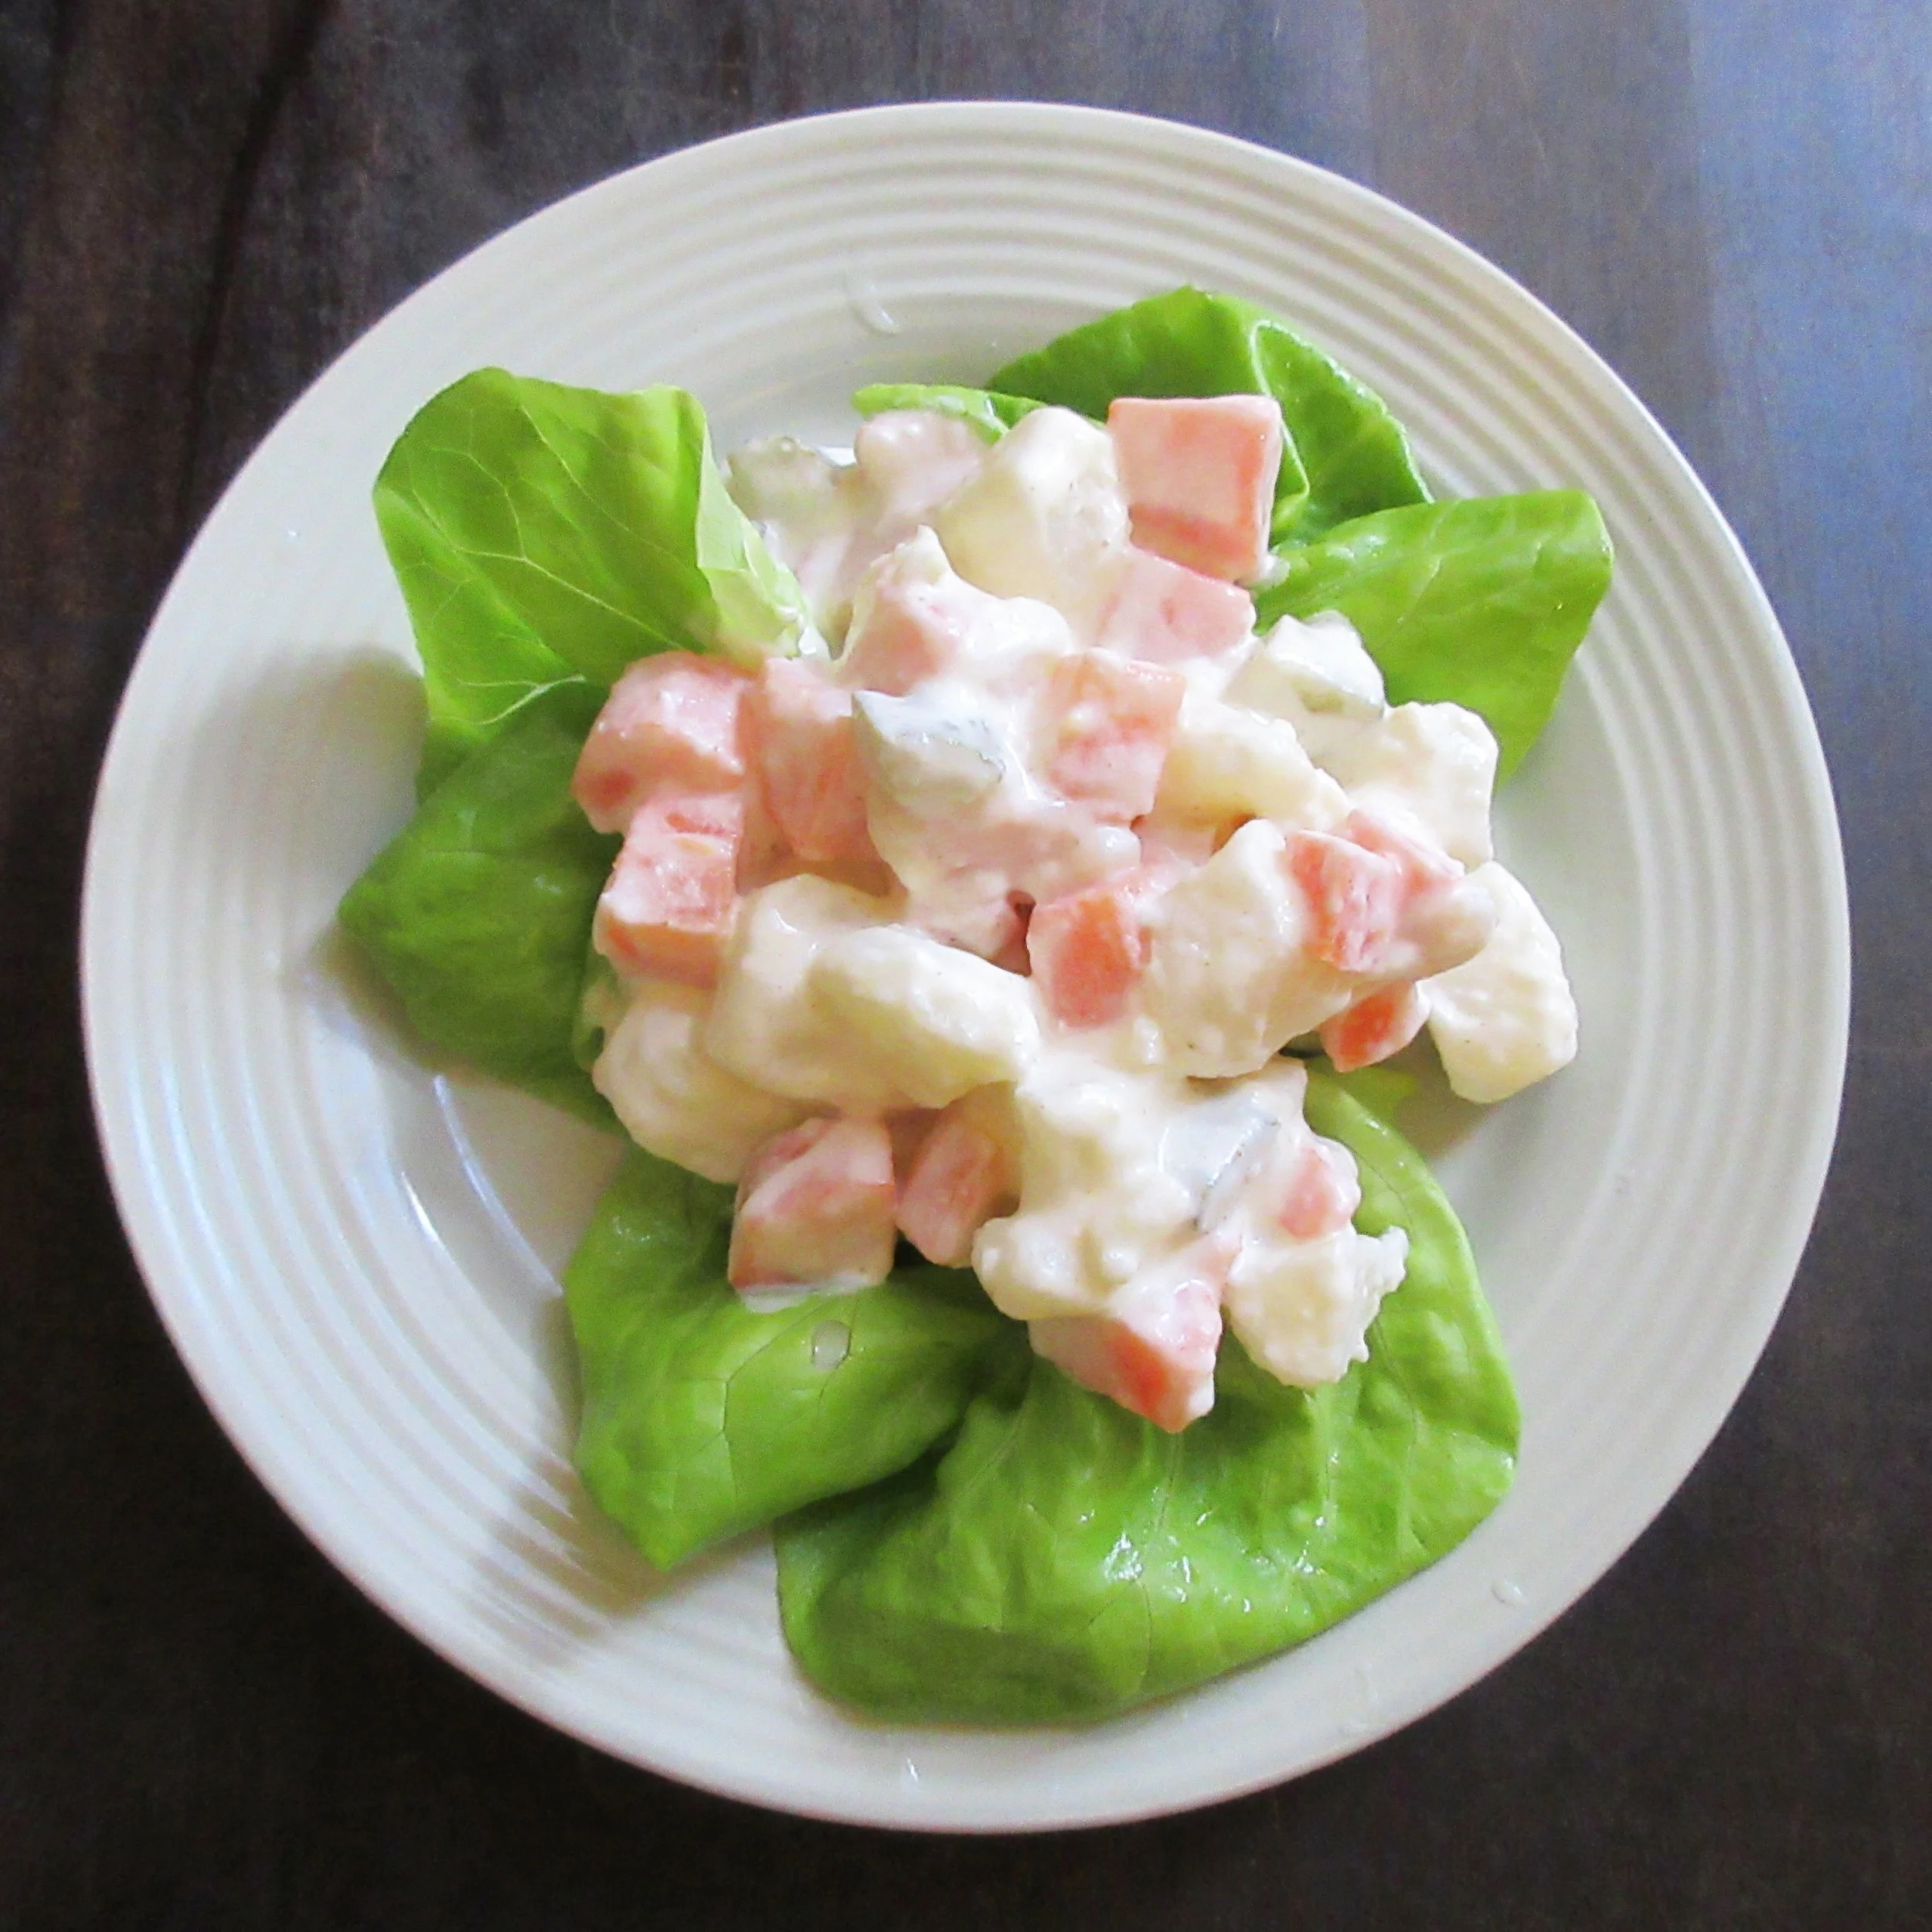
Potato Carrot Salad
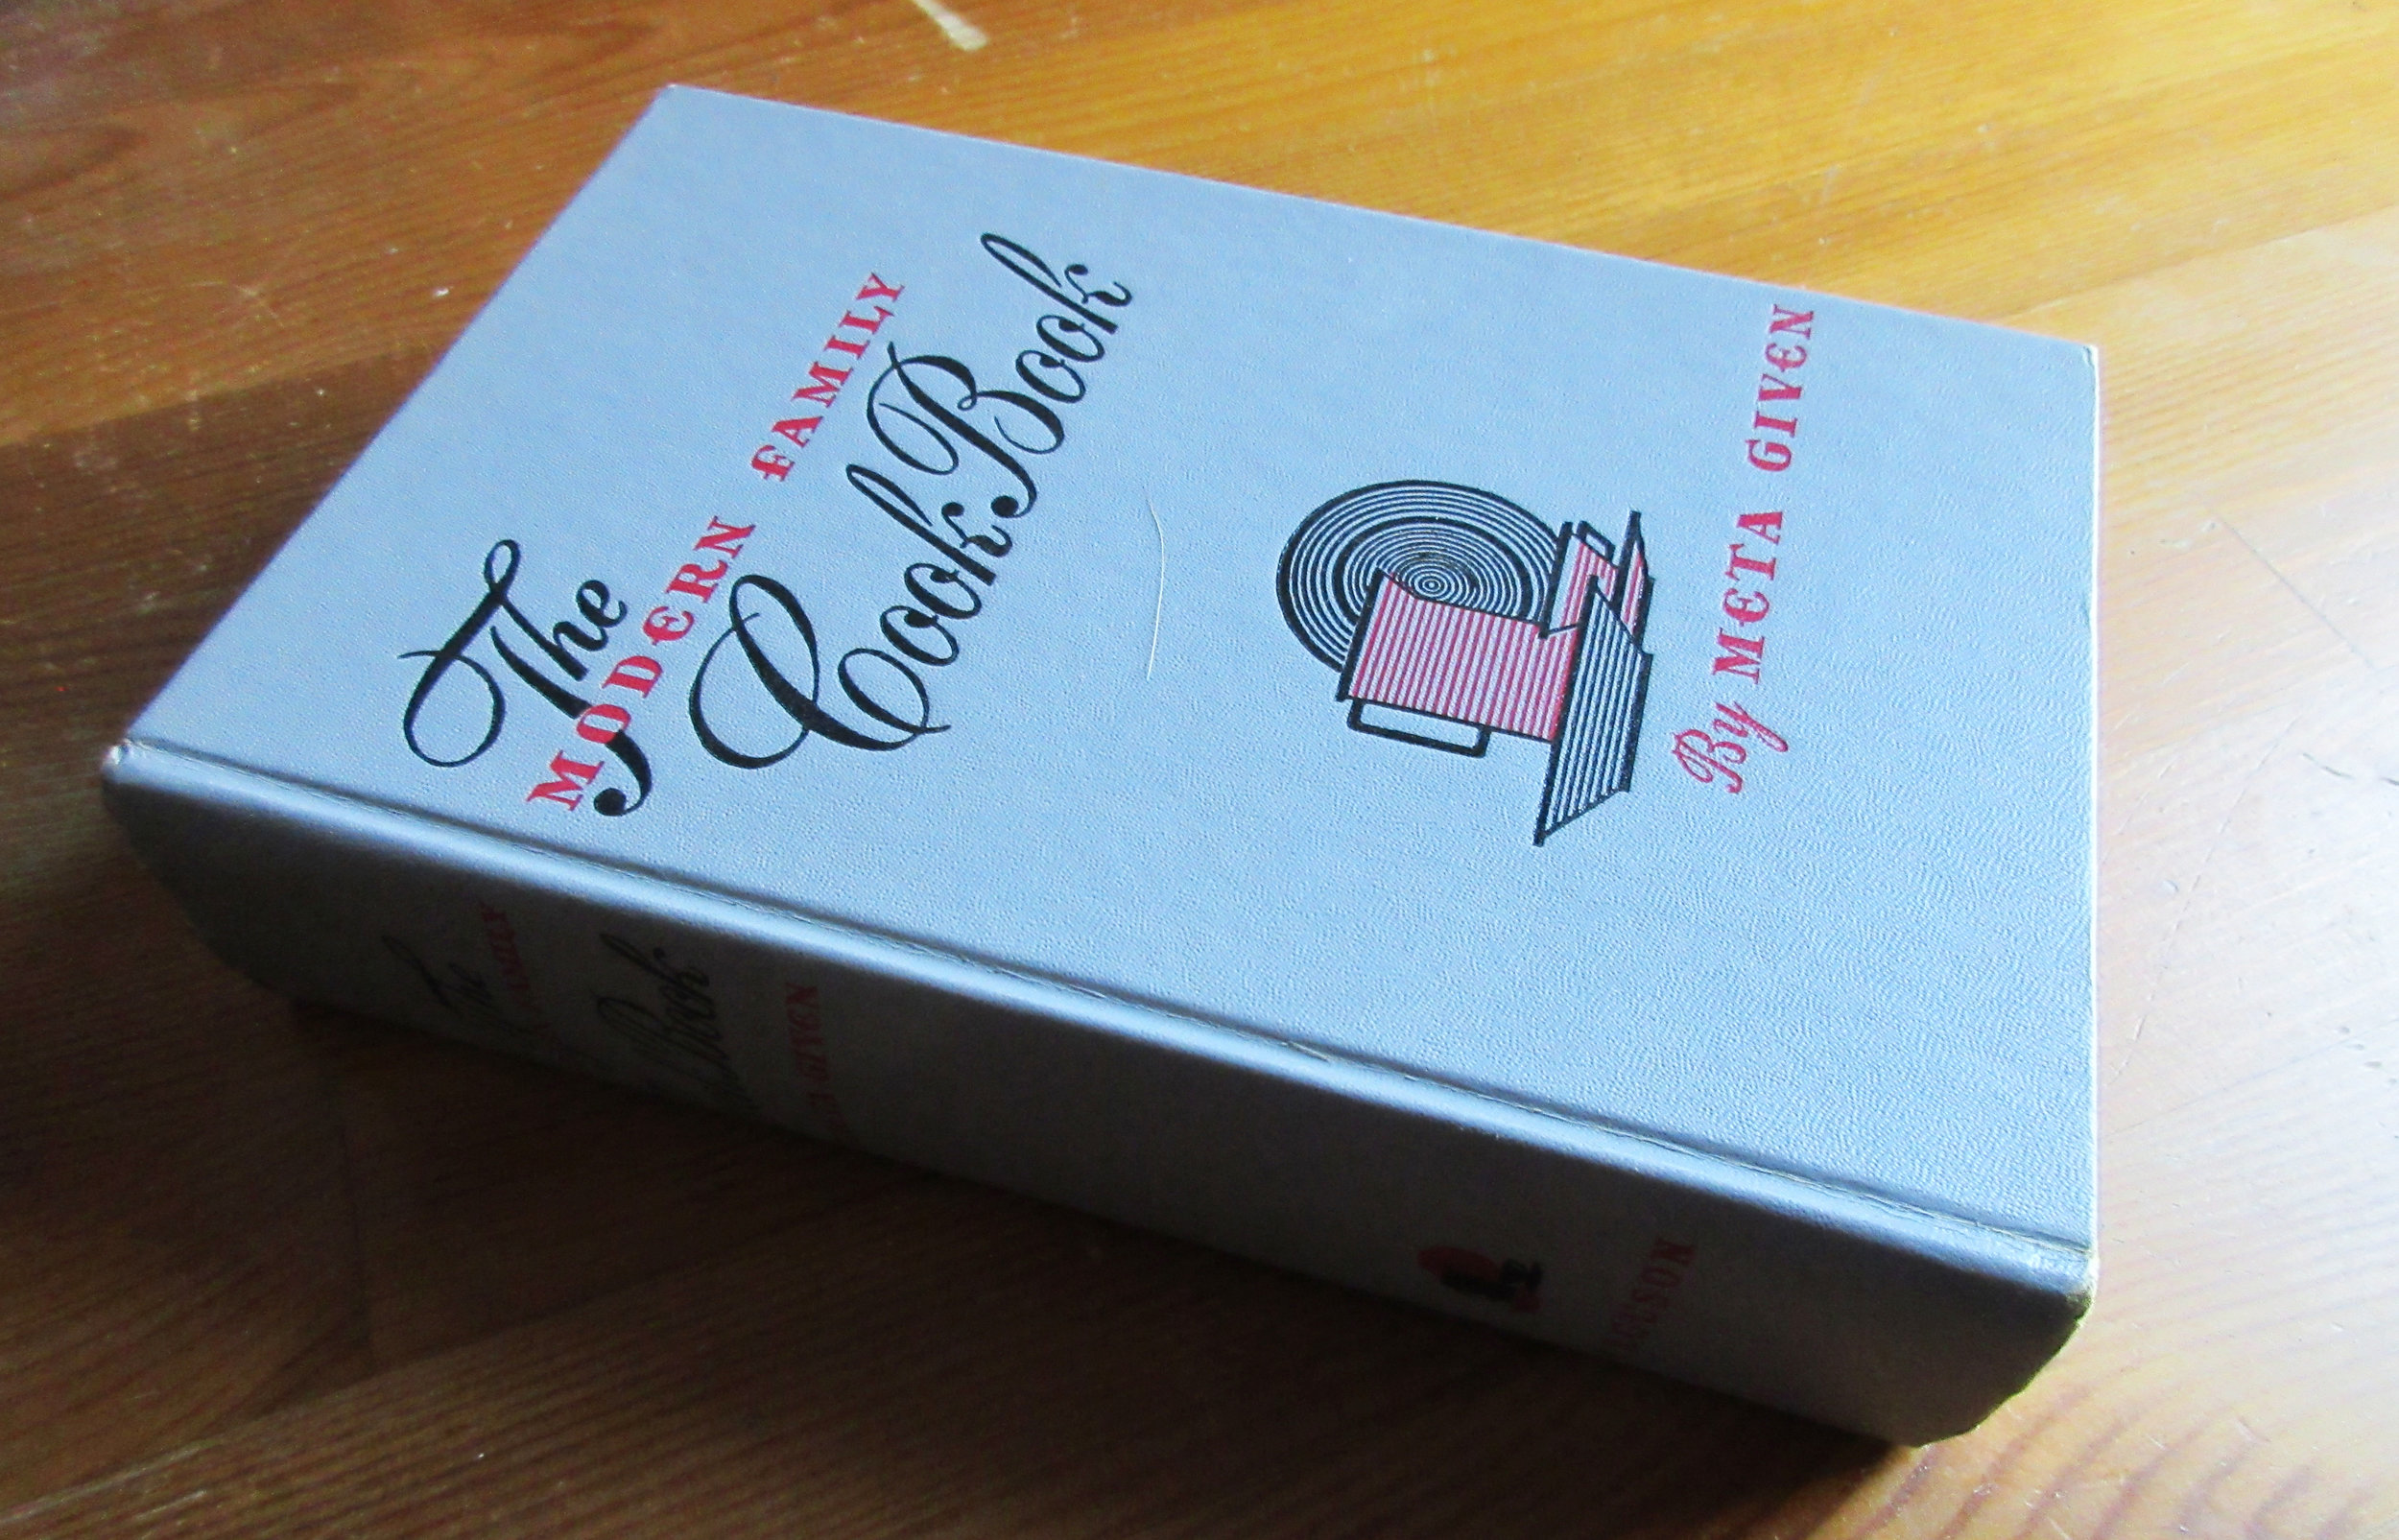
With only three chopped ingredients in the salad, this is a fairly simple but delicious recipe to prepare. The dressing is also rather easy to put together, but is subtly flavourful. This recipe is found in The Modern Family Cook Book from 1953, which was written by Meta Given, who probably has the best cookbook author name in history! When I was growing up, my Mom had her own copy of this cookbook in our kitchen, and I remember loving its design even as a kid. I think it's the most gorgeously designed cookbook in my collection today. Each time I open it, I marvel at the care that went into designing the layout, the illustrations and the attention paid to the tiny details.

You'll find this recipe in:
The Modern Family Cook Book
By: Meta Given
Chicago, 1953
The Original Recipe:
POTATO CARROT SALAD
3 cups diced cooked potatoes
2 1/4 cups diced cooked carrots
2/3 cups chopped dill pickle
1/2 cup mayonnaise
3 tablespoons pickle juice
1/2 teaspoon celery salt
1 teaspoon grated onion
Combine diced, cooked potatoes with carrots and pickle. Mix mayonnaise with pickle juice and add celery salt and grated onion, blending well. Add seasoned dressing to vegetable mixture, toss lightly and chill to blend flavors. Serve on lettuce arranged on individual plates or turn into a lettuce-lined salad bowl. 5 servings.


My Experience:
With only three chopped ingredients in the salad, this is a fairly simple but delicious recipe to prepare. The dressing is also rather easy to put together, but is subtly flavourful. The only issue is that I'd describe this salad as having a mayonnaise sauce, not a dressing. Next time, I'll either make less dressing or use more veggies for a more balanced salad. I was surprised that I enjoyed the addition of the lettuce leaves, though. Not only did it make my plate look beautiful, but the lettuce added a splash of freshness to the potato salad and cut the heaviness of all that mayonnaise.
I popped the vegetables onto my kitchen scale after I chopped them, so if you're accustomed to measuring via weight, you'll need approximately 450 g/1 lb of chopped uncooked potatoes, 300 g/11 oz of chopped uncooked carrots & 100 g/4 oz of chopped pickles.
I made this salad to bring along to an early Mother's Day work bee at my Mom's house. At 85 years old, my Mom lives alone in the country with a large backyard & kitchen garden to tend to. When I was a child, most of our evenings in the warm weather were spent outside in the garden and doing yard work, and I remember my Mom as a practical & seemingly tireless worker. She still has her "get 'er done" attitude, but these days she needs more help than she used to in order to actually get 'er done.
When I was growing up, my Mom had her own copy of the 1953 edition of The Modern Family Cook Book, and I remember loving its design even as a kid. I think it's the most gorgeously designed cookbook in my collection today. Each time I open it, I marvel at the care that went into designing the layout, the illustrations and the attention paid to the tiny details. My Mom was an elementary school teacher when she was in her late teens until her late 20s, and this cookbook was published around when she moved out on her own.
I was born when both my parents were in their 40s, so I had a different experience at home than most of my friends with younger parents. My Mom and Dad both grew up on farms and they also retained many of the values of the generations before them. My Dad could basically repair anything and we lived by the ideology of fixing, not replacing. My Ken doll was able to live an extended life thanks to a screw that held his head onto his neck, so he always wore a metallic kippah with a Phillip's head design!
My Mom preserved fruits and vegetables by canning them and filling our large chest freezer. Our washing machine was a ringer washer, and getting the weekly laundry done was a day-long process. When all my friends had a collection of Cabbage Patch Dolls, my Mom made me a Baby Miss Piggy doll with a hand-made "couture" wardrobe. We didn't have a dryer, microwave or computer until the 1990s.
I did find some of these differences embarrassing, and sometimes difficult to explain to my friends. As an adult, I really appreciate my slightly unusual upbringing and it's probably the main reason why I've found my passion as a Historical Interpreter & Historic Cook. I appreciate that I work in environments that were built to last for generations and not be discarded & replaced by the next-best-thing in a handful of years. Not only did my upbringing prepare me for some of the practical aspects of my duties, but I think my work life keeps me a bit more connected to the slower pace of my childhood, when the rest of my life seems to run faster as time goes on.
I certainly live a different lifestyle than my parents when they were my age, but I've never been afraid to live life my way thanks to their example. Happy Mother's Day, Mom! And to the rest of you – Keep It Weird.

This picture was taken about a year ago, when I was showing my Mom how to take a selfie on my new cell phone
Read the Cookbook:

Taheeni
This Taheeni recipe isn't a Tahini recipe, simply because its main ingredient is eggplant and not sesame seeds. I'd describe Taheeni as basically Baba Ganoush, ironically without the tahini! I found this recipe in The Blender Cookbook by Ann Seranne & Eileen Gaden from 1961 in the International Specialties chapter under "The Near East". Today, I'm able to walk into almost any grocery store and buy myself a container of tahini or baba ganoush, but this was likely not the case in 1961. I'll chalk up the name to something getting lost in translation, but whatever it's called, my tastebuds give this this dip two thumbs up.

You'll find this recipe in:
The Blender Cookbook
By: Ann Seranne and Eileen Gaden
New York, 1961
The Original Recipe:
Taheeni
(A Favorite Cocktail Dip in Lebanon)
Cut a thin slice from bottom and top of 1 medium eggplant and backe in a 350˚ F. oven for about 1½ hours, or until tender. Split and remove pulp. Into container put
1 cup eggplant pulp
3 tablespoons lemon juice
3 tablespoons olive or sesame oil
1 clove garlic
1 teaspoon salt
Cover and blend on high speed for 1 minute, or until very smooth and creamy. Pour into a bowl and fold in 1 tablespoon sesame seeds and 1 tablespoon chopped parsley. Serve with vegetable sticks or crackers. Makes about 1½ cups.


My Experience:
This dip recipe is delicious and very straightforward, although I'm kicking myself for not remembering to pop the eggplant on the scale to find out its weight for those of you who aren't in North America. Hopefully this will be an edit I make later on the next time I make a baked eggplant dish. It was a tad on the salty side for my palette, so next time I make this (and there will be a next time, it's really tasty!), I'll probably start with half a teaspoon of salt.

You've probably realized by now that this Taheeni recipe isn't a Tahini recipe, simply because its main ingredient is eggplant and not sesame seeds. I'd describe Taheeni as basically Baba Ganoush, ironically without the tahini!
Taheeni is found in the International Specialties chapter of The Blender Cookbook under "The Near East". Today, I'm able to walk into almost any grocery store and buy myself a container of tahini or baba ganoush, but this was likely not the case in 1961. I'll chalk up the name to something getting lost in translation, but whatever it's called, my tastebuds give this this dip two thumbs up.
I grew up with a copy of The Blender Cookbook on the cookbook shelf in the kitchen, so I jumped at the opportunity to pick up my own copy when I saw it at Bibles for Missions, which is my favourite place to pick up historic/vintage cookbooks here in my hometown of Hamilton, Ontario. I lucked out that I happened to be in the store on a day when books were half price, so I invested an entire 75₵ to add it to my library.
We're in a blenderizing boom these days, thanks to the popularity of green smoothies and make-your-own nut milks. In their Introduction, Ann Seranne and Eileen Gaden urge housewives to get their blenders out of storage and into regular rotation:
If you have only used your blender to mix drinks and make soups, you will find within these pages exciting new ideas, short cuts, and magic recipes that will take the drudgery out of cooking and make it a pleasure. If you own an electric blender and have it stored away on a top shelf, get it down! You don't know the treasure you are hiding! Attach it to the handiest electric outlet and keep it there. And begin, right away, to make some of the easy and quick recipes – all delicious – in this book. Soon you will find that you will use your blender many times every day in the preparation of your daily meals, to grind, grate, crumb, purée, chop, aerate, and homogenize. Your entire cooking habits will become revolutionized almost overnight. You'll find yourself relegating much of your obsolete, old-fashioned kitchen equipment to that top shelf!
I selected this recipe because I was searching for a historic recipe that followed the guidelines of the Cleanse program that I was taking part in last week, but I plan on asking my Mom what her favourite recipes are from the book and trying them out. I actually don't have a childhood memory of her referencing The Blender Cookbook, so she may not have used it very often (or I just didn't notice because I was a kid with bigger fish to fry). My Mom is also one of those cooks who uses a recipe as a starting point, creates her own version and makes the hybrid recipe often from memory. Who knows - perhaps a dish that appeared regularly on our kitchen table has its roots in this book?

Read the Book:

To Dress Cucumbers Raw
Miss Leslie would be appalled, and perhaps stupefied, that I made this recipe today. In April. In Canada. She put forth a very strong opinion about cucumbers and their longevity in Miss Leslie's Directions for Cookery, stating that "few vegetables being more unwholesome when long gathered". Who knows when my grocery store cucumber was harvested, but I still found this recipe to be delicious. It's fresh-tasting, subtly flavoured by the salt, pepper & onion.

You'll find this recipe in:
Miss Leslie's Directions for Cookery
By: Eliza Leslie
Philadelphia, 1851
The Original Recipe:
TO DRESS CUCUMBERS RAW.-They should be as fresh from the vine as possible, few vegetables being more unwholesome when long gathered. As soon as they are brought in lay them in cold water. Just before they are to go to the table take them out, pare them and slice them into a pan of fresh cold water. When they are all sliced, transfer them to a deep dish, season them with a little salt and black pepper, and pour over them some of the best vinegar, to which you may add a little salad oil. You may mix them with a small quantity of sliced onion; not to be eaten, but to communicate a slight flavour of onion to the vinegar.


My Experience:
To Dress Cucumbers Raw is a rare recipe from the 1850s that doesn't require a modern adaptation. It's very a simple dish. Peel and slice the cucumbers, put them in a bowl, add vinegar, oil, salt, pepper and a few onion slices. Since I only had half a cucumber to cut, I didn't bother with putting the already-sliced cucumbers into cold water while I continued slicing the rest. Miss Leslie doesn't specify which type of vingegar is the "best", so I chose to use raw apple cider vinegar and complemented it with olive oil.
The onion slices are a very nice touch. I first sampled the cucumbers when they had been marinating in the fridge for about 30 minutes. I was careful not to dish out the onion as advised in the recipe, but a delicate onion taste definitely carried through to the vinaigrette.

Eliza Leslie learned her cookery expertise after her father's death in 1803 in Philedelphia. To make ends meet, her mother opened a boardinghouse and Eliza found herself supervising the servants, including a Cook. She had little experience in the kitchen herself, so she enrolled in a cooking school run by Mrs. Goodfellow in her confectioner's shop and soon the Leslie family's boardinghouse was known for its fine meals.
Miss Leslie didn't aim to be a cookbook author, though. She was an author of children's stories and short fiction, and it was thanks to others encouraging her to share her recipes that her cookbook career was launched. In 1828, Seventy-Five Receipts for Pastry, Cakes, and Sweetmeats was published, followed by Miss Leslie's Directions for Cookery in 1837, followed by many editions and a list of cookbooks & etiquette books.
Miss Leslie would be appalled, and perhaps stupefied, that I made this recipe today. In April. In Canada. She seems to have held a strong opinion about cucumbers and their longevity, stating that "few vegetables being more unwholesome when long gathered". Who knows when my grocery store cucumber was harvested, but I still found this recipe to be delicious. It's fresh-tasting, subtly flavoured by the salt, pepper & onion.
I chose to make this recipe now, instead of when cucumbers are in season, because I'm doing a week-long Cleanse these days and I thought I'd set myself the challenge of finding a historic recipe or two that I can eat. It wasn't easy to find a nineteenth-century recipe that doesn't include meat, dairy, wheat or sugar, but here's one that I would happily make again – Cleanse or not.
If you're curious to read more about Eliza Leslie's life, read this Manuscript Cookbooks Survey article, which also delves into this question: how many of Miss Leslie's published recipes came from Mrs. Goodfellow, who taught her how to cook?

Read the Cookbook:
A scanned copy of the 1851 edition from the New York Public Library on the Internet Archive (this recipe's on pages 194-195)

German Cabbage
Before I began speaking to people about trying out Fannie Farmer's German Cabbage recipe from 1896, I never knew how many people had a passionate love affair with cabbage! I really like how the flavours are balanced in the German Cabbage: some tang thanks to the vinegar, a bit of sweetness from the nutmeg & sugar, and a hint of spice from the cayenne pepper. And of course, if a dish is fried in butter, it's got to be delicious.

You'll find this recipe in:
Boston Cooking-School Cook Book
By: Fannie Merritt Farmer
New York, 1896
The Original Recipe:
German Cabbage.
Slice red cabbage and soak in cold water. Put one quart in stewpan with 2 tablespoons butter, one-half teaspoon salt, one tablespoon finely chopped onion, few gratings of nutmeg, and few grains of cayenne; cover, and cook until cabbage is tender. Add two tablespoons vinegar and one-half tablespoon sugar, and cook five minutes.
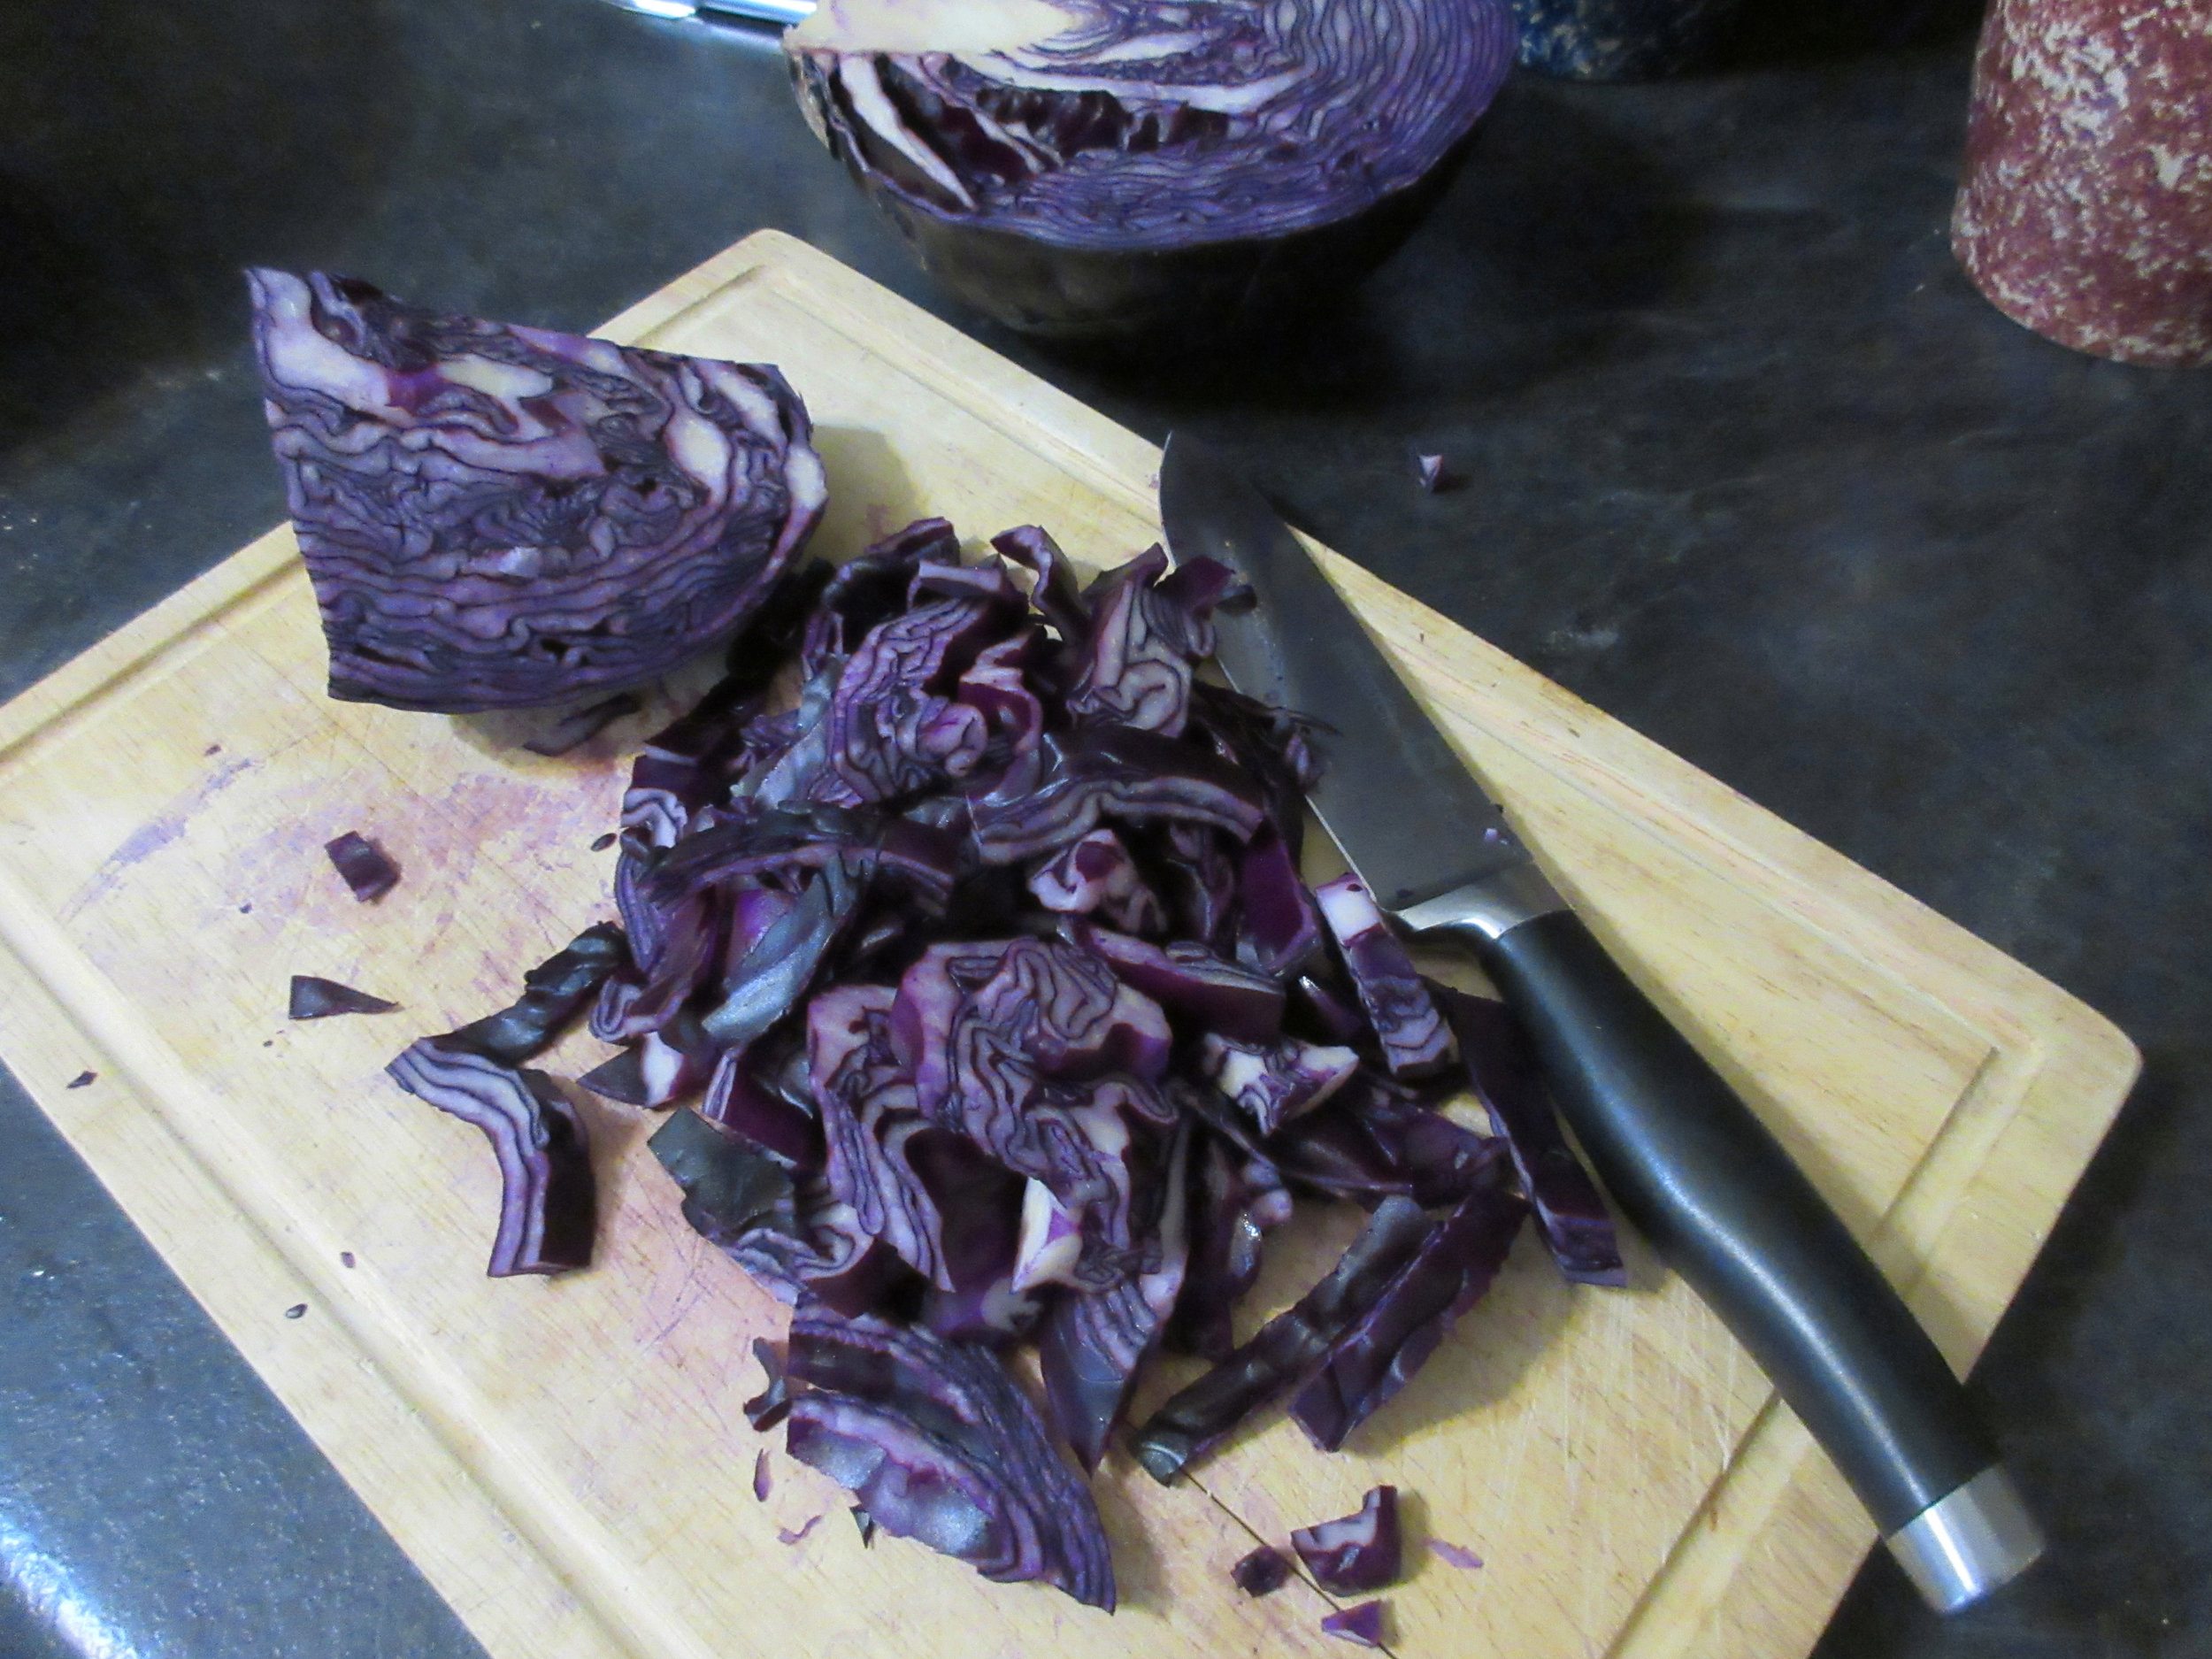
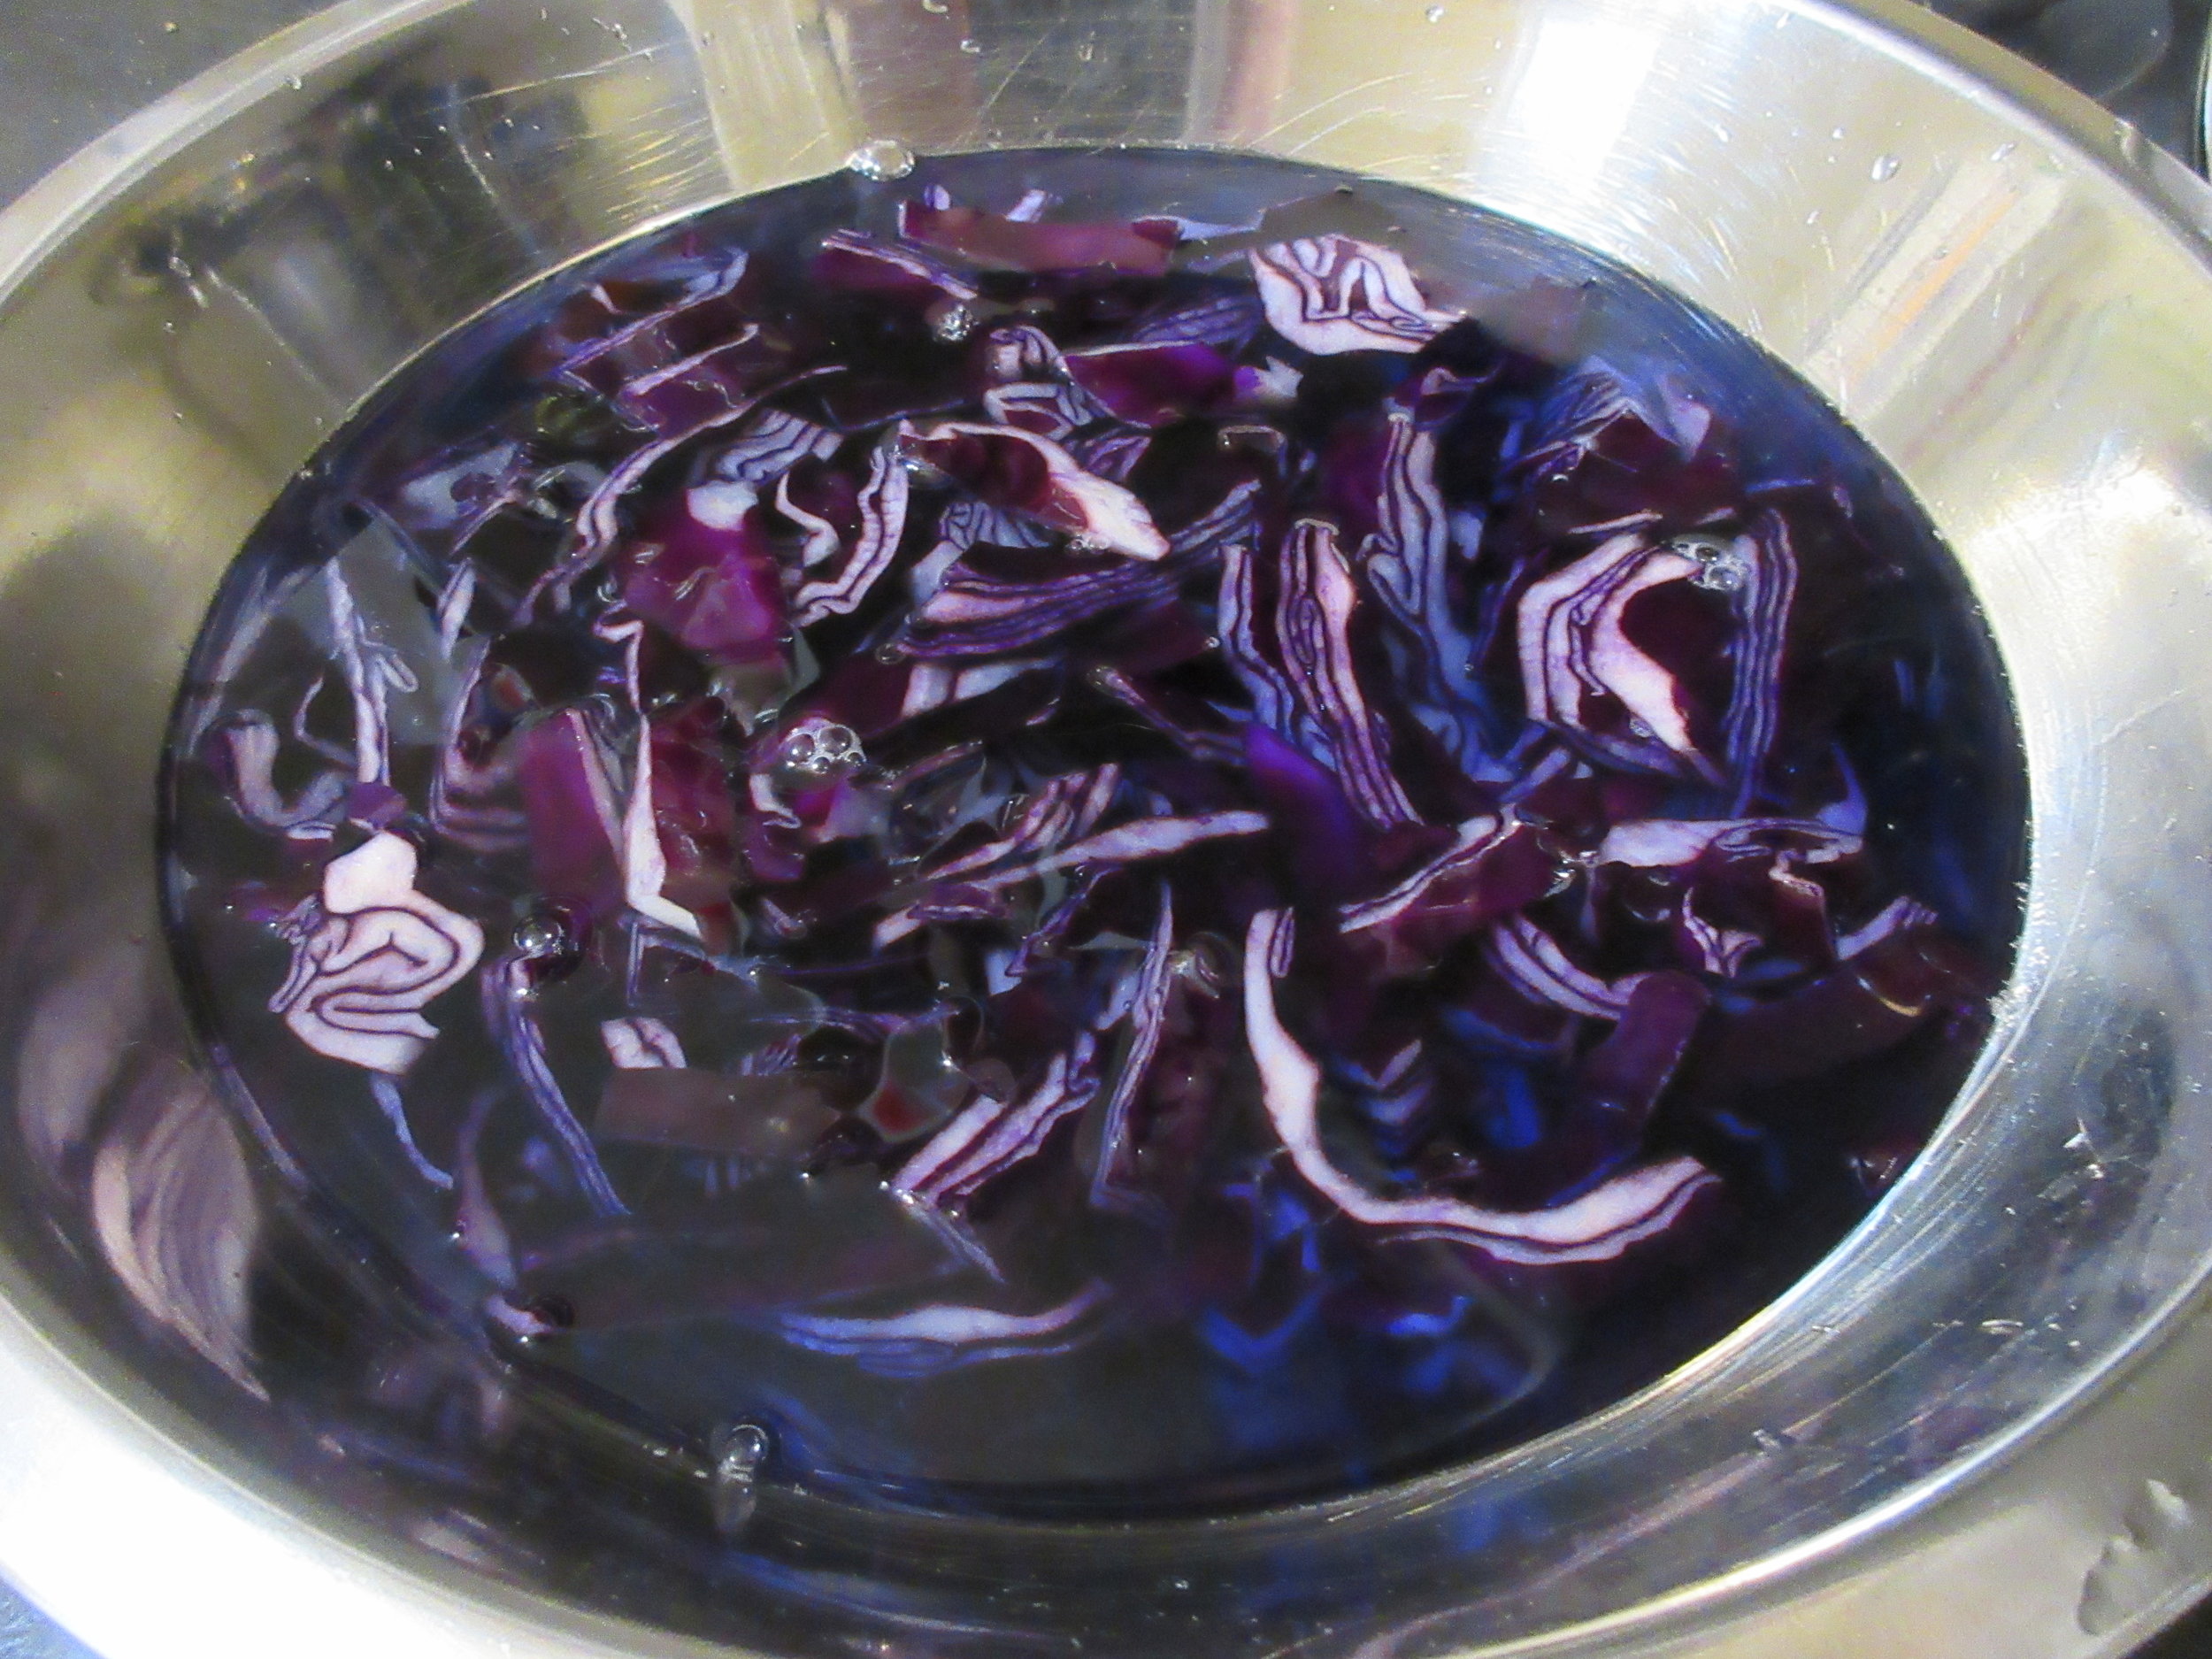
My Recipe:
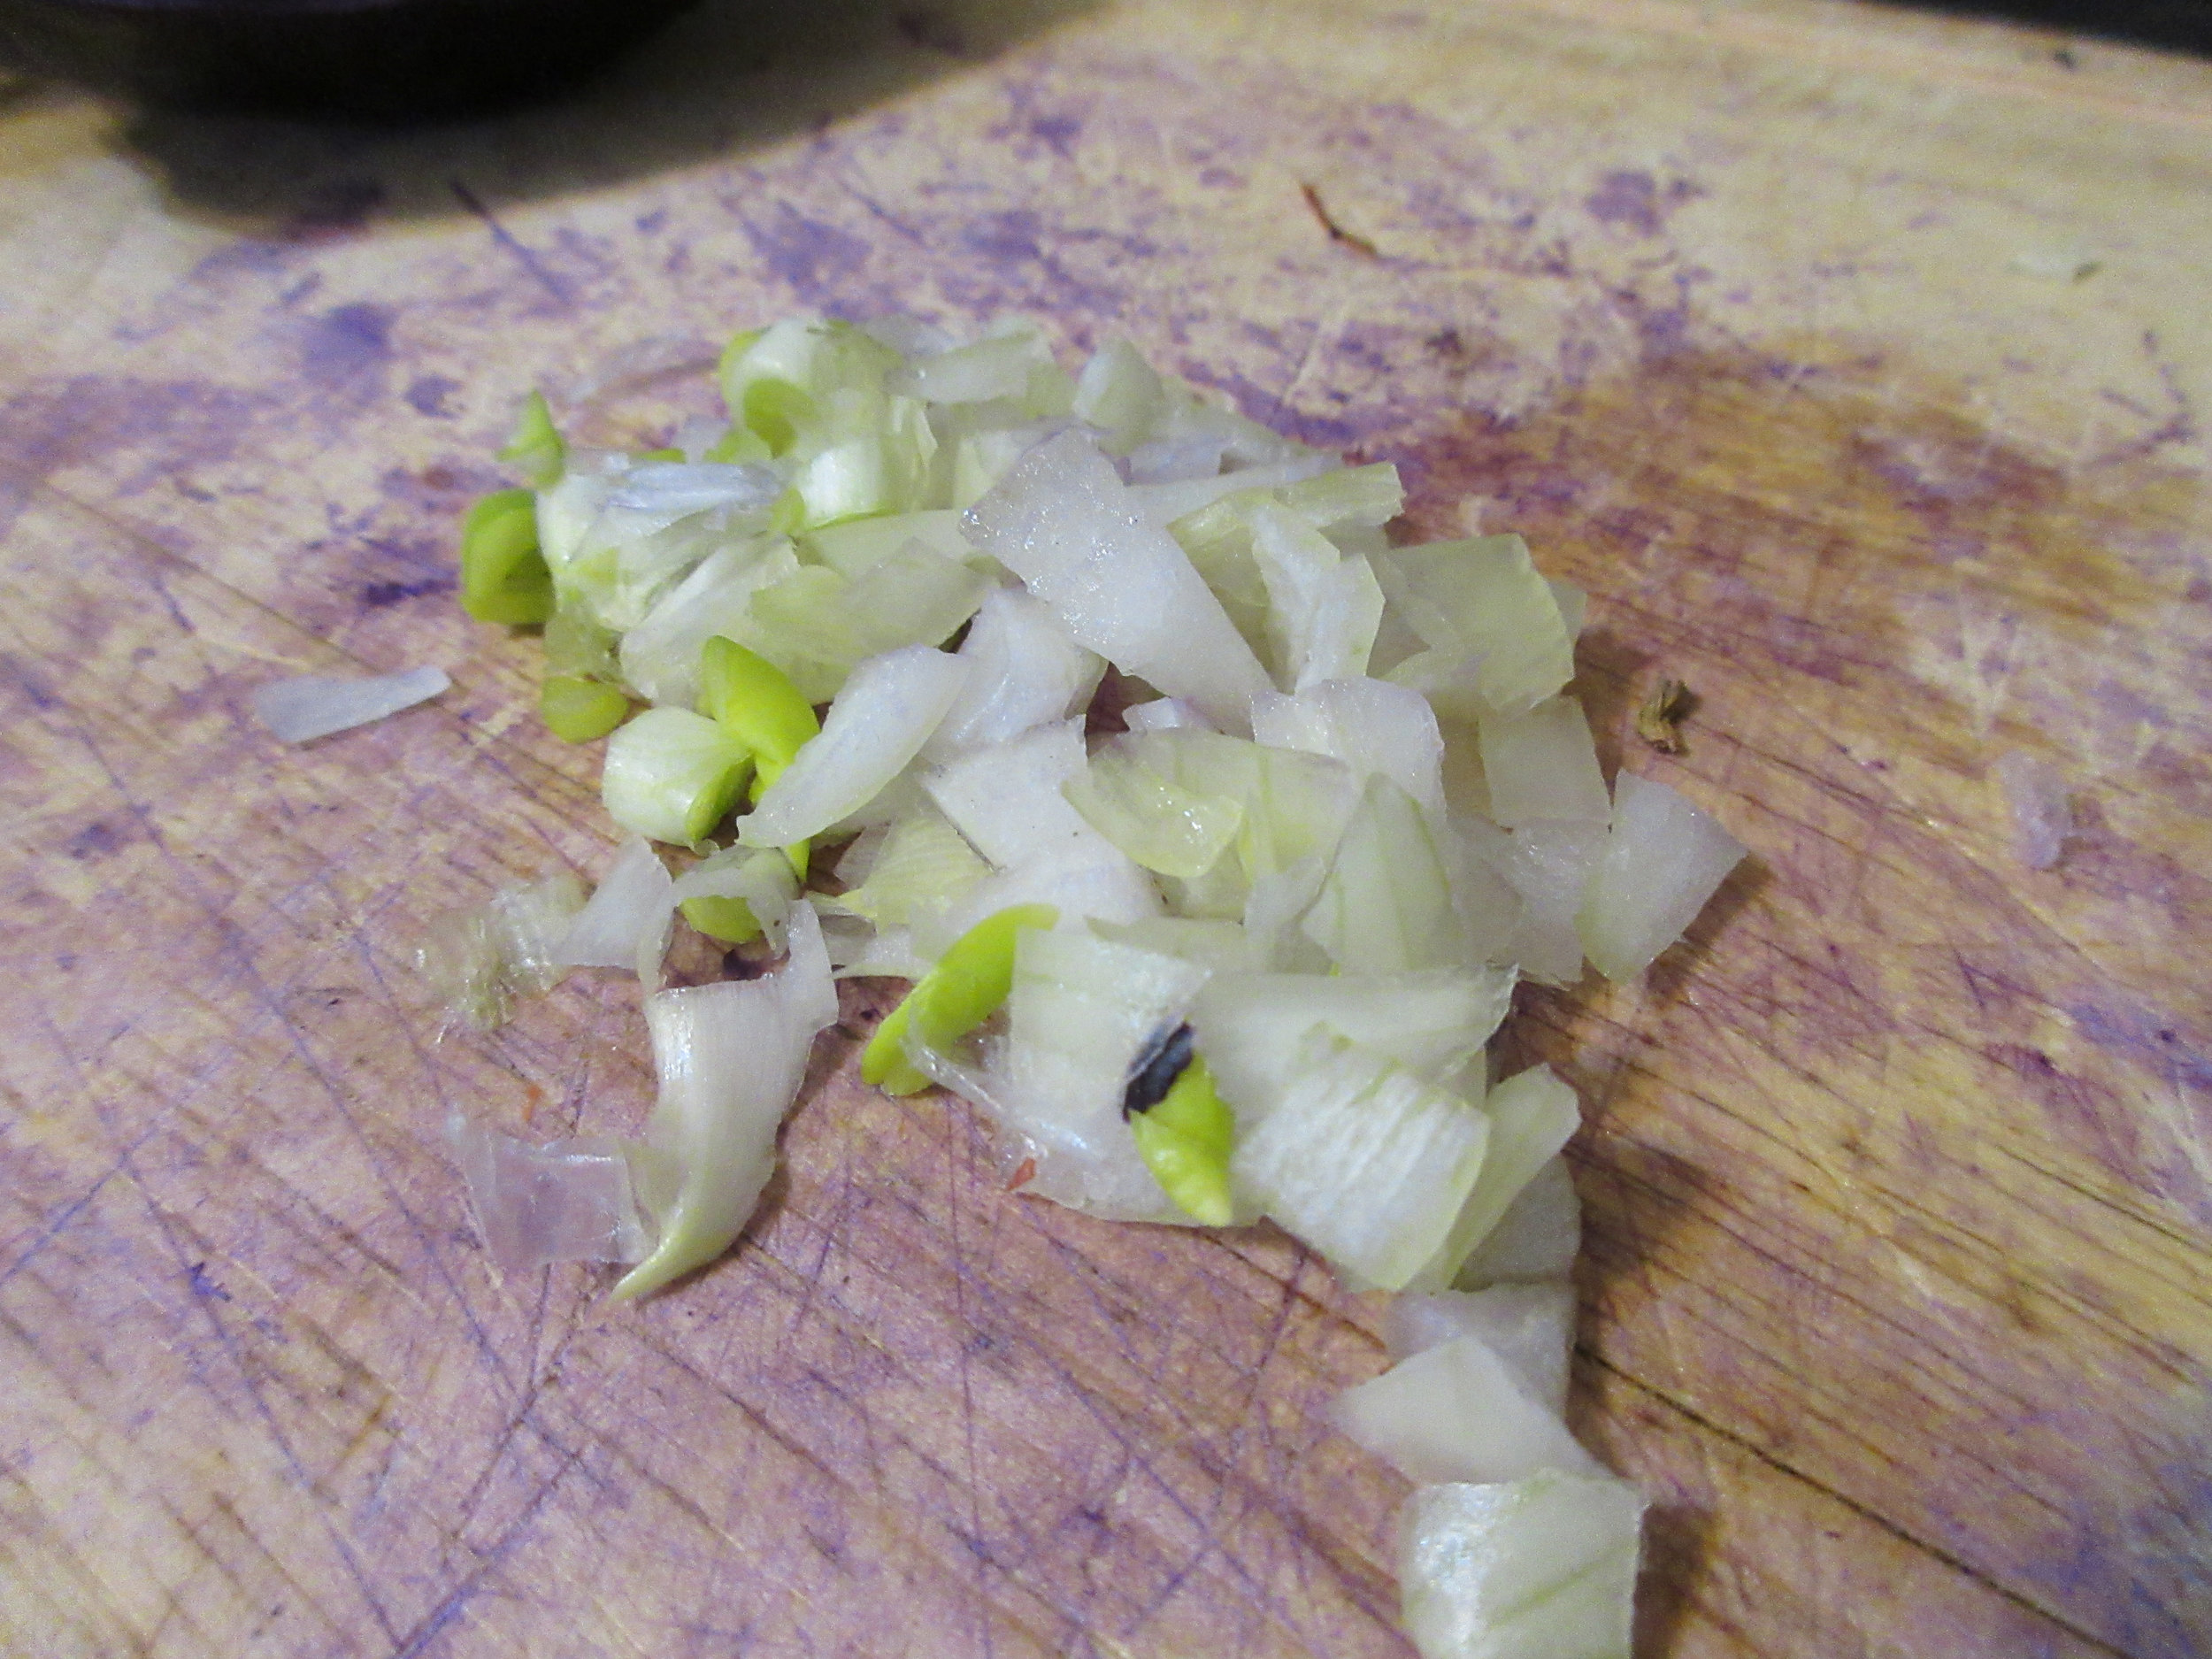
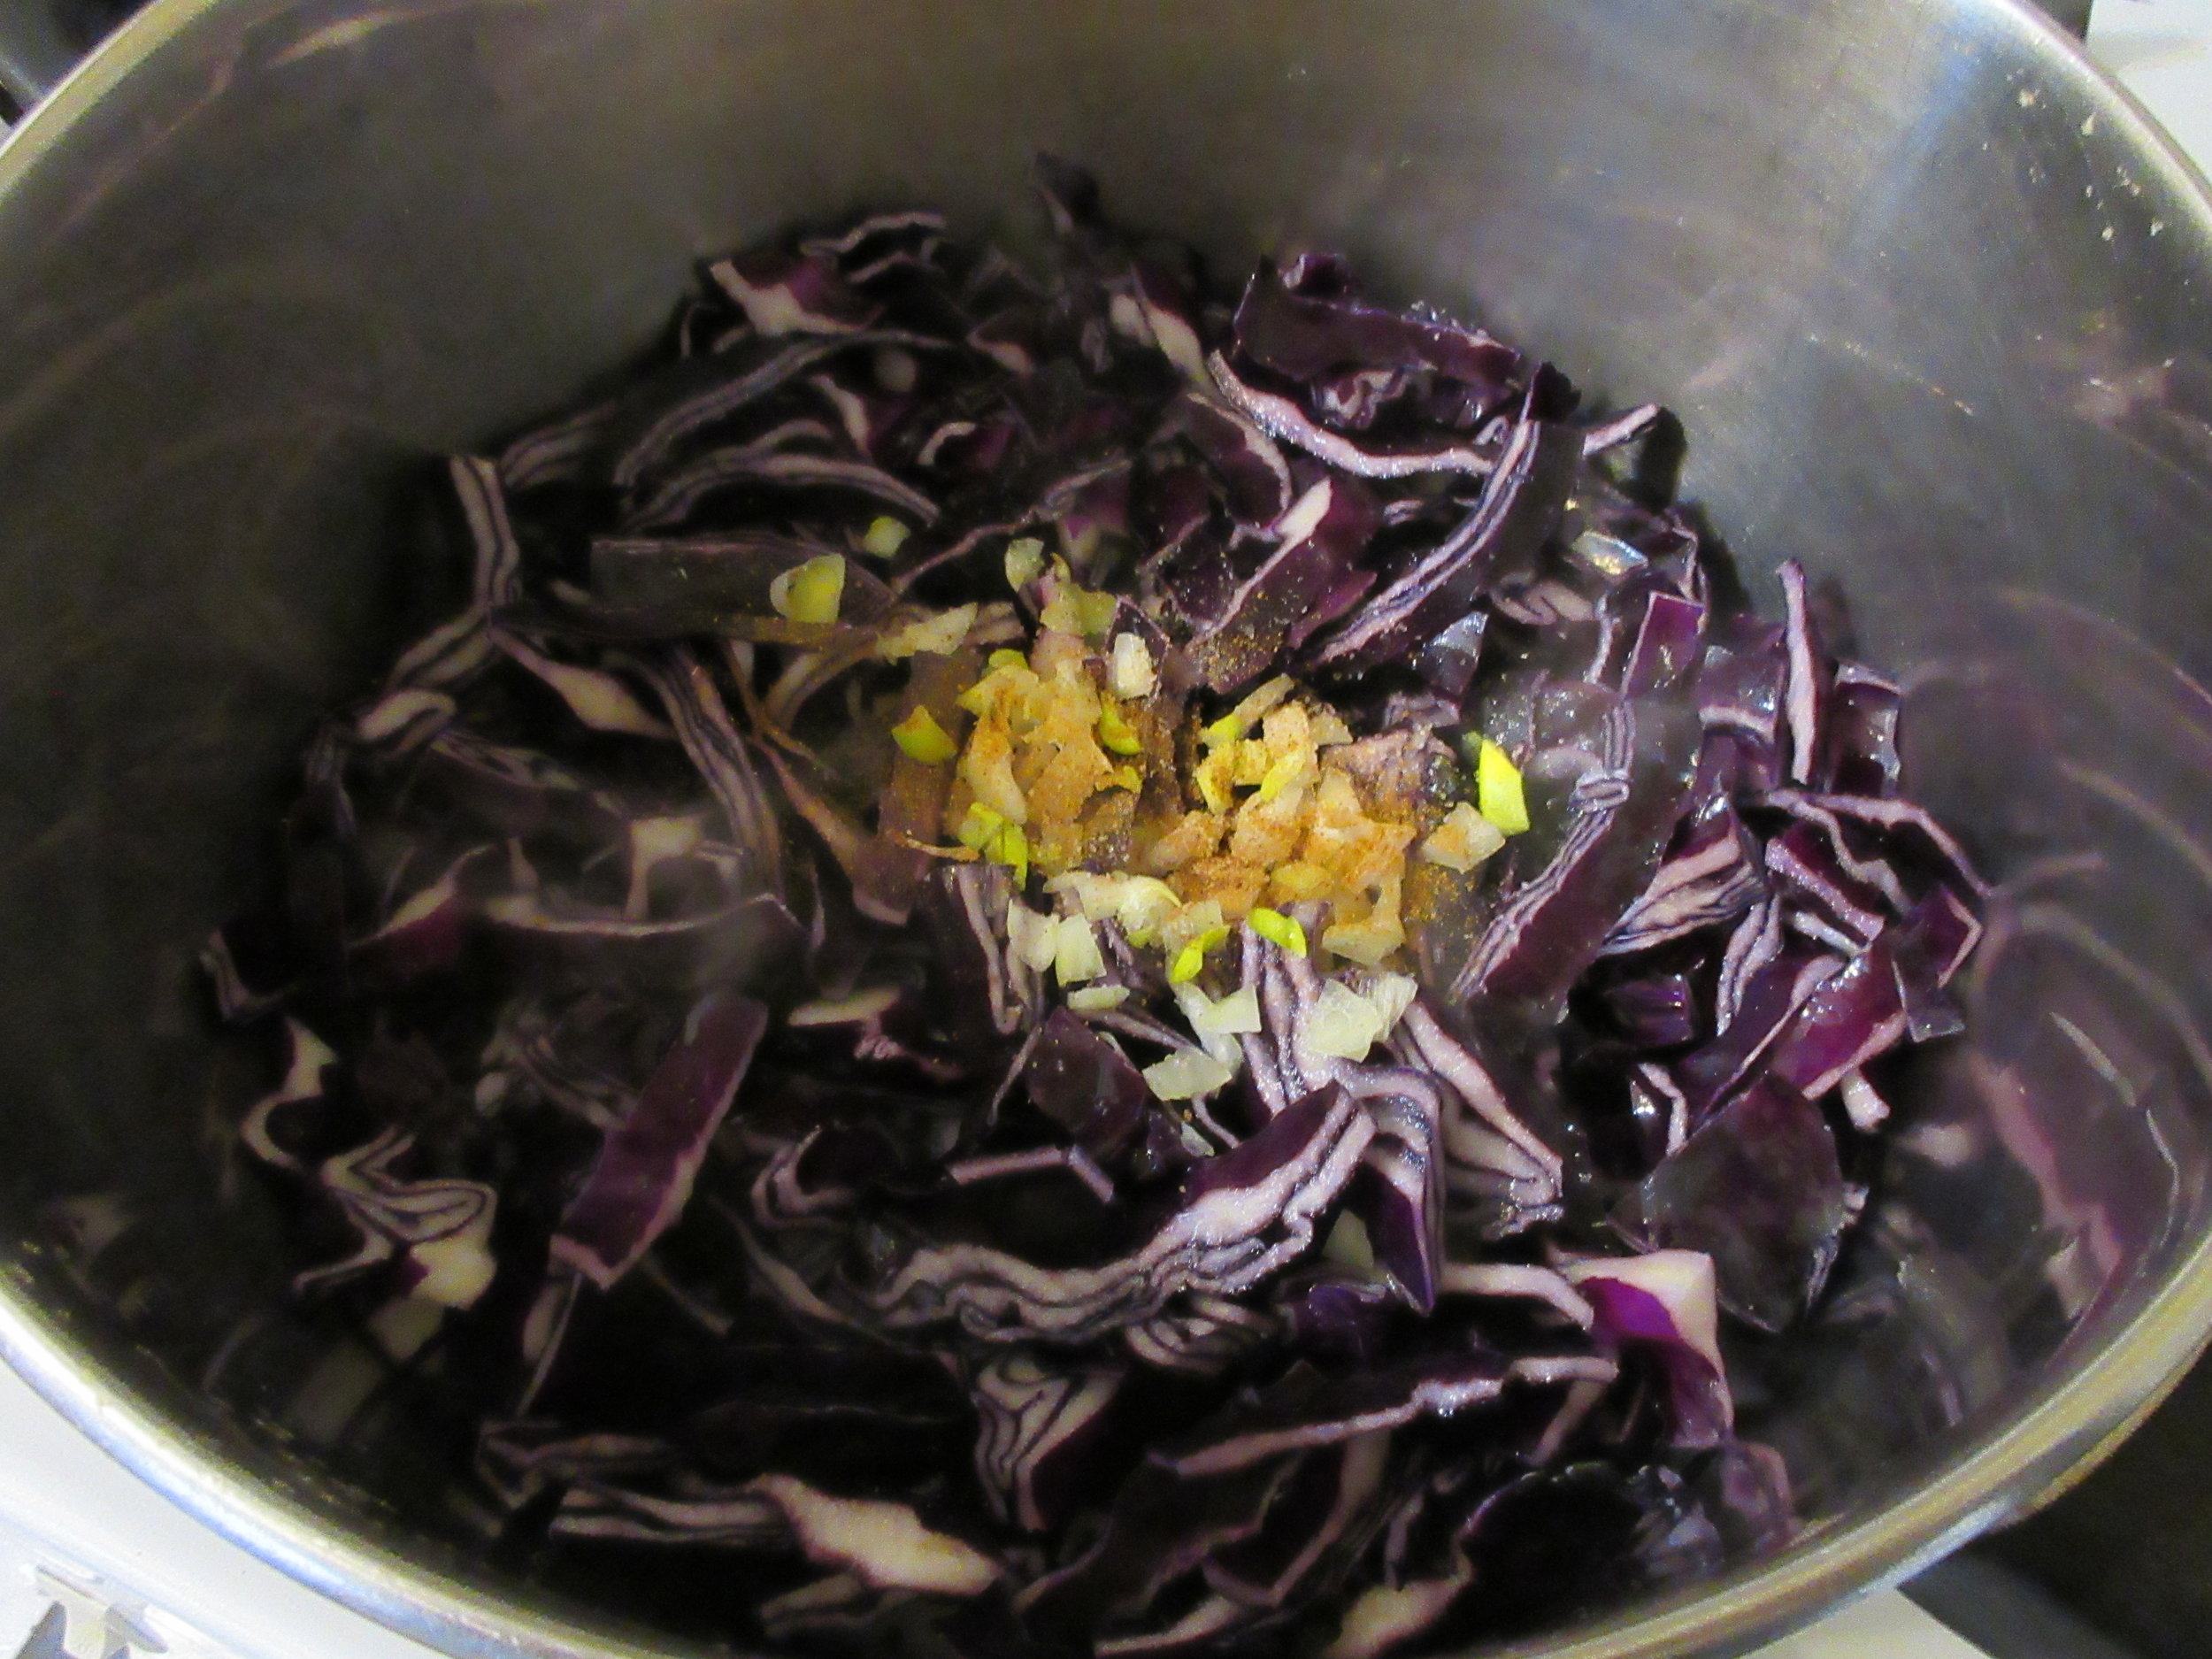
4 cups sliced red/purple cabbage - 500 g
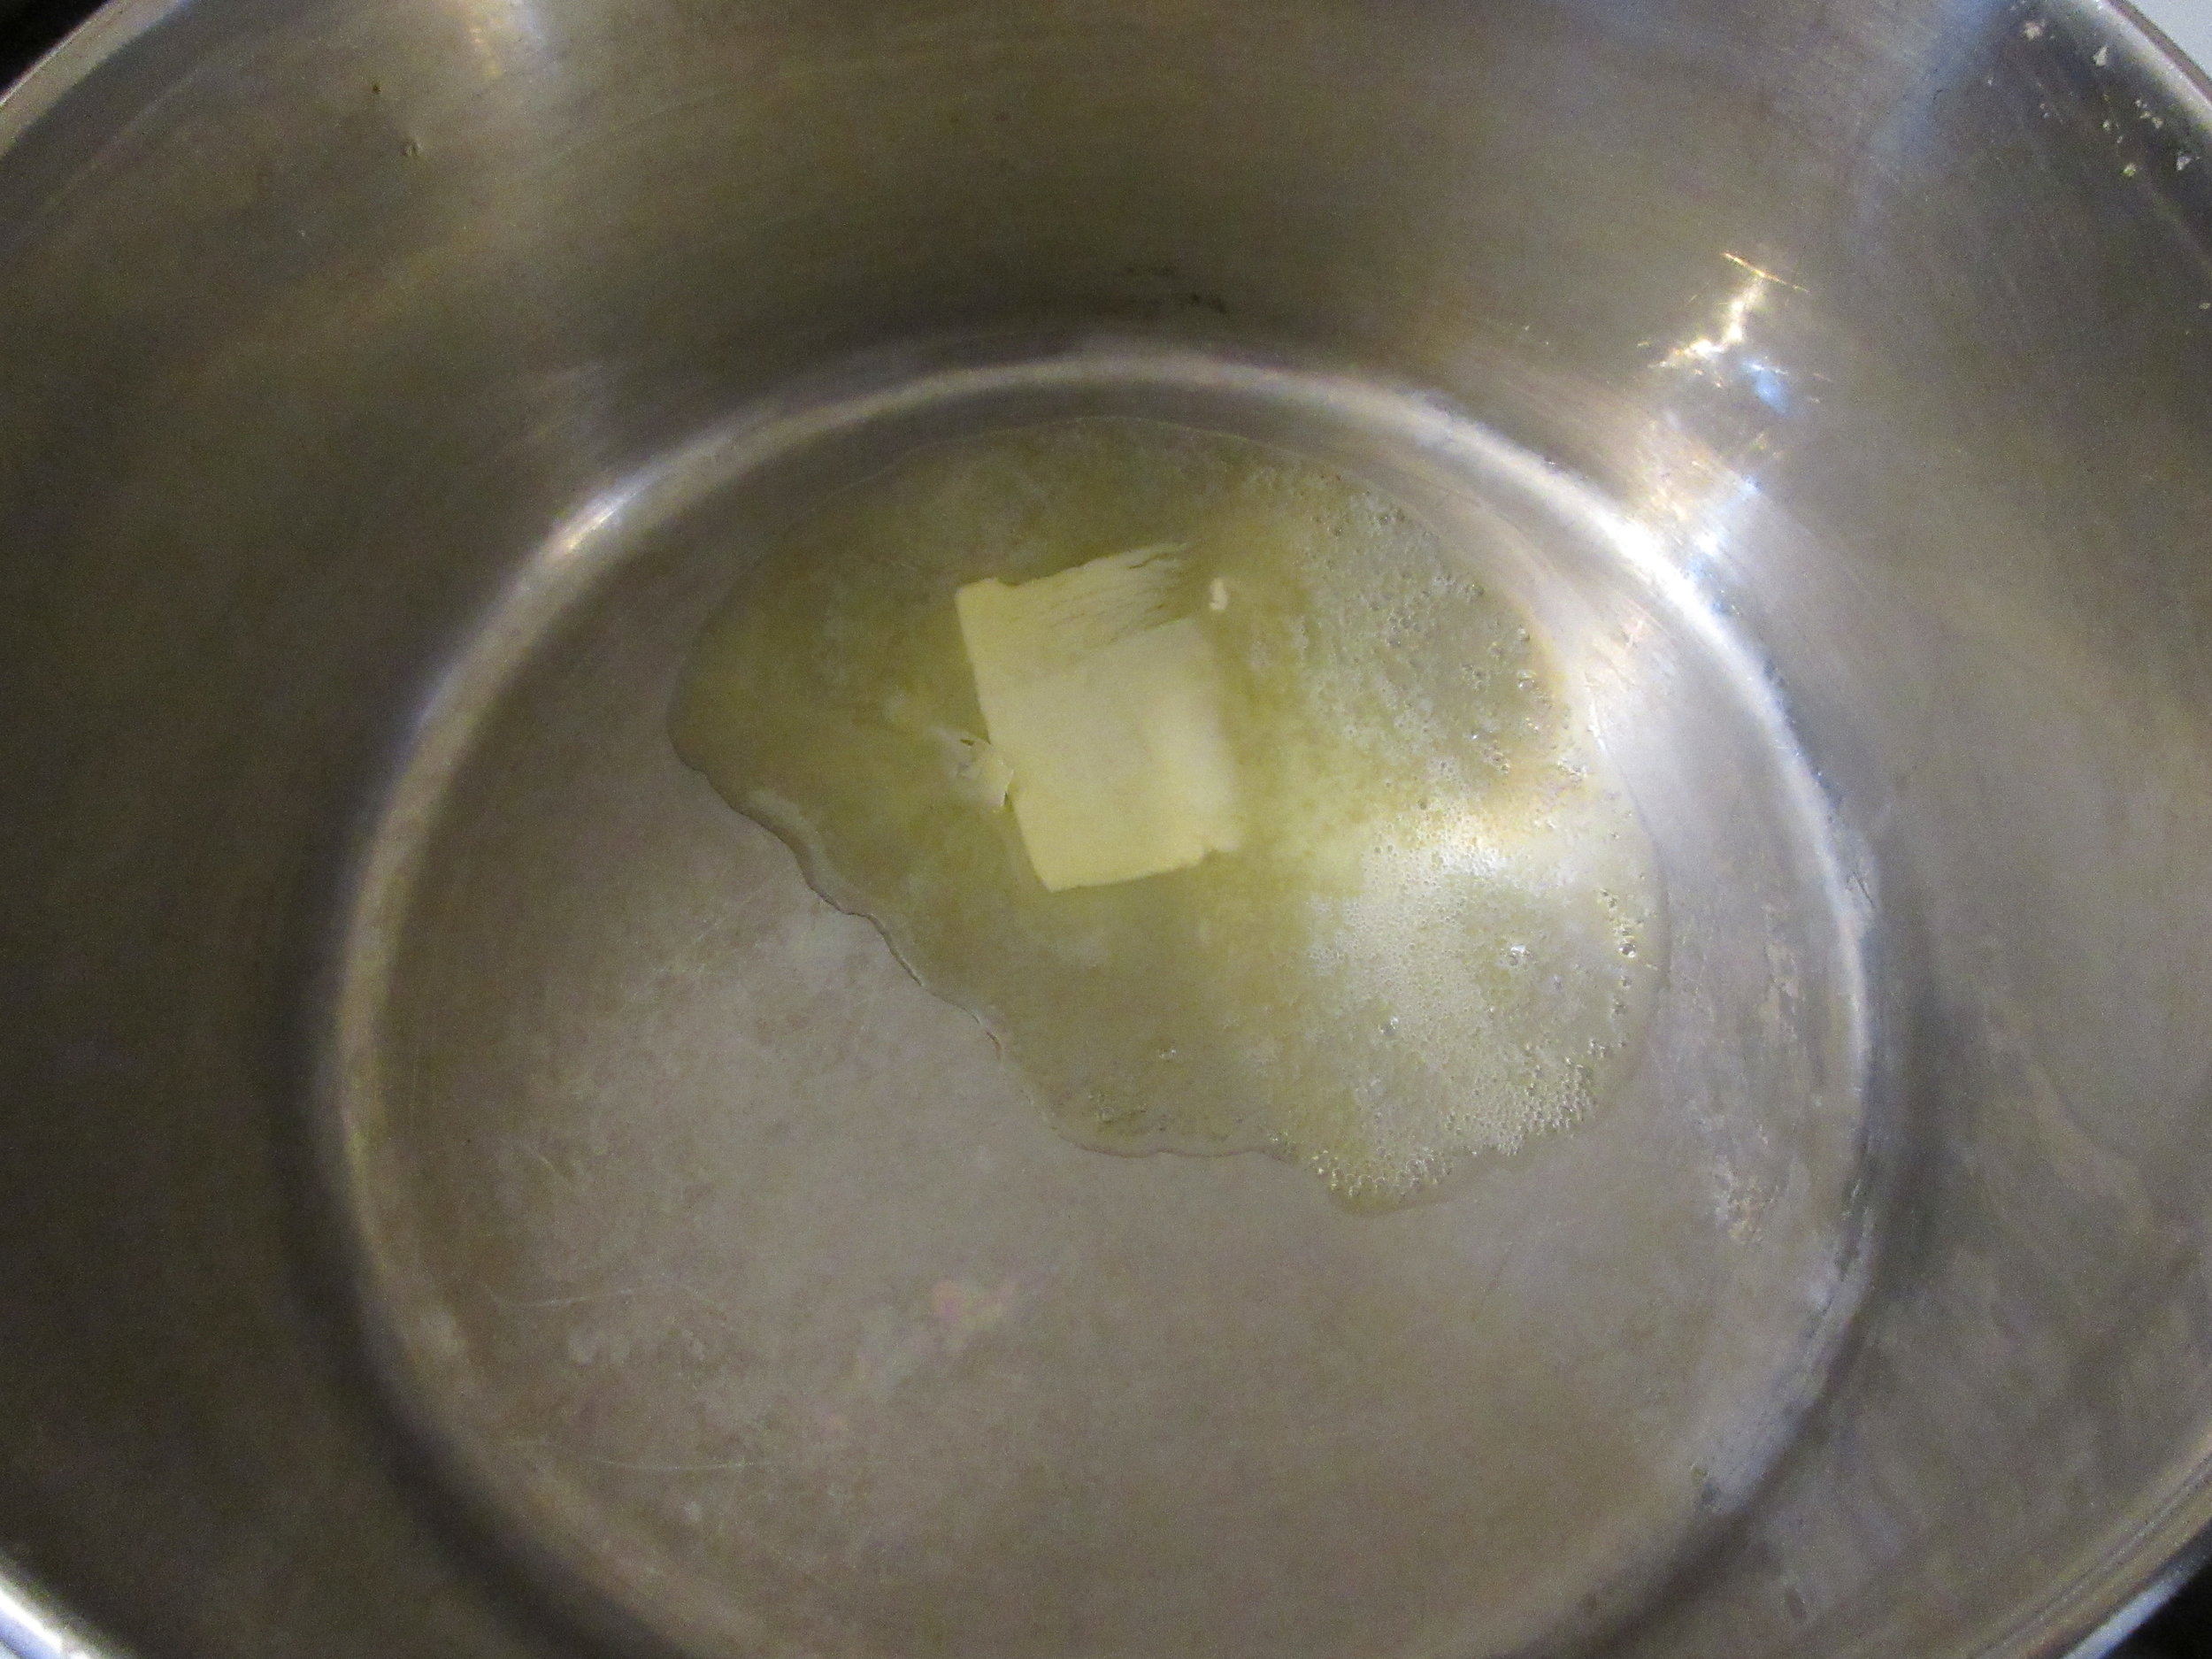
2 tbsp butter
1/2 tsp salt
1 tablespoon finely chopped onion
A few shakes or a pinch of ground nutmeg
A few shakes or a pinch of ground cayenne pepper
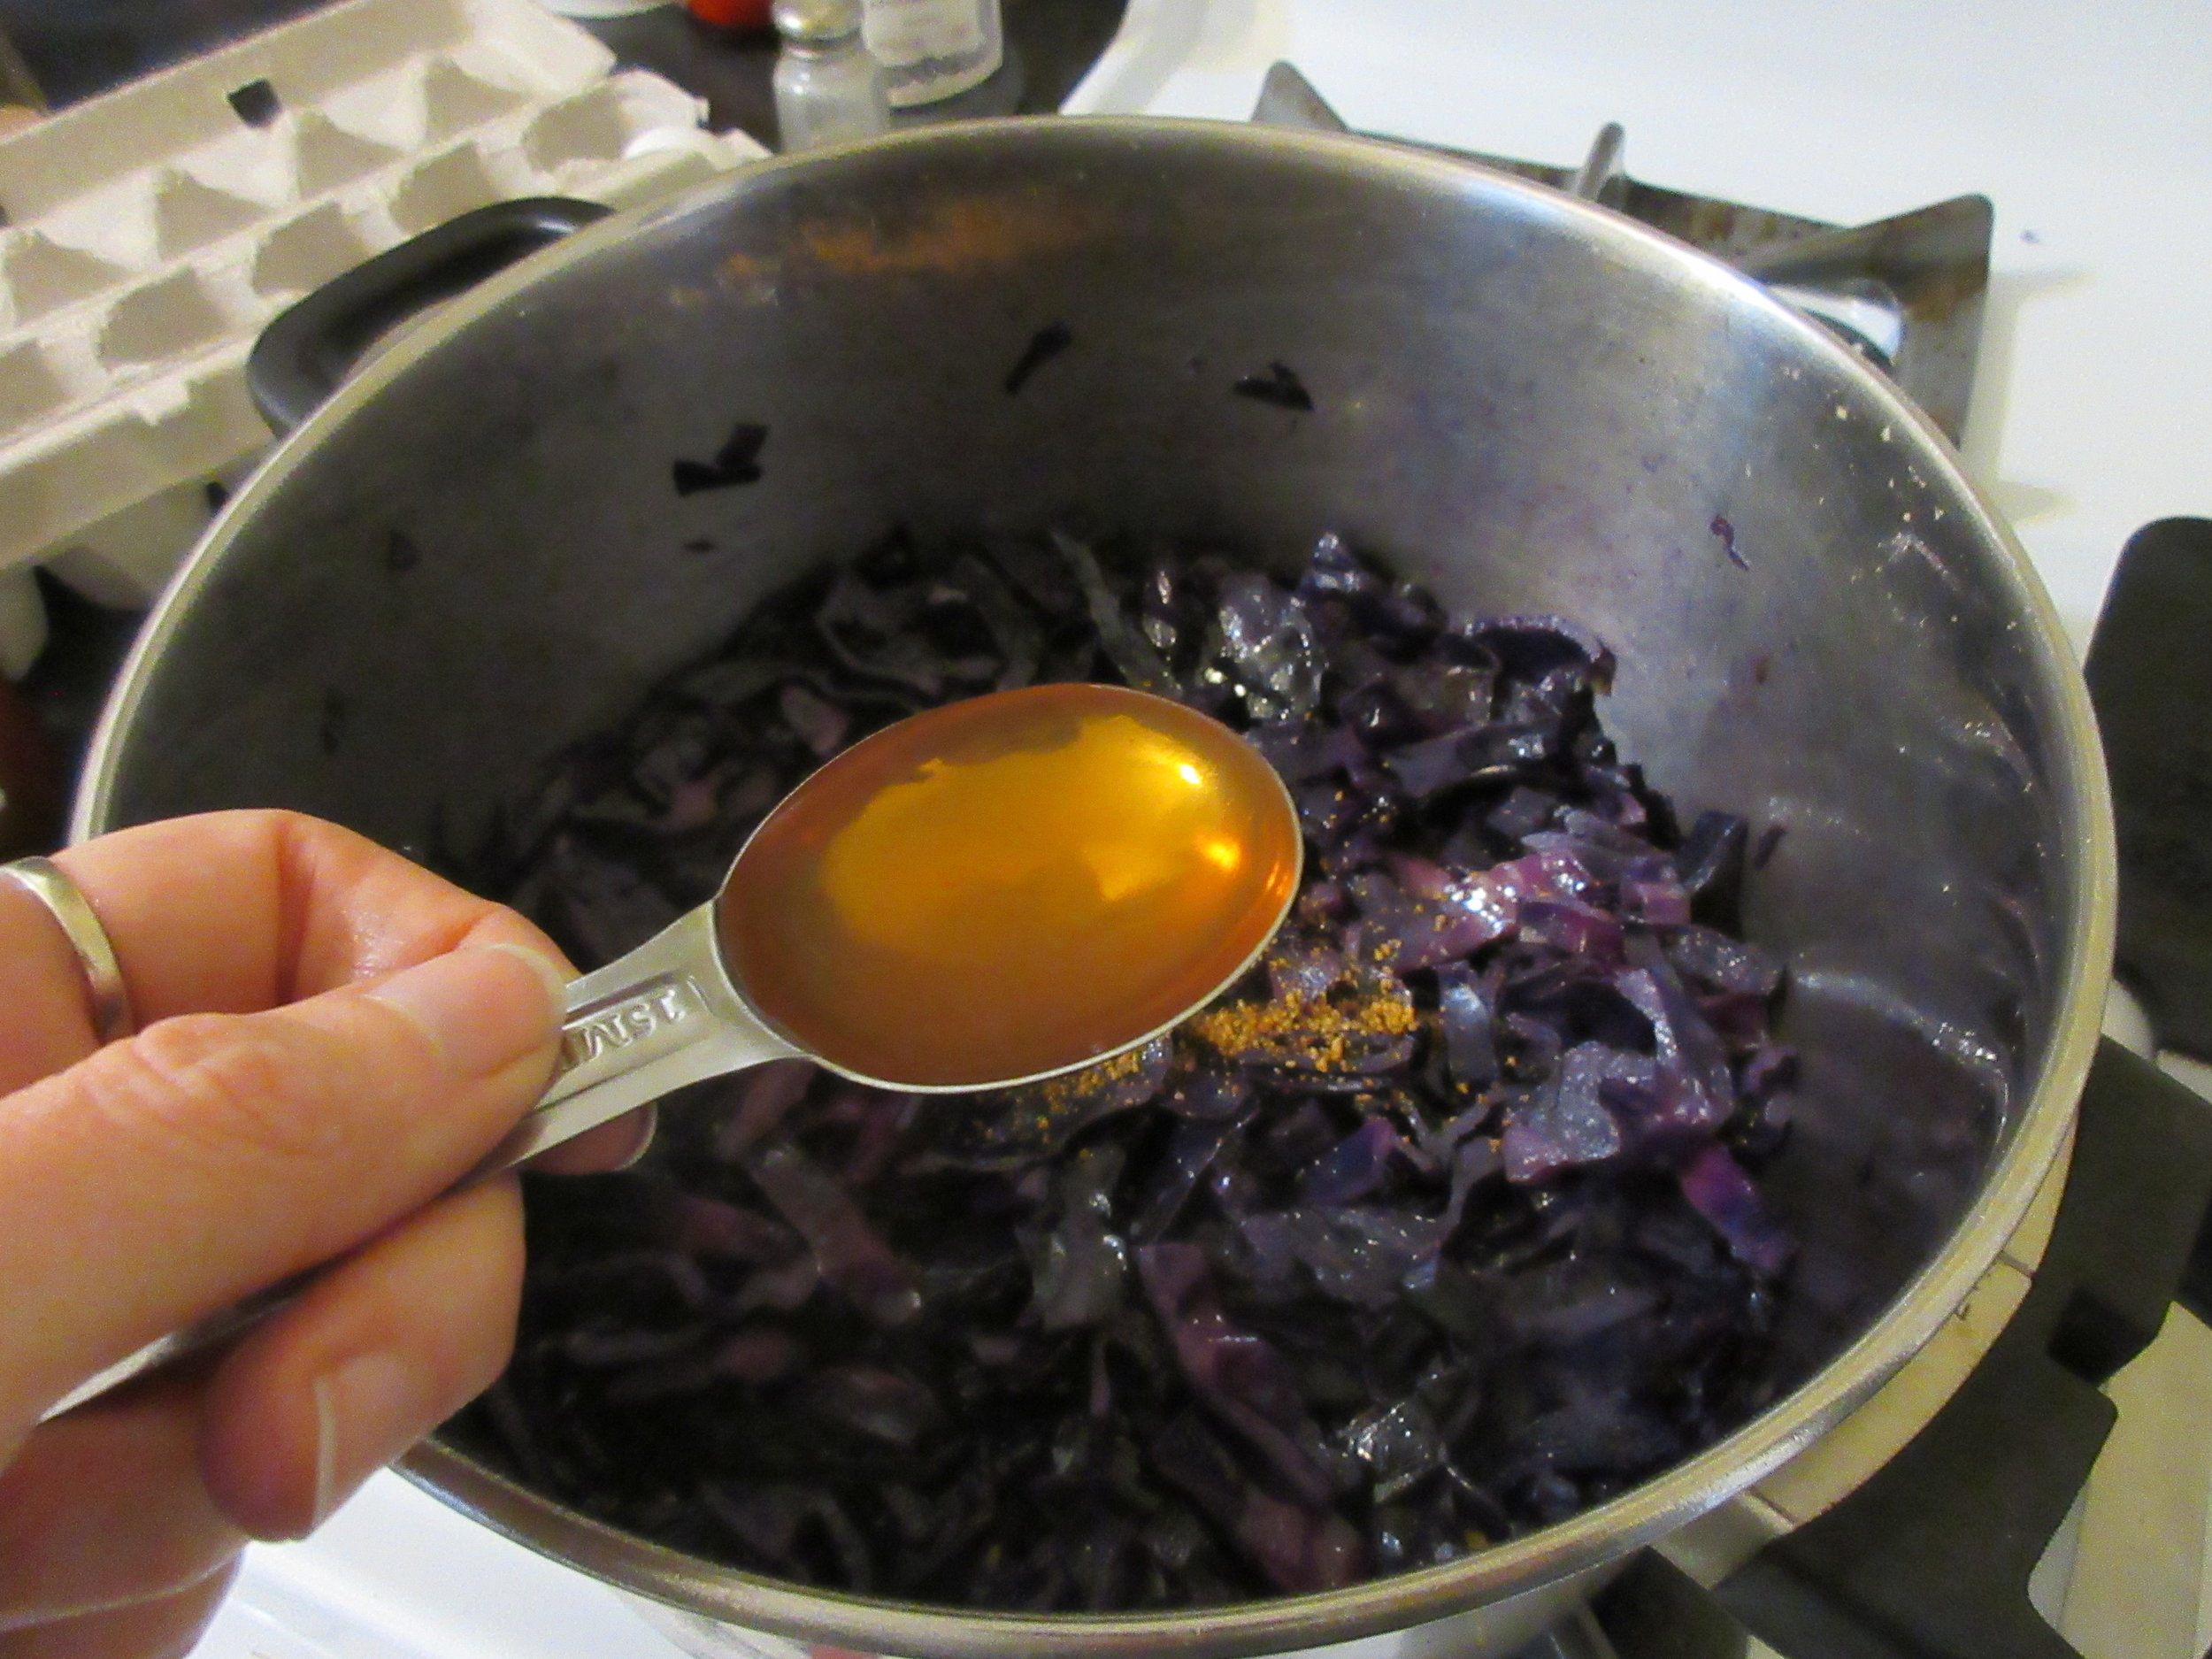
2 tbsp vinegar – I used red wine vinegar
1/2 tbsp sugar (I used brown)
Slice the cabbage and soak in cold water. Fannie Farmer's recipe doesn't say how long to soak the cabbage, so I soaked it as long as it took me to chop the onion, have a few sips of wine and gather ingredients & supplies for the recipe. If you have thoughts about how long the cabbage should be soaked, please share in the comments!
Drain the cabbage and melt the butter in a large pot. Add the cabbage, salt, onion, nutmeg and cayenne pepper. Cover and simmer on low until the cabbage is tender, stirring occasionally. Add two tablespoons vinegar and one-half tablespoon sugar, and cook five minutes. Since the type of vinegar & sugar isn't specified, I decided to use red wine vinegar and brown sugar because I thought the flavours would go together nicely.

Before I began speaking to people about trying out Fannie Farmer's German Cabbage recipe from 1896, I never knew how many people had a passionate love affair with cabbage!
I really like how the flavours are balanced in the German Cabbage: some tang thanks to the vinegar, a bit of sweetness from the nutmeg & sugar, and a hint of spice from the cayenne pepper. And of course, if a dish is fried in butter, it's got to be delicious.
The Boston Cooking-School Cookbook (also popularly known as The Fannie Farmer Cookbook) was written in 1896 by Fannie Merritt Farmer, who was a student at the Boston Cooking School and became the Principal of the school not long after she graduated. In 1896, she approached a publisher with her cookbook idea. The publishers were not convinced, but conceded to print a limited run of 3000 copies if Miss Farmer covered the costs herself.
The Boston Cooking-School specialized in a more scientific approach to cooking & housekeeping, which is reflected in the recipes. Compared to other recipe books of the day, the measurements are rather exact, and the instructions are explained clearly. This cookbook has never been out of print since 1896, and these days you'll find the 13th edition of the Fannie Farmer Cookbook new in bookstores. If you'd like to read more about Fannie Farmer and her cookbook, have a look at these articles from Amazing Women in History and Smithsonian Magazine.
I found my copy at Cover to Cover, a second-hand bookstore in Collingwood, Ontario. When we were there a few years ago, Cover to Cover could have been called Floor to Ceiling because there was barely enough space to walk through the full shelves and piles of books. A woman appeared from around a corner, and I explained my specific cookbook interests. She said, "Yeah, we've got shit like that" and told me to search on a bottom shelf behind a pile of books. Sure enough, waiting there for me was a 1945 Joy of Cooking, and my reprint of the 1896 Boston Cooking-School Cookbook.
I knew it would be mine when I read on the cover that it was a fascimile of Fannie Farmer's first edition, but it had my heart when I opened it up and saw the inscription inside. Written in 1978 when the book was given as a gift from someone with an illegible signature (please comment if you can make out the name) to Glenda, who I'm guessing is the gift giver's sister. To me, this handwritten message conveys why The Fannie Farmer Cookbook has been in print for over 120 years:
dear Glenda – This book has been a never-failing reference to me since I first left Mom's home cooking and was challenged to produce meals on my own. With love, ???
Christmas 1978

Read the Cookbook
A scan of the 1896 first edition on the Internet Archive:

Cayenne Cheeses
When I decided to start my own food history blog, I knew right away that my first blog post would be about Cayenne Cheeses. Why? Cayenne Cheeses were the first historic food that I fell in love with when I started working as a Historical Interpreter, and I'm not alone. If my coworkers don't have dietary restrictions against dairy and wheat, it's a pretty safe bet that they're also mad about Cayenne Cheeses.

You'll find this recipe in:
Mrs. Beeton's Book of Household Management
by Isabella Beeton
London, England – 1861
The Original Recipe:
CAYENNE CHEESES.
1642. INGREDIENTS. - 1/2 lb. of butter, 1/2 lb. of flour, 1/2 lb. of grated cheese, 1/2 teaspoonful of cayenne, 1/3 teaspoonful of salt; water.
Mode. - Rub the butter in the flour; add the grated cheese, cayenne and salt; and mix these ingredients well together. Moisten with sufficient water to make the whole into a paste; roll out, and cut into fingers about 4 inches in length. Bake them in a moderate oven a very light colour, and serve very hot.
Time. - 15 to 20 minutes. Average cost, 1 s. 4 d.
Sufficient for 6 or 7 persons. Seasonable at any time.

My Recipe:
1/2 lb butter
1 1/4 cups flour – 225 g
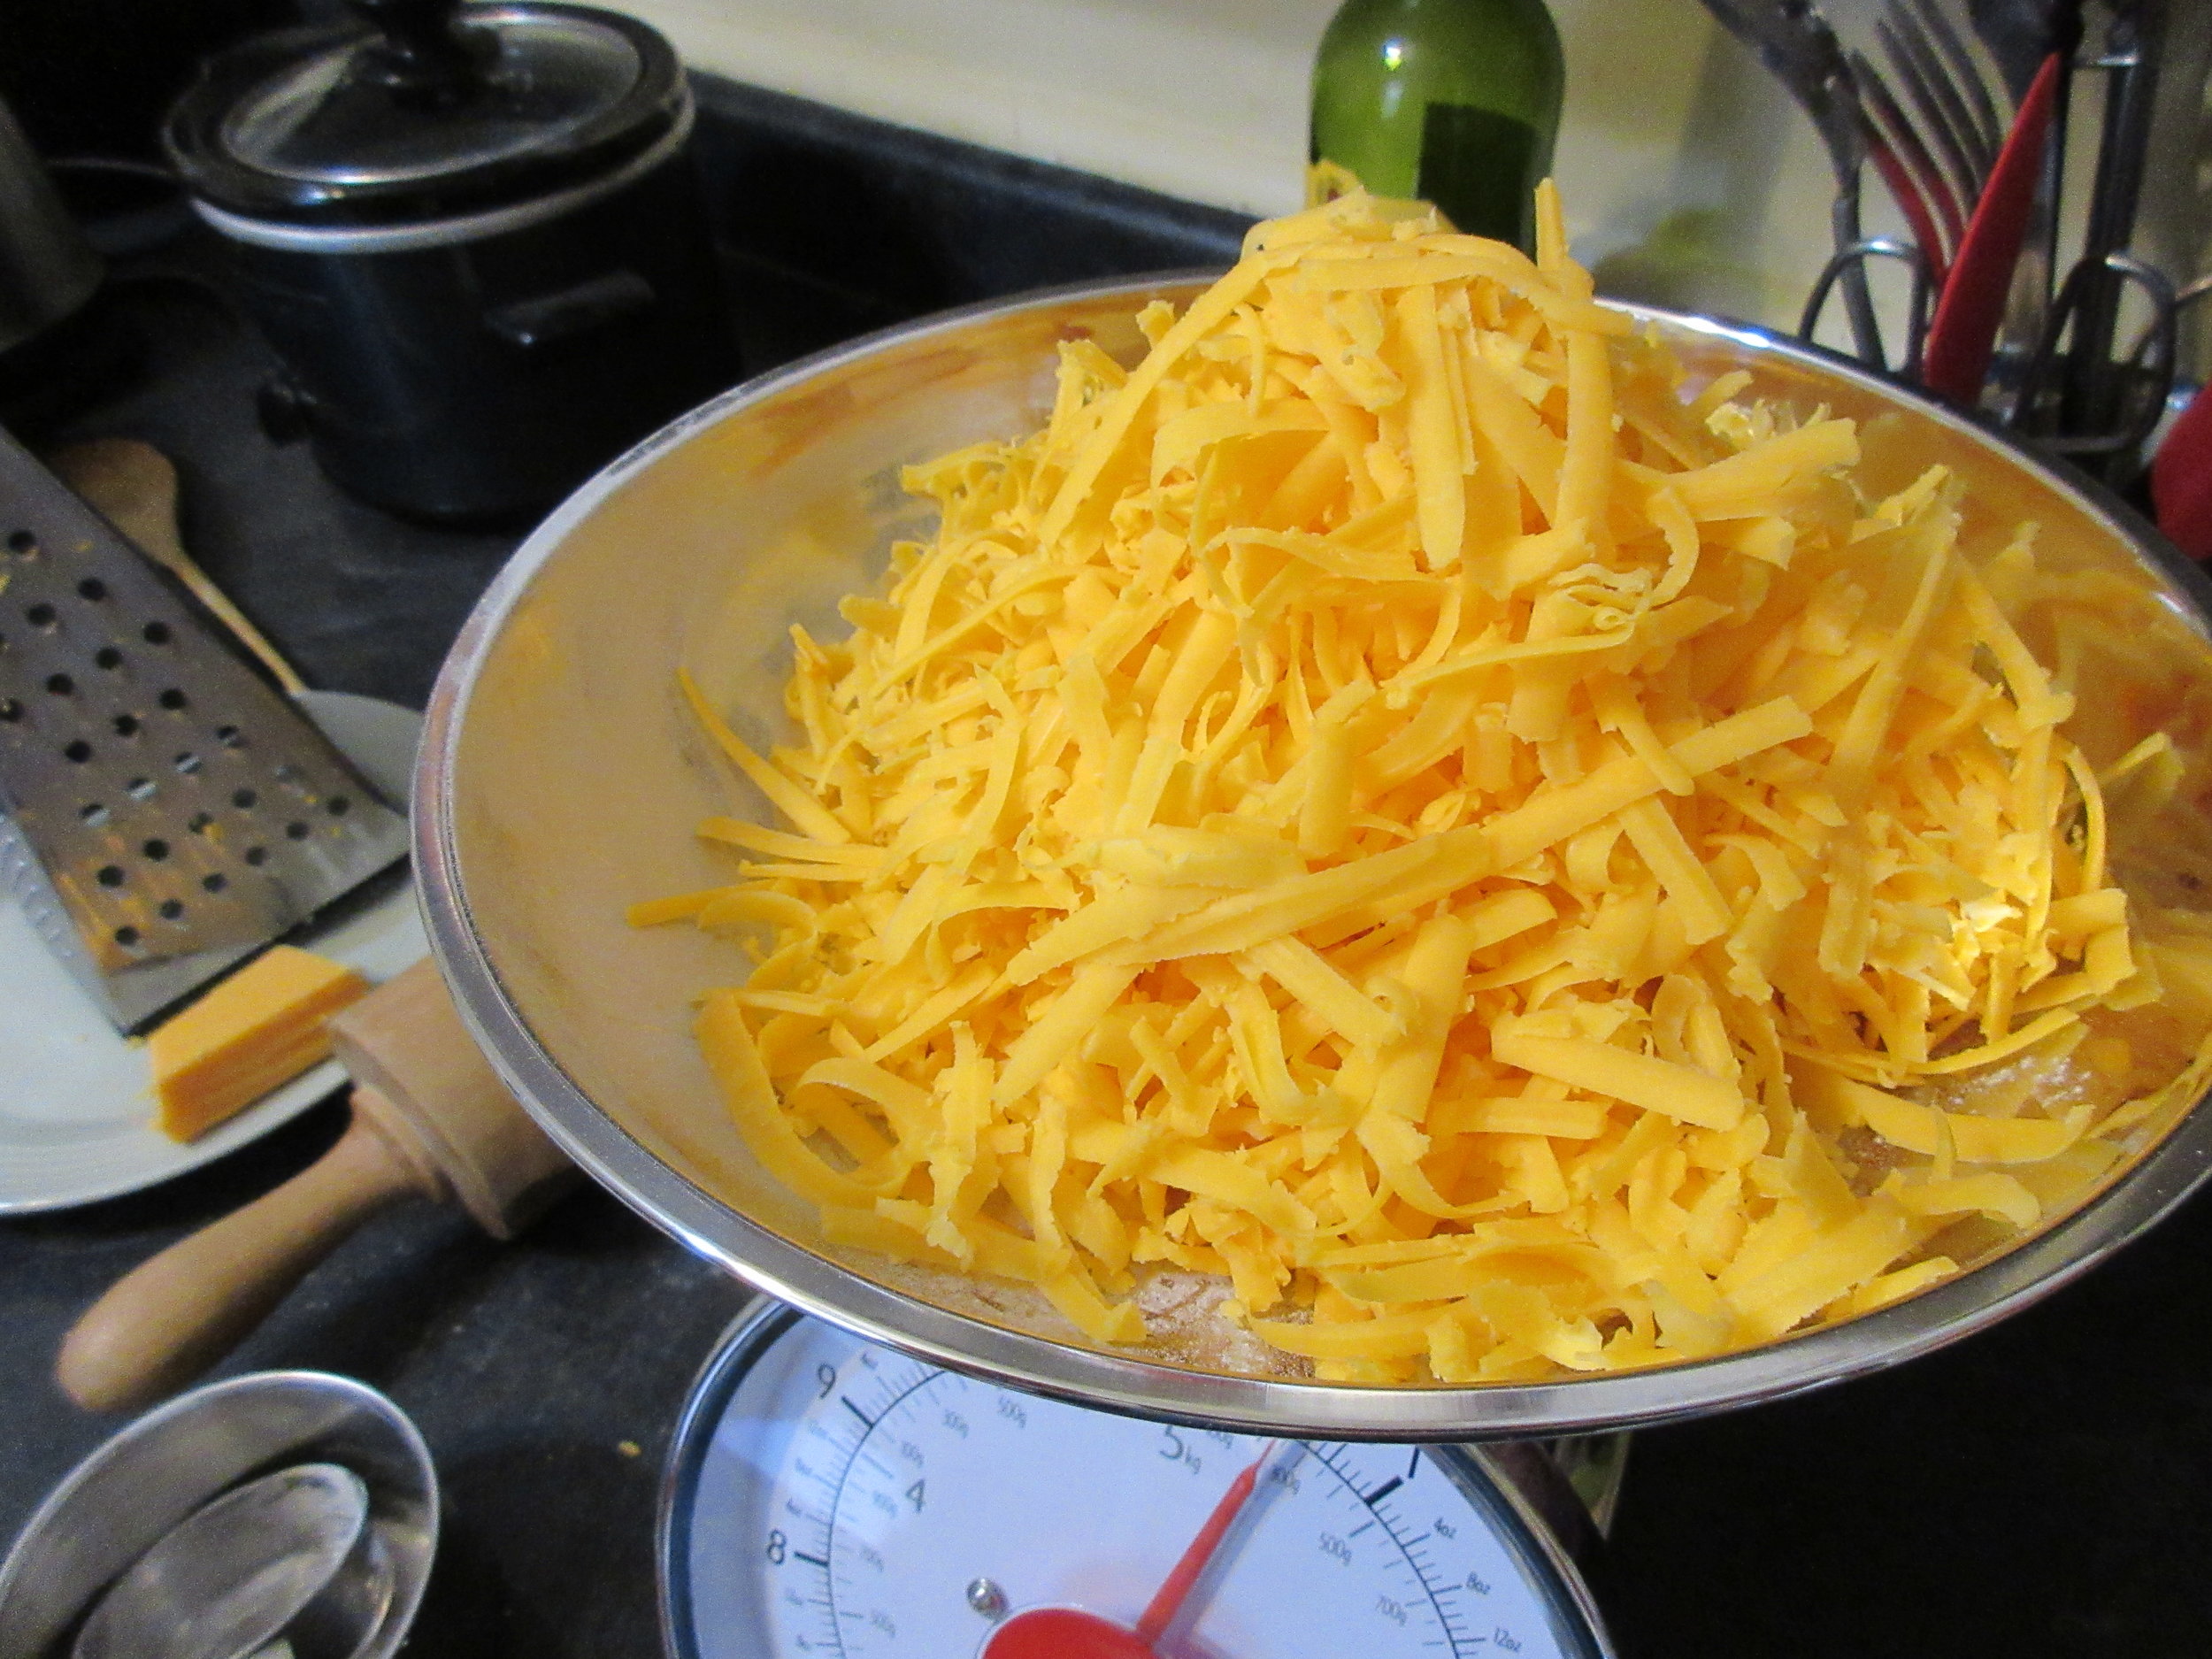
2 1/4 cups grated cheese – 225 g (I used cheddar)
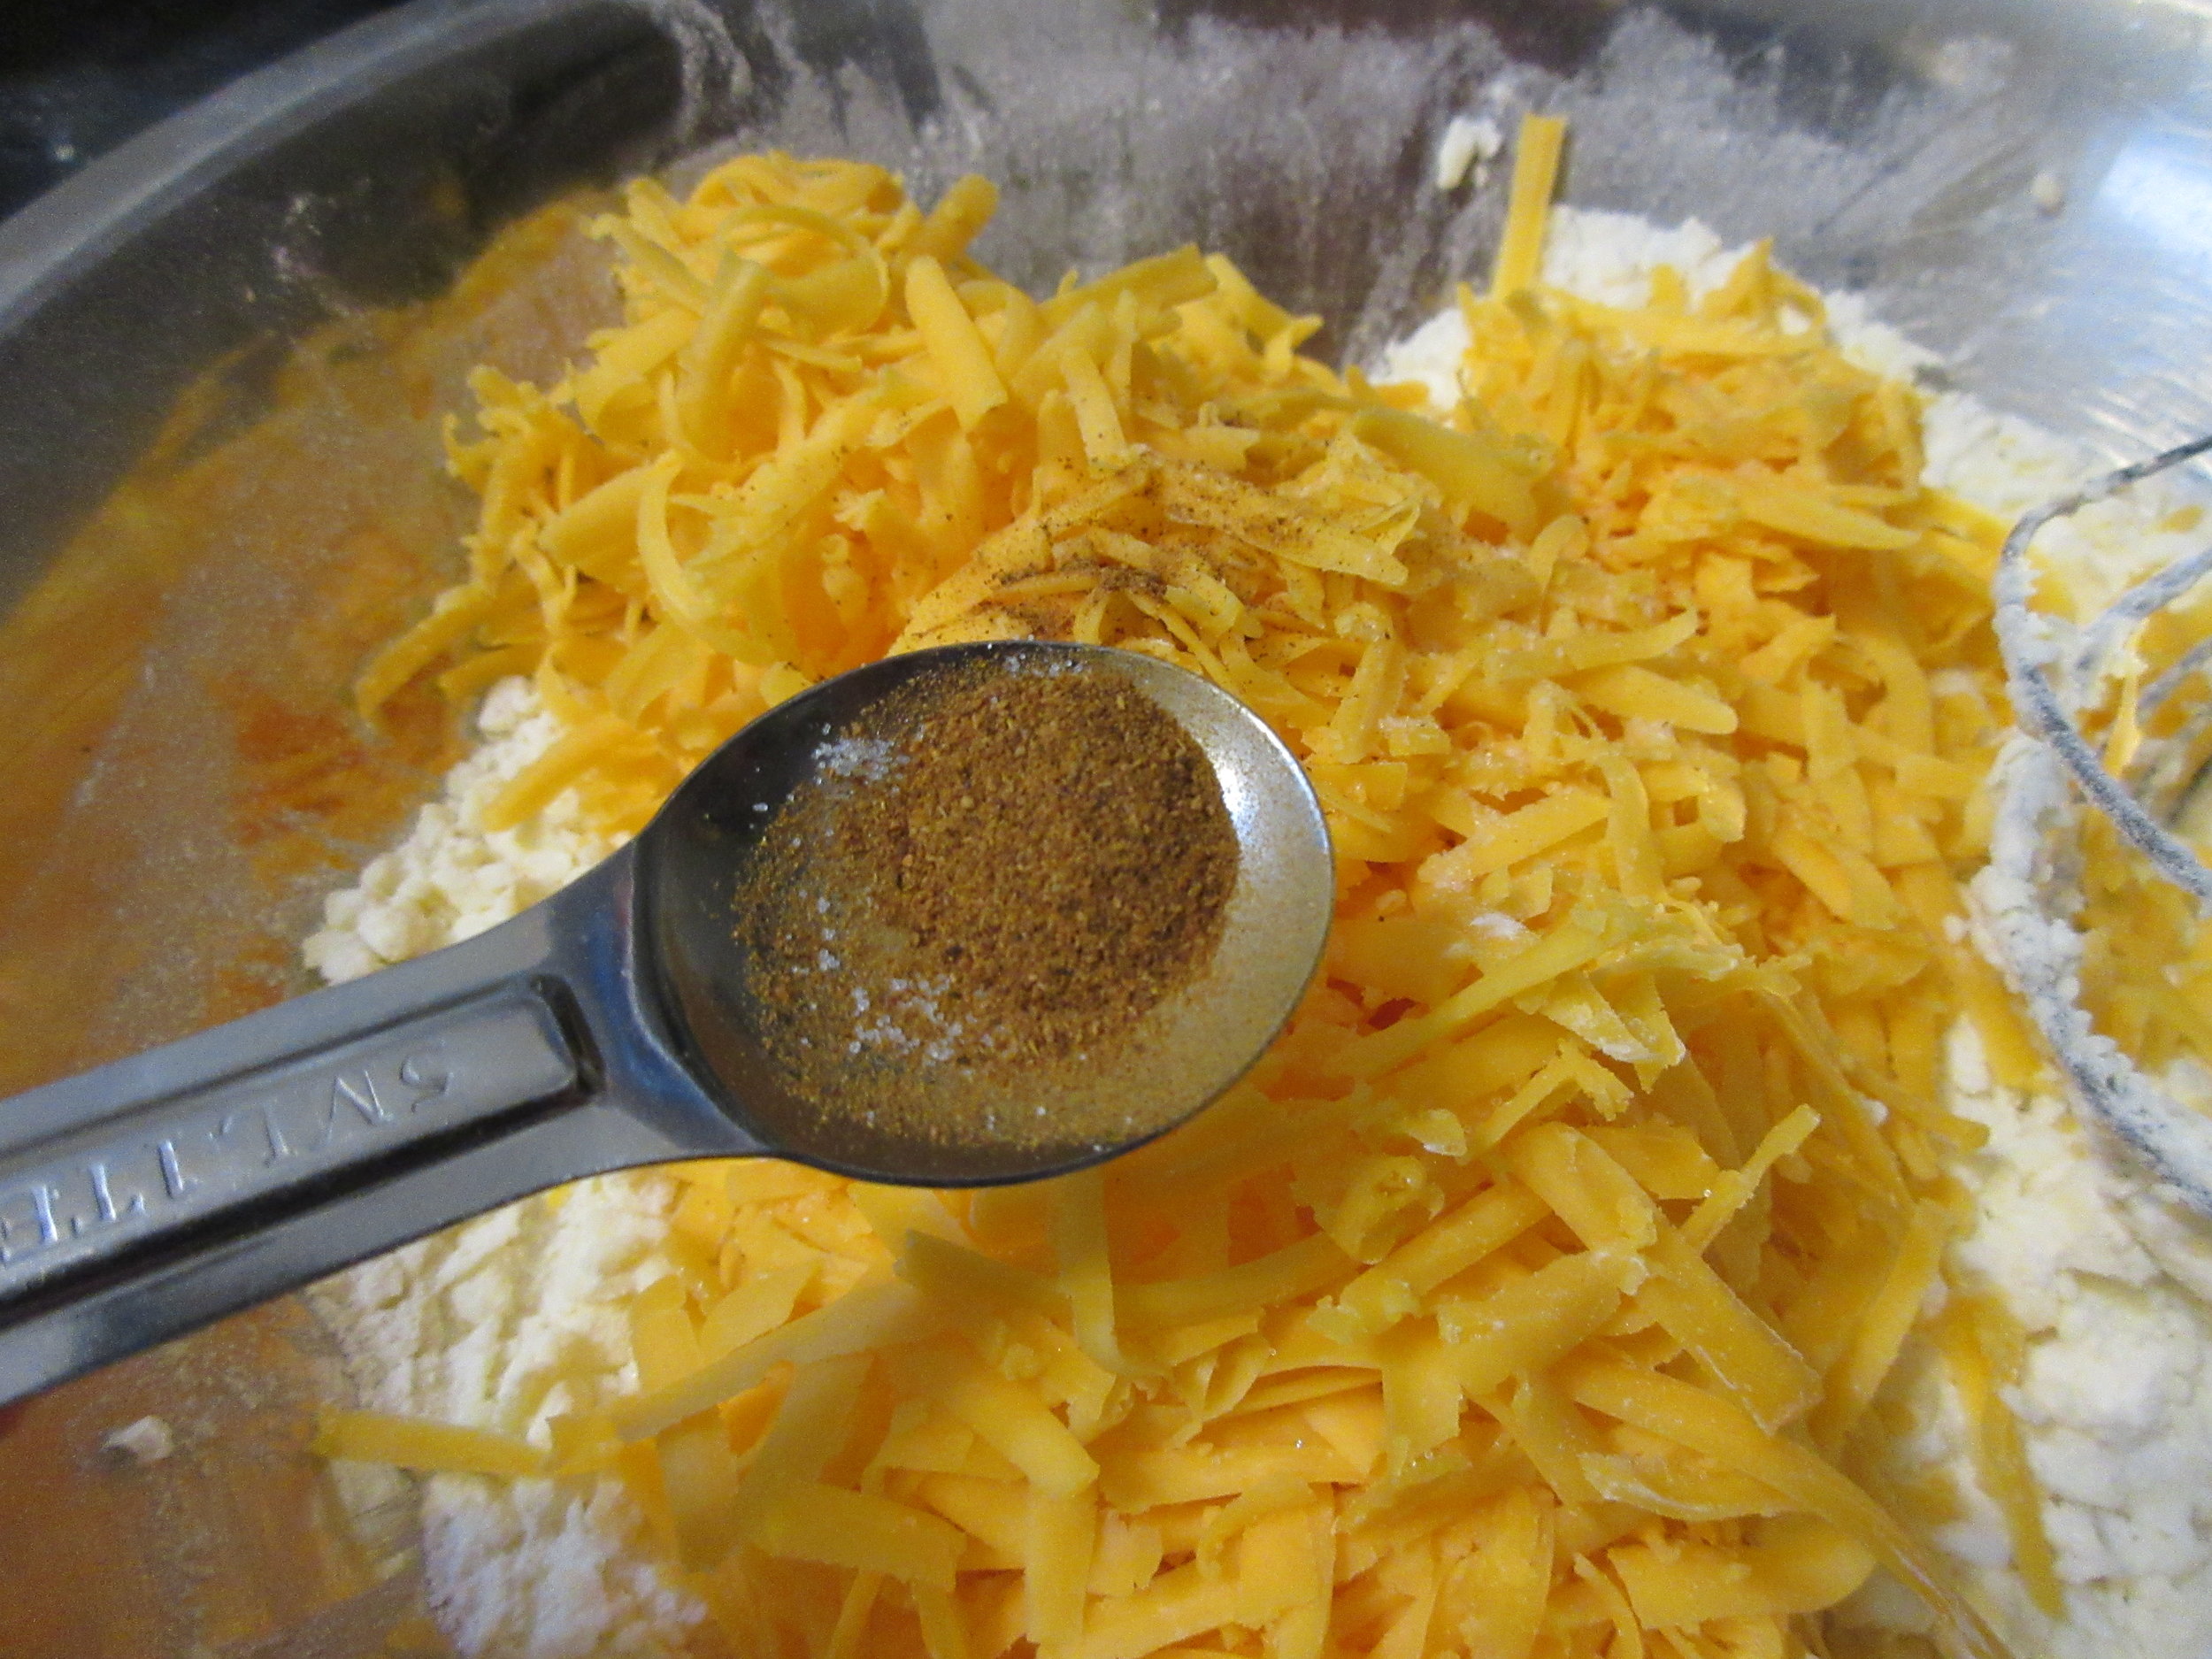
1/3 teaspoon salt
1/3 teaspoon ground cayenne pepper (or to taste)
Water – I used about 3/4 cup/175mL
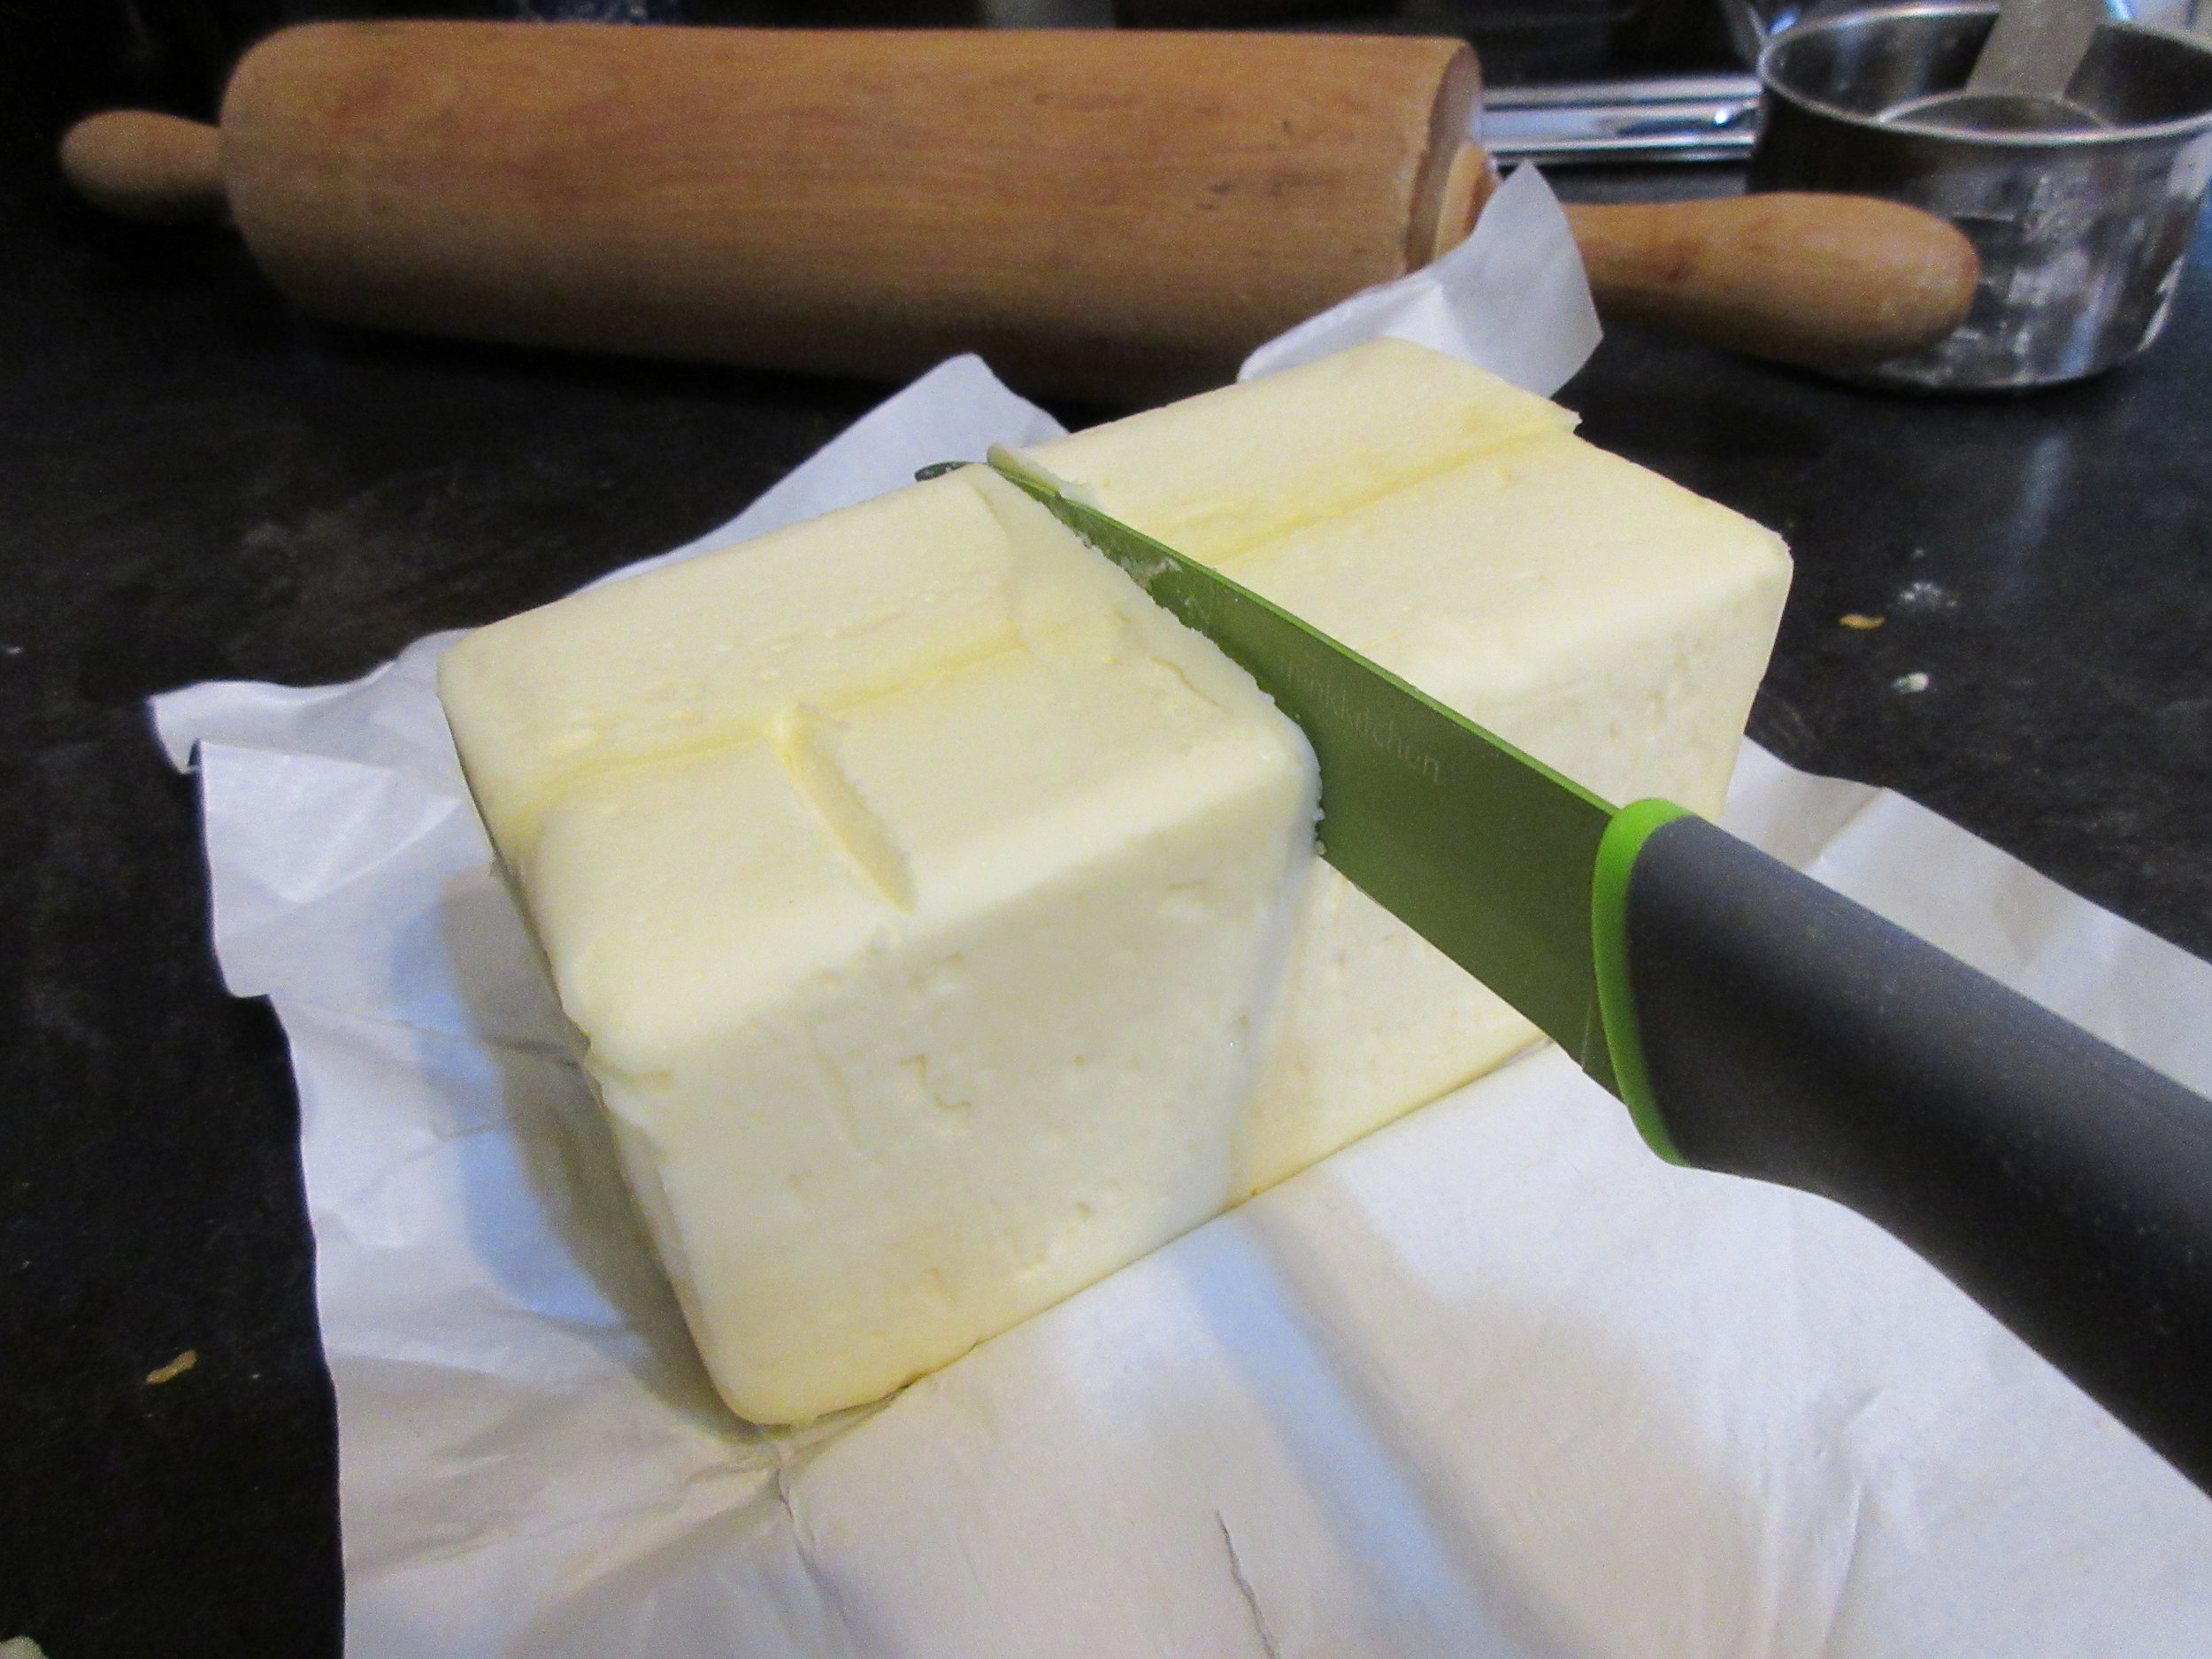
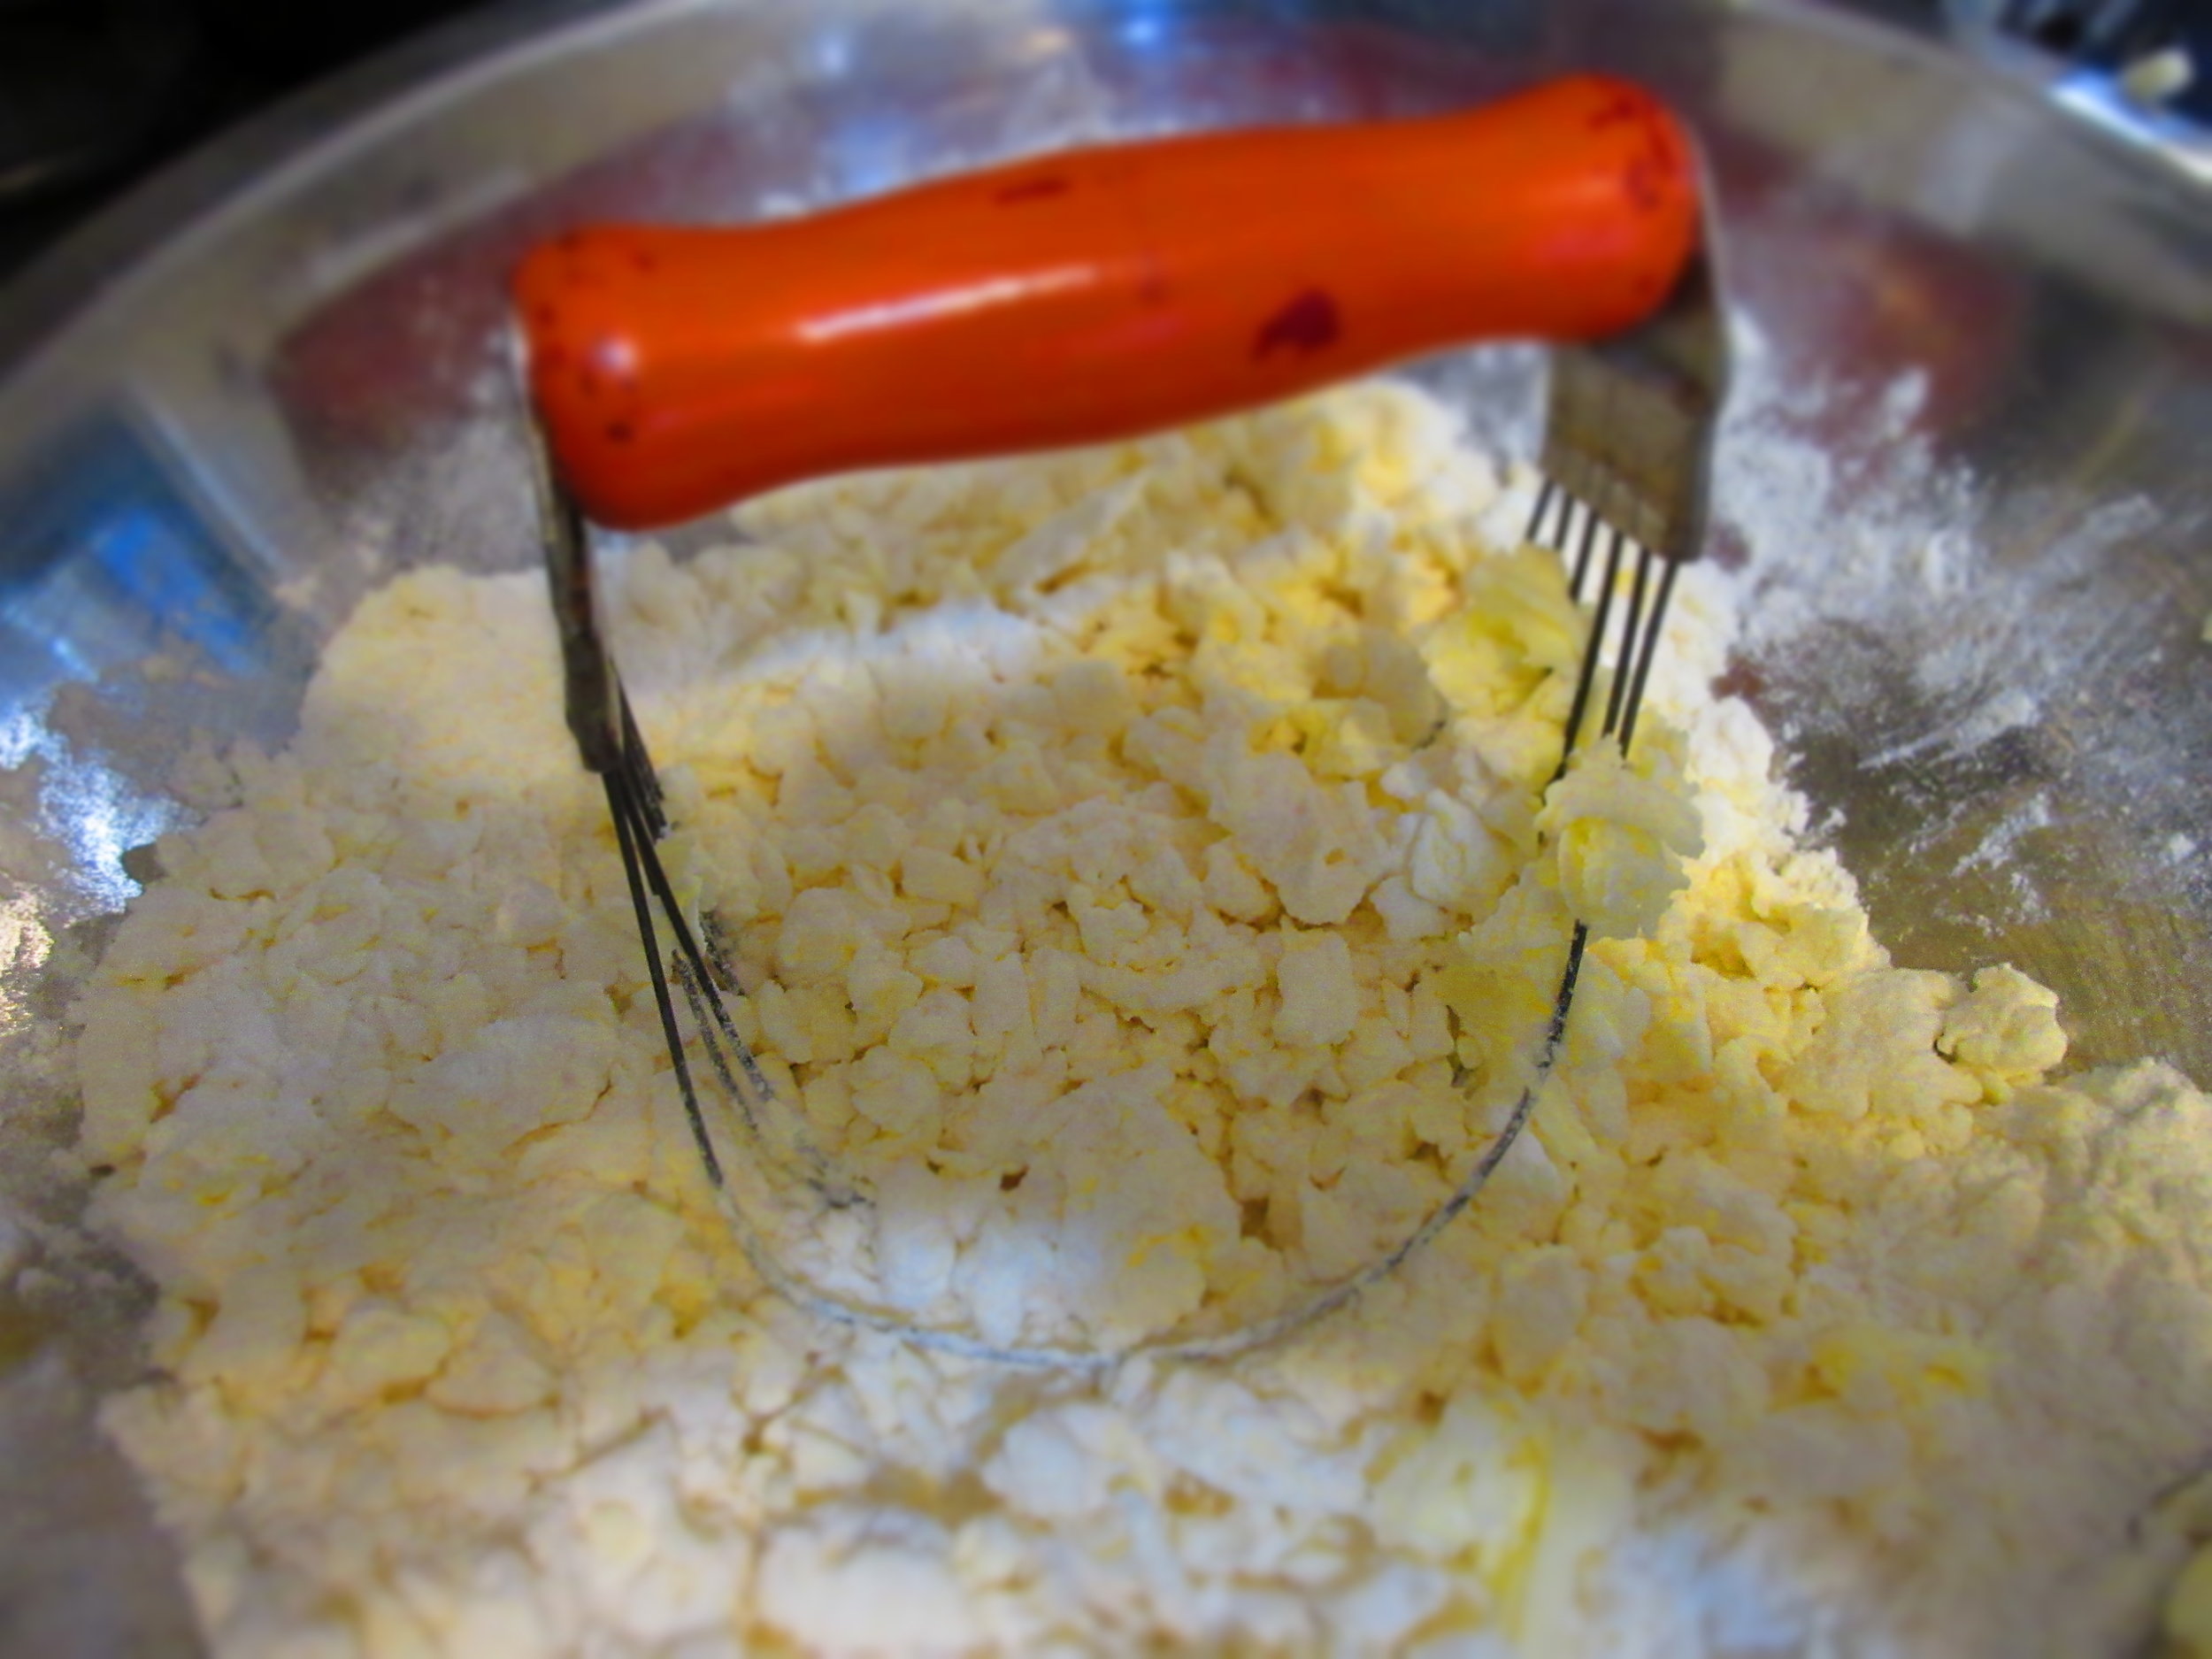
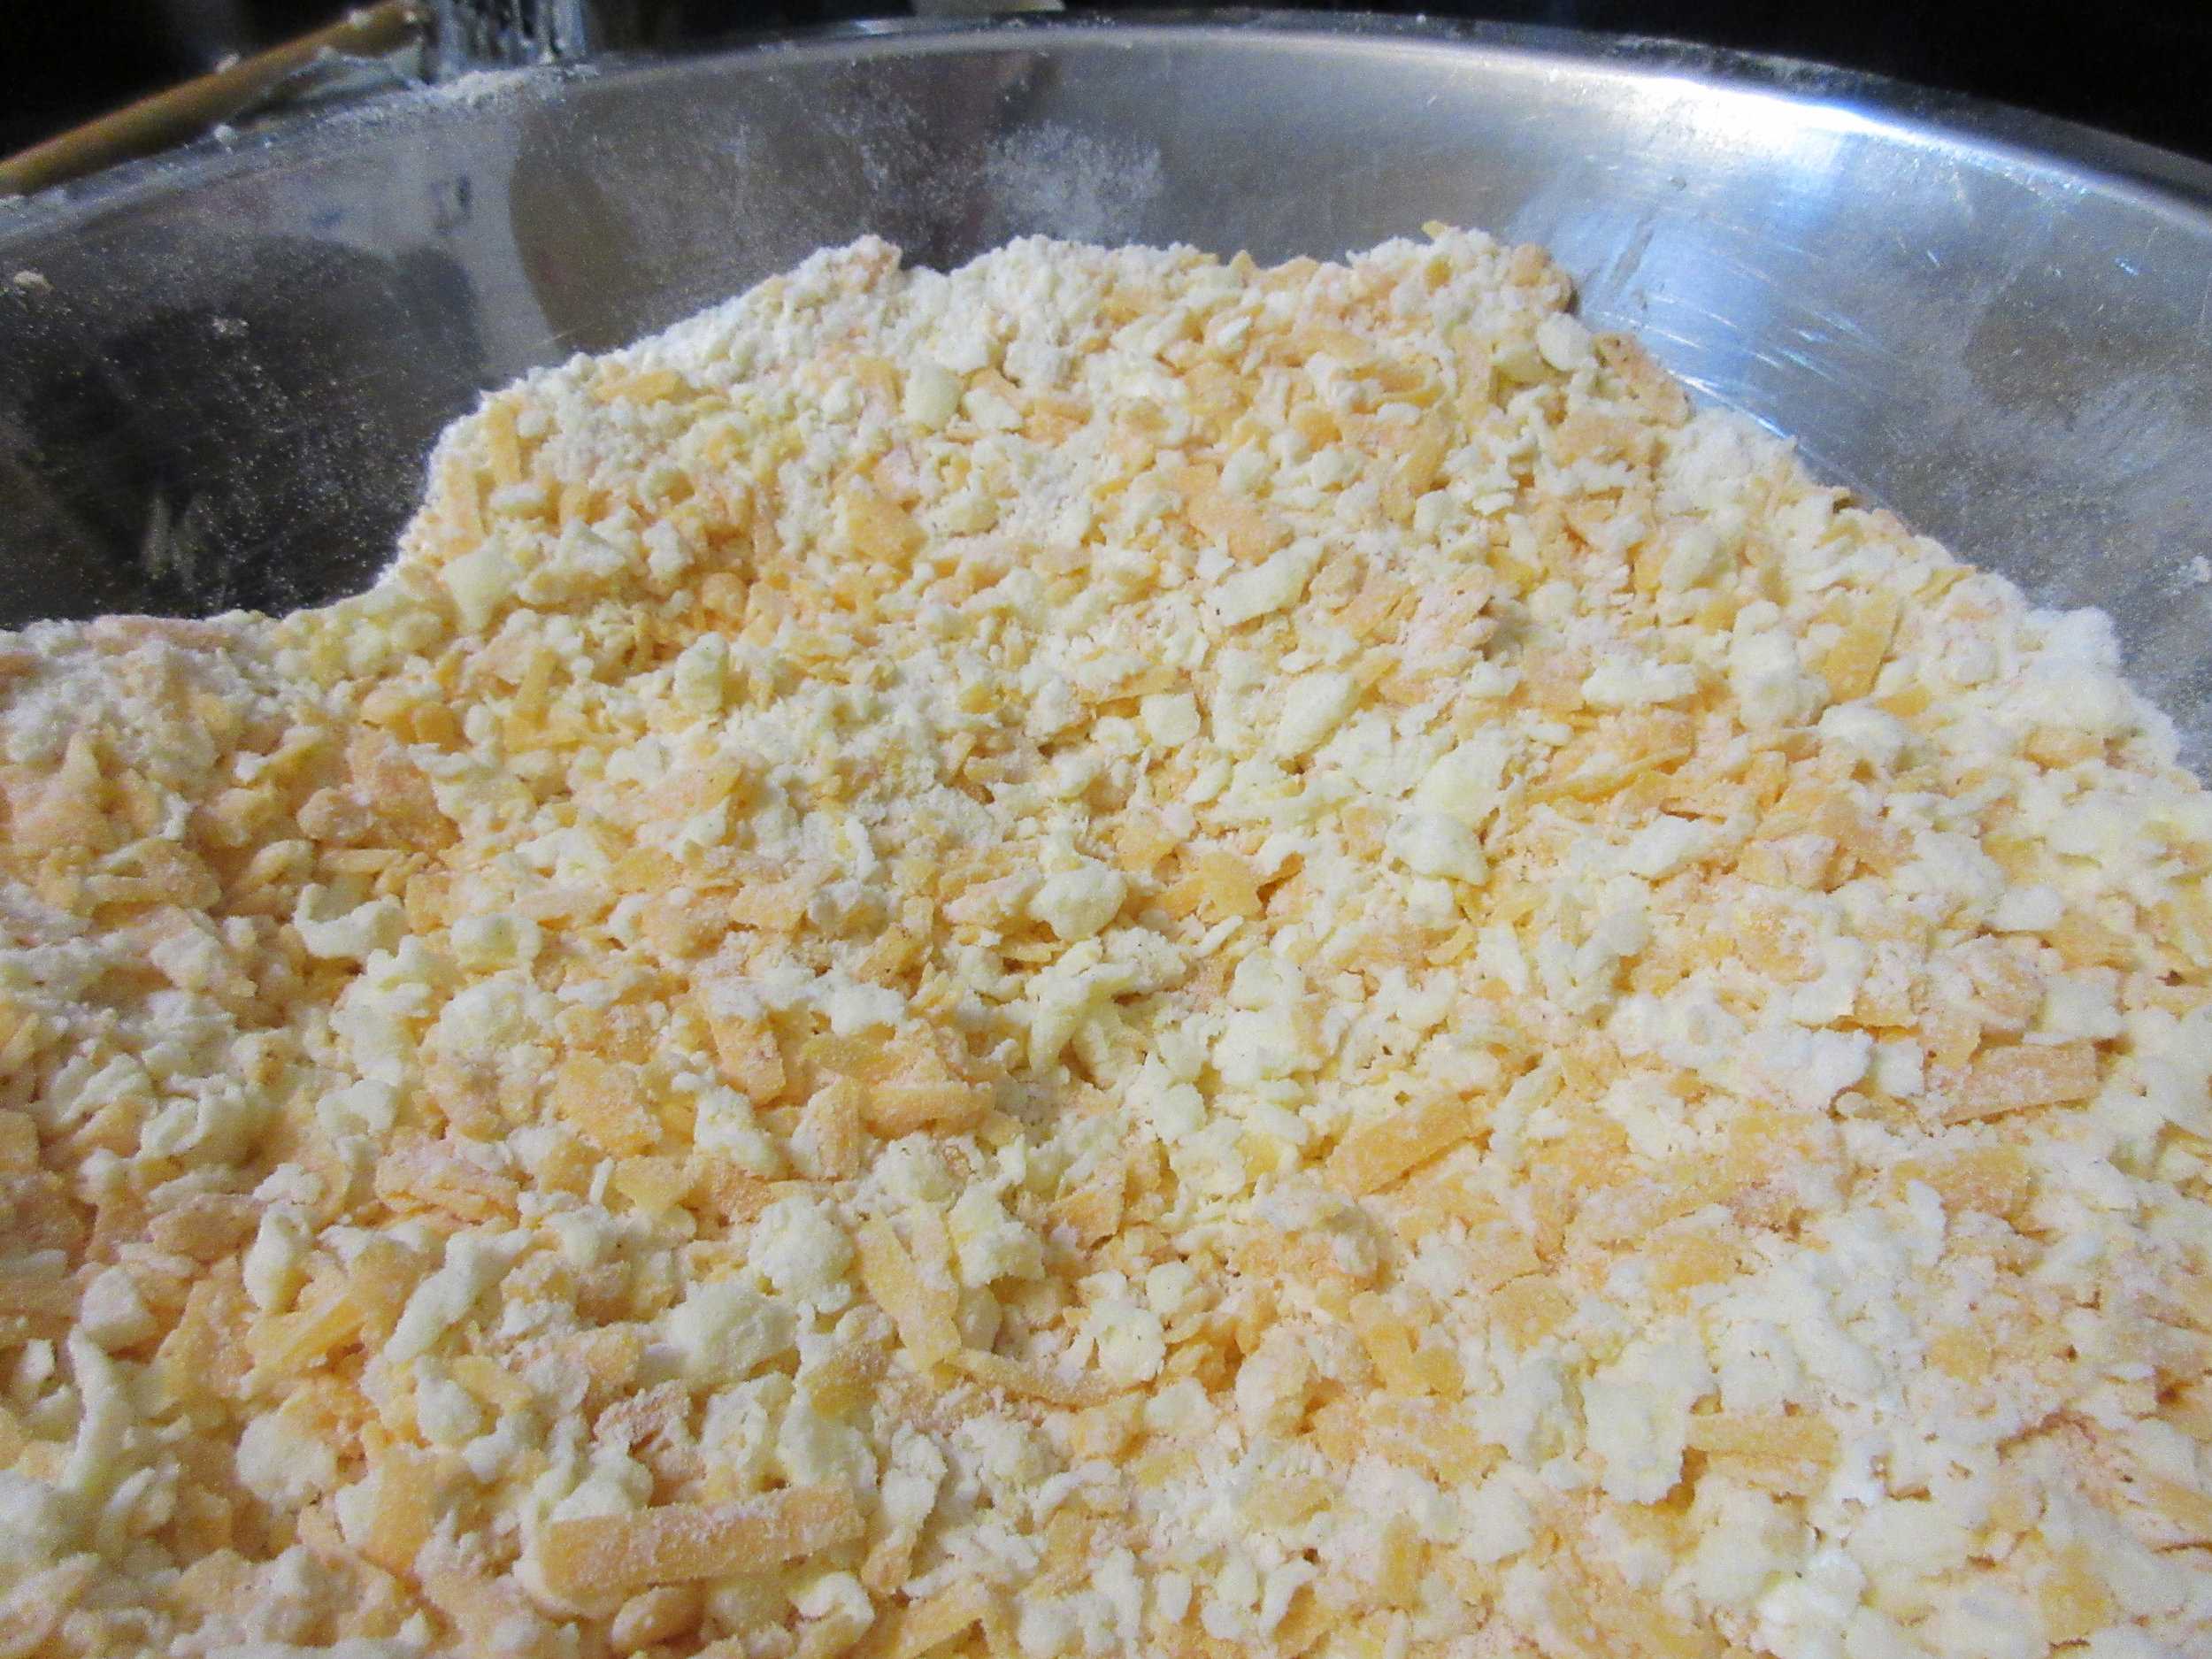
Preheat oven to 350F/175C. Measure the flour into a large mixing bowl. Cut the butter into small pieces (make your life easier & grate the butter on a cheese grater!) and add to the flour. Incorporate the butter and flour using a dough cutter or two knives or rub it into the flour with your hands.
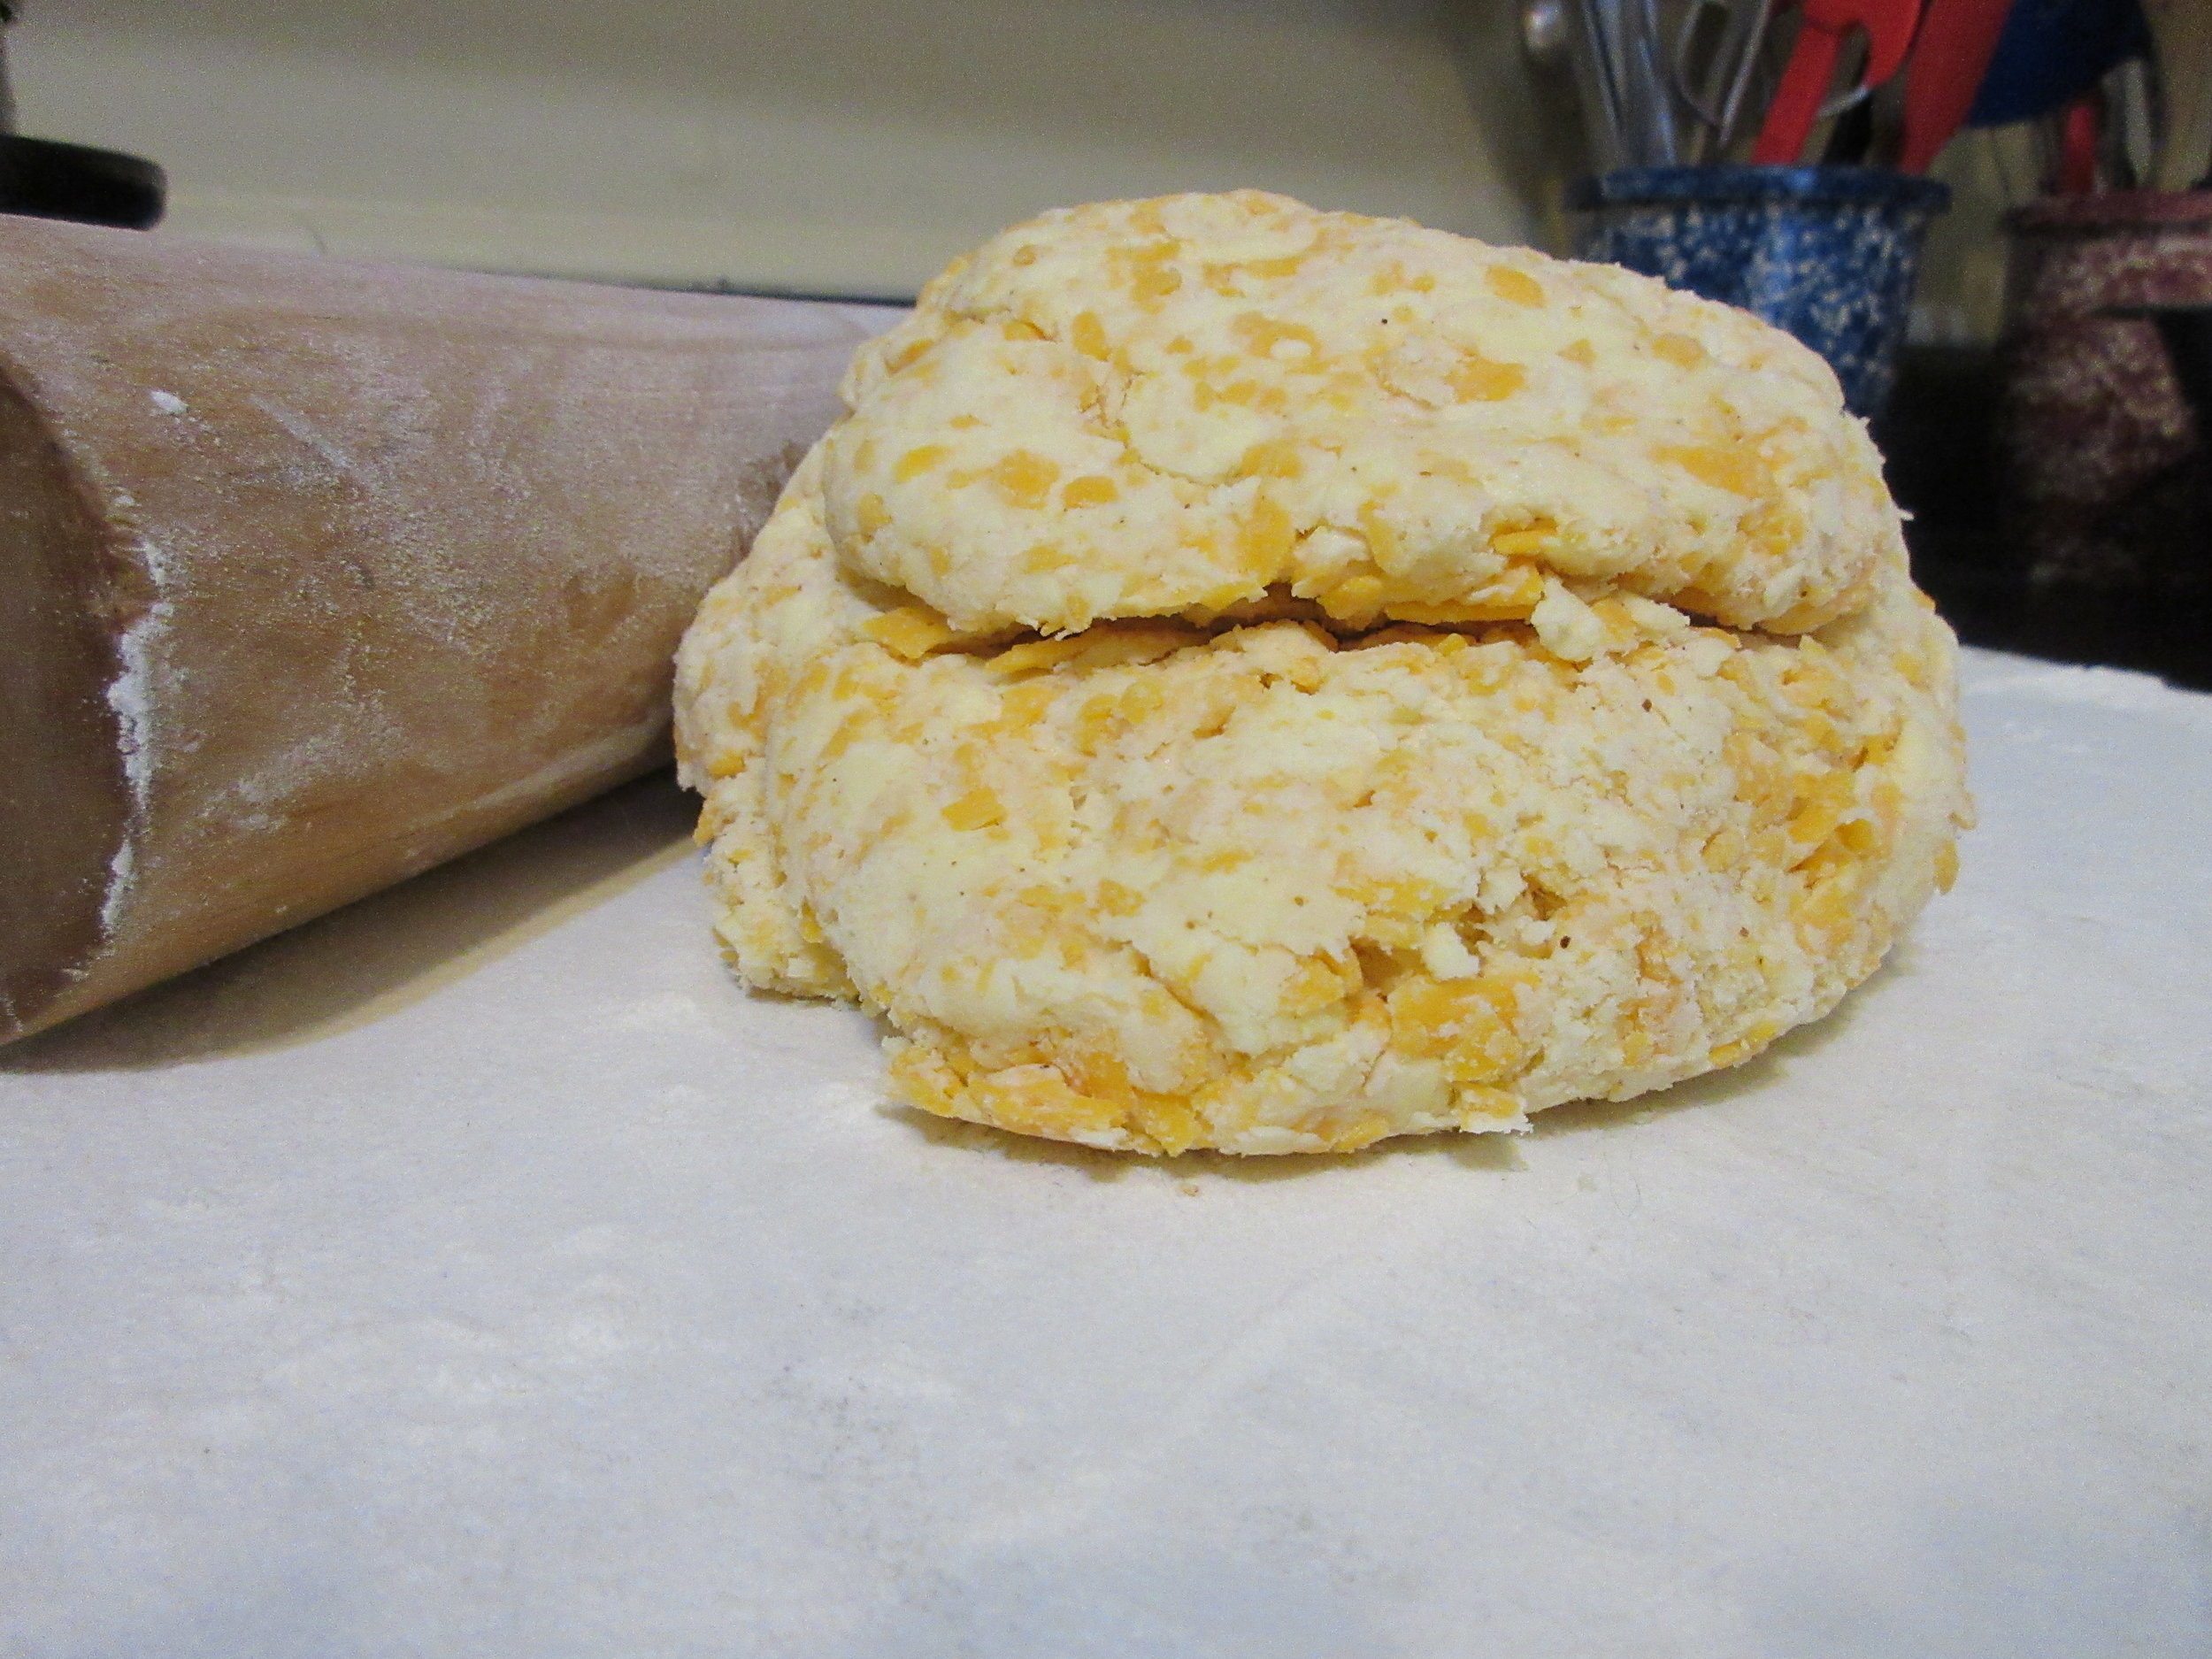
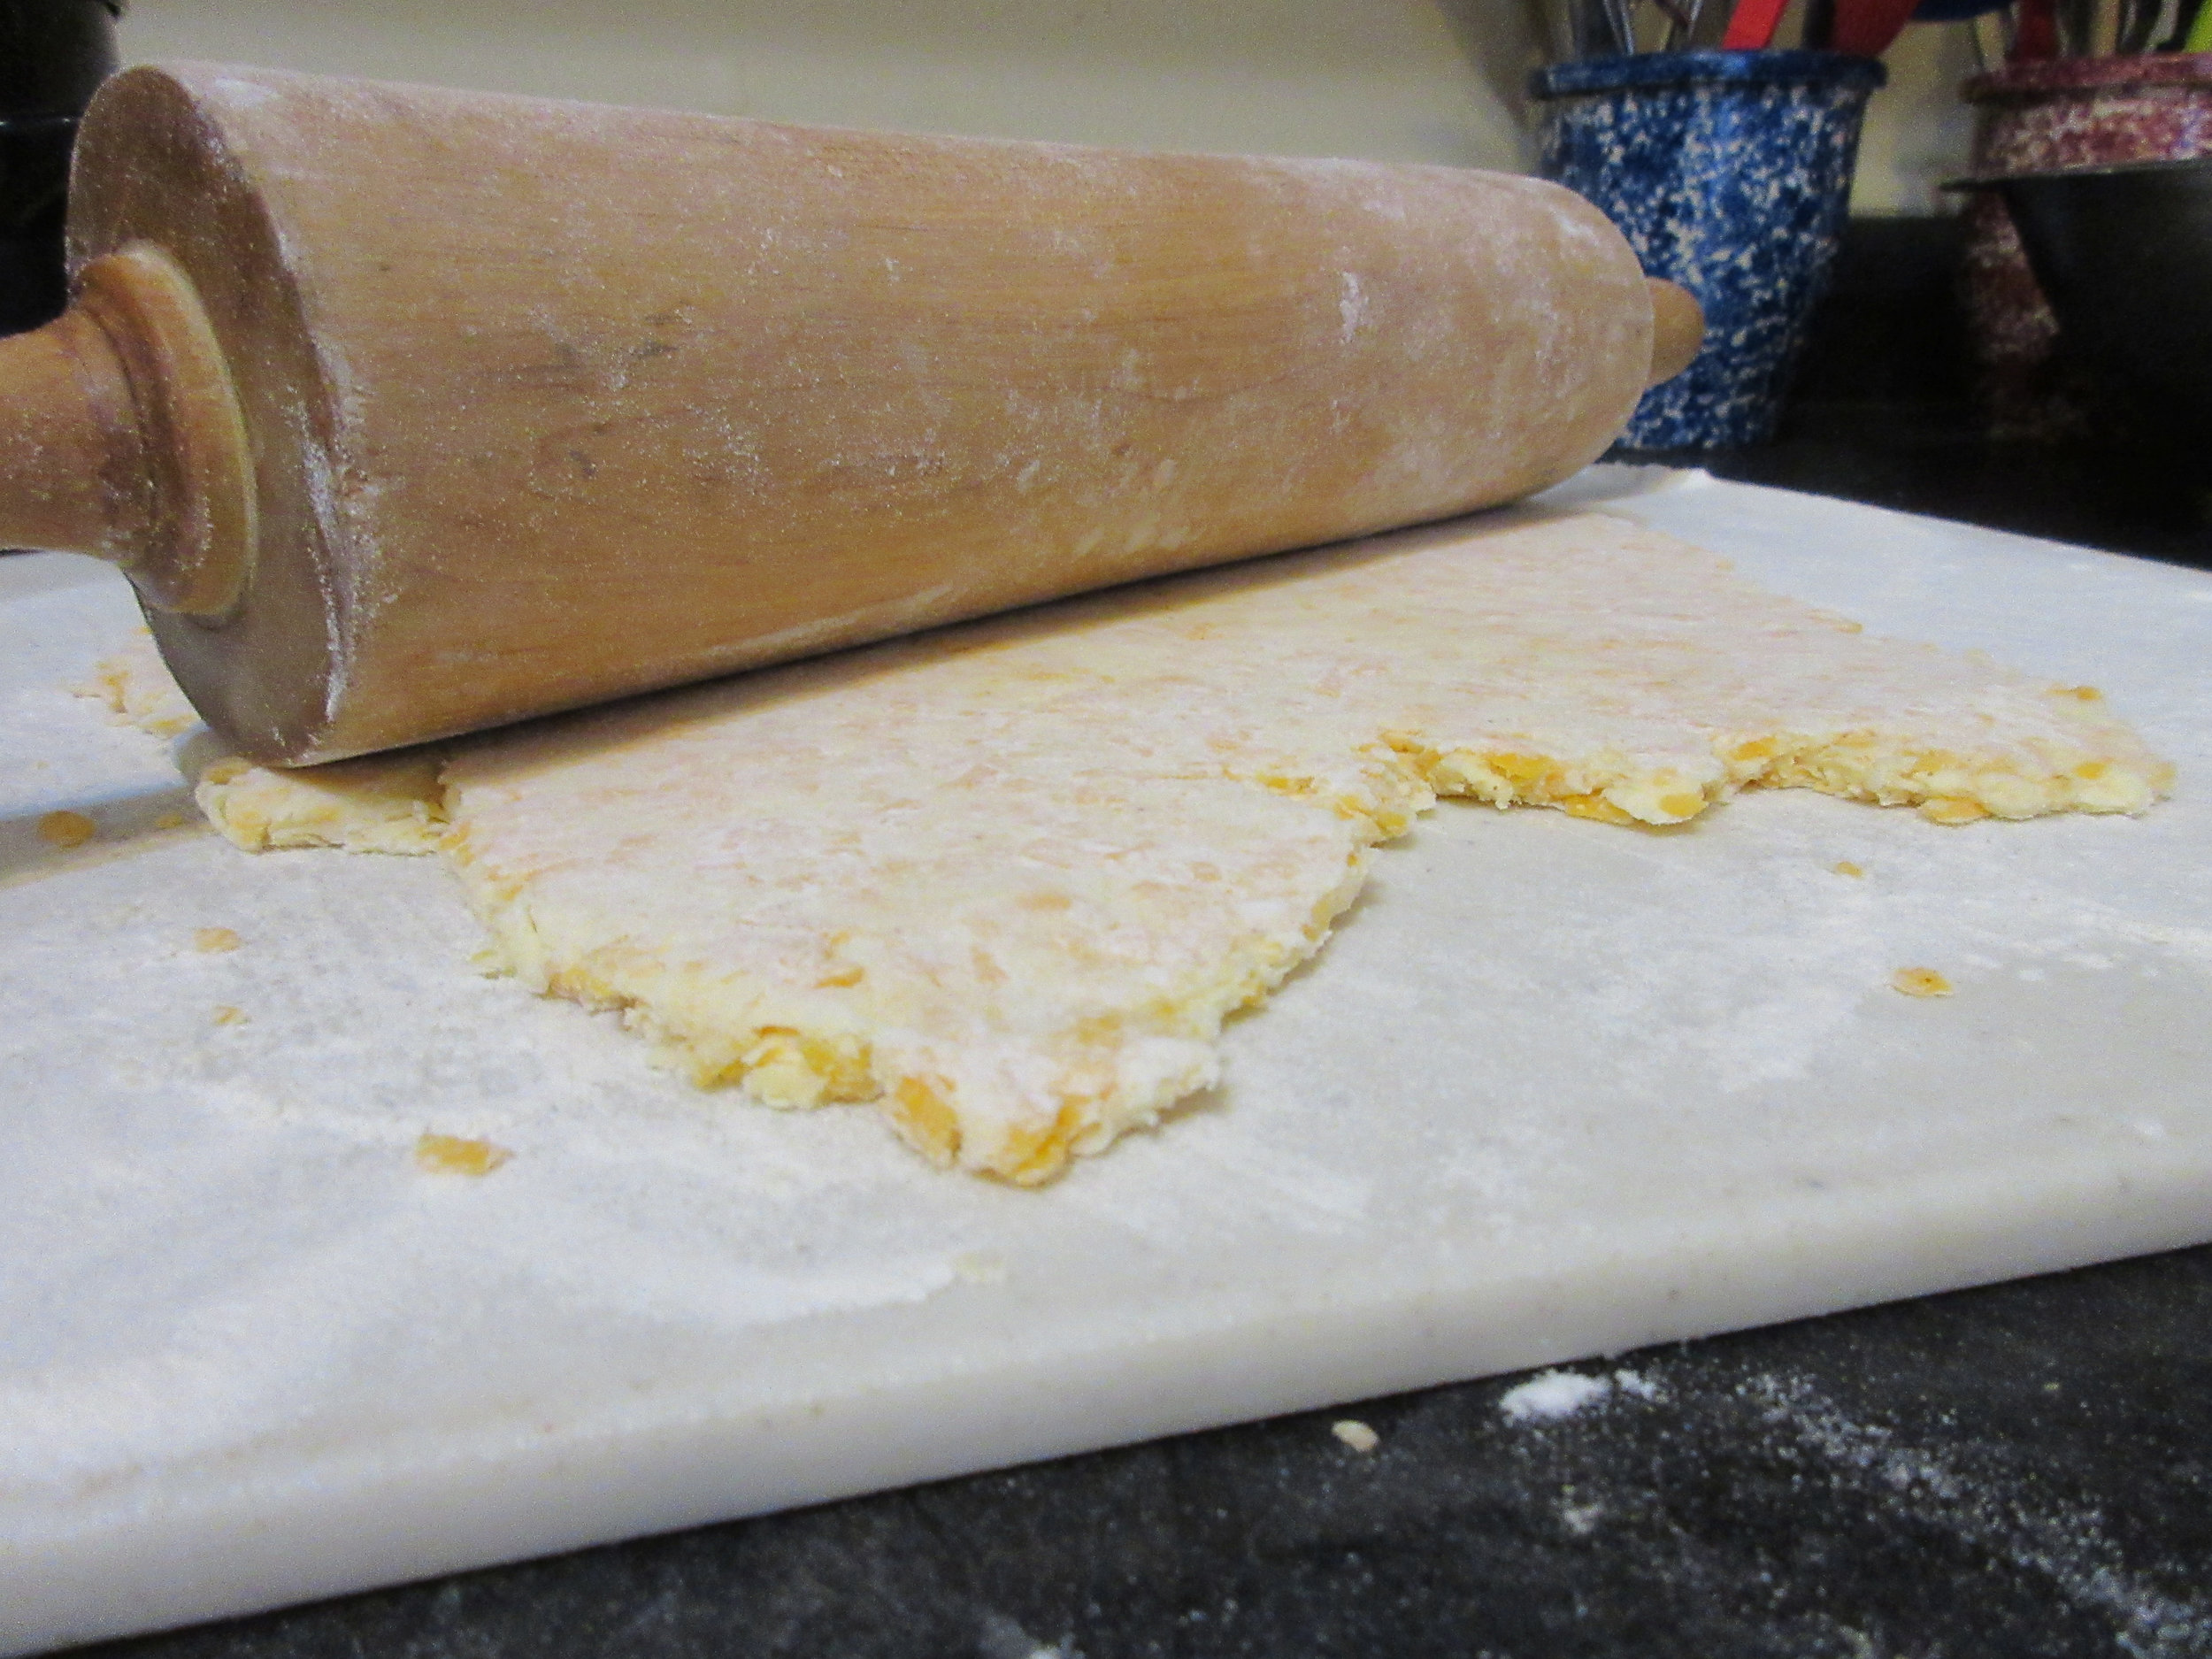
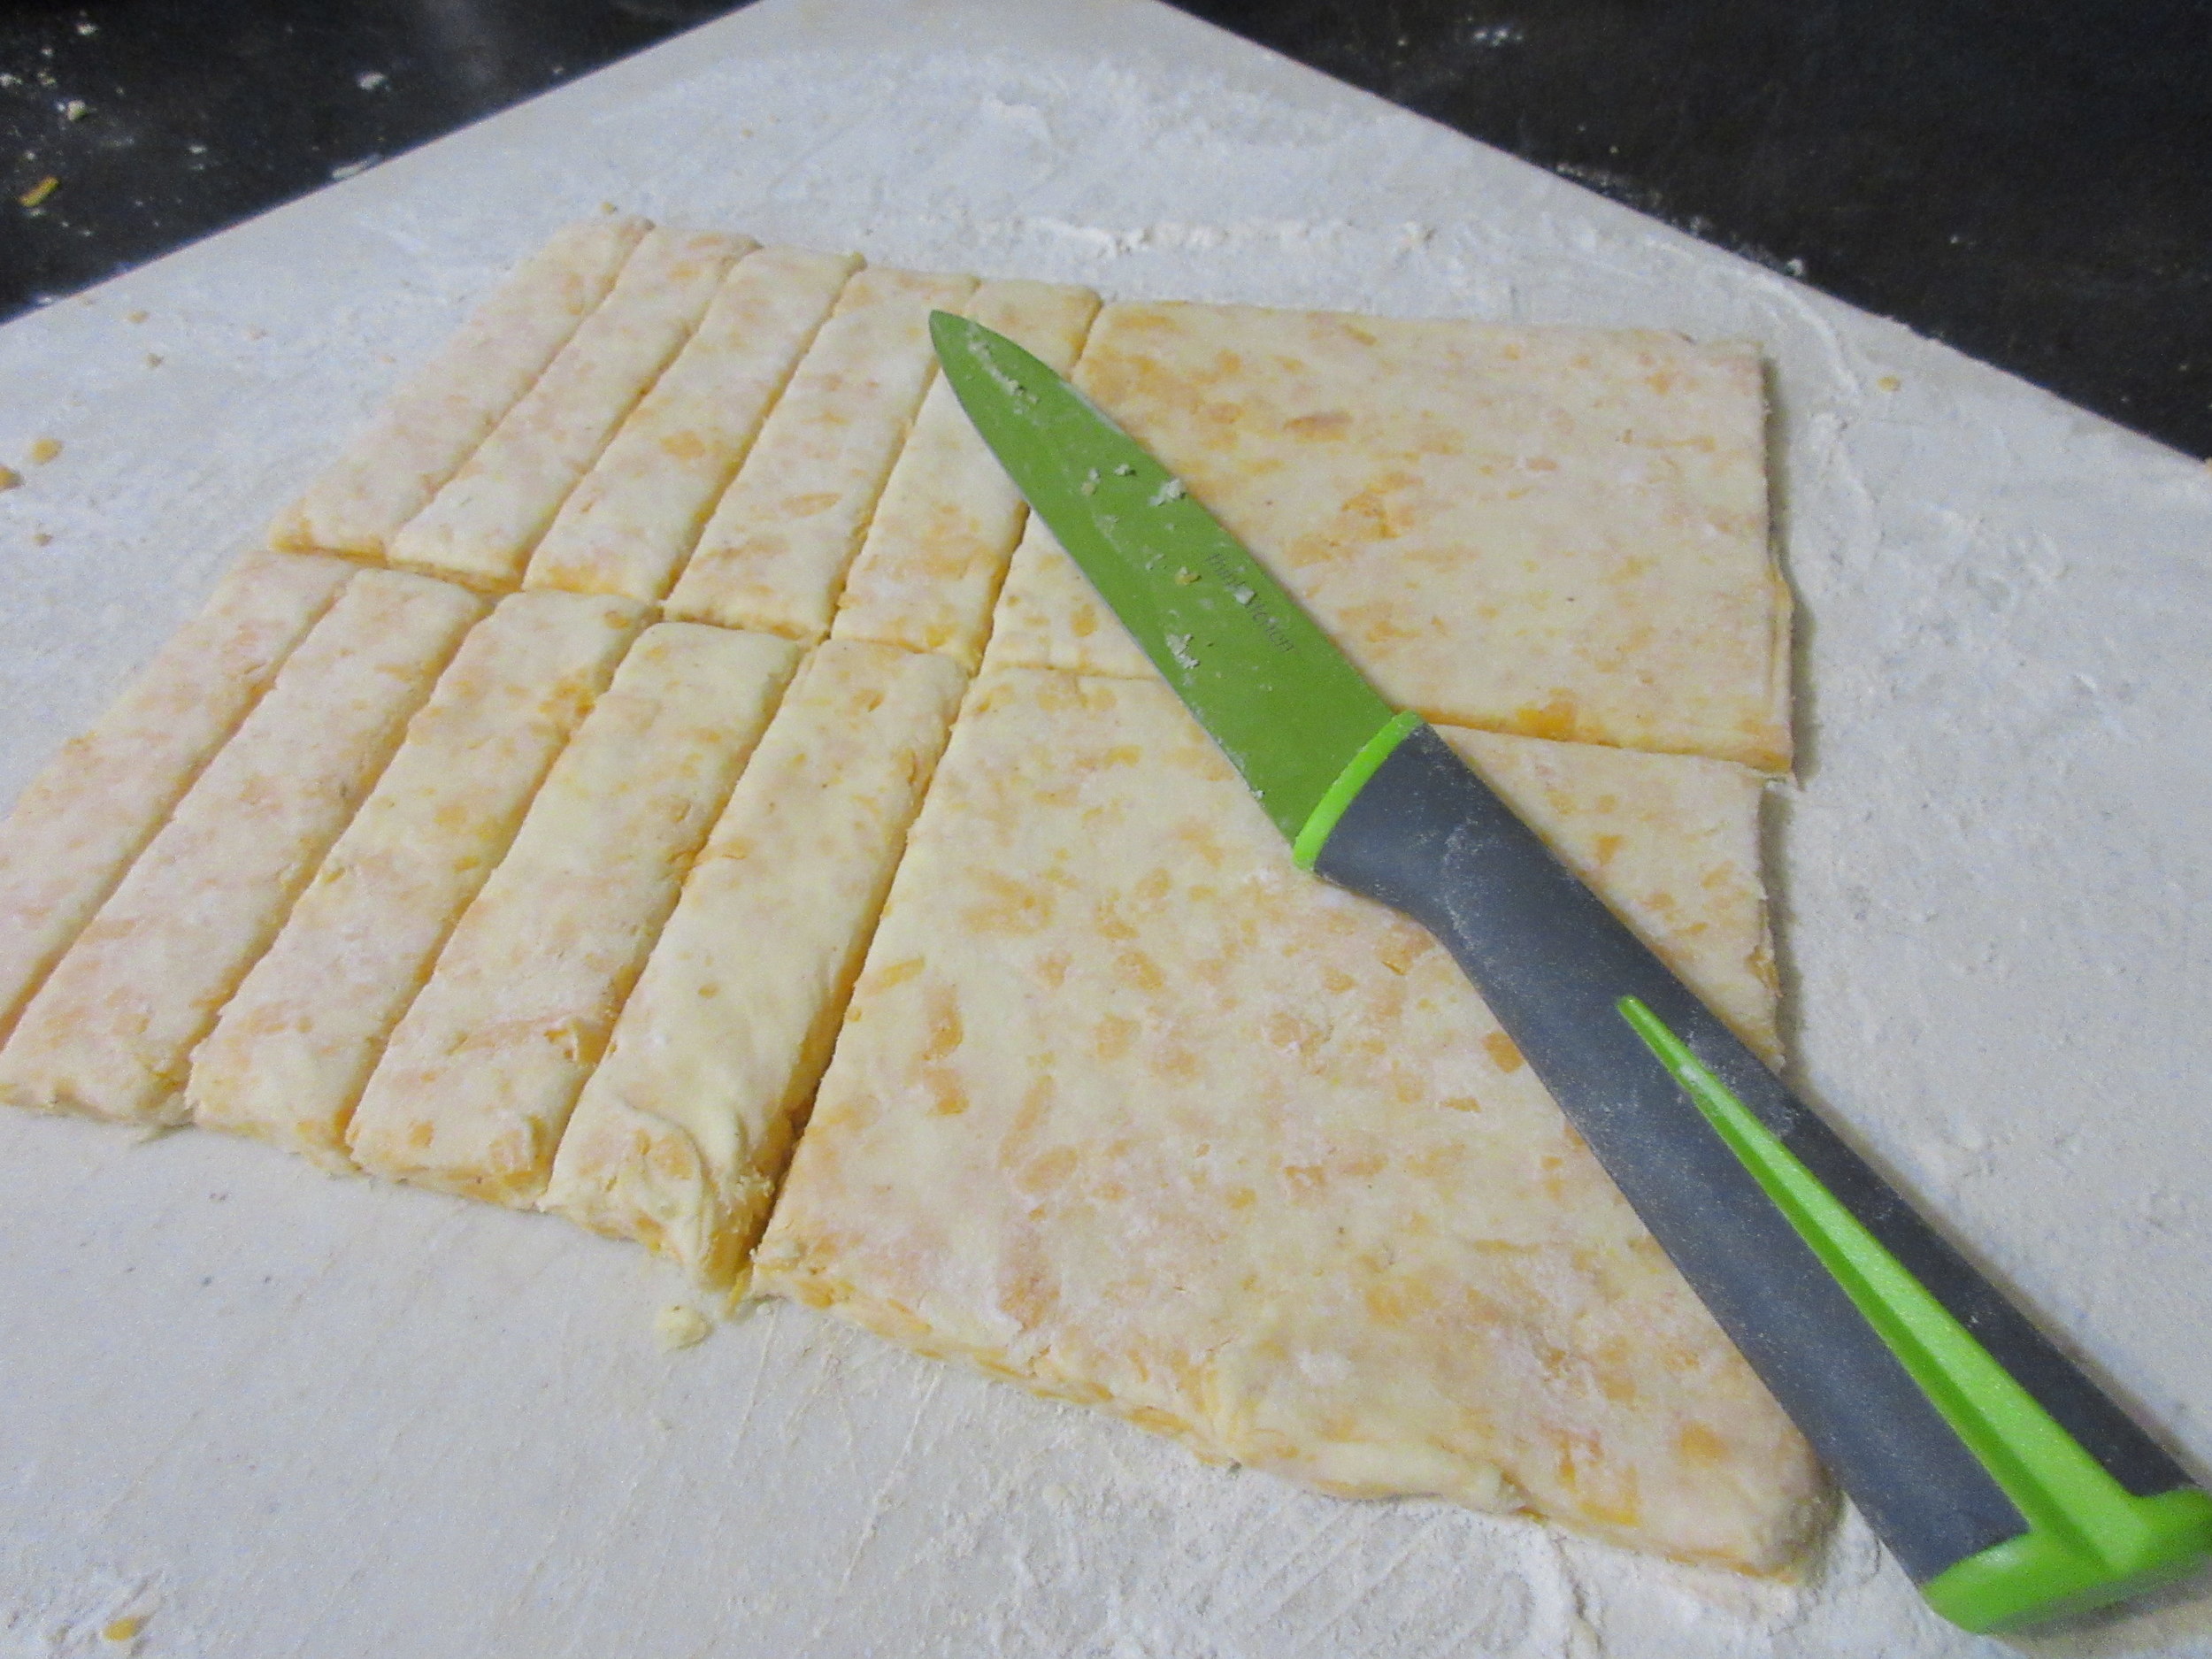
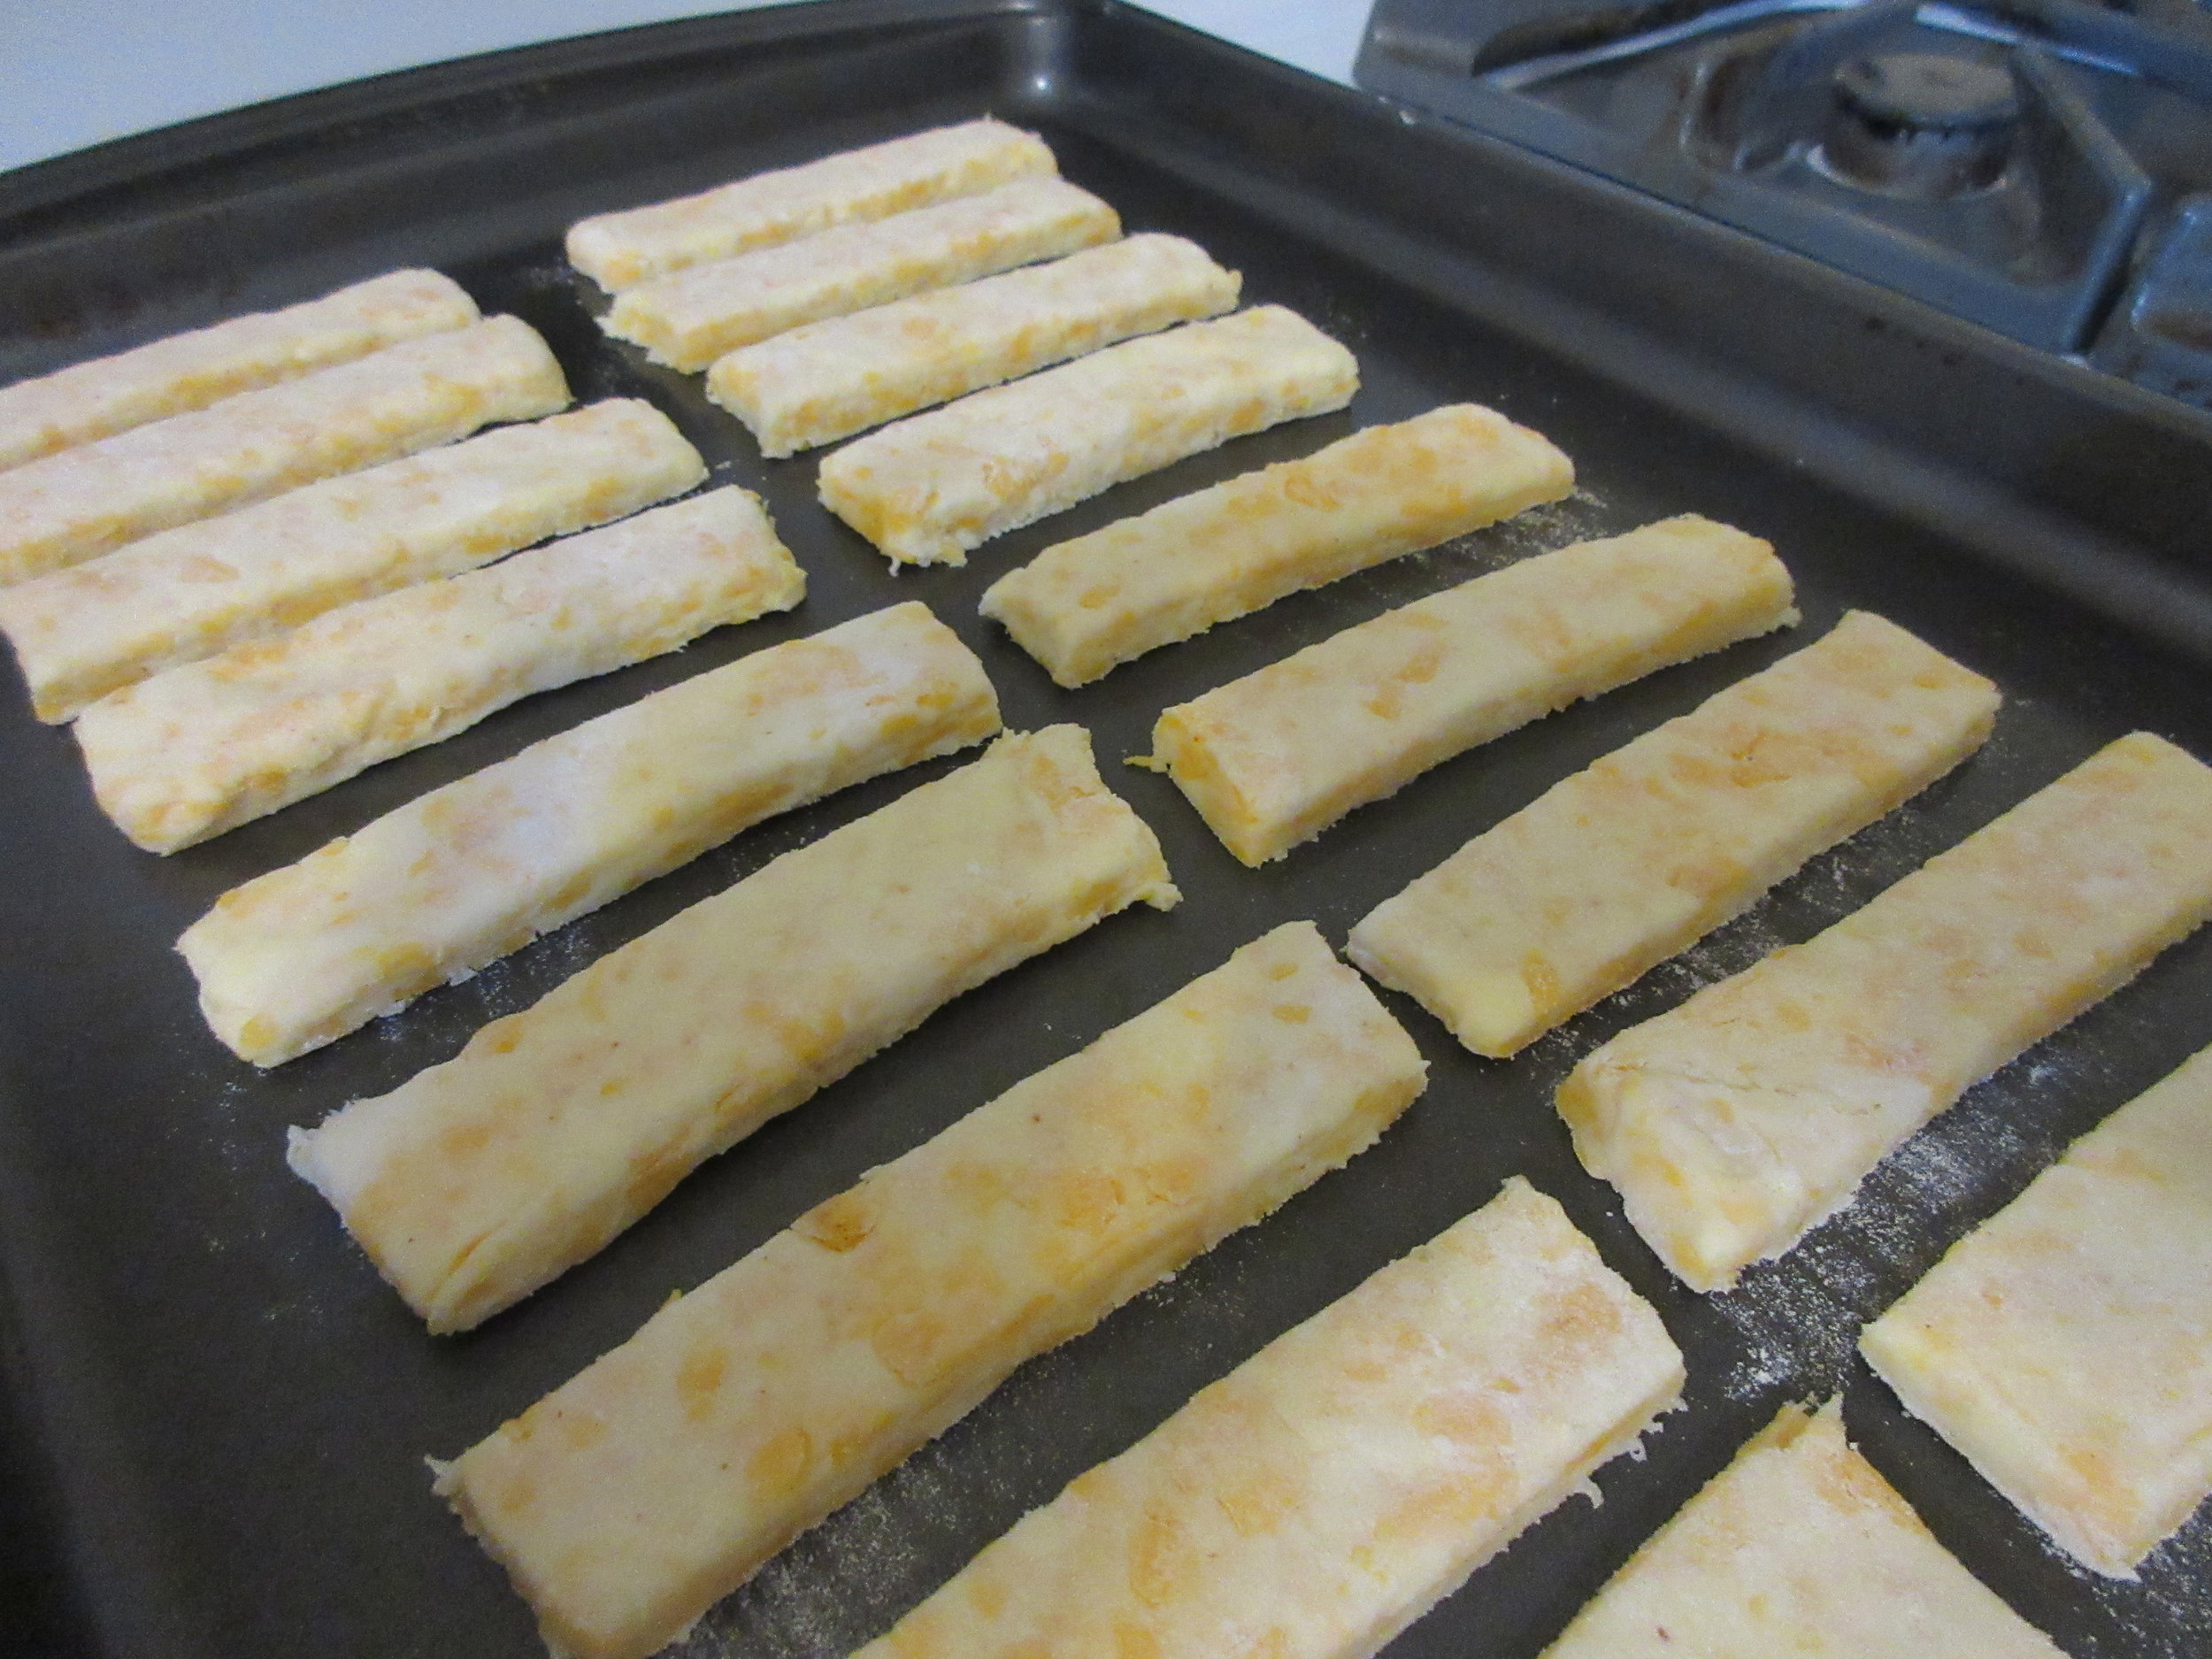
Add in the grated cheese, salt & cayenne pepper and mix together. Add just enough water so it holds together as a dough. Flour your rolling pin & rolling surface, and roll out until it's roughly 1/2 cm or 1/4 inch thick. Cut out with cookie cutters if you'd like, or if you'd like to stick with Mrs. Beeton's suggestion of fingers, trim the sides of the dough and use a knife to cut the dough into long, thin rectangular shapes.
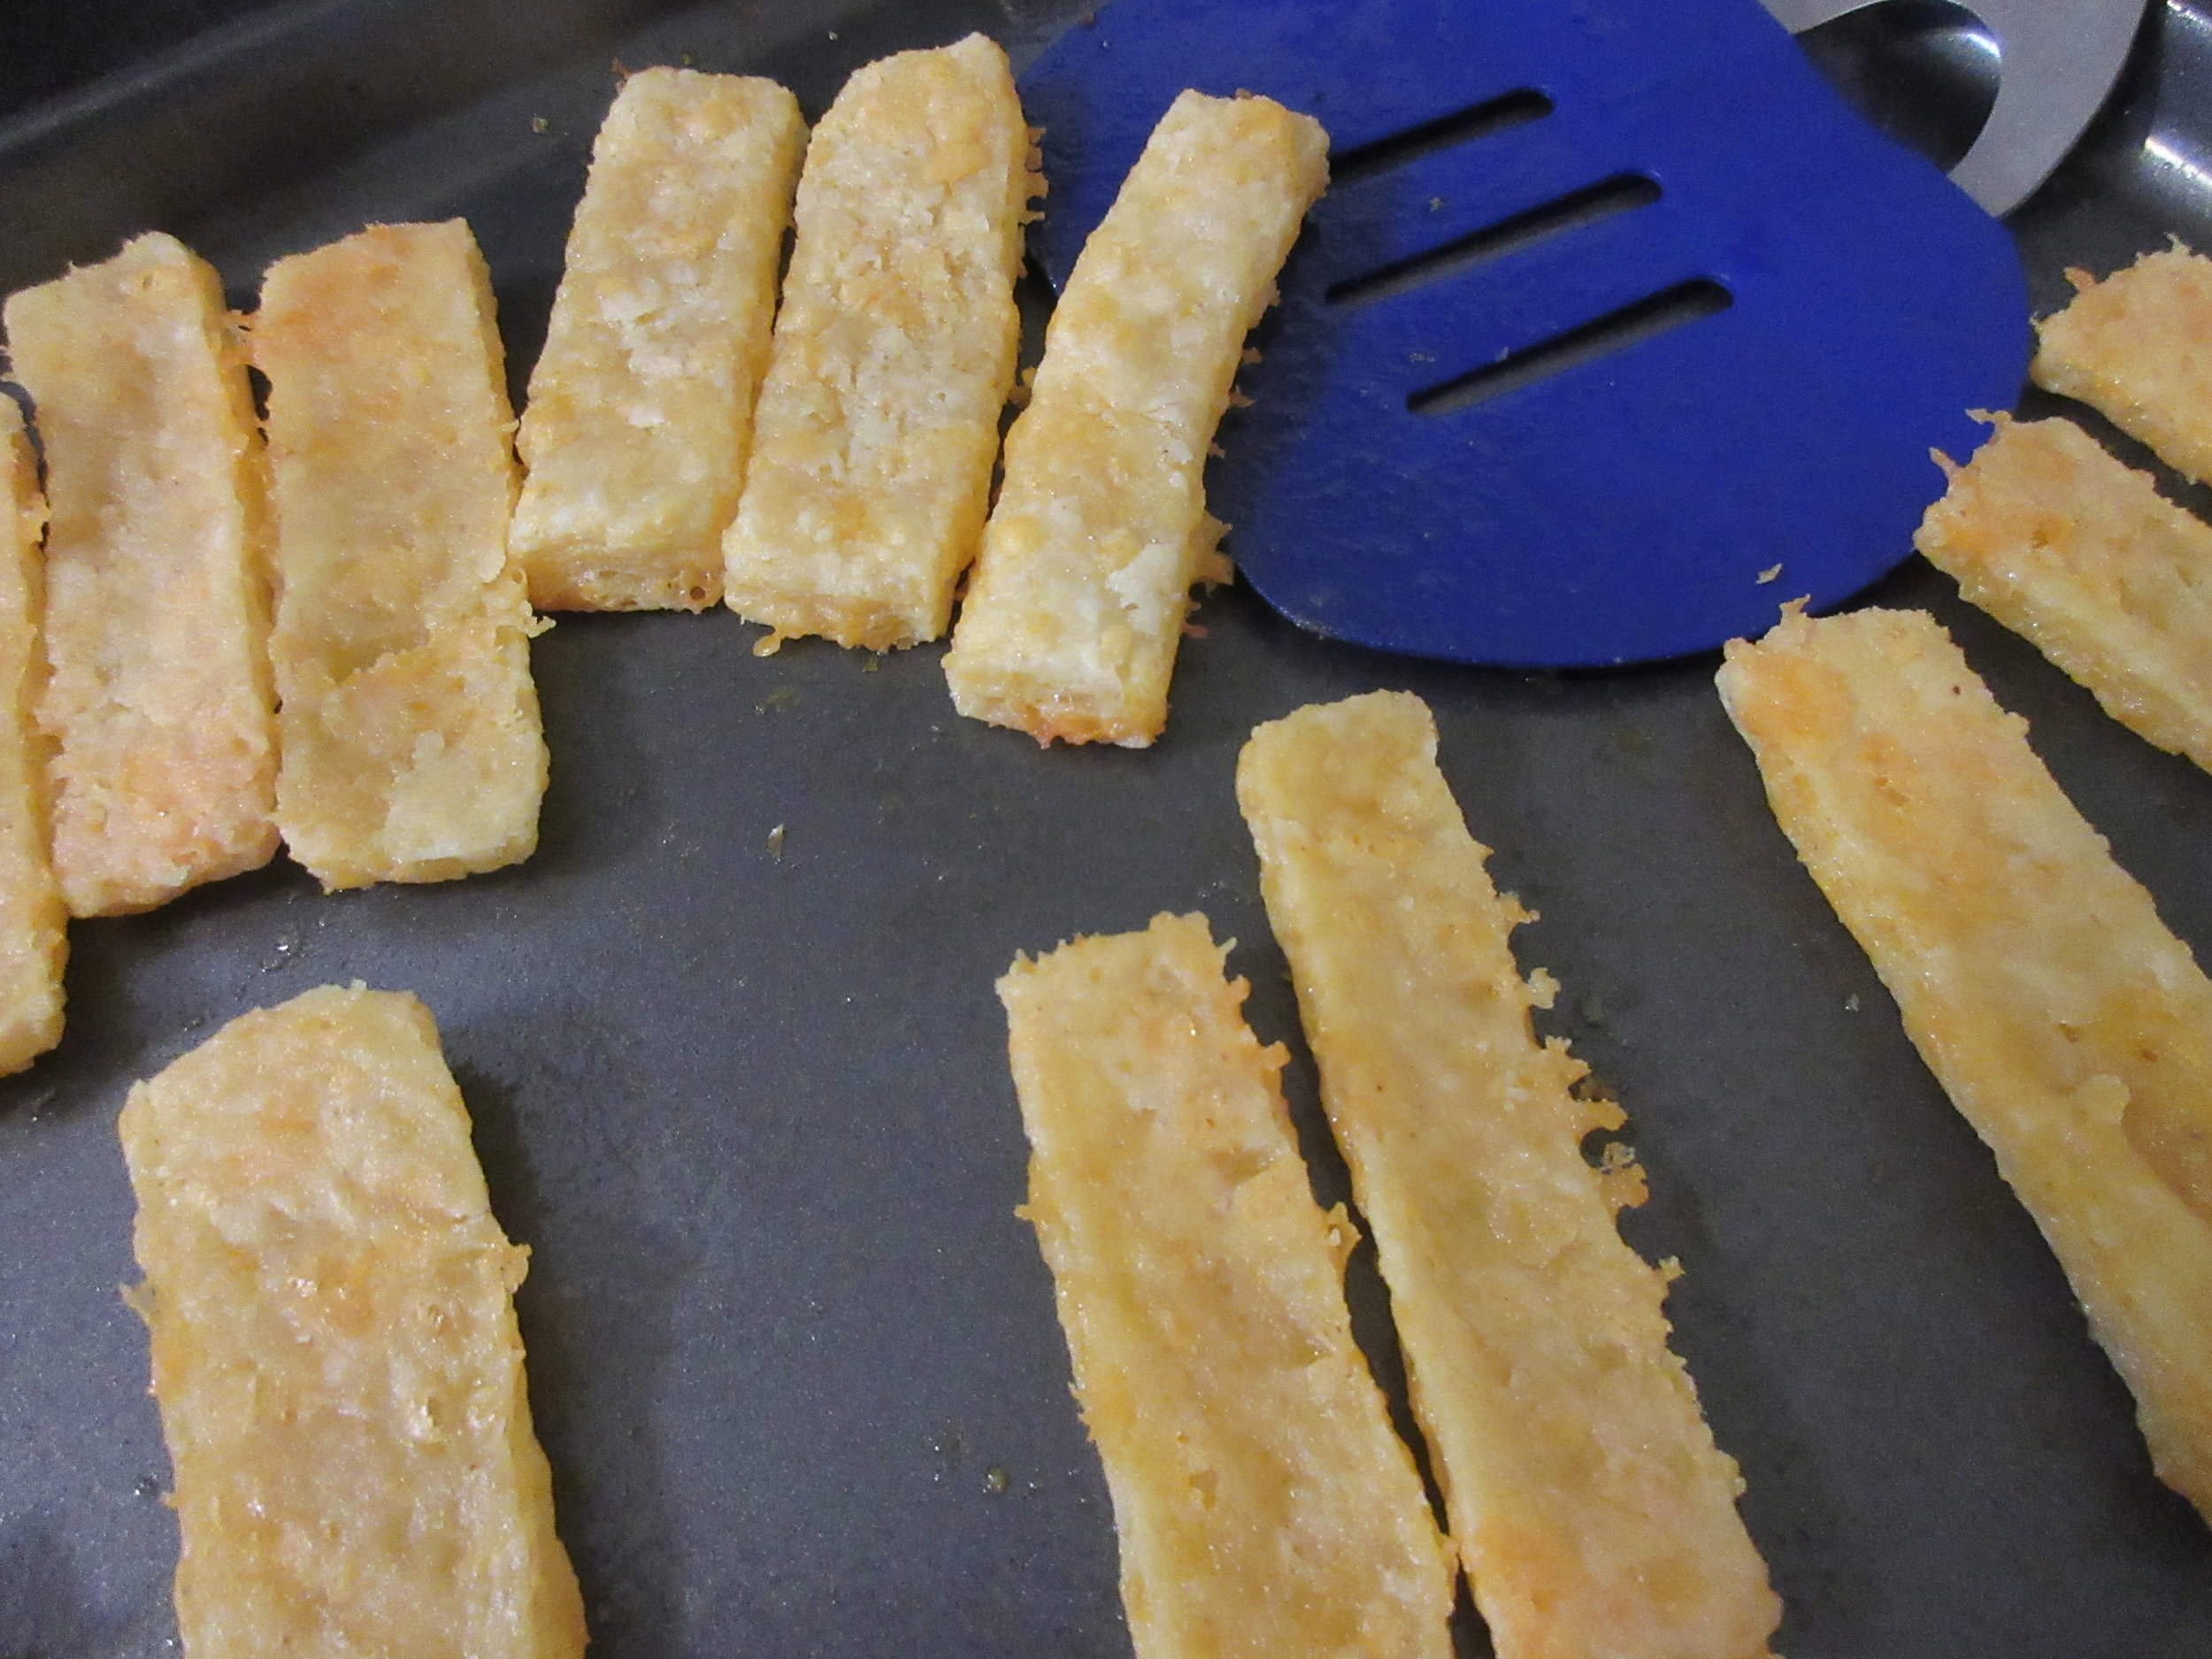
Place on cookie sheets, and put in the oven. You'll know it's time to flip the Cayenne Cheeses when they're slightly golden on the bottom and will move around on the sheet when pushed. Flip them over, put the tray back in the oven and watch them carefully – they're almost done. Take out of the oven when both sides are a golden brown. You'll end up with about 3 cookie sheets full of Cayenne Cheeses, and at 350F/175C, they should be baked in roughly 30-40 minutes.
Cayenne Cheeses always taste the best when baked over an open hearth, so this would be a fantastic campfire recipe! For this reason, I think it would be tasty to switch out the Cayenne Pepper for Chipotle.

When I decided to start my own food history blog over 4 years ago, I knew right away that my first blog post would be about Cayenne Cheeses.
Why? Cayenne Cheeses were the first historic food that I fell in love with when I started working as a Historical Interpreter, and I'm not alone. If my coworkers don't have dietary restrictions against dairy and wheat, it's a pretty safe bet that they're also mad about Cayenne Cheeses. My first historic house Curator, who had a strict personal rule to never eat food touched by visitors, would gladly pop Cayenne Cheeses made by snotty 8 year olds into her mouth on the rare occasion when there were leftovers after their school program!
I decided to start my own food history blog over 4 years ago, so what took me so long to write this first blog post? A concussion, then cancer. And then another concussion. Well into my recovery from my first concussion, I thought that if I wasn't able to start a blog at the time, at the very least I could start a food history twitter account, @Cloud9Cookery, which I've been passionate about when I could and ignored when I didn't have the energy.
You can imagine that this first blog post is a rather significant life event for me. It's the fruition of years of fighting to stay alive and to regain being myself again. When I finish writing & arranging this post and finally hit that "Publish" button, a gate will have opened to a future filled with possibilities, joy, wrinkles & grey hairs.

Read the Cookbook
Mrs. Beeton's Book of Household Management has its own website:
http://www.mrsbeeton.com/
Peruse an original scanned copy of Mrs. Beeton's 1861 book on the Internet Archive:
Mrs. Beeton's is about 1100 pages long, so if you get yourself a copy of the book, I recommend investing in a hardcover copy for the longevity of your book spine!