
To Fry Fish
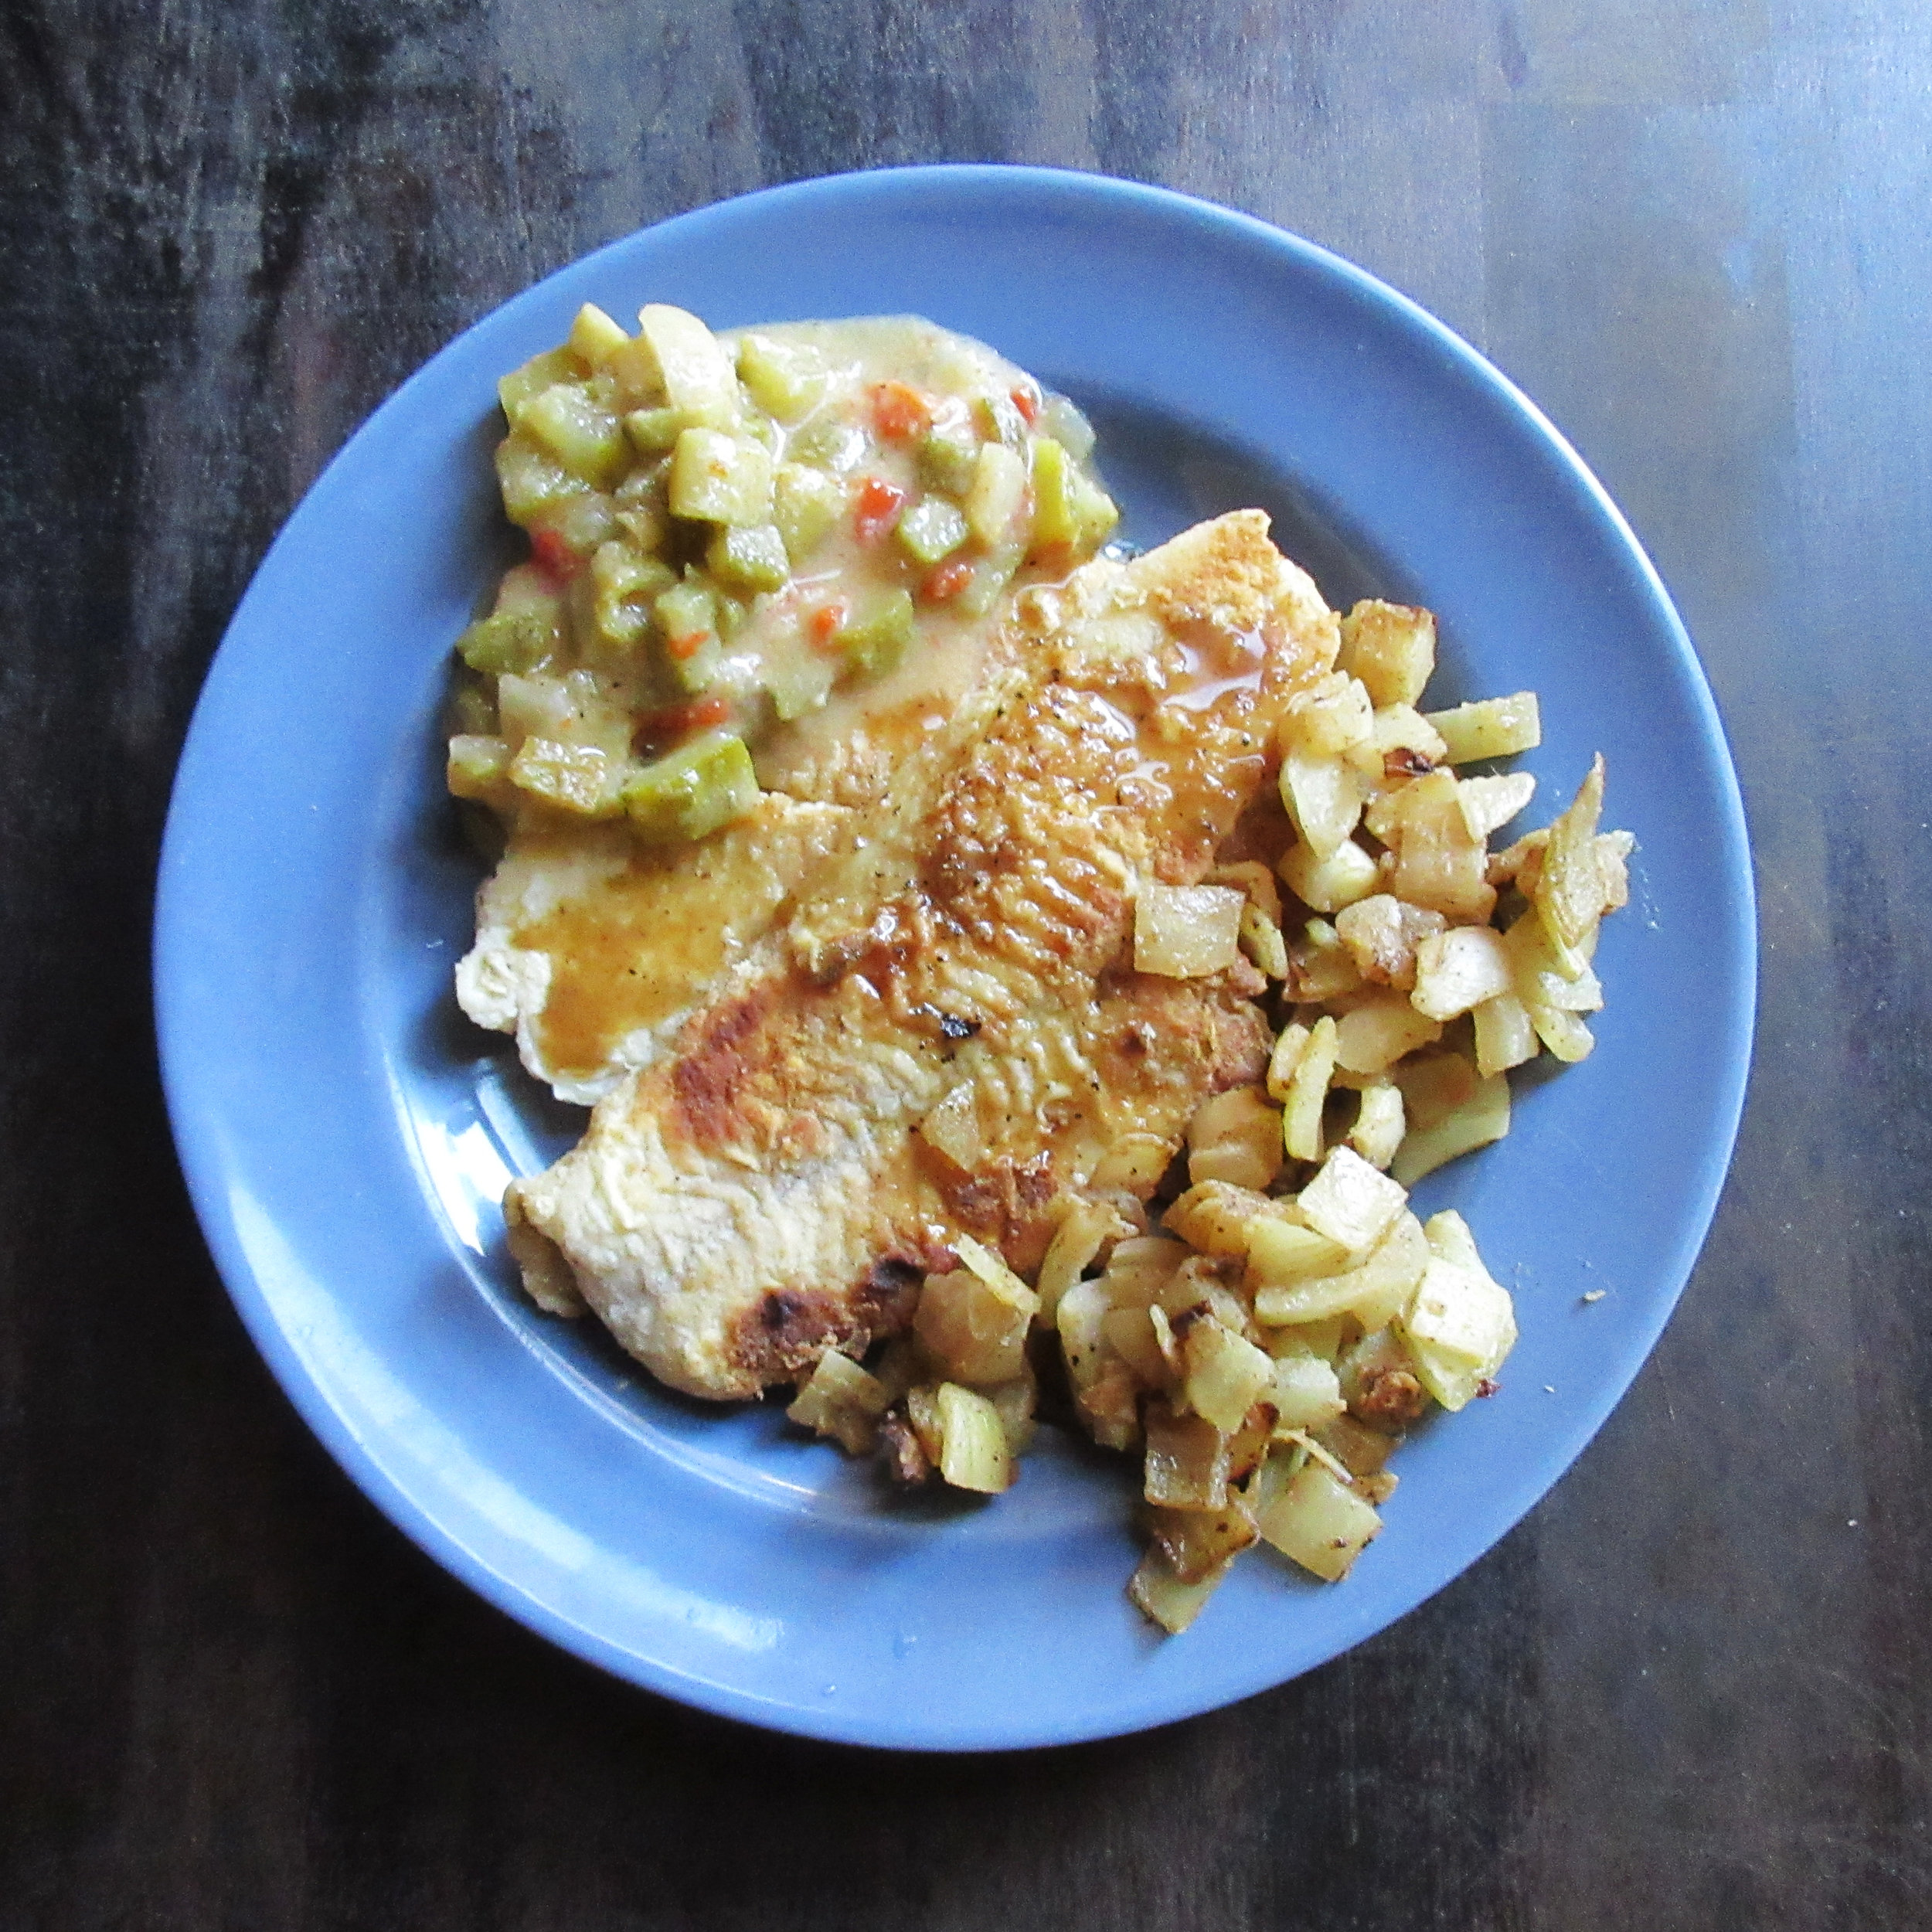
To Fry Fish is found in A Plain Cookery Book for the Working Classes, written by Charles Elmé Francatelli in London in 1852. Fortunately, I had some bacon fat in my fridge, so that's what I used to fry my fish. Let me tell you, fish dredged in flour and fried in bacon fat is scrumptious, and so were the fried onions that we ate on the side. I paired the fish with Sharp Sauce for Broiled Meats from the same cookbook. The main component of this sauce is a variety of pickles and it reminds of relish, albeit without the sweetness. I round out this blog post by delving a little bit into the Fish Slice, a serving utensil for fish.

You'll find this recipe in:
A Plain Cookery Book for the Working Classes
By Charles Elmé Francatelli
”Late Maître d’hôtel and Chief Cook to Her Majesty the Queen Victoria”
London, 1852
The Sauce:
'Sharp Sauce for Broiled Meats' goes very well with the fried fish recipe (which you'll find below). The main component of this sauce is a variety of pickles and it reminds of relish, albeit without the sweetness. I ended up with a double batch of this sauce, so before it was finished, I had eaten it with fish, sausages, chicken and pierogies. It paired well with everything, but it was especially delicious with the sausages.
No. 21. SHARP SAUCE FOR BROILED MEATS
Chop fine an onion and a pennyworth of mixed pickles; put these into a saucepan with a half-a-gill of vinegar, a tea-spoonful of mustard, a small bit of butter, a large table-spoonful of bread-raspings, and pepper and salt to season; boil all together on the fire for at least six minutes; then add a gill of water and allow the sauce to boil again for ten minutes longer. The sauce will give an appetizing relish to the coarsest meats or fish when broiled or fried, and also when you are intending to make any cold meat into hash or stew. In the latter case, the quantity of water and raspings must be doubled.


My Recipe:
1 small onion
1 ¼ cups mixed pickles – 225 g
(I used pickled green beans, cucumbers and red peppers)
⅔ cup apple cider vinegar – 156 mL
1 tsp mustard powder
1 tbsp butter
2 heaping tbsp breadcrumbs (this is double the historic recipe)
Salt and pepper to taste
1 ¼ cups water – 300 mL
Honey to taste (optional – not in the historic recipe)
Finely chop the onion and the pickles. Put in a small saucepan with the vinegar, mustard powder, butter, breadcrumbs, salt and pepper. Simmer over medium for 5-10 minutes, then add the water. Allow to bubble for at least another 10 minutes. Add honey to taste, if desired.
My thoughts:
A big issue with this recipe is the measurement of using "a pennyworth of mixed pickles", which literally means "an amount of pickles worth a penny" and is not very instructive for those of us living today! I just guessed and I think it was a good ratio for pulling an amount out of the air. I did find that I needed to double the breadcrumbs to thicken the liquid enough for a sauce, and maybe I wouldn't have had to if I had put more chopped pickles in the pot.
I'm usually a stickler for historical accuracy, but I HAD to add a bit of honey to this recipe to cut the edge from the extreme vinegariness of this sauce! When I sampled it from a spoon when it was cooking, I would immediately start coughing: not a desirable trait for a sauce. I didn't add enough honey to sweeten the sauce , just enough so I could actually eat it. You may like it without the honey, though.

The Fish
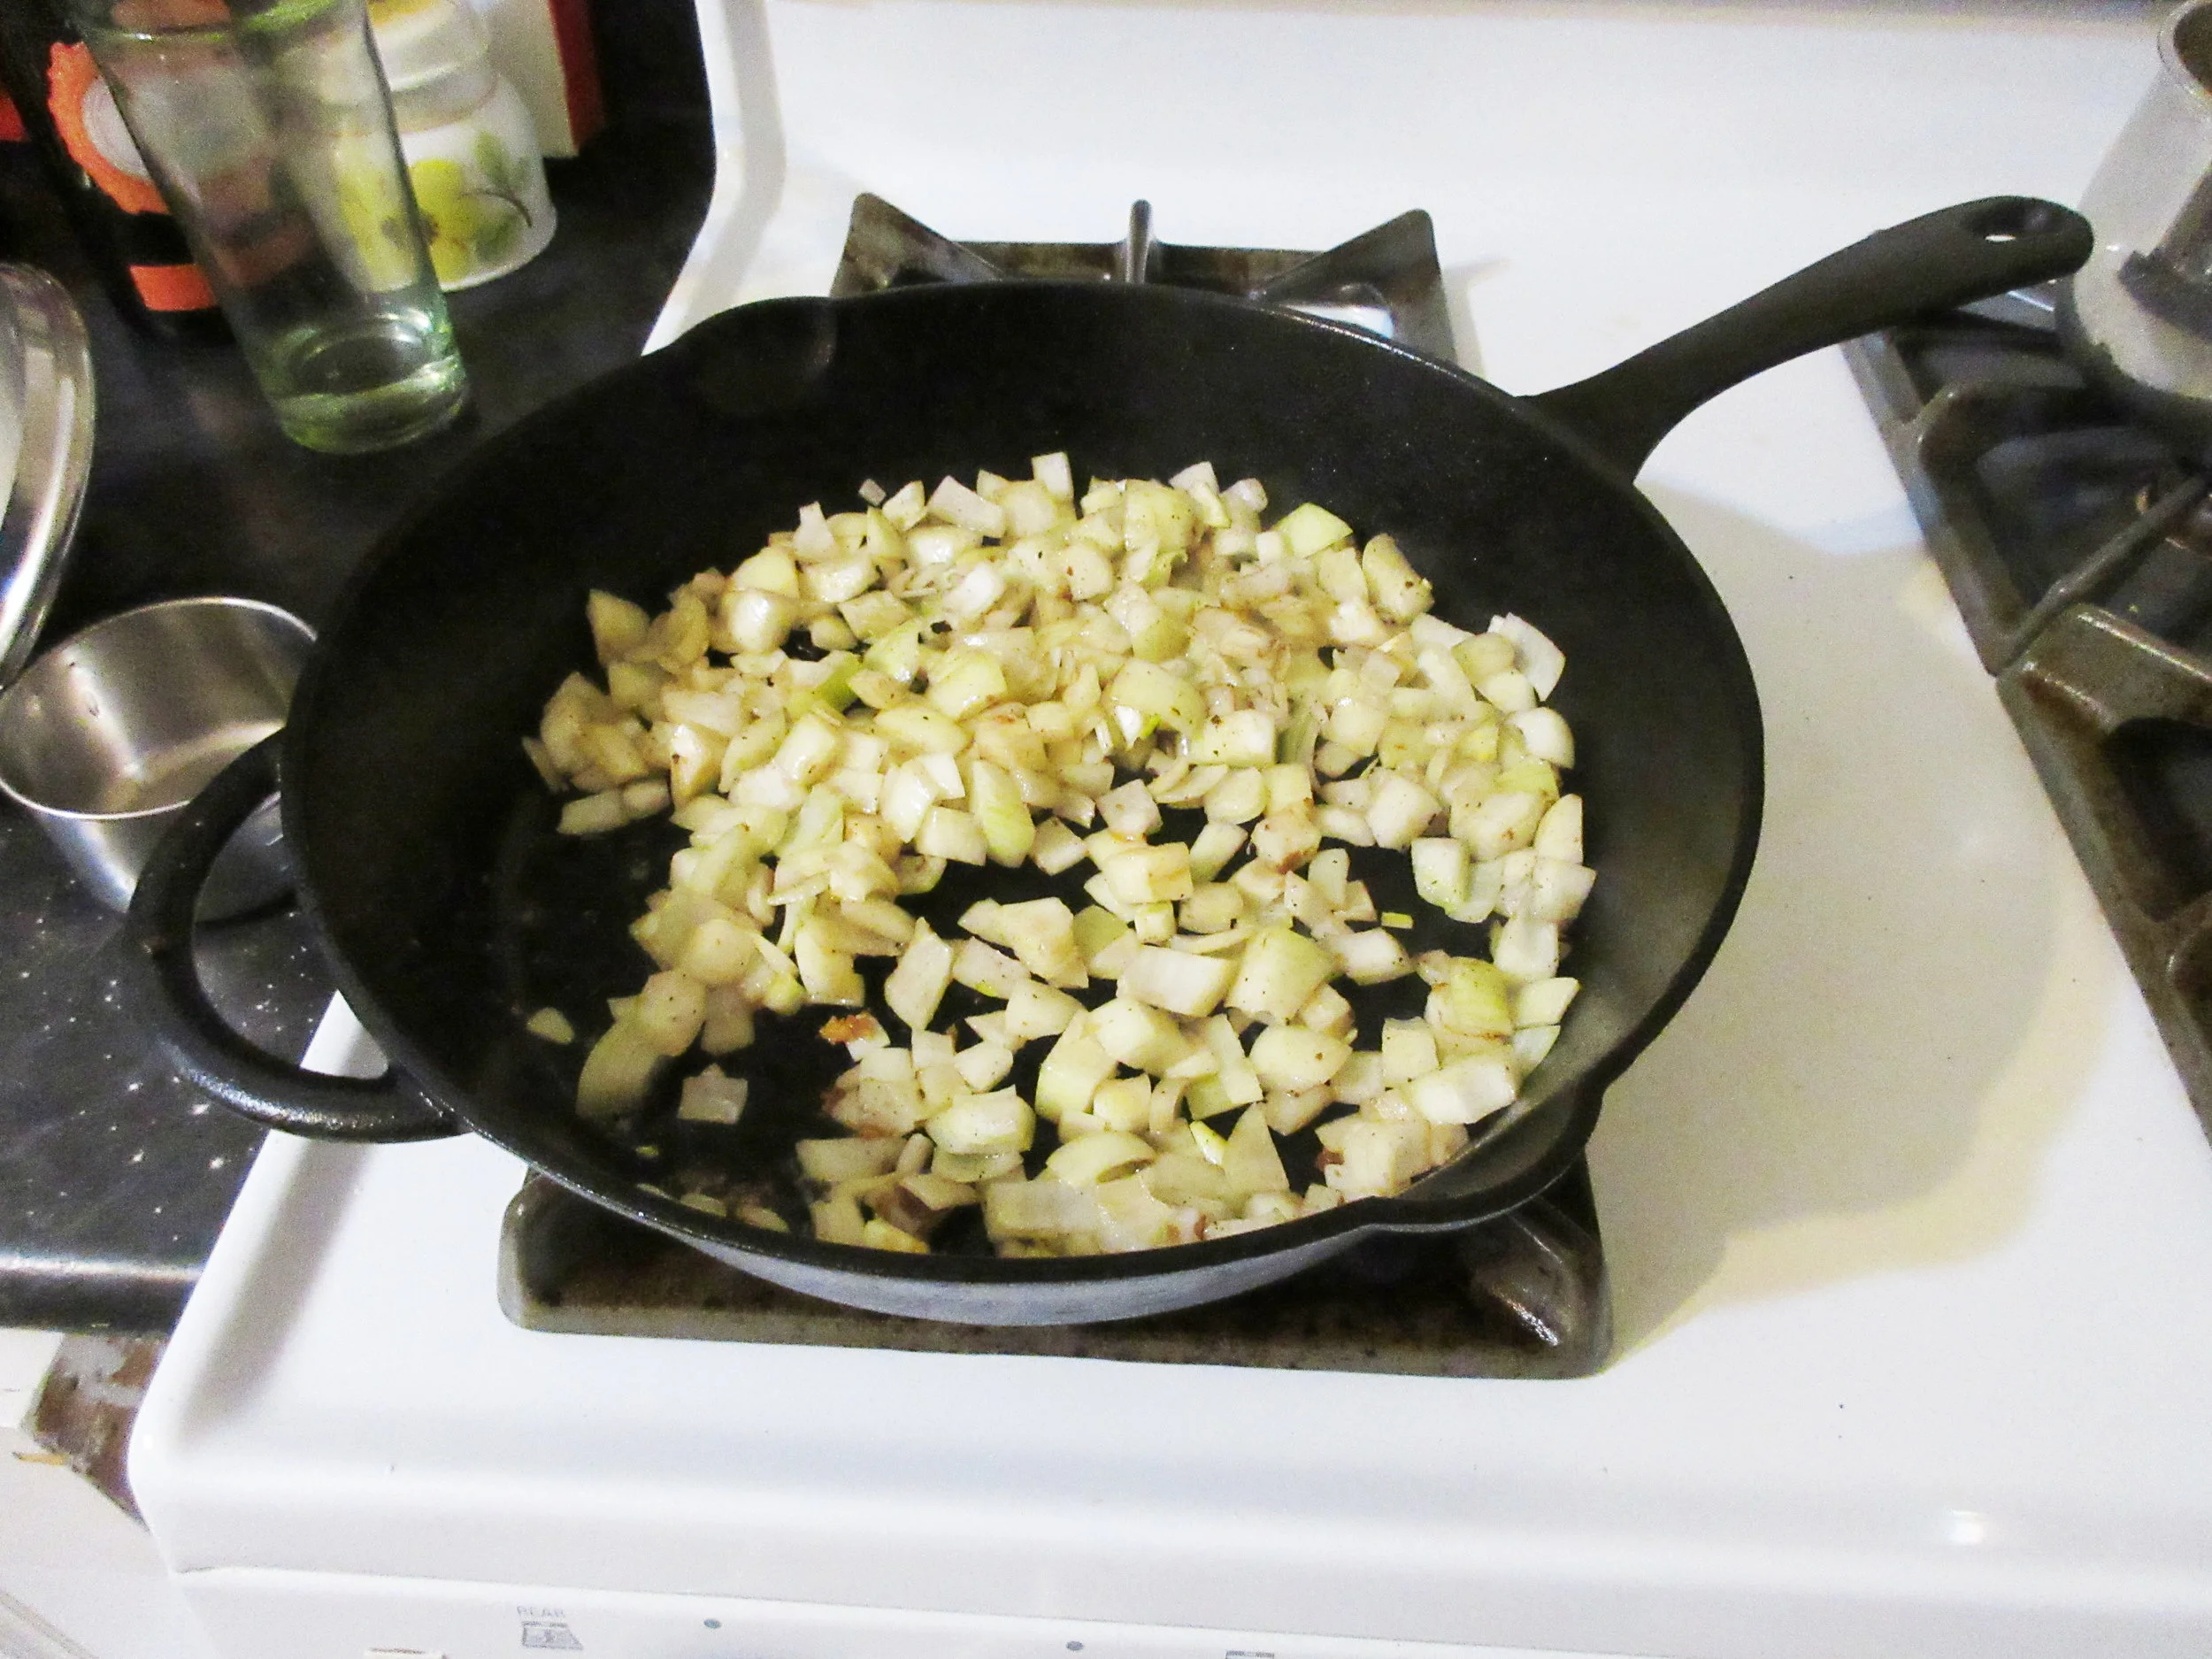
Fortunately, I had some bacon fat from when I made Piquant Beets, so that's what I used for frying my fish. Let me tell you, fish dredged in flour and fried in bacon fat is scrumptious, and so were the fried onions that we ate on the side.
No. 121. TO FRY FISH.
For this purpose you must have some kind of fat. Either lard, butter, or dripping fat, would be excellent; but they must be bought, and cost a little money. True; but then, if you can afford yourselves a bit of meat occasionally, by dint of good thrift you should save the fat from the boiled meat, or the dripping from your baked meats, and thus furnish yourselves with fat for frying your fish twice a-week; and let me tell you that by introducing fish as an occasional part of your daily food, your health, as well as your pockets would feel the benefit of such a symptom of economy. Suppose, then, that you have bought some cheap kind of fish, such as herrings, large flounders, plaice, small soles, or any other small or flat fish. First of all, let the fish be washed and wiped dry, and rubbed all over with a little flour. Next, put about two ounces of fat, free from water, in a frying-pan on the fire, and, as soon as it us hot, put the fish in to fry, one or two at a time, according to their size, as, unless they have room enough in the frying-pan they do not fry well; this must be carefully attended to, and when the fish is a little browned on one side, turn it over with a tin fish-slice, that it may be fried on the other side also; and, as soon as done, place the fried fish on a dish and then fry the others. When all your fish are fried, with what fat remains in the pan fry some onions, and place the round the fish, and, by way of adding an extra relish to your meal, just throw a few table-spoonfuls of vinegar, some pepper and salt, into the frying-pan, give it a boil up, and pour this round the fish.


My Recipe:
Fish fillets – herring, flounder, sole or plaice
Flour
Butter, oil or fat (I used bacon fat)
Onions
Vinegar (I used apple cider vinegar)
Salt and pepper
1) Chop the onions – how much depends on your love of onions and how many people you're serving. I cut up 3 medium & small onions for 6 sole fillets and it was a good amount for us.
2) Rinse the fillets with water and pat dry with a tea towel or paper towels. Lightly coat the fish in flour.
3) Warm up the butter, oil or fat in a frying pan over medium heat, then add the fish. Flip over when slightly browned on the bottom. When nicely browned on both sides, put the fillets on a plate to the side and fry the remaining fillets, adding butter/oil/fat as necessary.
4) When the fish is done, fry the onions in the same pan. Serve the onions on the side of the fish.
5) Remove the frying pan from the heat, then pour in some vinegar into the same pan. Stir, add salt and pepper and pour on top of the fish.

Our historic To Fry Fish recipe instructs us "and when the fish is a little browned on one side, turn it over with a tin fish-slice, that it may be fried on the other side also". I've never encountered anyone calling a fish slice by that name in Canada, but today a fish slice is considered an extra long or wide flipper with drainage holes or slots.

My understanding is that fish slices of this era were usually made of silver, not tin, and were used for serving, not flipping. The Encyclopaedic Dictionary (1887) describes a fish-slice as "A broad-bladed silver knife used for serving fish at table. The trowel-shaped blade enables a portion of fish to be removed from the backbone without breaking it into unsightly fragments".
Cassel's Household Guide (1869) delves even further into fish slices: "A silver or plated slice or knife...is used for this, as for other kinds of fish, because steel spoils the flavour of fish. A knife needs to be broad to divide the flakes without breaking them. A fish-knife has a sharp curved point to disengage the bones, and is perforated with holes to allow any water retained about the fish to run off. A fork is not used in helping fish." There's also very specific instructions for using a fish slice to carve different types of fish, so if learning that skill interests you, have a look at Cassel's Household Guide for some fish-carving tips fit for a Butler.
Nineteenth-century silver fish slices are gorgeous, often featuring the shape of a fish and intricately designed perforations. I had a look at the Royal Ontario Museum's online collections and found four beautiful Canadian examples of Fish Slices created from c.1815-1840 in Montreal and Quebec City, crafted by Nelson Walker, Laurent Amiot, James Ellis and Henri Polonceau; and I'll leave you with this little slice of fish-slice eye candy.


Read the Cookbook:

Tuna Sandwiches
This Tuna Sandwich recipe comes from the Peanuts Lunch Bag Cookbook (1974), which is a cookbook that was in our house when I was growing up. I don't remember anyone ever making a recipe from this cookbook when I was a kid, but I remember flipping through this book to read the Peanuts comics that are nestled amongst the recipes. About 6 months ago, I found this book in an antiques market...and all the memories flooded back.
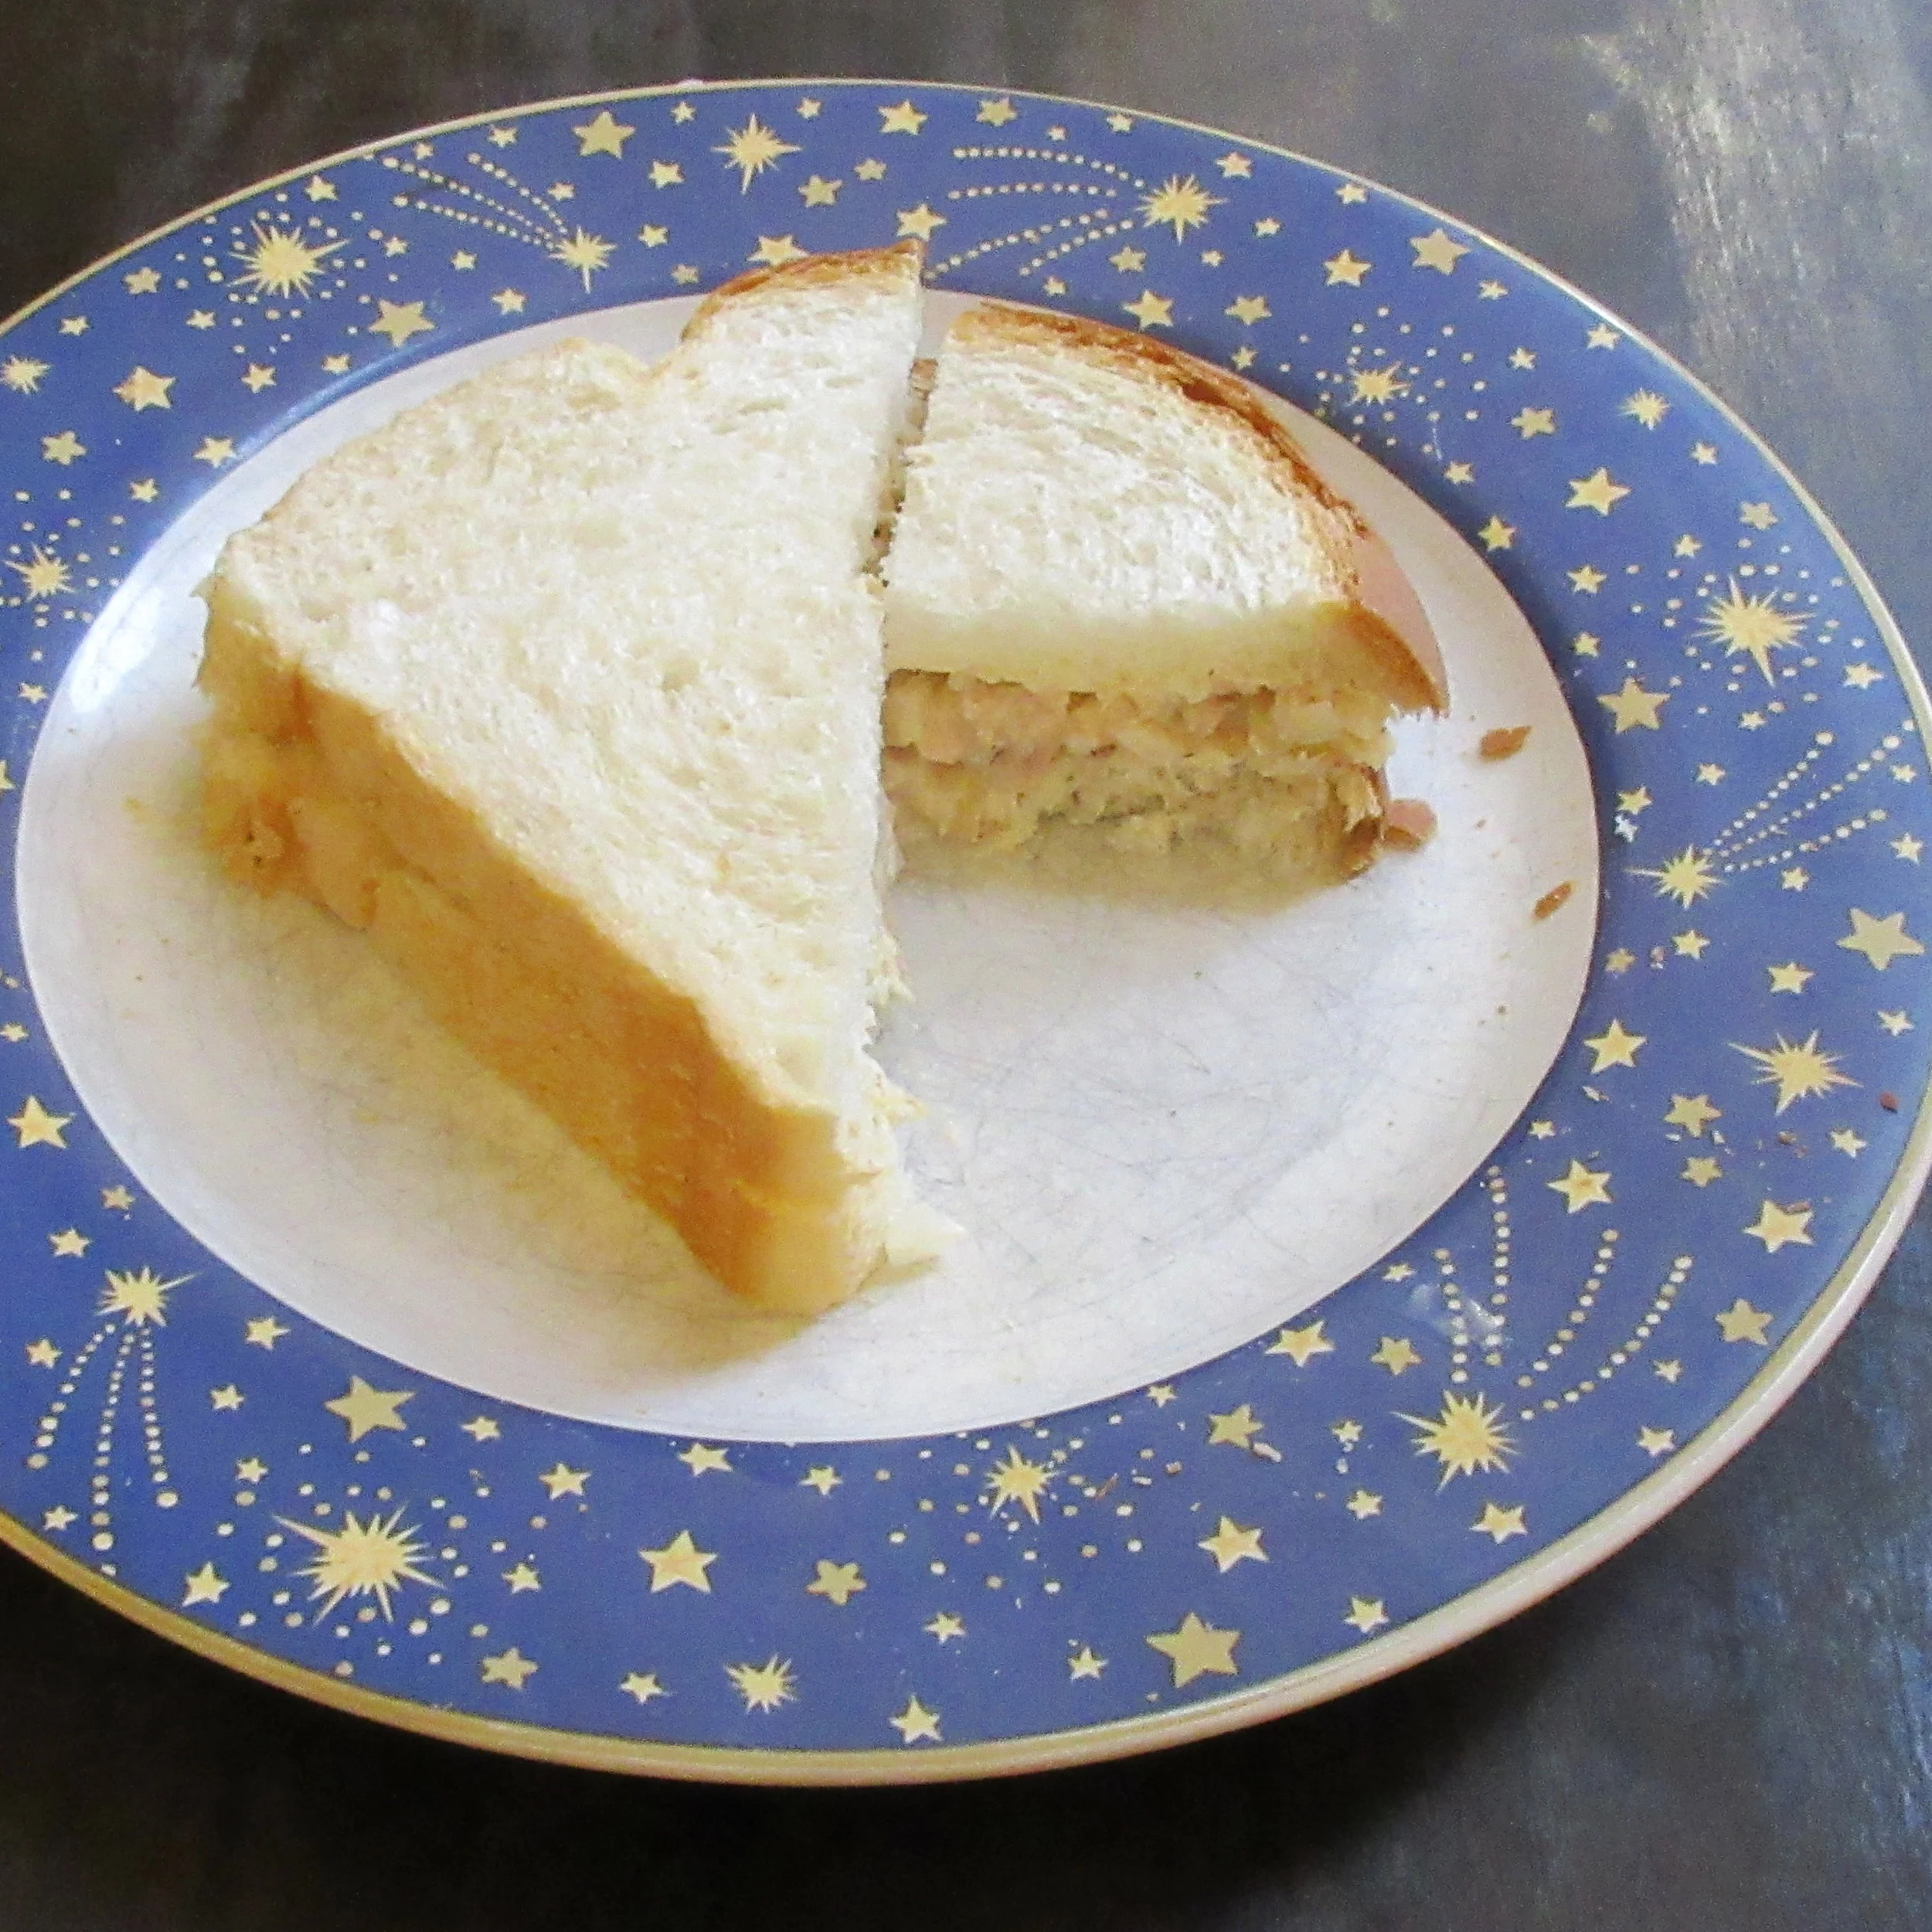
In this sandwich filling, you'll find flaked tuna, crushed pineapple and chopped water chestnuts. When I selected this recipe, my hunch was that it would either be delicious or disgusting and I had no idea which way it would go! I'm happy to report that it was delicious. The pineapple is very subtle. You can taste something a little bit sweet in there but you aren't quite sure what that is, and the water chestnuts add a nice crunch to the sandwich filling. The pineapple and water chestnuts cut the fishiness of the tuna, so you end up with a low-key tuna flavour (and smell), so this recipe would make tunafish sandwiches more palatable for someone who isn't a fan.

You'll find this recipe in:
Peanuts Lunch Bag Cookbook
Cartoons by Charles M. Schulz
Recipes by June Dutton
New York, 1974
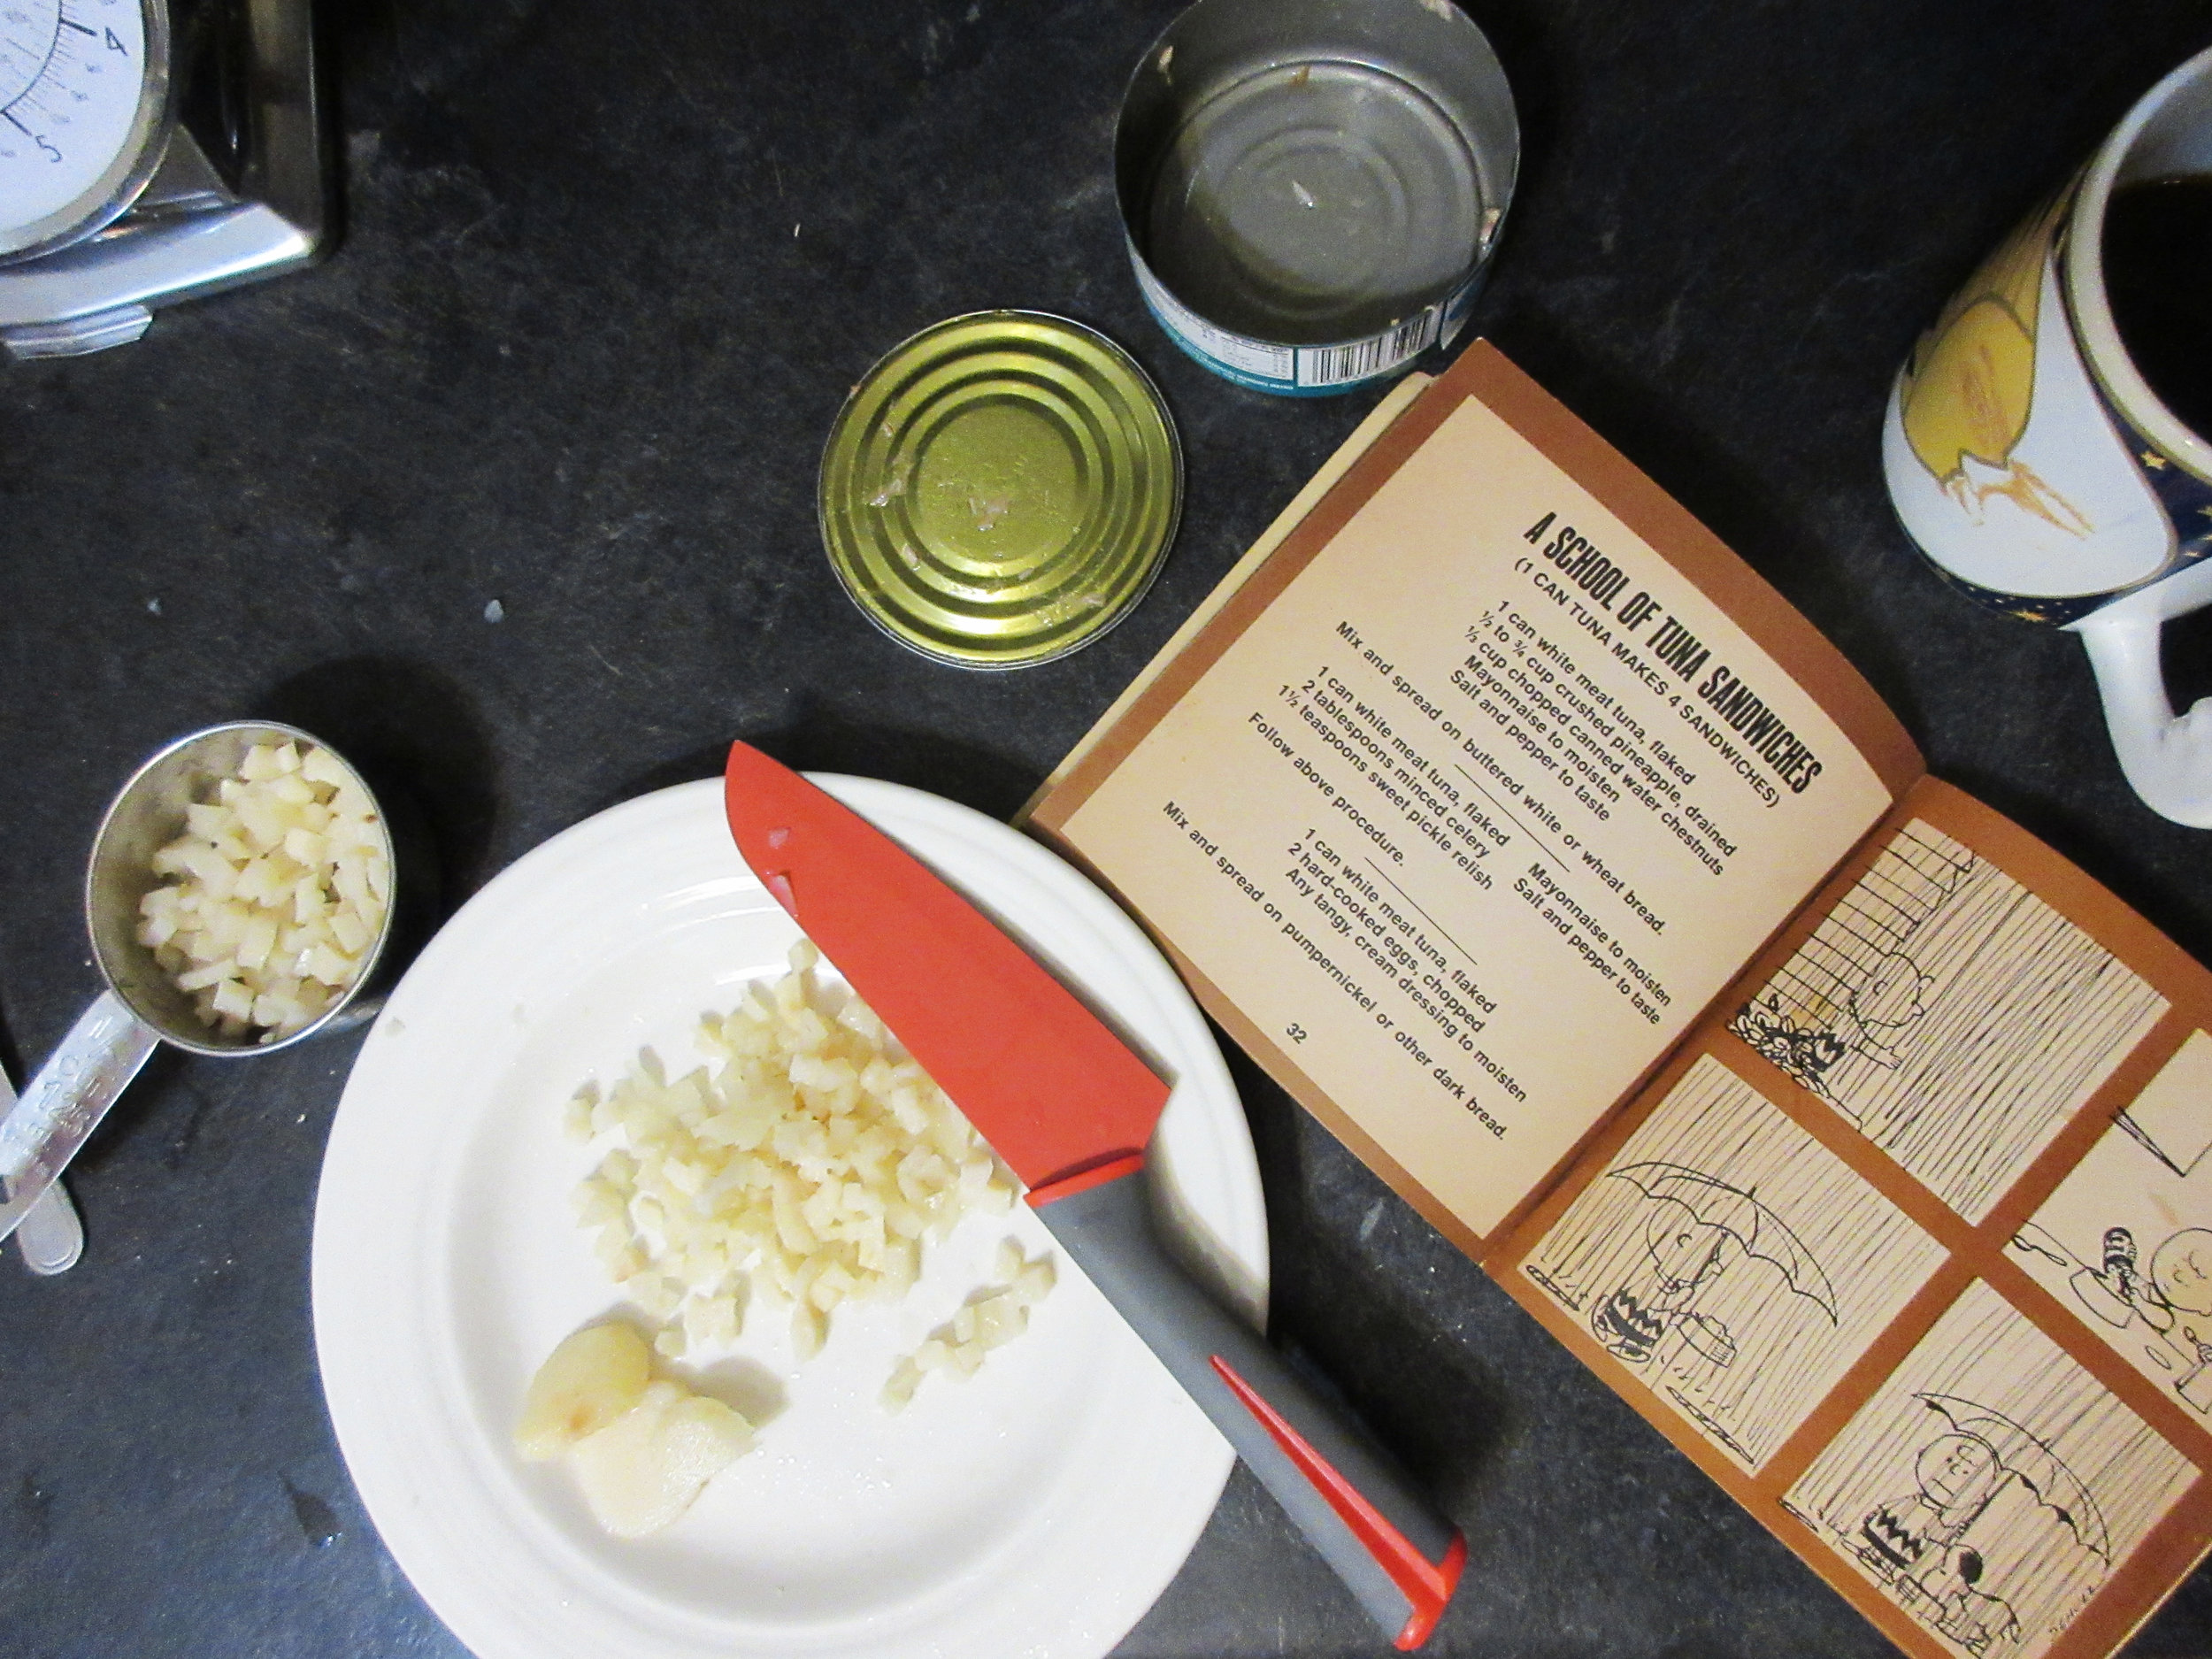
The original recipe:
1 can white meat tuna, flaked
½ to ¾ cup crushed pineapple, drained
½ cup chopped canned water chestnuts
Mayonnaise to moisten
Salt and pepper to taste
Mix and spread on buttered white or wheat bread.


My Experience:
This Tuna Sandwich recipe comes from the chapter entitled "A School of Tuna Sandwiches" (very punny) and when I selected this recipe, my hunch was that it would either be delicious or disgusting and I had no idea which way it would go! I'm happy to report that it was delicious. I made them to take to a potluck at a staff meeting and one of my coworkers gave them the review of being "delightful". I ended up coming home with only one little sandwich in my container.
Since I was suspicious of how the sandwiches would turn out, I only added ½ cup of the crushed pineapple. I also made sure that I had some really good bread by taking an early morning scroll to the bakery down the street to pick up a fresh loaf. The taste of the pineapple is very subtle. You can taste something a little bit sweet in there, but you aren't quite sure what that is, and the chopped water chestnuts add a nice crunch to the sandwich filling. The pineapple and water chestnuts cut the fishiness of the tuna, so you end up with a low-key tuna flavour (and smell), so this recipe would make tunafish sandwiches more palatable for someone who isn't a fan.

Last March, right about the time that I was working on getting this blog up and running, Steve and I went on a daytrip to Waterford, Ontario where we checked out the Waterford Antiques Market and Steve discovered his favourite vintage musical instrument store, Fishin' Musician in the same building. There's also a lot of great hiking trails in the area – we'll probably be back in the winter to do some cross country skiing there.
Of course in all the booths filled with antiques, I went straight to the books to search for old cookbooks or interesting history books. Nothing really stuck out to me until I spotted a thin faded book spine that said Peanuts Lunch Bag Cookbook. When I pulled it out and saw the book cover, I was greeted by an old friend who I honestly had forgotten about over the years...but all the memories flooded back.
We had a copy of Peanuts Lunch Bag Cookbook in our house when I was growing up. I don't remember anyone ever making a recipe from this cookbook when I was a kid, but I do remember spending time slowly flipping through the pages to read the Peanuts comics that are nestled amongst the recipes.
The chapters are organized by main ingredient and the titles are quite cute: Lucy's Crabby Sandwiches, Full of Baloney Sandwiches and Linus Loves Liverwurst Sandwiches. I love that this is a recipe book geared towards children to teach them how to make their own lunches. The first page starts off with the title 'READ THESE TIPS!', and is followed by a list of handy tips such as to wash your hands, read the recipe before beginning and to ask permission before using a sharp knife.
I have always been surprised by how many children have never prepared food or have never used a sharp knife in their lives when doing museum cooking programs with schoolchildren, so I appreciate the respectful tone of the book. Peanuts Lunch Bag Cookbook is funny, but the recipes aren't dumbed down for the children, and it's assumed that a child is capable of using a sharp knife & can figure out a recipe with a bit of adult help.
